
Vintage Sideboard Transformation
We are always in search mode for vintage pieces that are in good condition that we can transform. Sometimes, we are not even looking, we are just out running weekend errands when we come across the prettiest pieces!
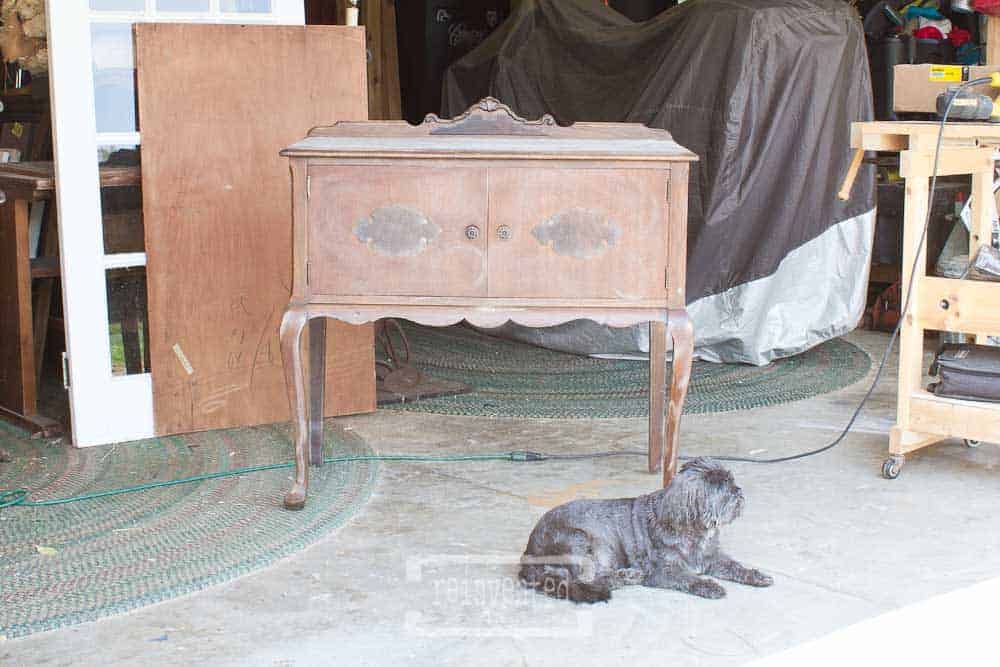
That was the case with this gorgeous depression era sideboard. We were out running errands and saw this at a yard sale and we weren’t even in yard sale mode!!
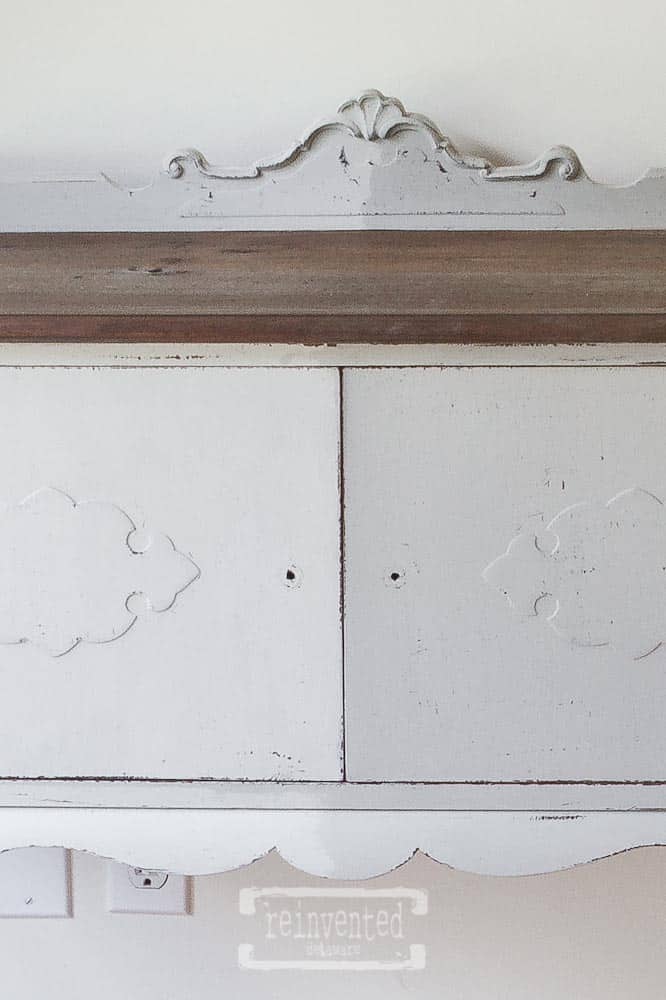
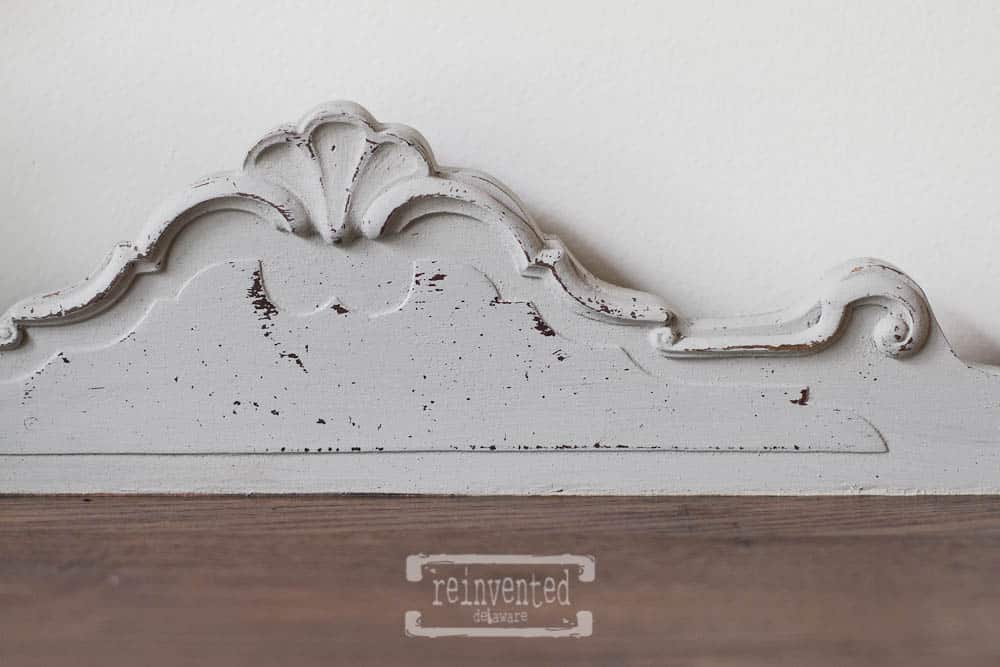
I loved the simple details of the piece right off the bat. The soft curve of the Queen Anne style legs and the subtle details on the backboard. It didn’t take long before it was in the back of my jeep!
Let’s get started on this transformation!
![]()
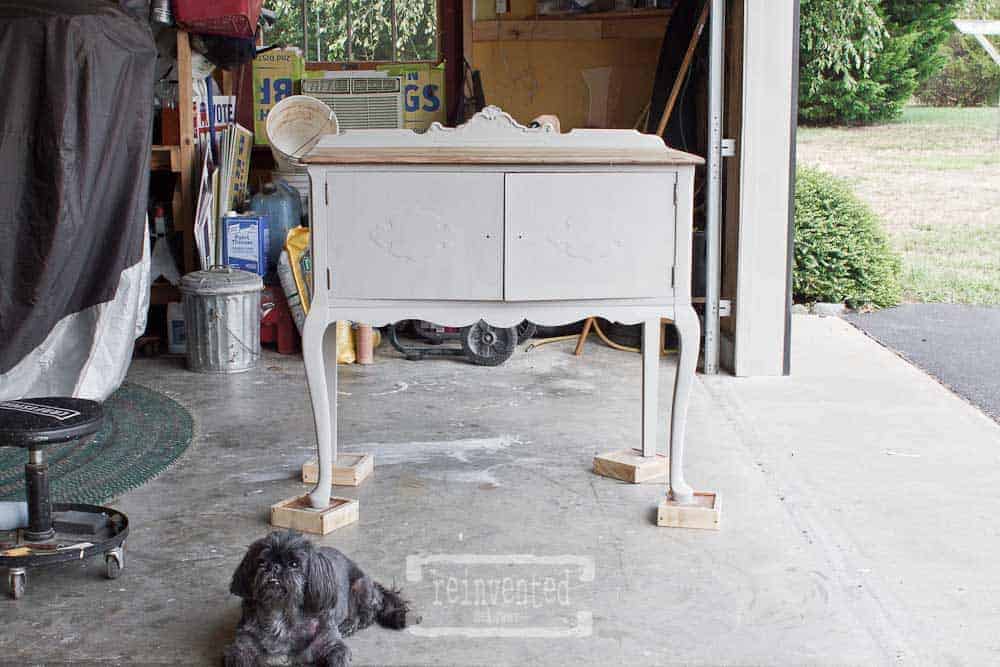
Like I said, this piece practically jumped into the back of my truck! At first glance, there was just one little repair that had to be made. A chunk of one of the legs was loose and had to be glued on. I took care of that little issue as soon as we unloaded it from the truck. A bit of wood glue and some tape-clamping was all it took. By the next day you couldn’t even tell it had been broken. My camera didn’t even have time to snap a pic of it before it was repaired!
My little fella Elmo, is always ready to get to work on projects! He recommends a quick sanding with 150 grit and my orbital sander as the first step. I have said it before, going over the piece lightly with the sander is a great way to give the piece a good once over while I am also knocking off any shine. The interior also had a once over with the sander. I didn’t spend too much time on this step.
When I got to the top I realized that the veneer was not in as good of condition as I had originally thought. Veneer is not my favorite aspect of furniture restoration, but sometimes it just has to be dealt with. Spots of veneer were bubbled so I knew that it needed to come off.
I started with my chisel and lifted as much of the loose parts that I could.
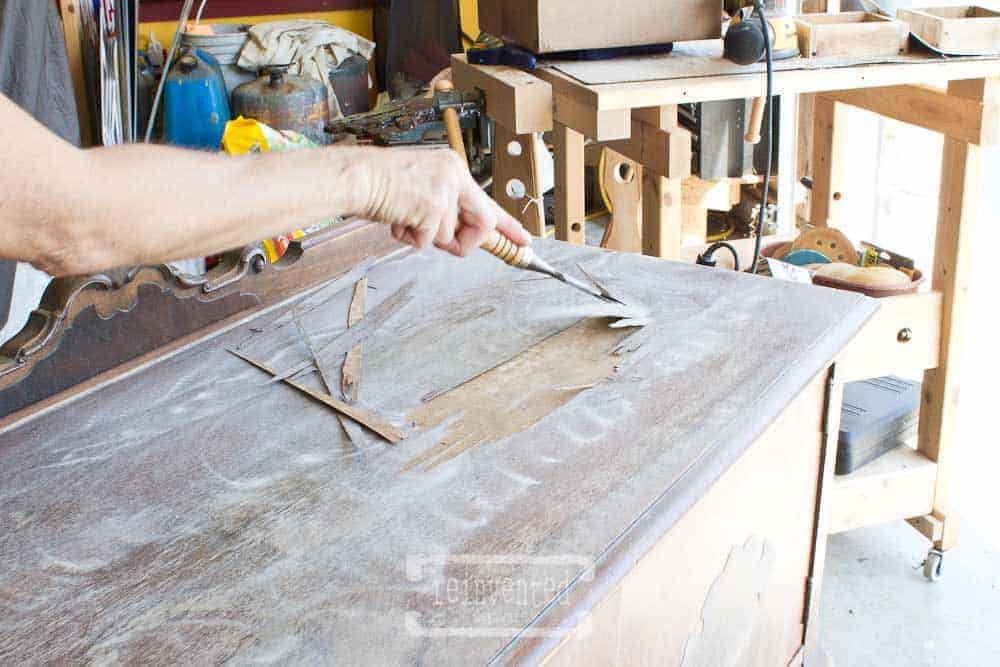
Once you get the chisel under a loose section, the veneer can be peeled off. I had to be careful with he chisel so I didn’t gouge the top. Holding the chisel at a slight angle instead of a steep angle helps to protect the top.
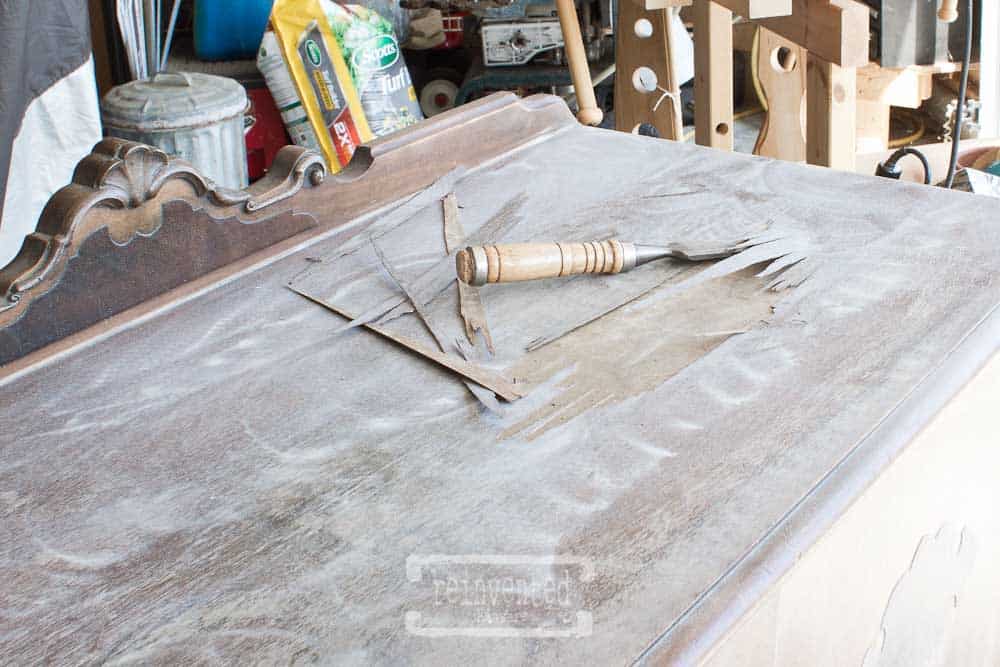
After removing most of the veneer, I realized there was yet another layer of veneer that was in better condition. The second layer was still flat and securely glued but at this point I had a slight irritation with veneer. That second layer just had to come off. Let me say that this is risky, you never know what lies beneath. But I was willing to try. I knew that if it turned out to be a fail, hubby could build a farmhouse top for the piece.
The grain of the second layer ran in the opposite direction of the first layer, so I used the chisel in the opposite direction as well. The heat gun had to get to work as well. The heat loosens the veneer. Be careful if you use this method, that heat gun gets very, very hot! It can burn the veneer so I used it cautiously.
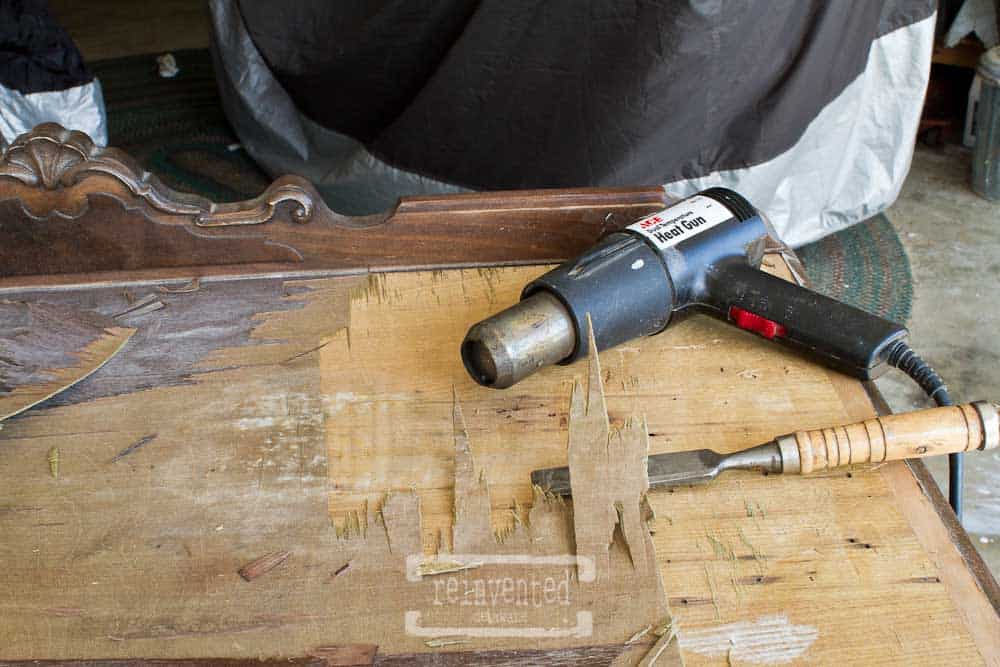
Hold the heat gun a couple of inches from the surface and heat up the area. Then use the chisel to pry it loose. I held the heat gun in one hand and the chisel in the other, loosening as I went. Caution is the name of the game with this tool, I certainly didn’t want to burn my hand!
Also, be aware of where you lay the heat gun down. It stays hot for quite awhile. I would never use this heat gun when children were around. I was even careful of where the cord was so that little Elmo would trip over it and pull it down on himself! Safety first!
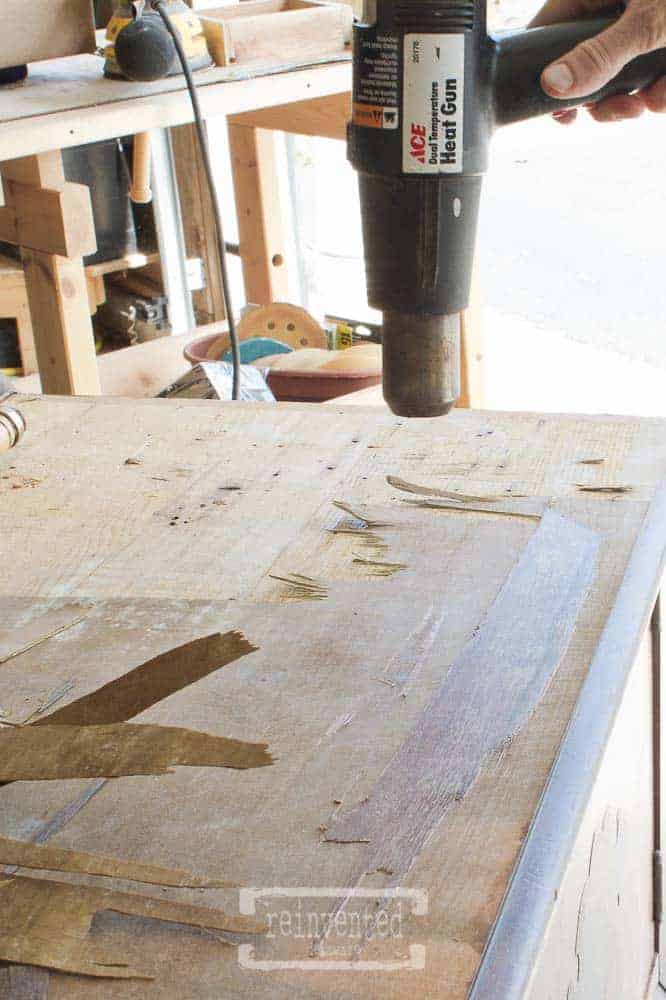
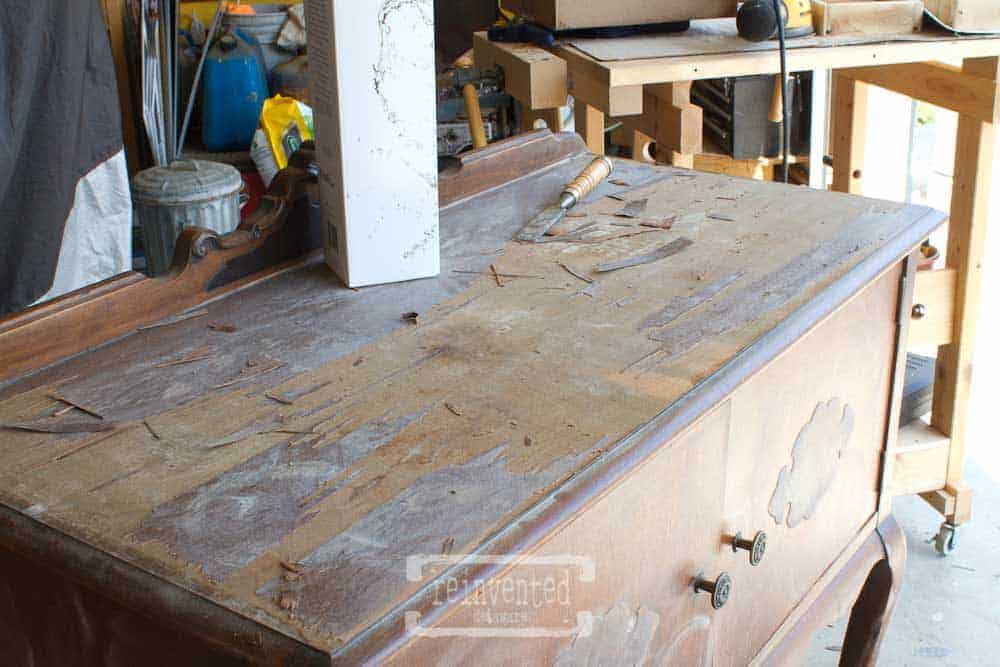
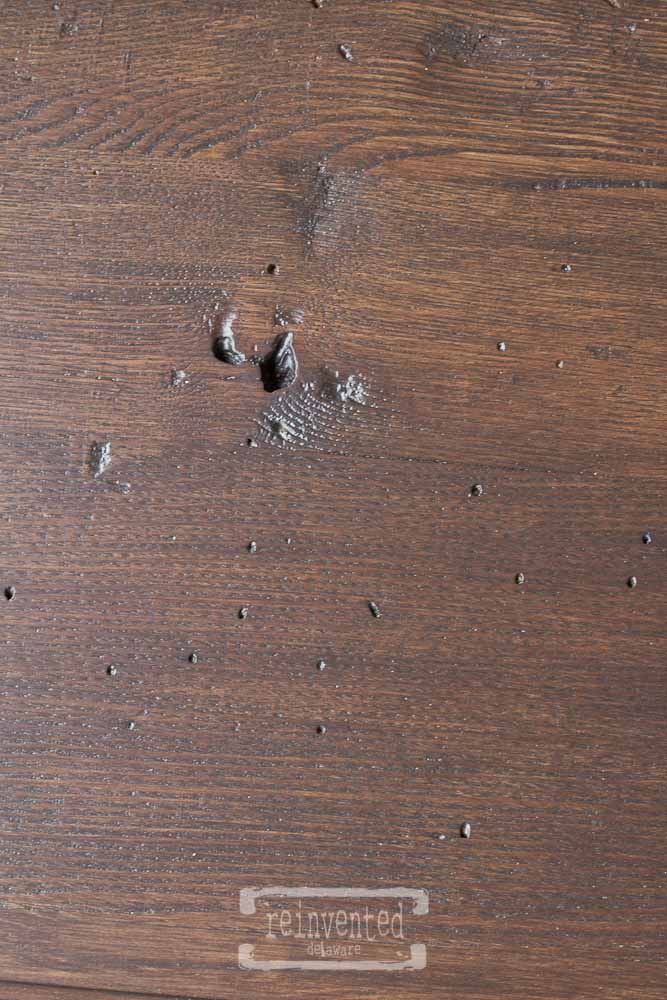
Much to my delight, solid oak wood planks were under all that veneer! Look closely and you can see the beautiful grain of the wood. And the worm holes just added so much beautiful character to the piece!
Isn’t it interesting that when this piece was built, the defects in the wood were covered with a lesser quality, man-made, thin piece of veneer. But in today’s standard of decorating, we love the original, rustic look that the worm holes and bug infesting would have occurred in the wood naturally. Personally, I love the look of the wood with all the naturally beautiful so-called ‘defects’. My kinda home decor 😉
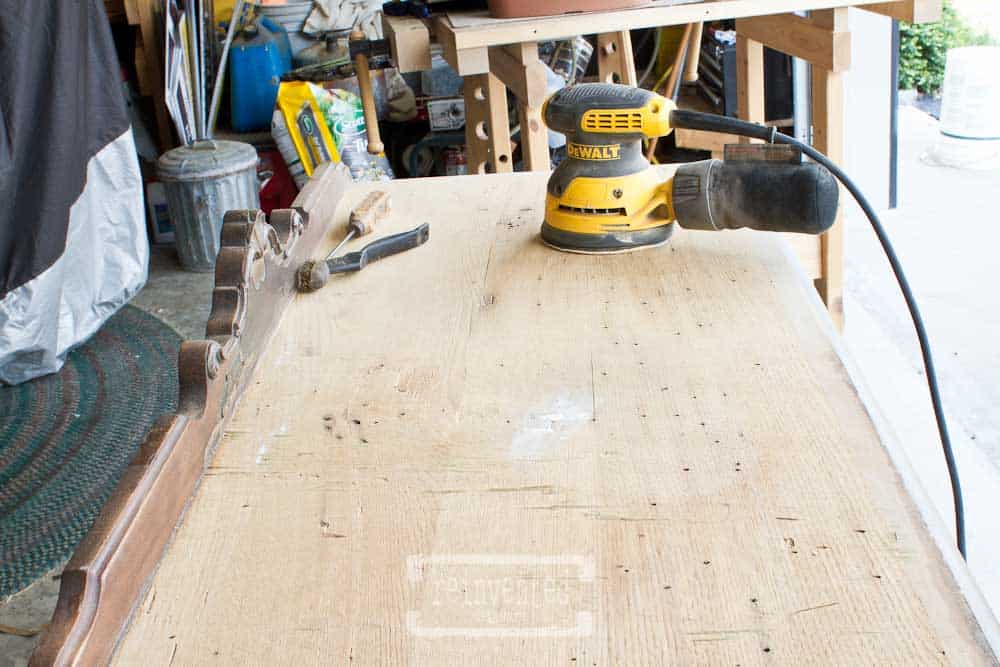
I used the orbital sander. Hubby wrote a tutorial on sanding that is very detailed. Check it out here for more instructions!
Some of the defects were pretty deep and the original craftsman who built this filled the spots. The veneer would have not faired well with the divots that the larger holes created so they were filled. I used an ice pick to carefully loosen the filler and a wire brush to clean it out. The shop vac was great to clean up the dust so I could see if more had to be removed.

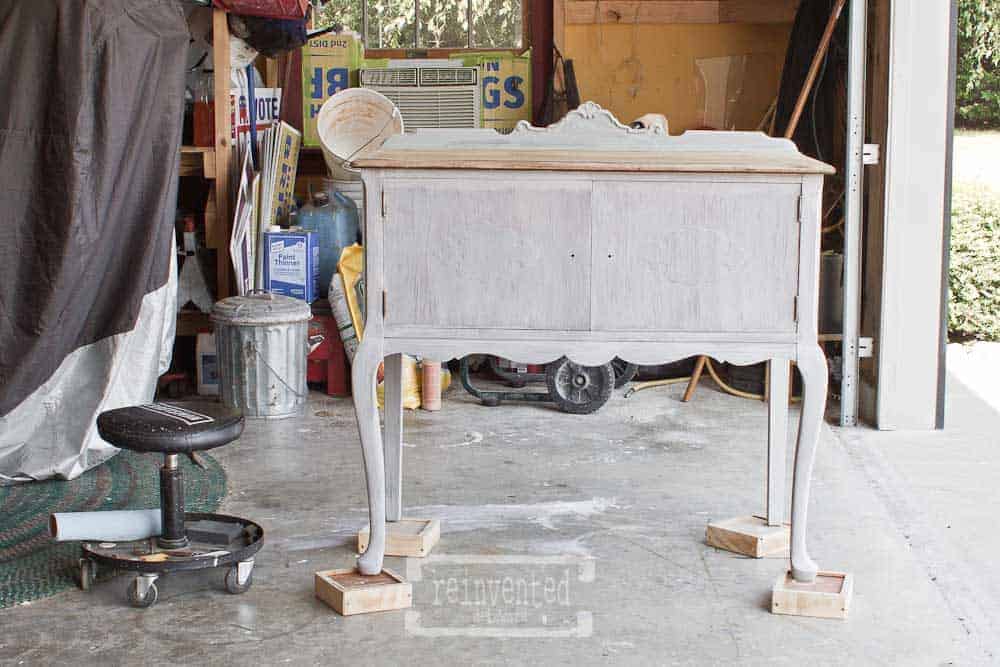
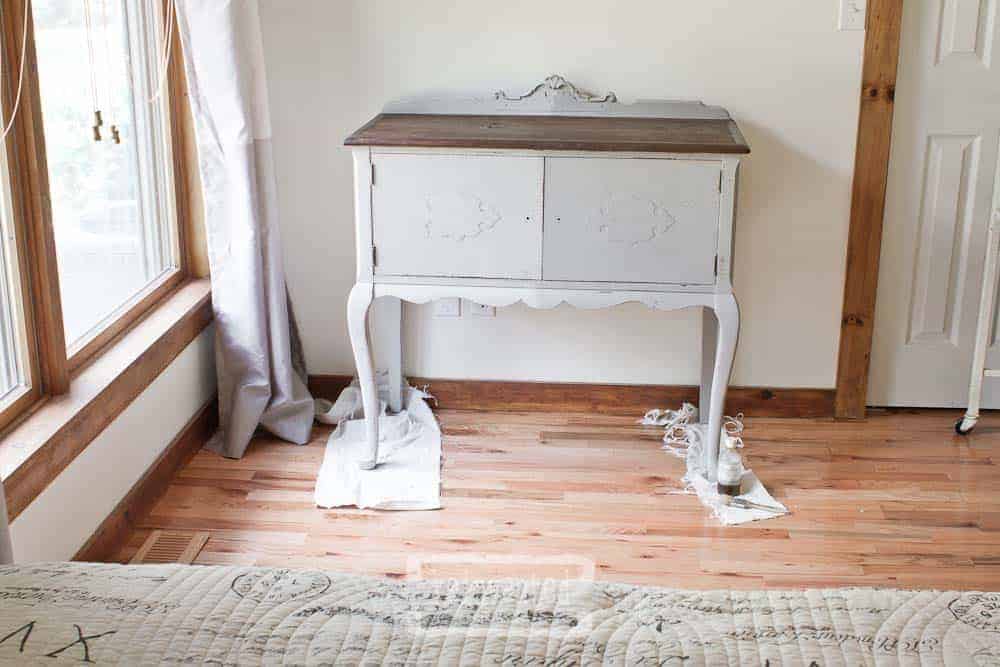
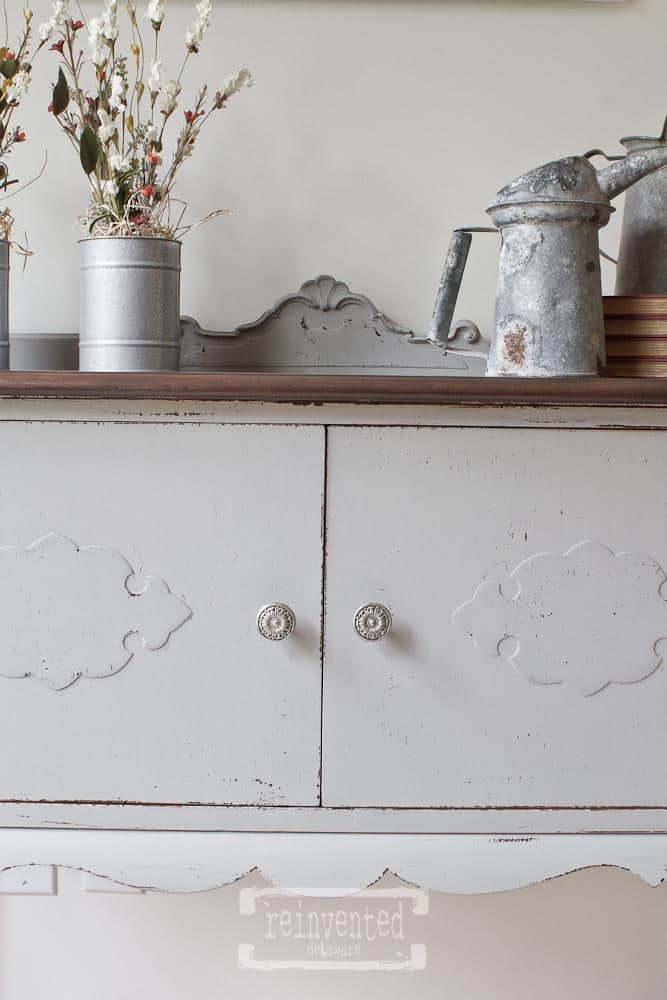
Two coats of Miss Mustard Seed Milk Paint in a custom mix of Ironstone and Schloss covered the wood beautifully!
Little fella looks pleased!
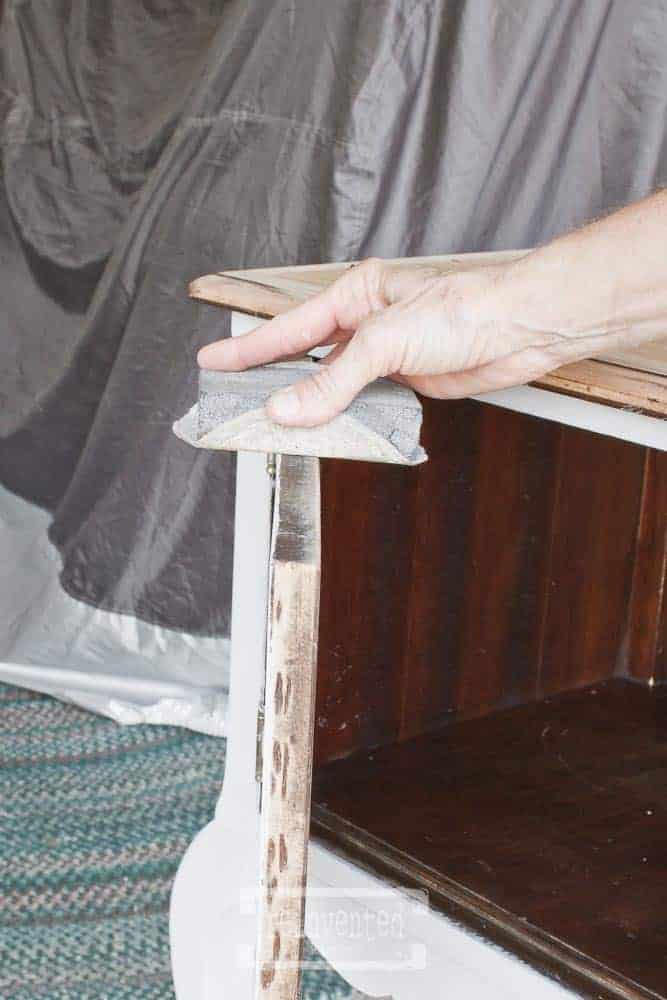
The paint brush usually brushes over the edges of areas like doors, drawers and the back. Taking a sanding sponge over these edges does a good job of cleaning them up. I like to keep the worn out sponges and use a piece of 150 or 220 left over sandpaper to do this job. This little step really adds a professional touch to the piece.
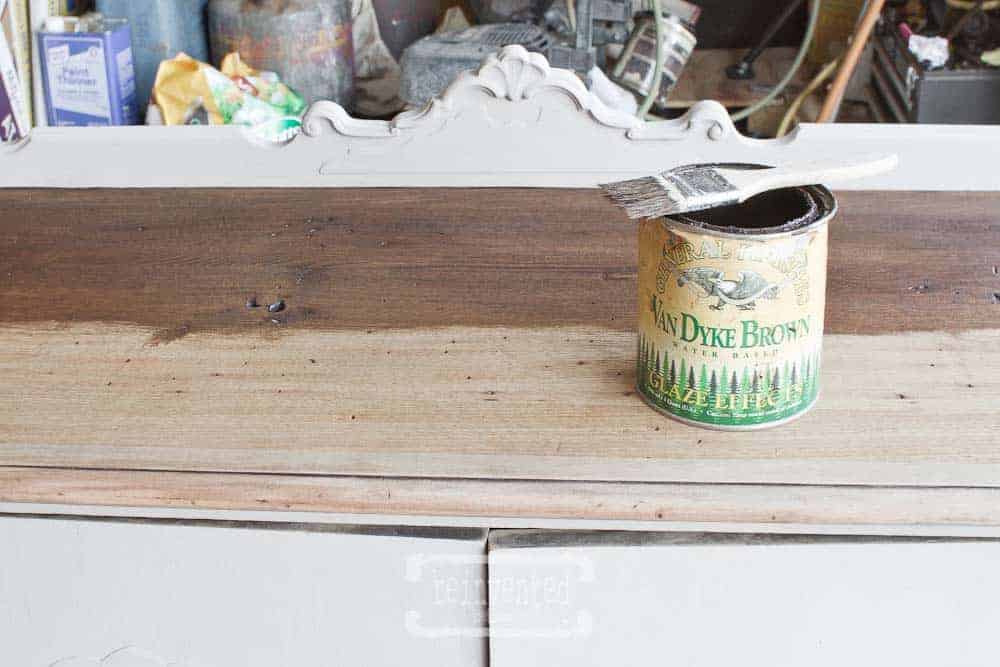
The top called for a vintage color of stain. I have tried lots of combinations of stain colors but honestly, I just can’t find the right mix to replicate the old wood look. What I have found to work best is General Finishes Van Dyke Brown Glaze. It is water based and easy to work with.
The typical use of glazes is to apply it and then wipe off the excess. If you are trying to age a piece of painted furniture, this is a great method! But I have used this glaze as a stain on many of my projects. The tone of brown brings such an old look to wood!
Apply it with the grain and be sure it is spread thin. It can streak if you use too much. You could apply it like a glaze and wipe off the excess. But since I am pretty budget conscience, I prefer to use thin coats with less waste. Only one coat was necessary. I did have to work it into the worm and bug holes with the bristles of the chip brush. Then go back and brush in the direction of the grain, being sure to not allow the glaze to fill the holes.
For the finish, I chose Miss Mustard Seed Hemp Oil. This is a natural based product and produces an authentic old-world finish to furniture. I love using this type of finish. For years, my husband has used teak oil to accomplish the same result on so many of the furniture pieces we have in our home.
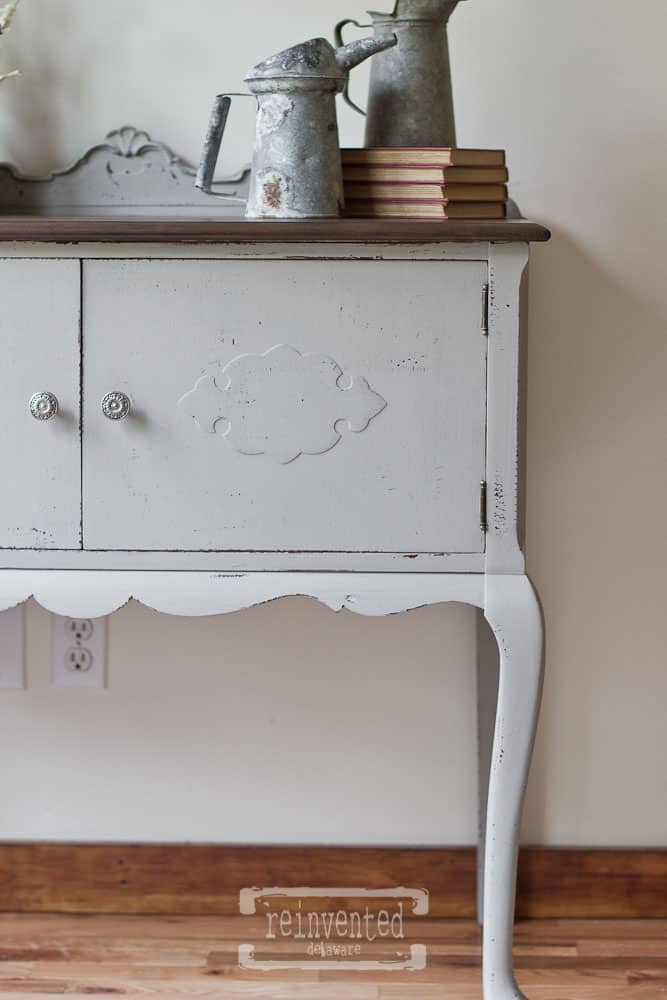
Miss Mustard Seed Hemp Oil works wonders on milk painted surfaces. See the difference in the two doors? The right side has MMS Hemp Oil and the other side doesn’t. The hemp oil brings such a richness and depth to the milk paint!
To apply the oil, I use a chip brush and a micro fiber cloth. I apply a few drops of oil to the brush, spread it on a small section of the piece, working it in as I go. The bristles get into all the nooks and crannies. Then I go back with the cloth and wipe off any excess. More coats can be added if you desire a sheen. In this case, I applied one coat. I did not apply it to the top, although I could have. I prefer General Finishes High Performance in Flat for the tops of furniture pieces.
Here is a close-up to see the difference the MMS Hemp Oil makes!
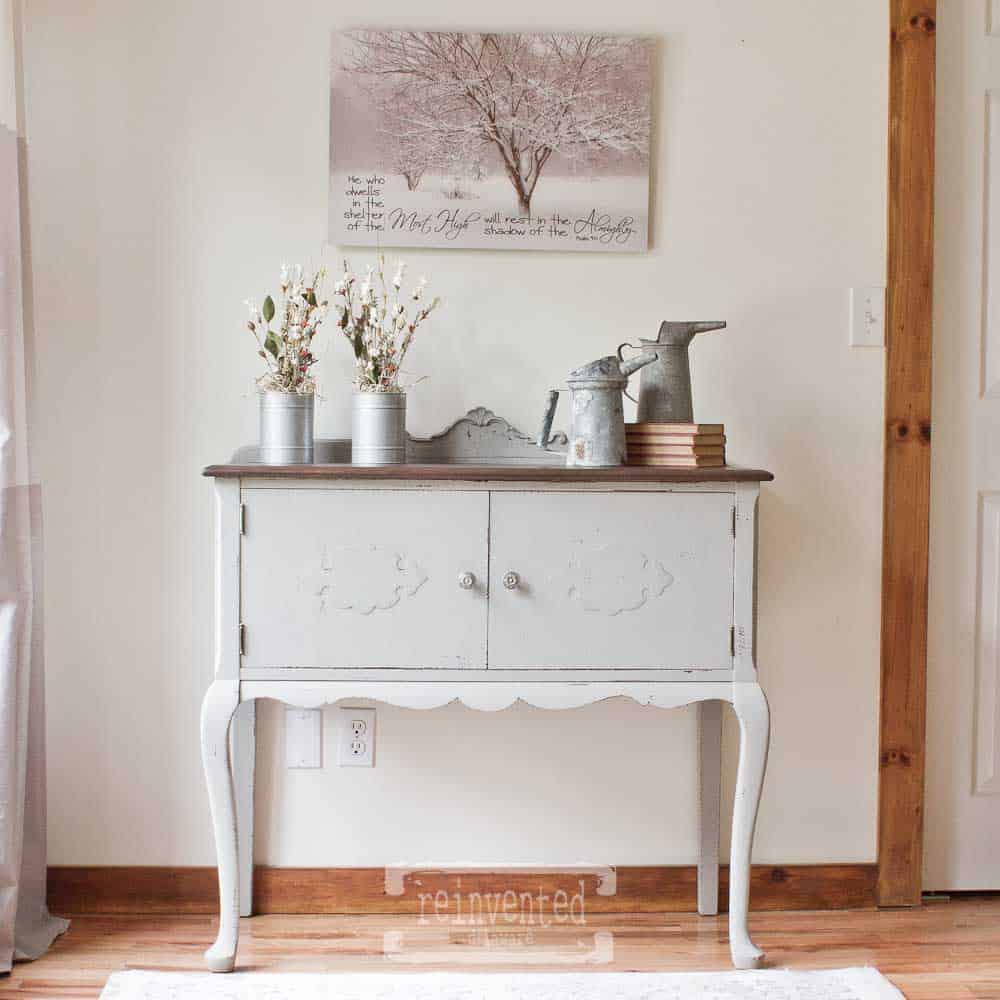
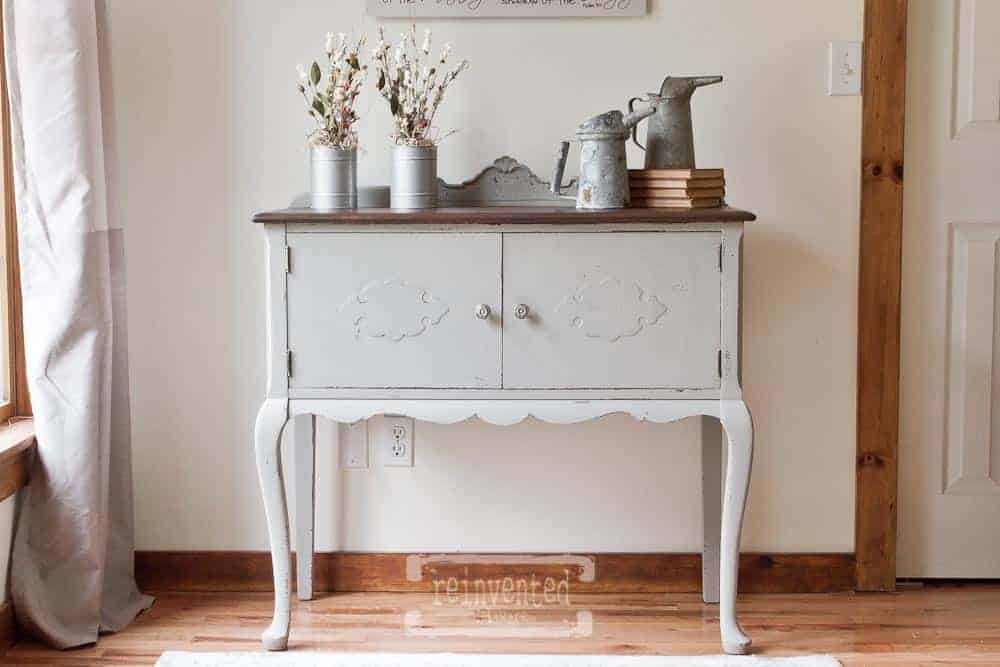
Here she is finished! This piece had a hard time leaving our home! Some pieces just speak to me and this is one of them! (BTW even though the sideboard seems darker on one side than the other I assure you that I put Hemp Oil on the whole thing! Funny lighting next to the window makes it seem like I forgot a side 😉 )
Light distressing is a breeze with MMS Milk Paint. See how the detail show up on the back board? So authentic and lovely! See more about my distressing method here!
Check out this close up of the top! All that character!! The top has three coats of General Finishes High Performance in Flat plus a little extra in the larger bug holes!
This vintage sideboard isn’t just for dining rooms. This piece can be used in a guest room for overnight supplies and linens. It could also be used in a living room as a sofa table!
This vintage sideboard was one of those pieces that I fell in love with as soon as I saw it! Even with the veneer removal, I loved it all along it’s journey to be the beauty she is! Hope you enjoyed this as well!
![]()