
Tips for Applying Painter’s Tape | Laundry Room Refresh
Looking for some quick tips for applying painter’s tape to cabinets? Today, I will share with you tips I have used for years when painting!
The following post may contain affiliate links. That means if you click and then buy something, I will make a small commission at no additional cost to you! Thank you for supporting my blog. full disclosure here.

moving along
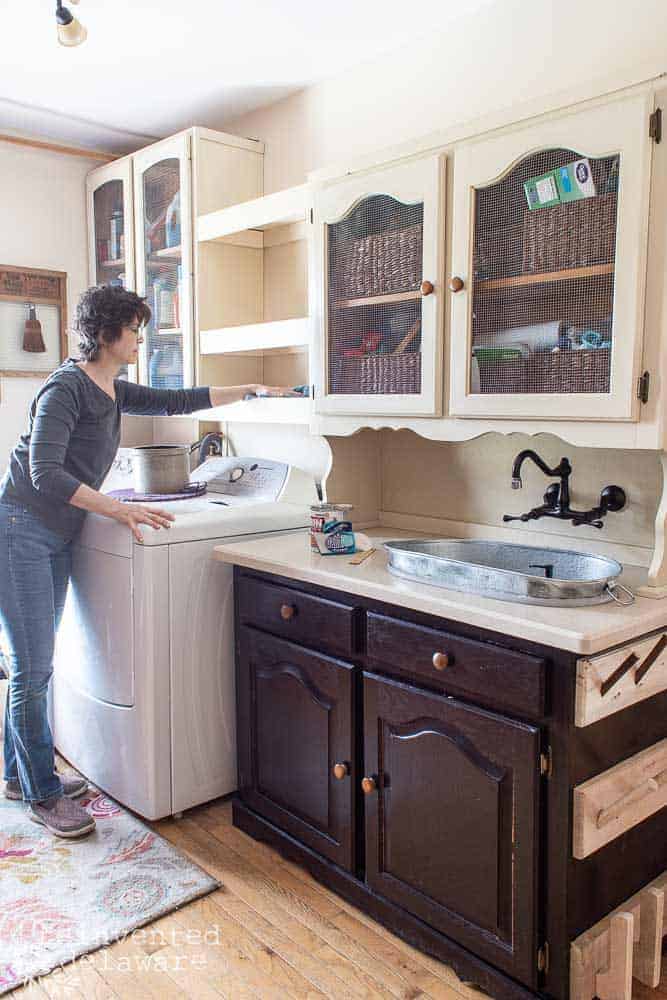
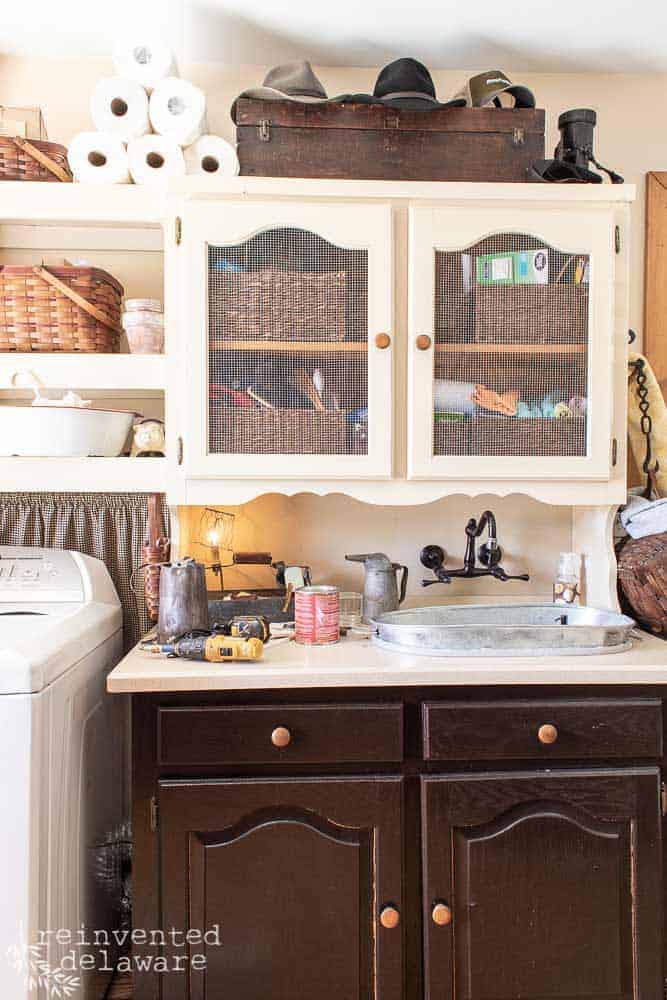
The Laundry Room Refresh is moving along nicely. Over the weekend, I was able to get the entire cabinet area prepped, primed, and painted!
While I cleaned the shelves and cabinetry, I thought you might like to see some tips for applying painter’s tape that I have used time and again.
We’ve done so much painting in our home over the years and painter’s tape can really make the task easier!
prep, prime, paint
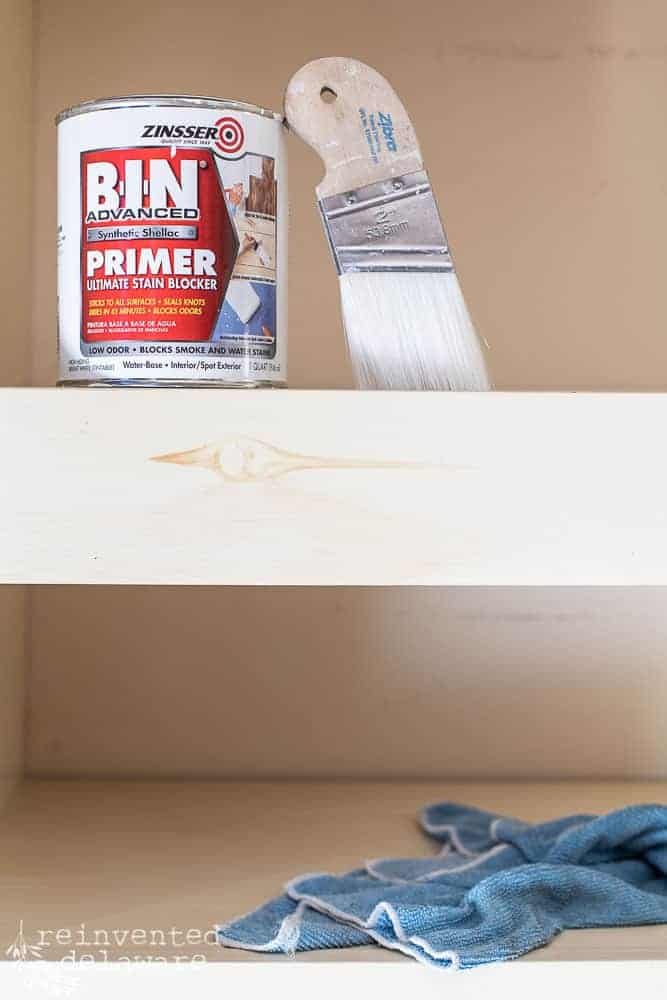
The cabinetry will have to be primed since some of the knots were showing through from the previous painting I did about 5-6 years ago.
Zinsser Bin Shellac Based White Primer is my go-to for preventing bleed through on many of the furniture projects we do around here. This is a staple in my workshop!
Speaking of my workshop, Zibra Paint Brushes, especially their Palm Pro, are my favorite paintbrushes!
The Palm Pro fits my arthritic hands perfectly!
let’s talk about taping first
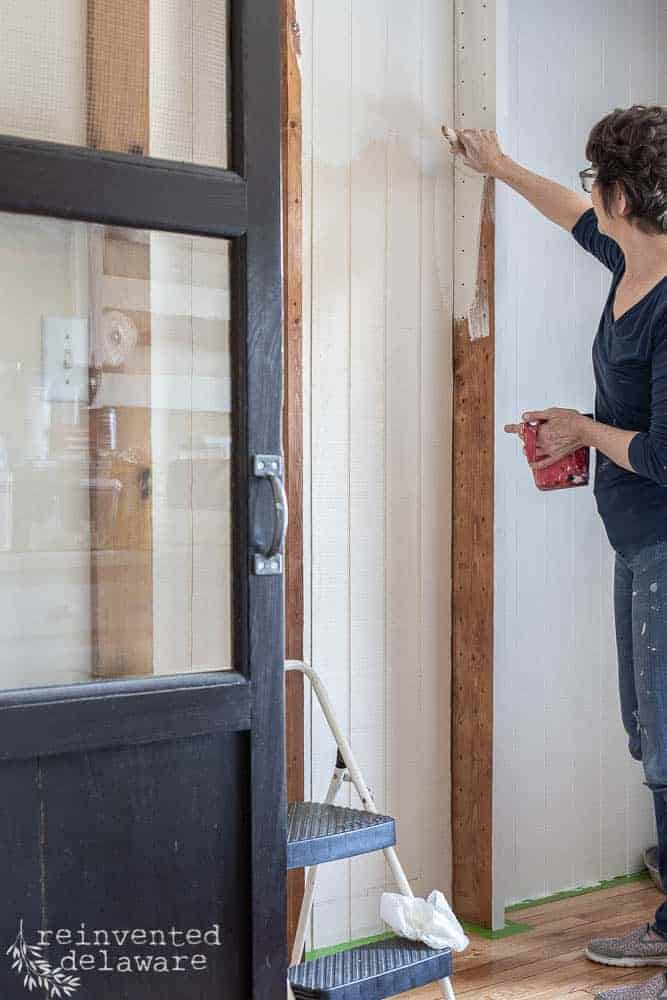
Let’s talk about taping for a minute. There are certain areas of a project that I always tape like flooring and baseboards. Cabinetry doesn’t always need to be taped off but in this case, it does. The last thing I want is to paint the metal hardware cloth on this cabinet door!
tip #1
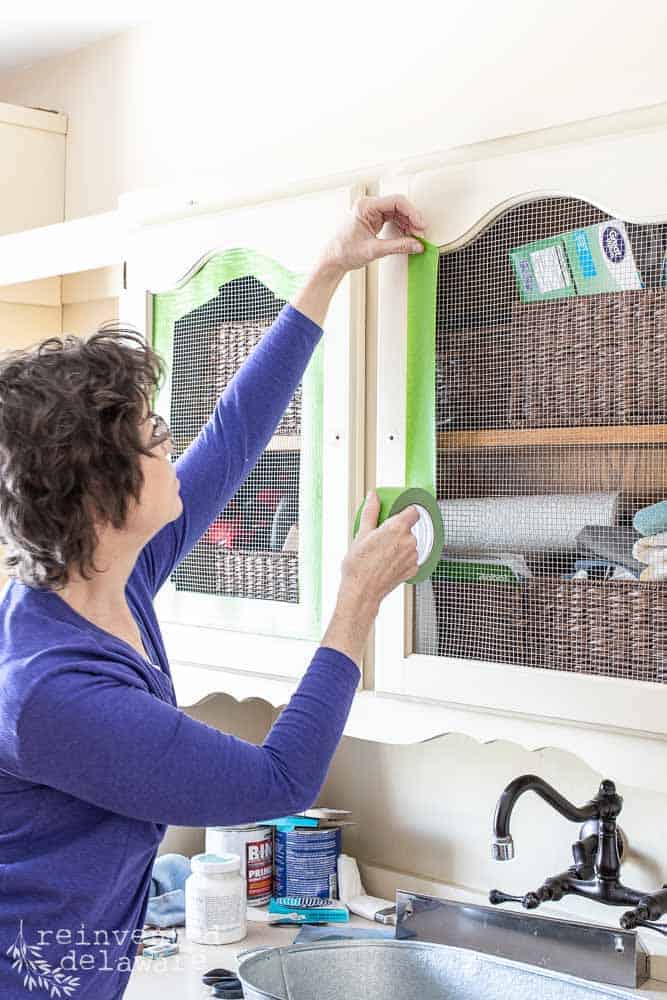
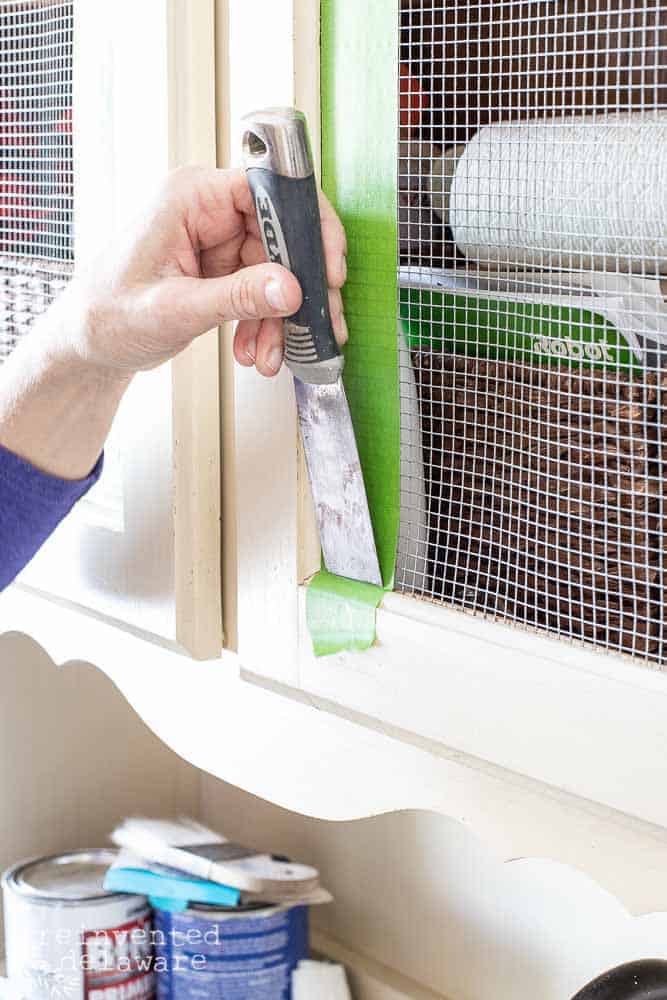
Start off by using long pieces of tape. Avoid short pieces if at all possible.
Here, I am lining up the top edge of the tape with the edge of the door frame. I am also holding the roll directly next to the wood frame of the door.
tip #2
After I have torn the tape just past the bottom edge, I use a putty knife to make a slight crease.
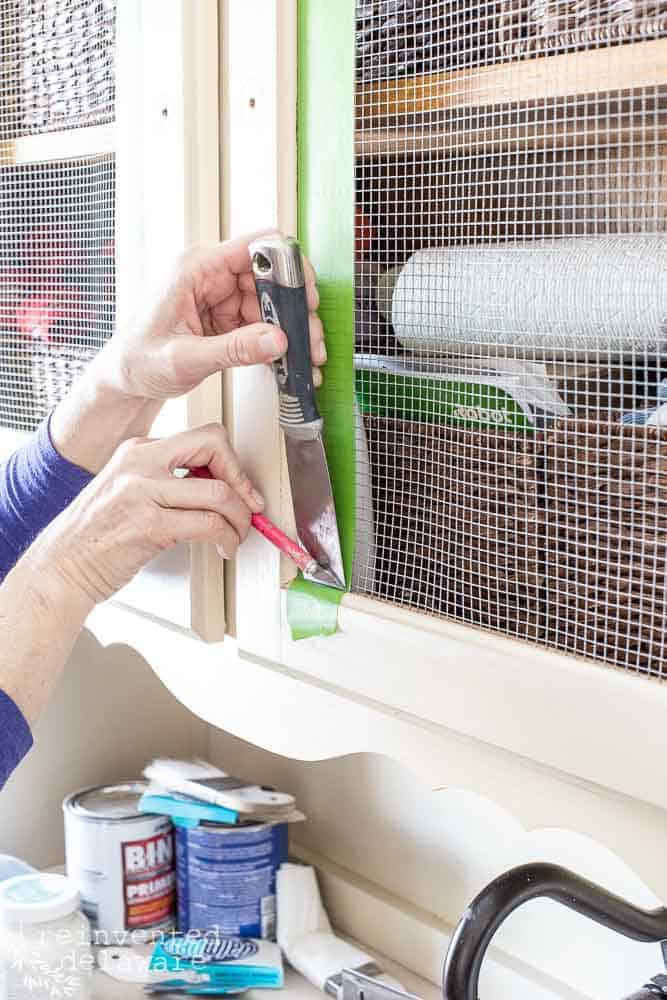
You can use the edge of the putty knife to tear a clean edge of the tape or…..
…you can use an X-acto knife and cut along the putty knife for a clean edge.
Both methods work great!
thanks for shopping my links!
The putty knife comes in handy to slide the Frog Tape just under the wood framing of the cabinet door.
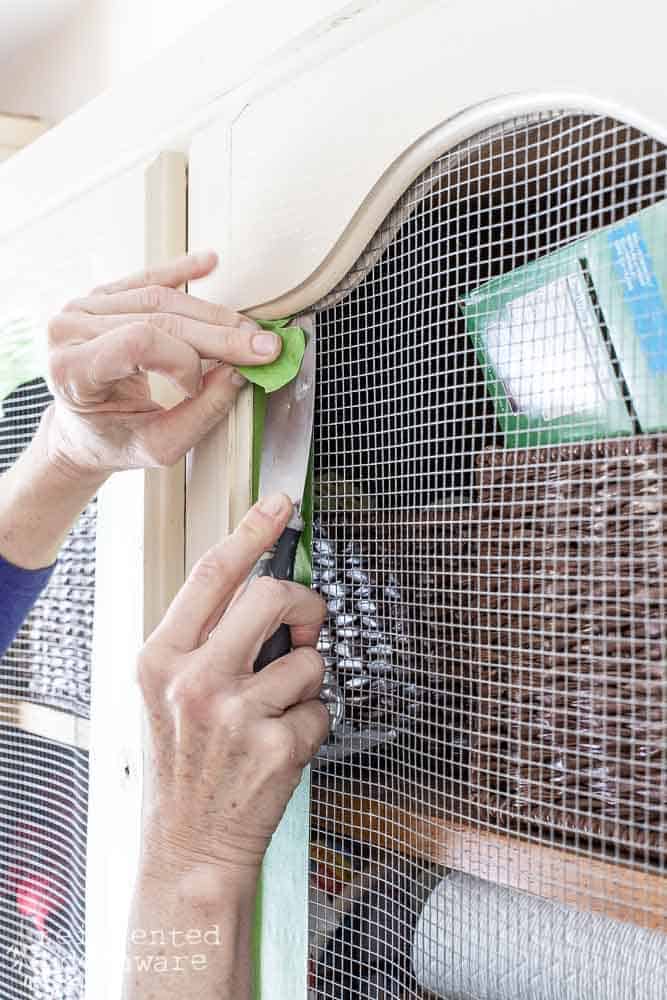
I used long pieces of tape on the three sides but the top had a soft curve design. It is best to use short pieces of tape to work around the curves. I carefully used the putty knife to tuck the tape underneath the wood framing.
tip #3
Eventually, I removed the four doors on this cabinet section of our laundry room. Taping the screws to the hinges is a good way to keep track of the screws.
The hinges on cabinets can be hard to line up correctly on this particular cabinet. Remember, we’ve had this china cabinet for over 30 years so I know its flaws well!
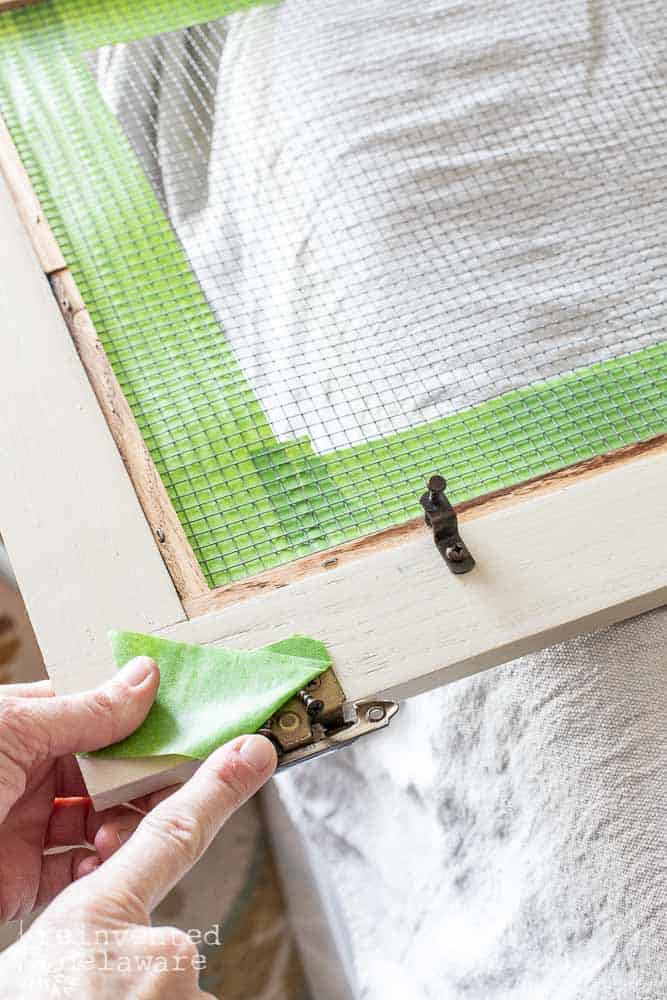
tip #4
Anyway, I didn’t take the hinges off but instead taped them (with the screws underneath the tape!) The Exacto knife made perfect cuts around the shape of the hinge.
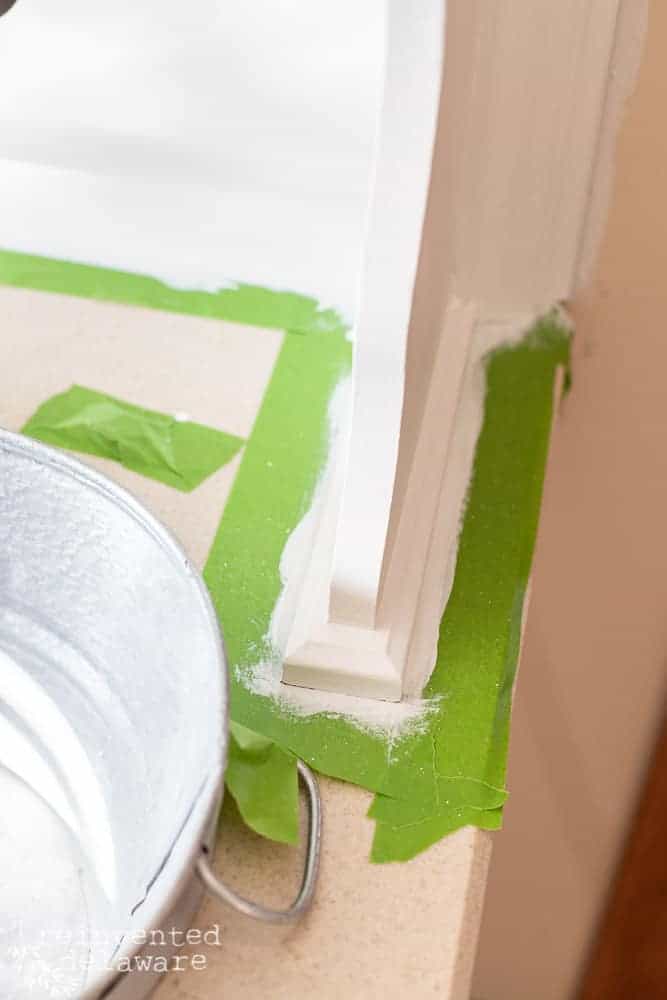
The countertop on this cabinet is Corian (remember that stuff?? it was a popular countertop way back when!)
tip #5
Anyway, I didn’t want paint all over the countertop so it was taped off too. Again, I used long pieces when I could and short pieces where I had to.
The putty knife and the Exacto knife were used on the inside corners to make perfect lines!
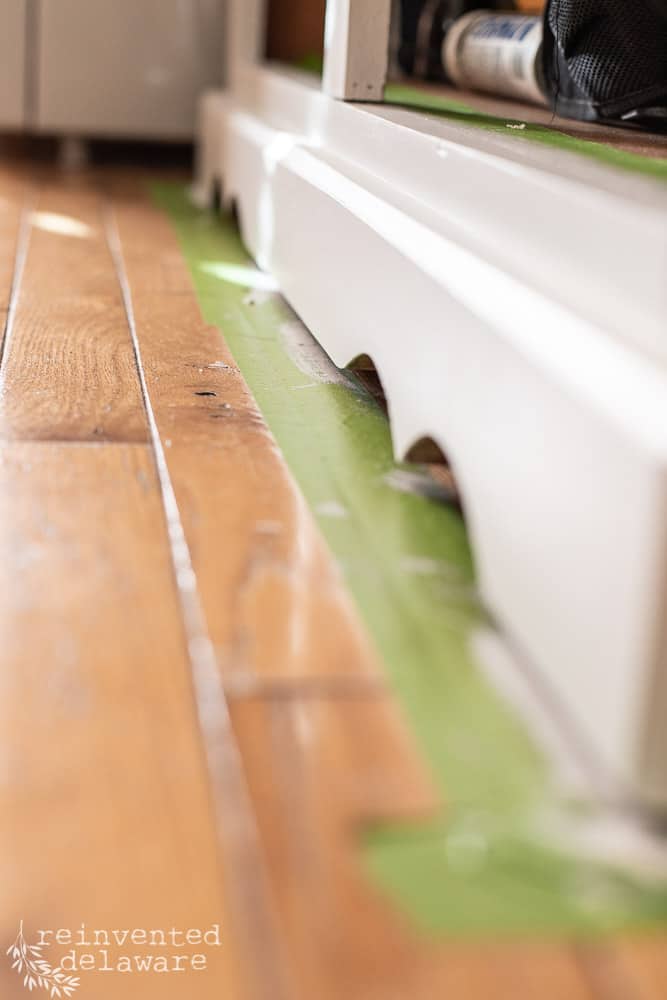
tip #6
Taping along the floor edge makes painting close to the floor a breeze! Even if you have carpeting, doing this step will save you so much aggravation!
tip #7
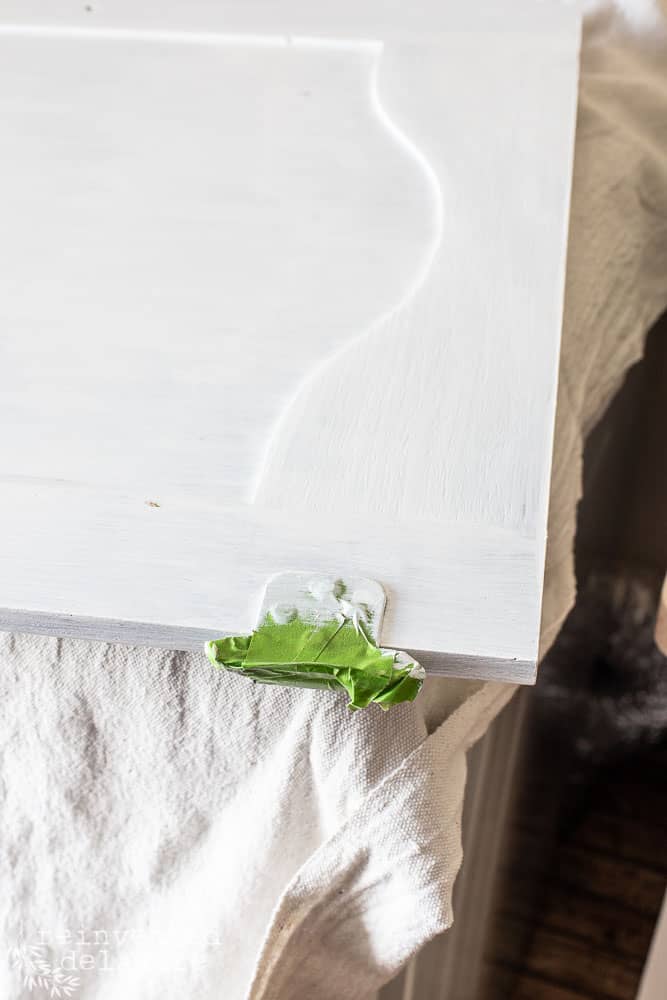
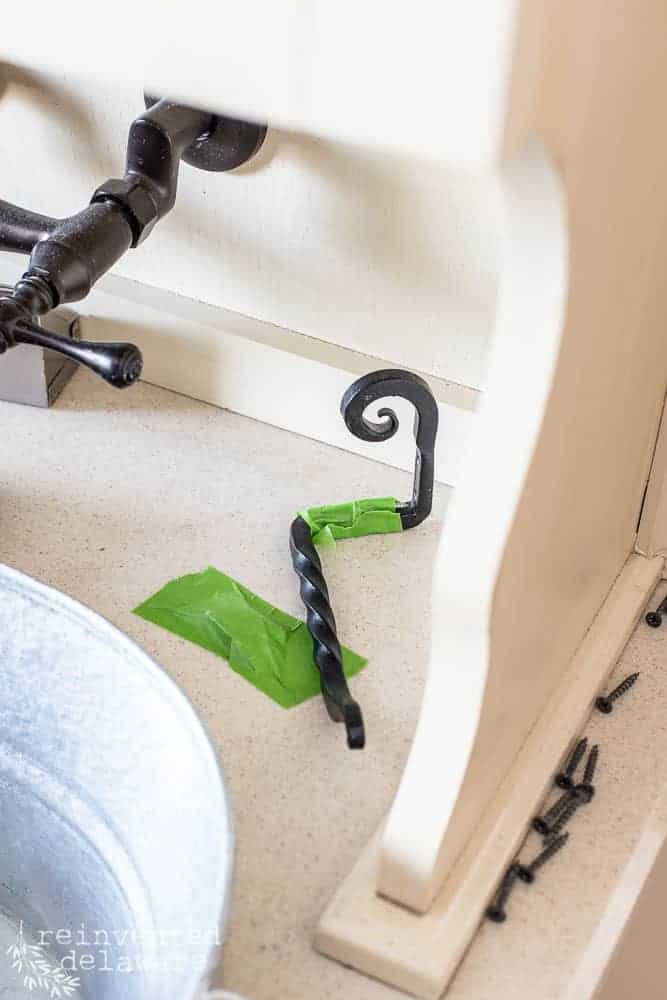
The side of the cabinet had a wrought-iron towel hook. When I removed it, I taped the screws directly to the hook.
See the piece of tape directly on the countertop? Those were screws to another piece of hardware that I can’t remember right now! Haha! At least I know where the screws are!
easy to remove
When all the painting is finished, remove the Frog Tape at an angle AWAY from the edge. This prevents the tape from peeling the paint up from the surface.
thanks for shopping my links!
Technically, the tape should be removed before the paint has completely dried. But I had primer and two coats of paint on the surfaces so that wasn’t an option for me.
If you are concerned about peeling your freshly painted surfaces, use an Exacto Knife and cut through the area where the painted surface meets the taped area. That will break the seal the dried paint creates.
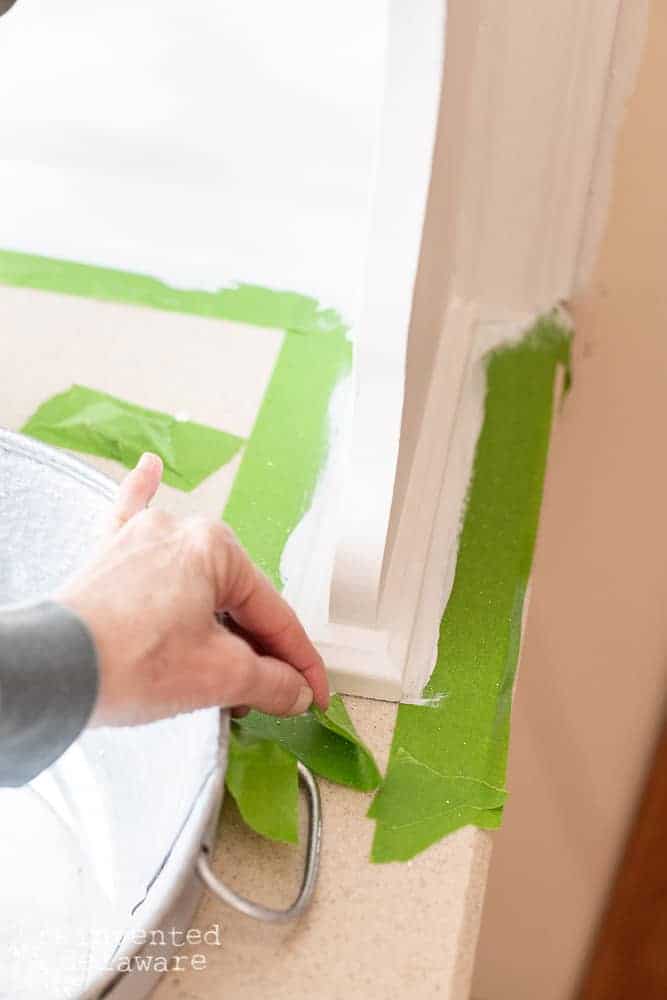
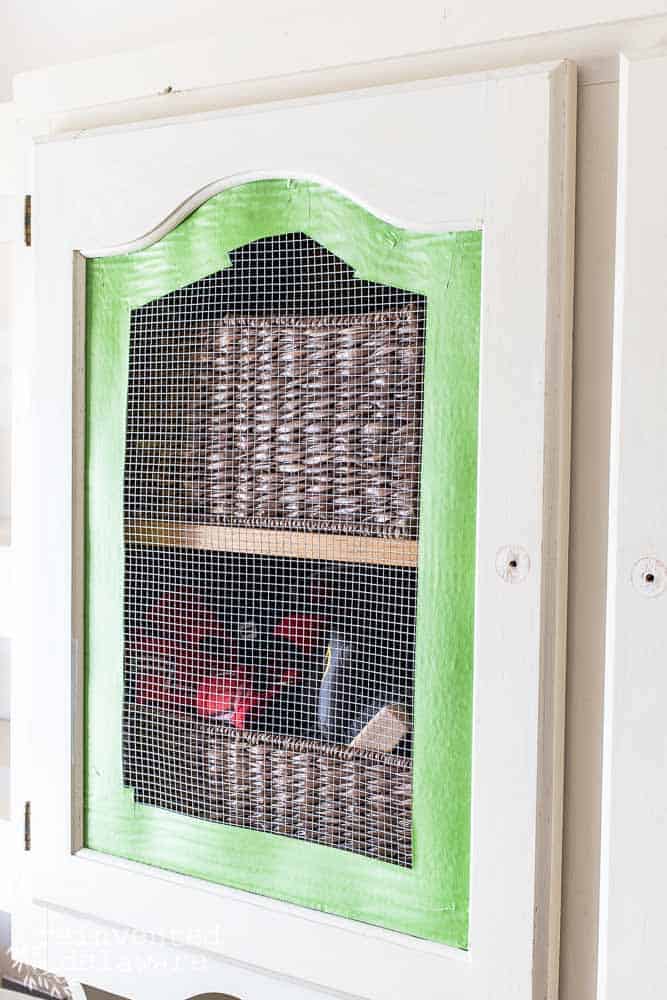
Just look at that clean hardware cloth under the Frog Tape! No paint!!

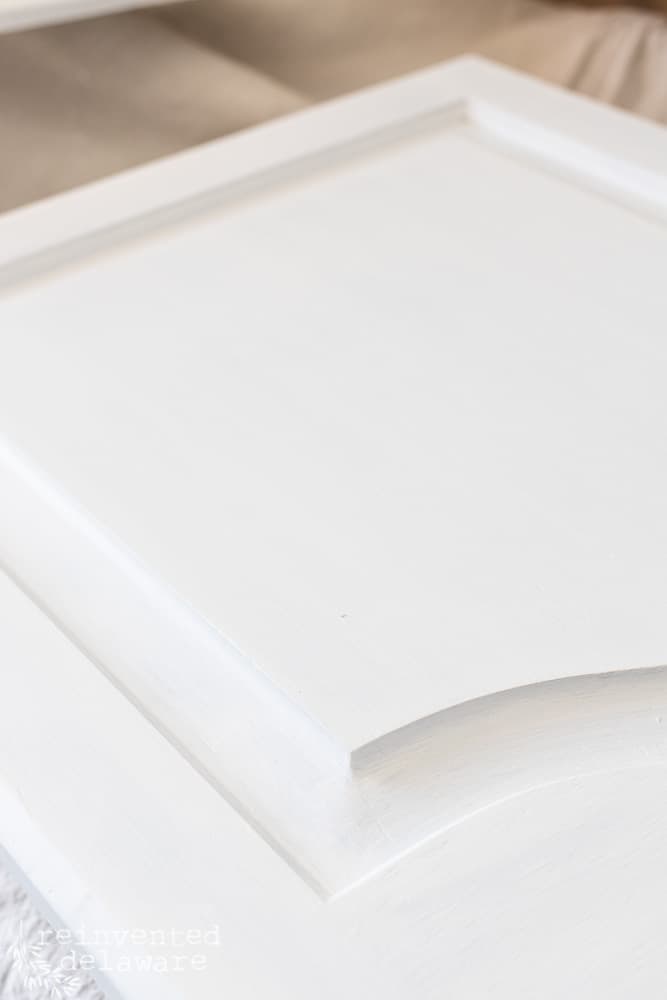
BTW, I used Fusion Mineral Paint in Casement on the cabinetry. This is after one coat:
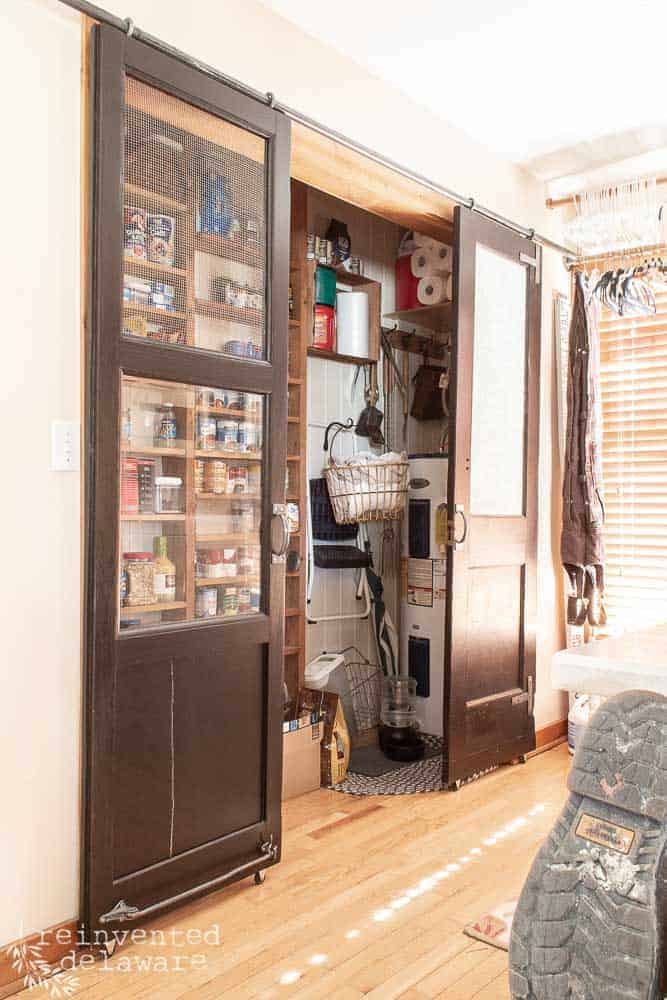
The last coat of paint is on and all the tape has been removed! I’ll share that in the next post about our laundry room refresh! The pantry area is the next spot to tackle!
Shopping Page
For your convenience, I’ve gathered many of the supplies I use on my Shopping Page. Head over and pick up the supplies you need! Shopping from our links helps to support this blog and all the free tutorials we offer you!
thanks for shopping my links!
Be sure to check out the first post in this series:
Thanks for stopping by today to learn my tips for applying painter’s tape! Sign up below so you don’t miss the reveal!
You are welcome to join us on the socials too! Find us on Instagram and Facebook for more glimpses of our projects. Feel free to pin any image to Pinterest for your own reference!
POST UPDATE:
You can read the progress on this project by clicking each image below:
POST UPDATE:
Click here to see the full laundry room refresh reveal!
Until next time….

Great painting tips. Thank you so much for sharing them.
Blessings to you.
So glad you enjoyed the painting tips! Thanks for stopping by Renae!
I think you forgot to mention the MOST important part of using Frog tape…after it’s applied you must wet it. The whole idea of Frog tape is that it expands to prevent leaking. Not the blue painters tape but Frog tape. Once it’s wet it has unbelievable power…I will never go back to the blue stuff.
Maybe you said this in a previous post but it’s worth repeating…
Thanks for sharing your tip! I have not heard that tip before so I headed over to the FrogTape website and did a little search. I don’t see where they recommend this method but if it works for you keep doing it!! :). Here is a video for anyone who might be interested in the FrogTape tips for applying the tape. https://www.frogtape.com/inspiration/tutorials/projects/how-to-apply-and-remove-frogtape I hope this helps anyone reading this post. Thanks, Diane for your tip! I just might give that a try for my next painting project! And yes, I’m a FrogTape girl too!! Have a great day and thanks for stopping by!