
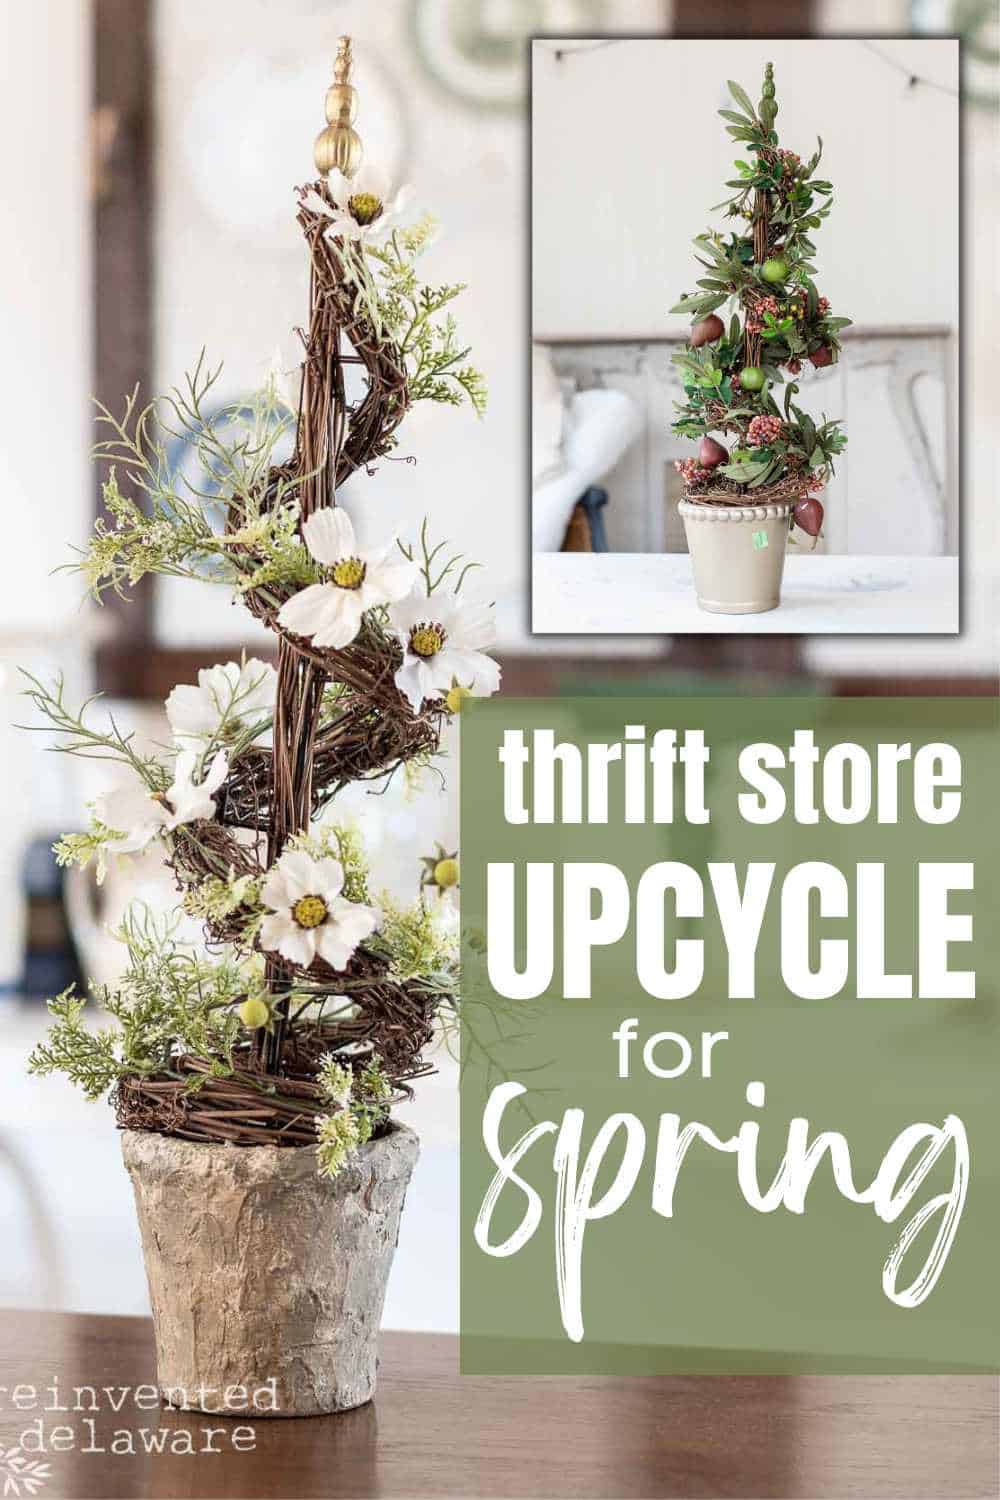
Thrift Store Upcycle Idea for Spring
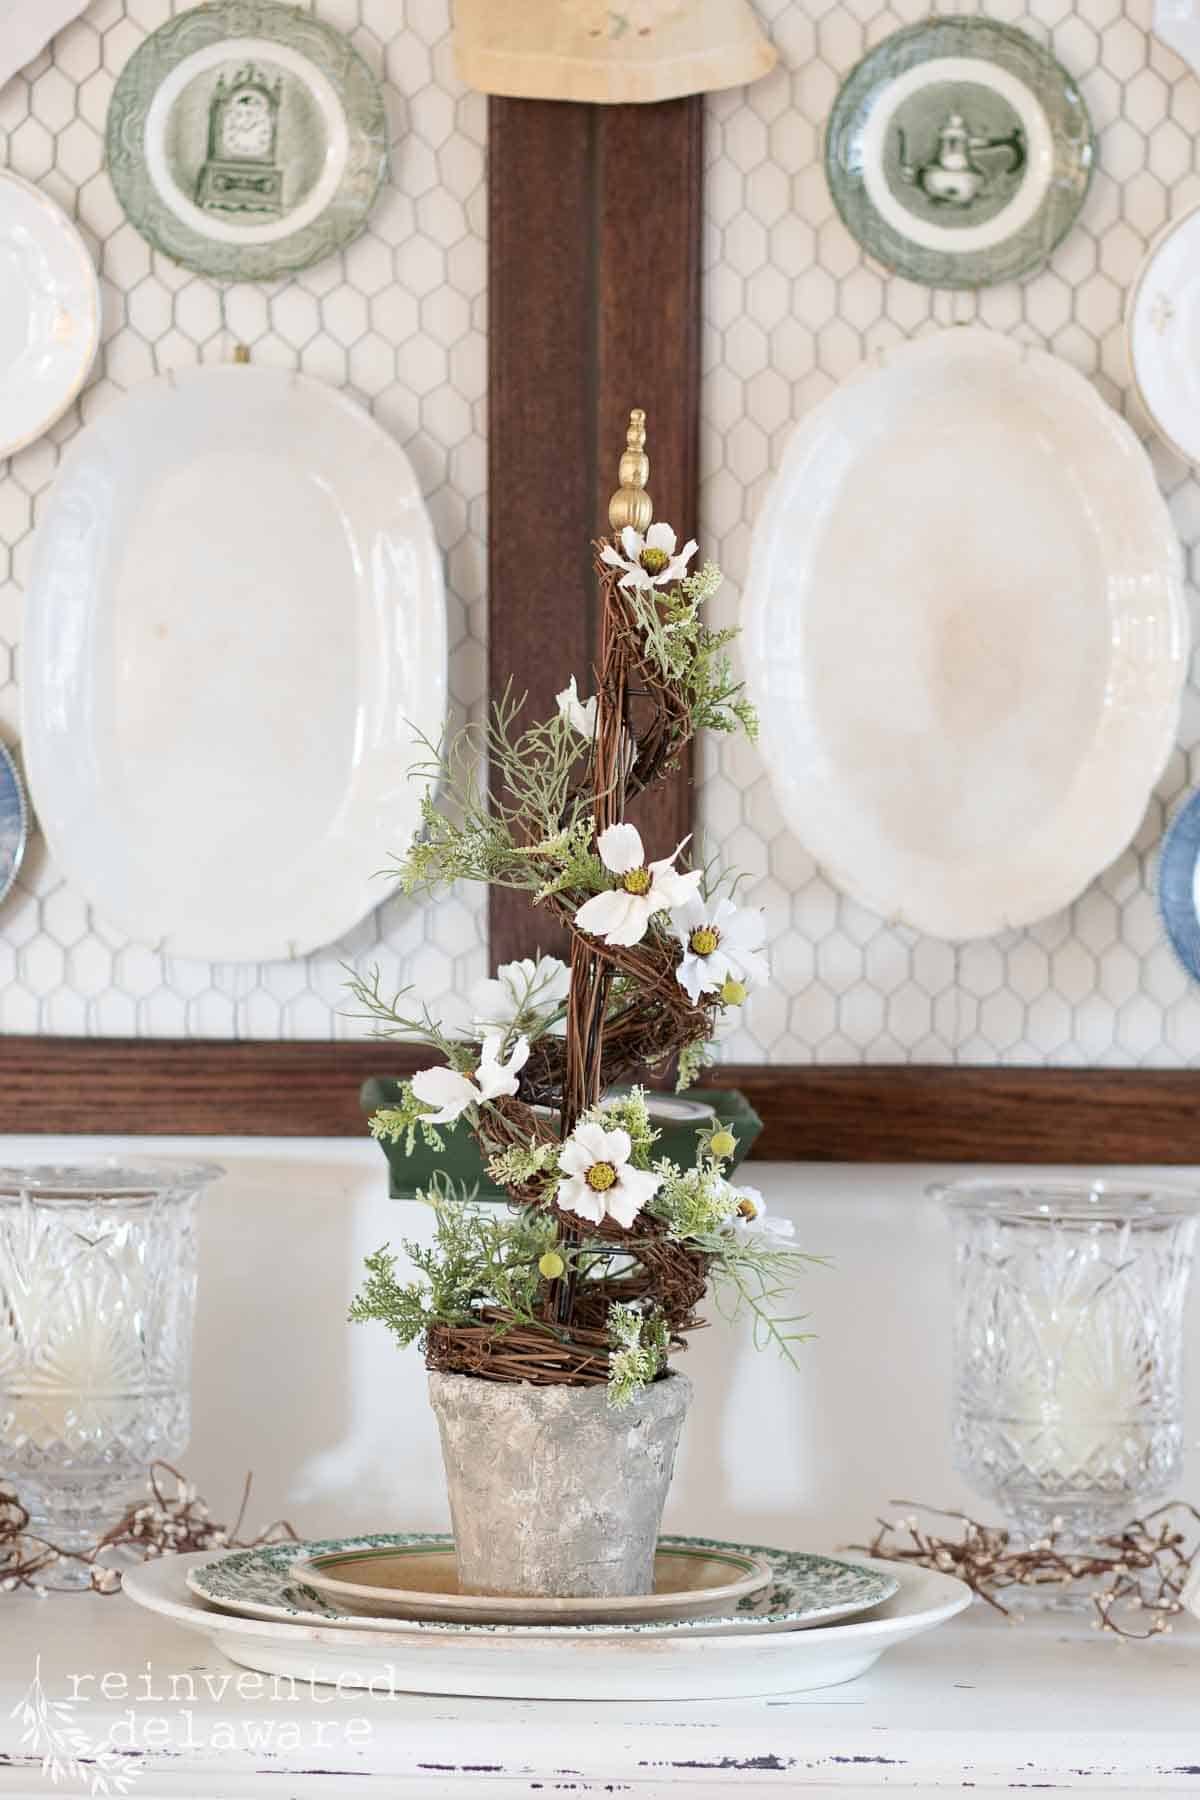
Visiting your local thrift store is a great way to find a home decor piece to upcycle for your spring decor. This outdated topiary project cost under $15 and is perfect for spring home decor!
local thrift store shopping
Do you have a local thrift store that you visit often? I do. We have four amazing thrift stores in our small town. Frequenting my local thrift shop is a great way to create new to me home decor. They are filled with DIY projects for upcyclers like you and me!
It’s too early in the season for yard sales or outdoor flea markets. But our local thrift shops give me plenty to choose from!
I’m always keeping my eyes peeled for home decor pieces that I can give new life to even if it seems out of the current season. Like this floral topiary.
The following Dixie Belle sponsored post may contain affiliate links. That means if you click and then buy something, I will make a small commission at no additional cost to you! Thank you for supporting my blog. full disclosure here.
tap here to see the list of supplies at the bottom of this post!
It was a chilly day when I stopped at our local Goodwill Store. I was looking for pieces for my next thrift store makeovers YouTube video.
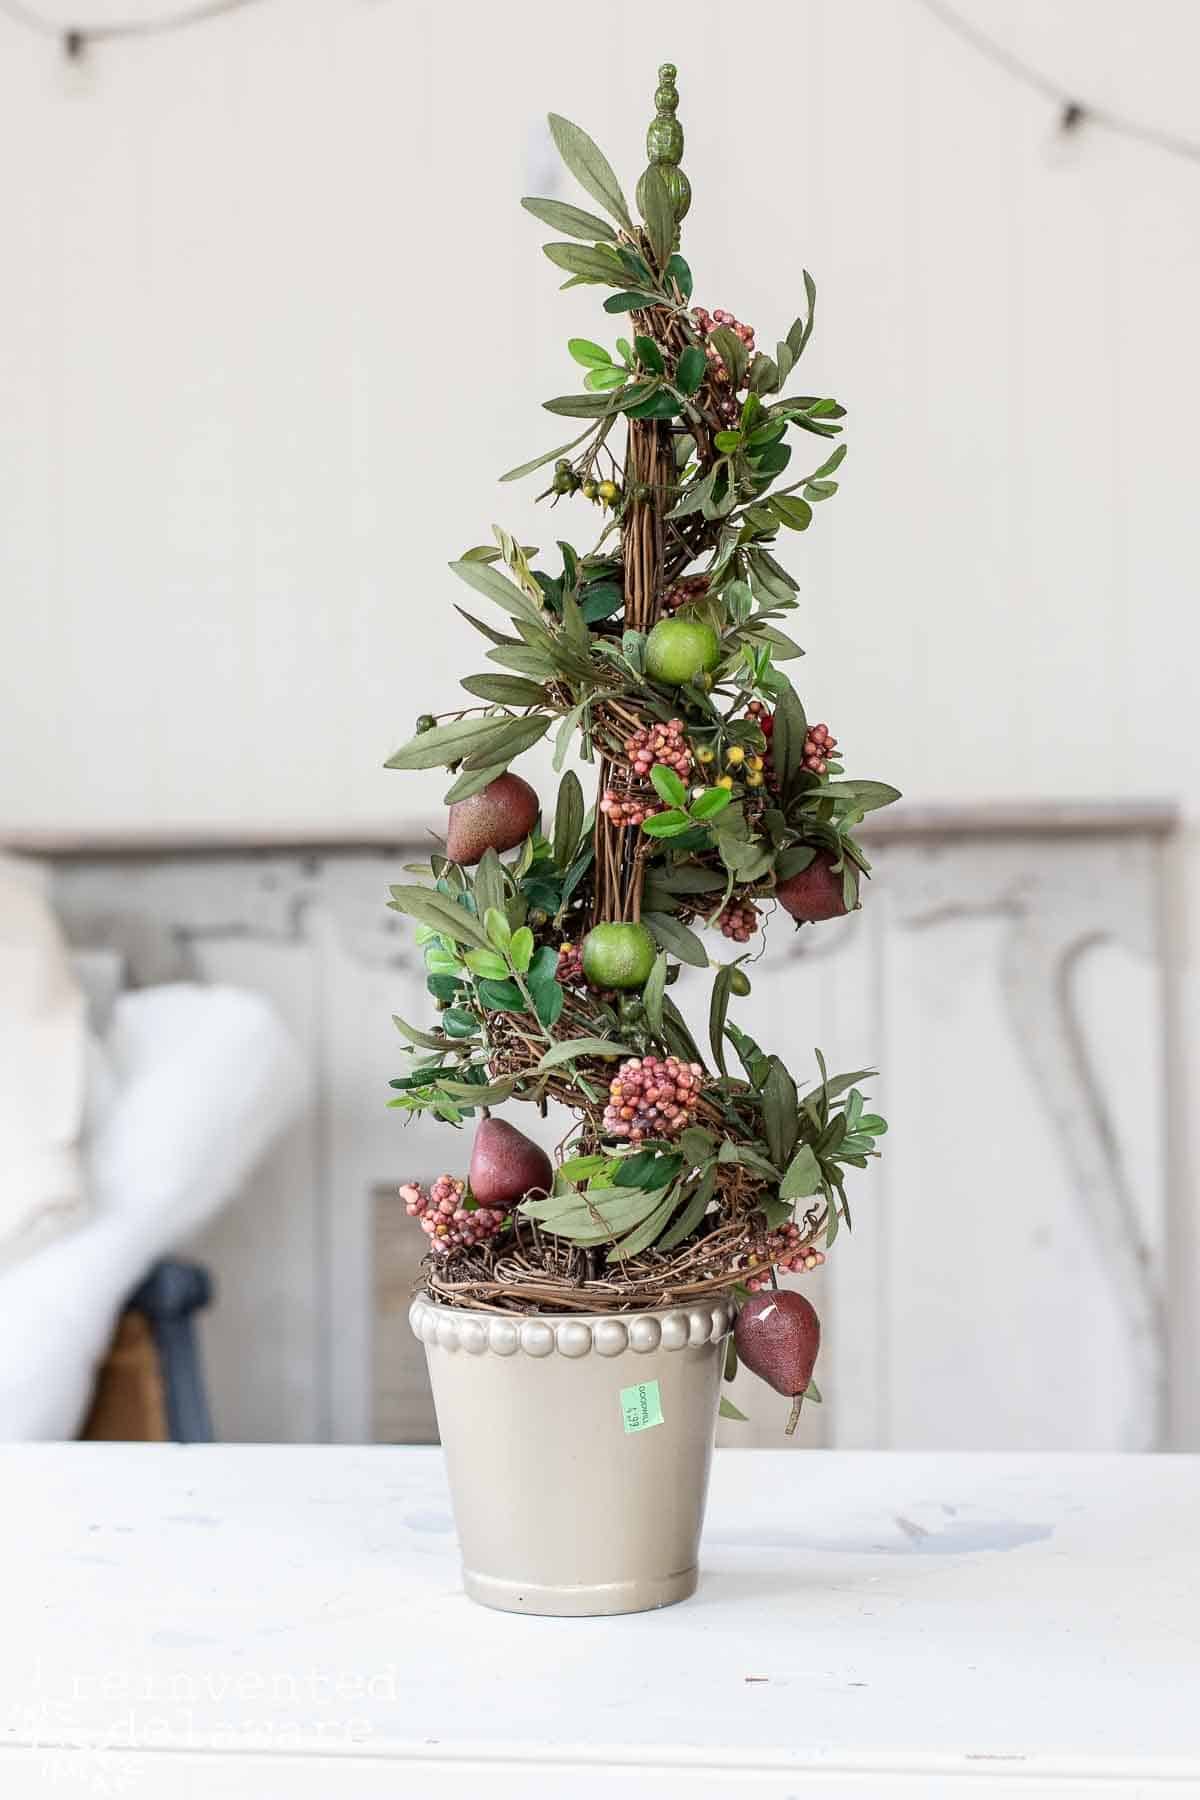
I perused the isles for a few minutes, then I saw it. A twisted grapevine topiary in a pot that was in really good shape. This thrifted item could be made over so easily and it was only $5! Sold! It went into my cart and out to my vehicle along with other pieces I found while out thrift store shopping that day.
chalk paint for easy thrift store makeovers
One of my favorite ways to upcycle just about anything is to paint it. I realize that might seem like the simplest thing in the world to do. It is one of the best ways to give new life to the pieces you find at antique stores or thrift stores.
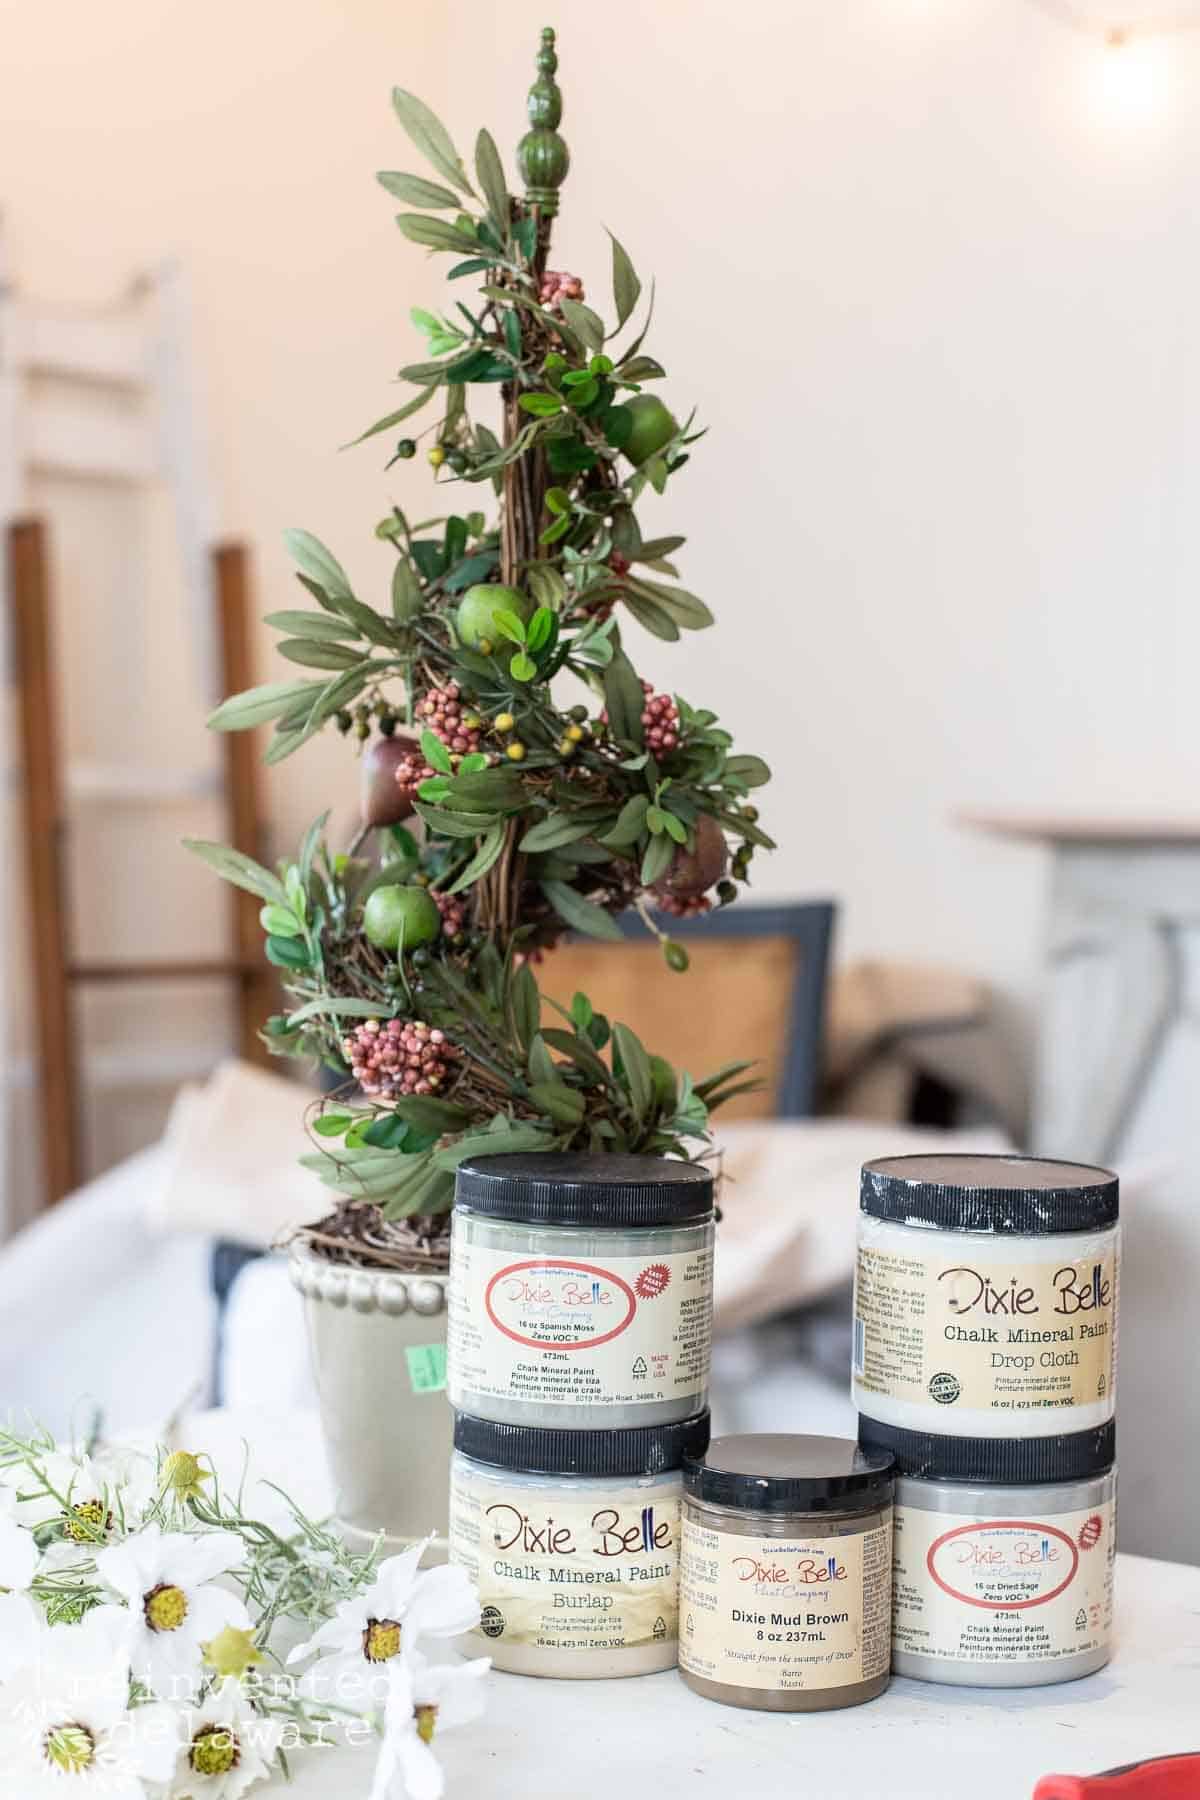
Spray paint is always an option. But for a girl like me who loves to hold a paintbrush, I like to use chalk paint! The great thing about chalk paint is the coverage. It sticks to anything and I kinda feel like an artist when I’m using it 😉
I’ve even used chalk paint on a thrift store tray. Even on another tray as a matter of fact! No surface is safe around me if I have a paintbrush in my hand!
how to make a faux concrete pot
If the container on this piece had been a terra cotta pot, I might have left it in its natural color. But this little pot was silvery and had a shimmer. Not my cup of tea at all! Except of course if it is a dull brass lamp that needs a little help! That’s where the shimmer belongs!
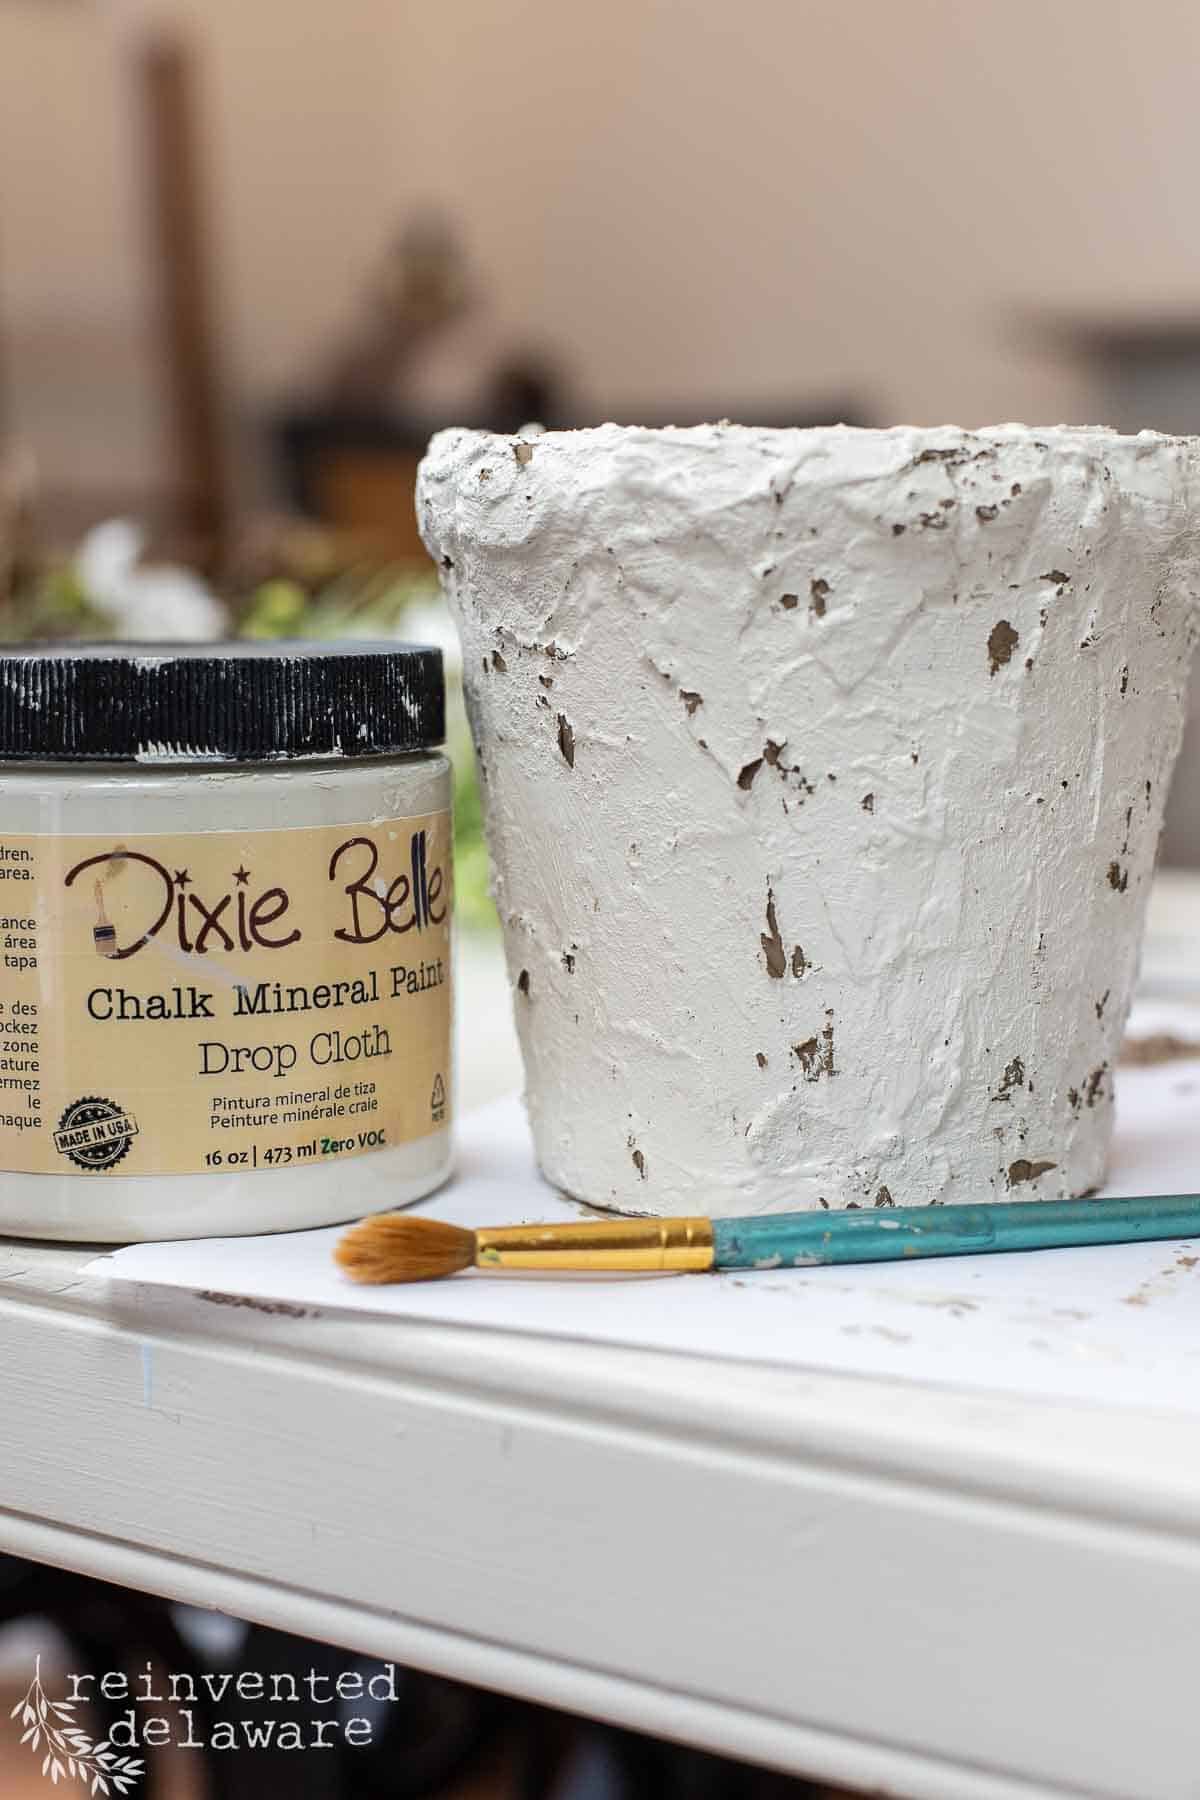
The shiny pot of this topiary needed to be a little more on the rustic side for me. I’ve heard of different ways to create a concrete texture on pots like this. But I wanted to find a different way to create texture.
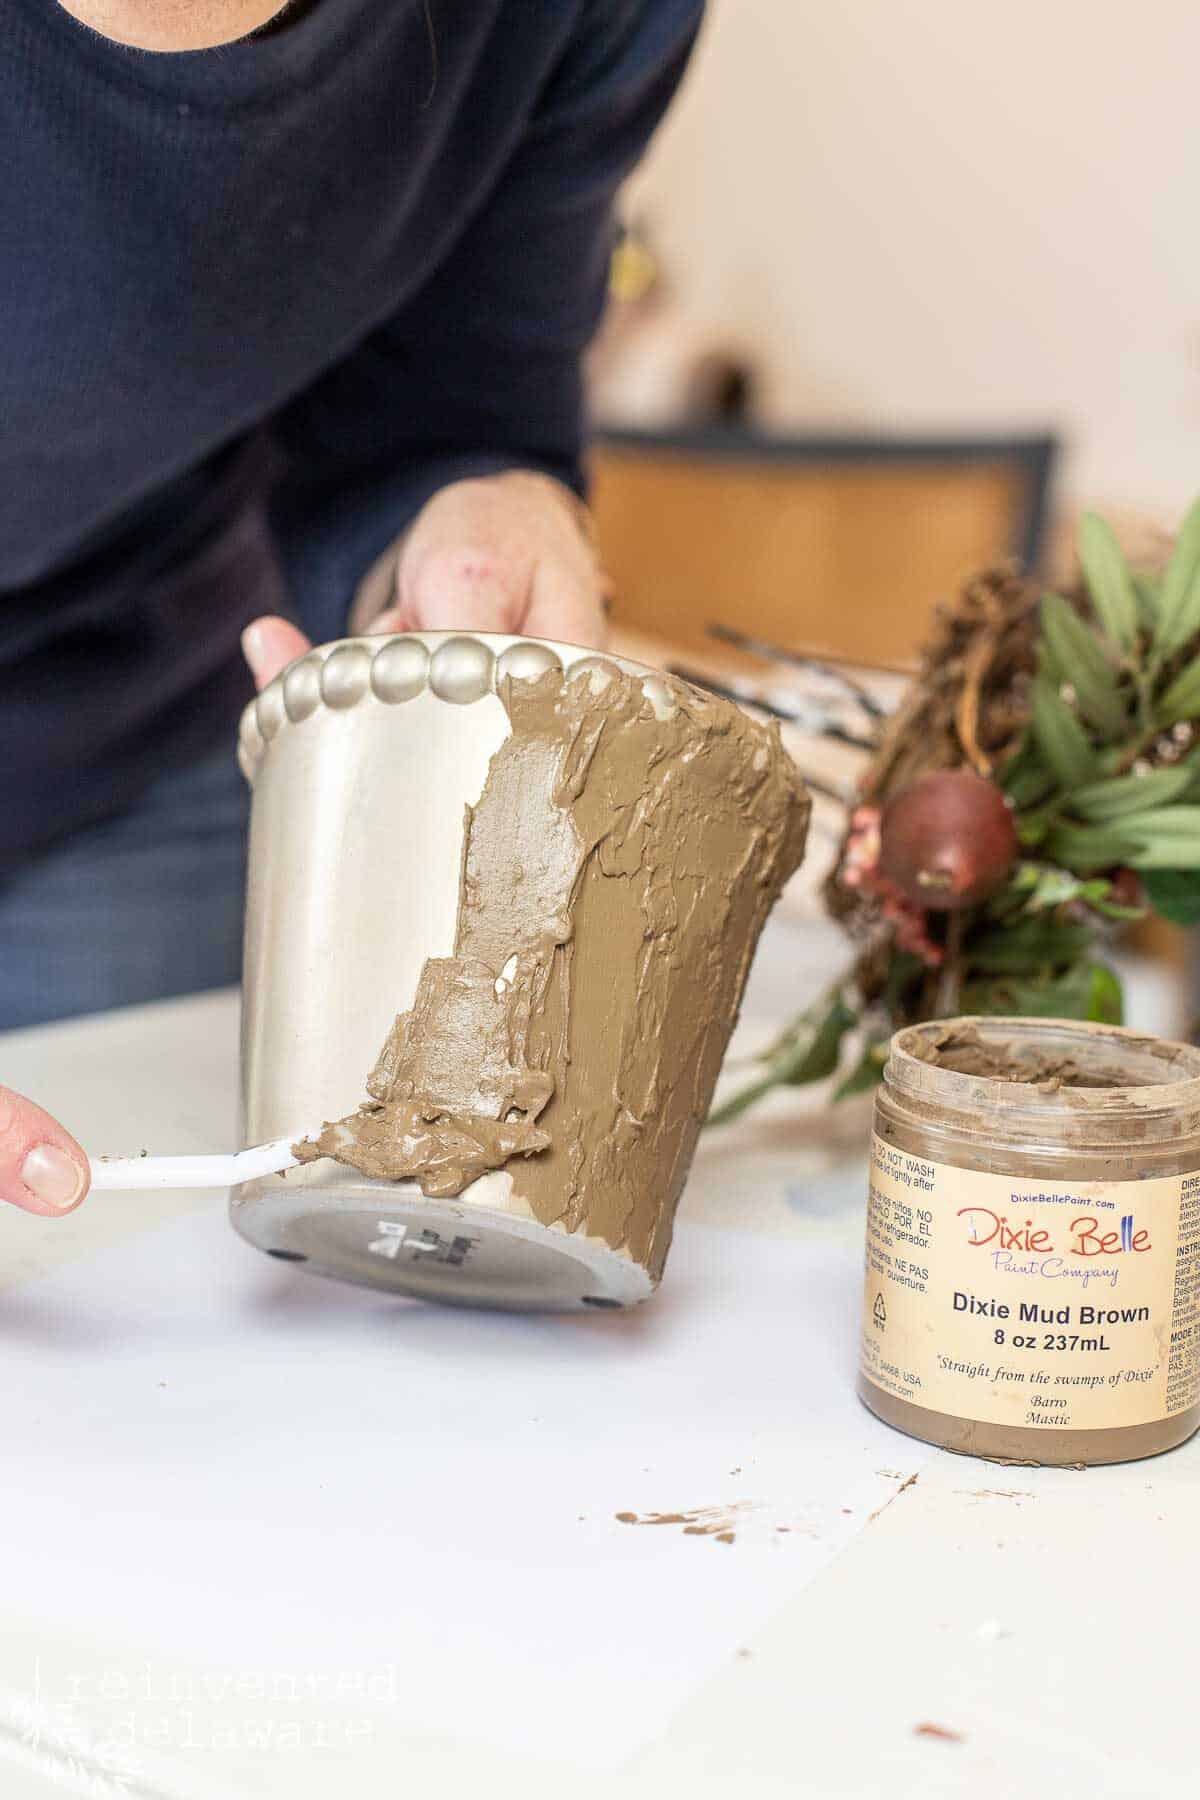
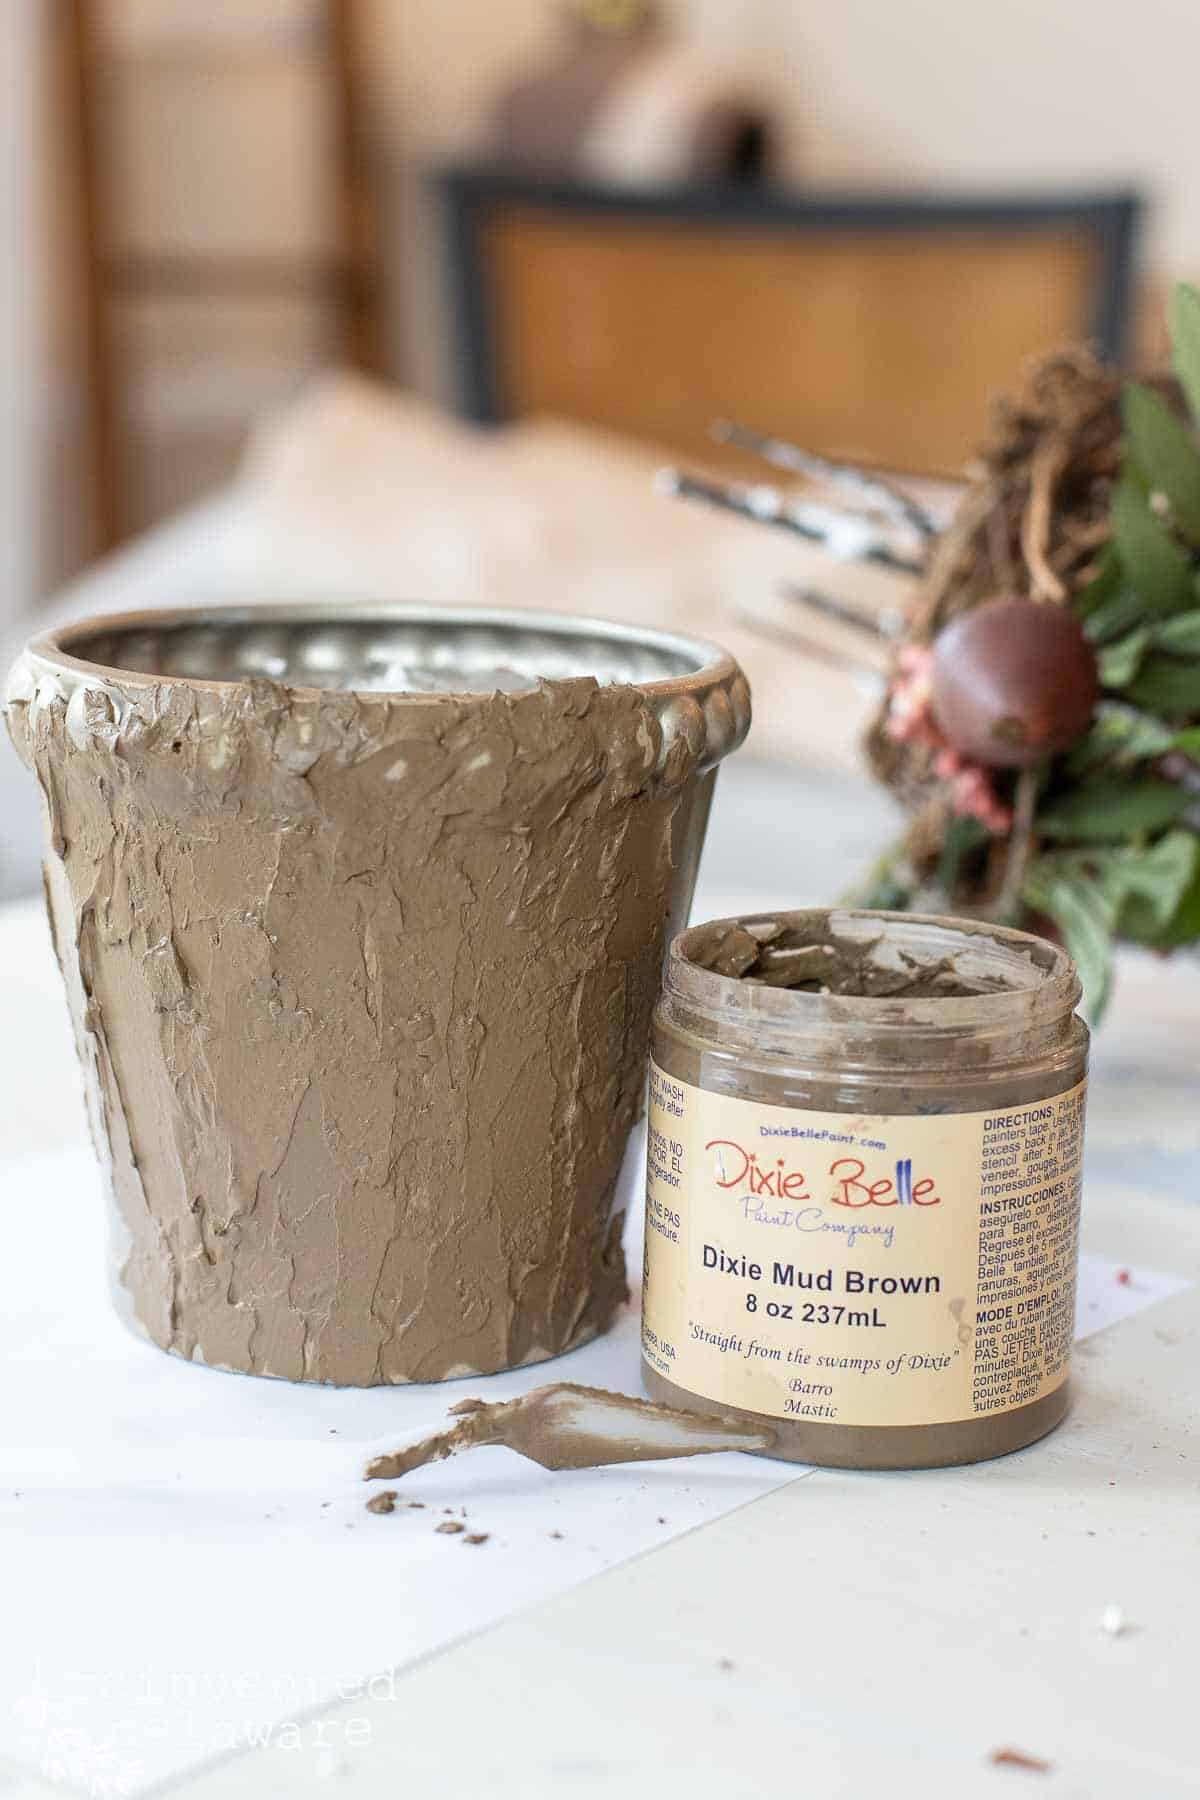
Dixie Belle makes a wood filler product called Dixie Mud. It’s a great filler for mishaps on furniture that will be getting painted. It’s fast-drying and easy to use. So I decided it would be a fun way to create texture on this thrifted find.
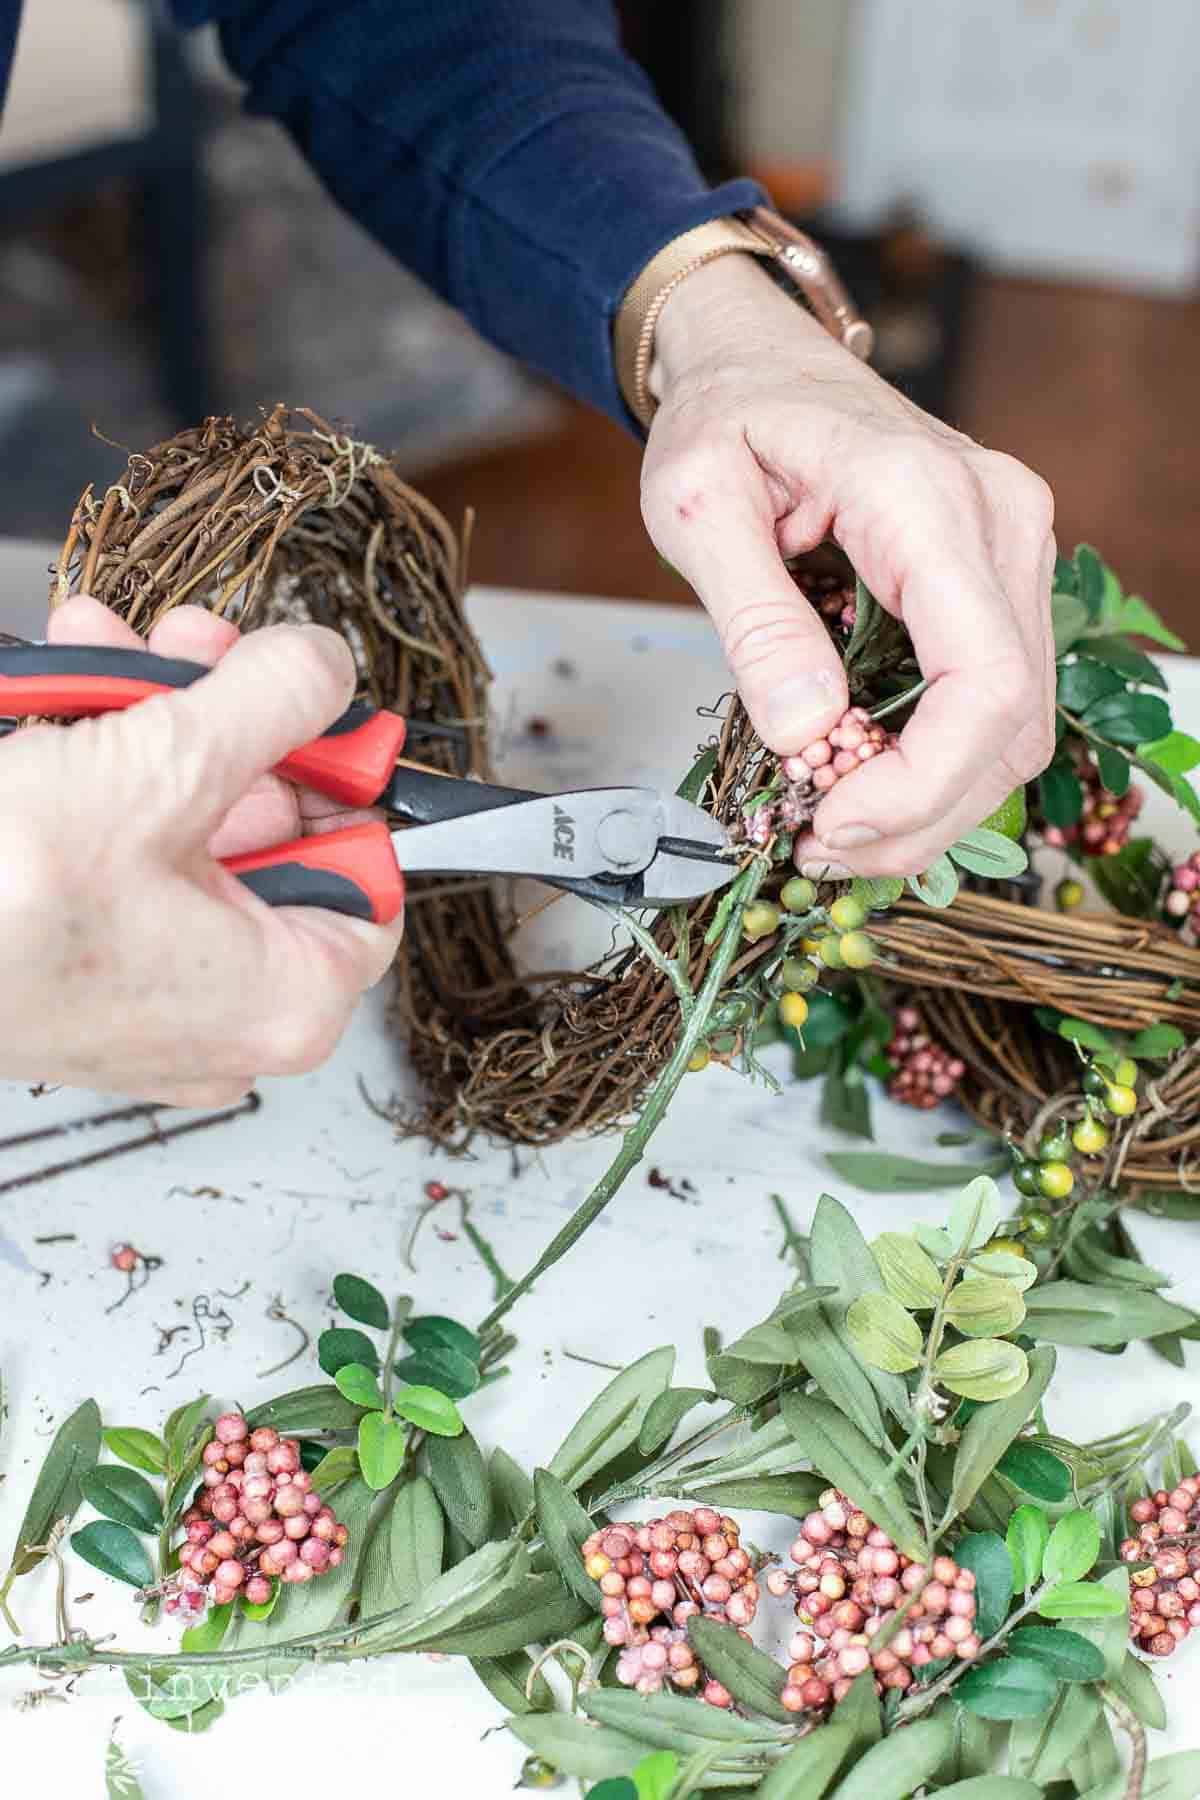
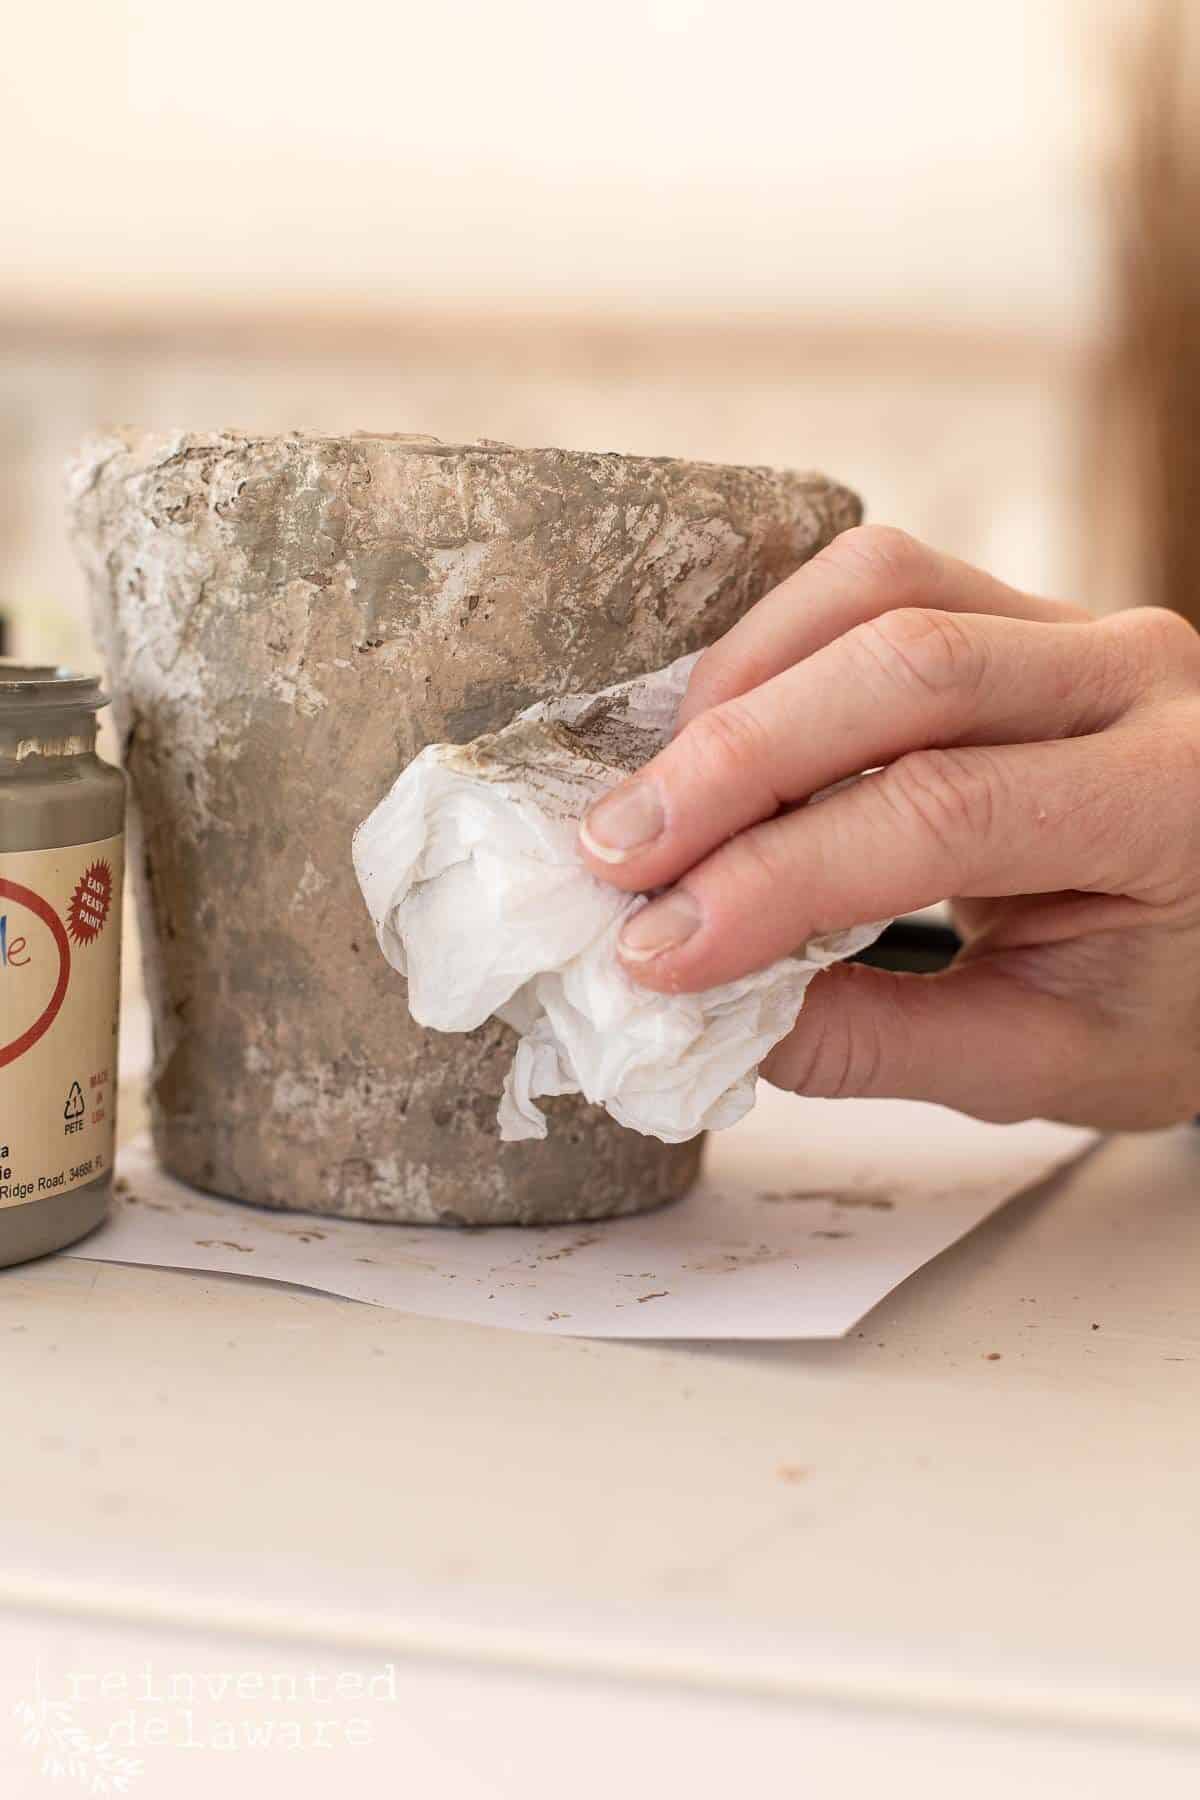
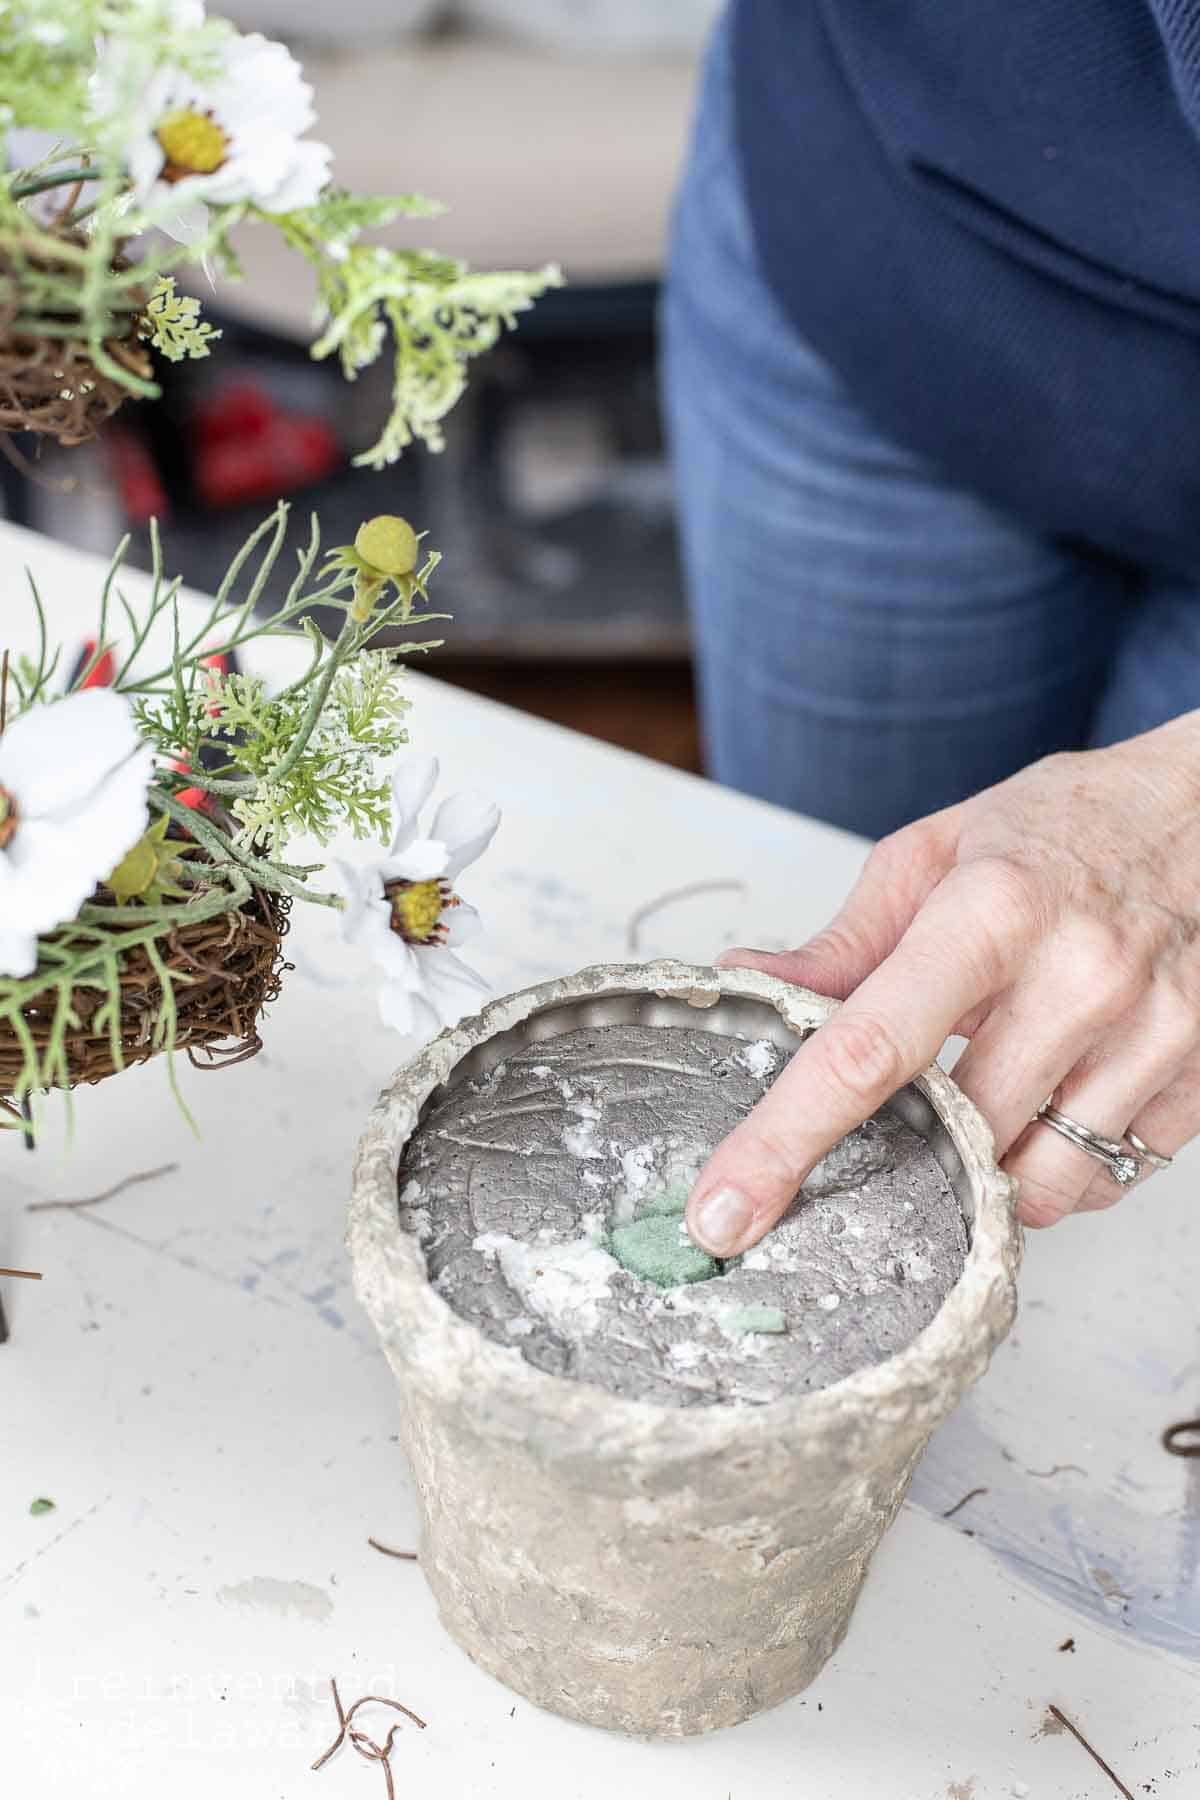
The first thing I did was clean the pot. Ok, well the very first step was to remove the grapevine topiary. Then I tackled the little pot. I spread the Dixie Mud onto the surface using a plastic spatula I had on hand.
The look I wanted was not a perfectly smooth surface but instead a surface with plenty of texture. So I spread the Mud on the pot and left all of the texture I could. The Mud is about ⅛” thick, just enough to cover the pot

replace outdated faux florals for spring
While the Mud dried, I disassembled the outdated flowers, apples, and pears so that I could replace them with spring flowers I had purchased at Hobby Lobby. BTW, when you shop at Hobby Lobby craft store, be sure you go when the flowers and greenery are 50% off. I got so many flowers for under $50. I have enough for this simple project and other spring home decor projects!
See the mini apples and pears? I have a plan for those when the fall comes around later this year! Be sure to subscribe to my blog so you don’t miss it!
chalk paint colors to add texture
Back to this thrift store upcycle! Remember I said I love to add a little bit of paint to everything? This little pot is no different! Once the Dixie Mud was completely dry, I grabbed some of the neutral colors I love in chalk paint.
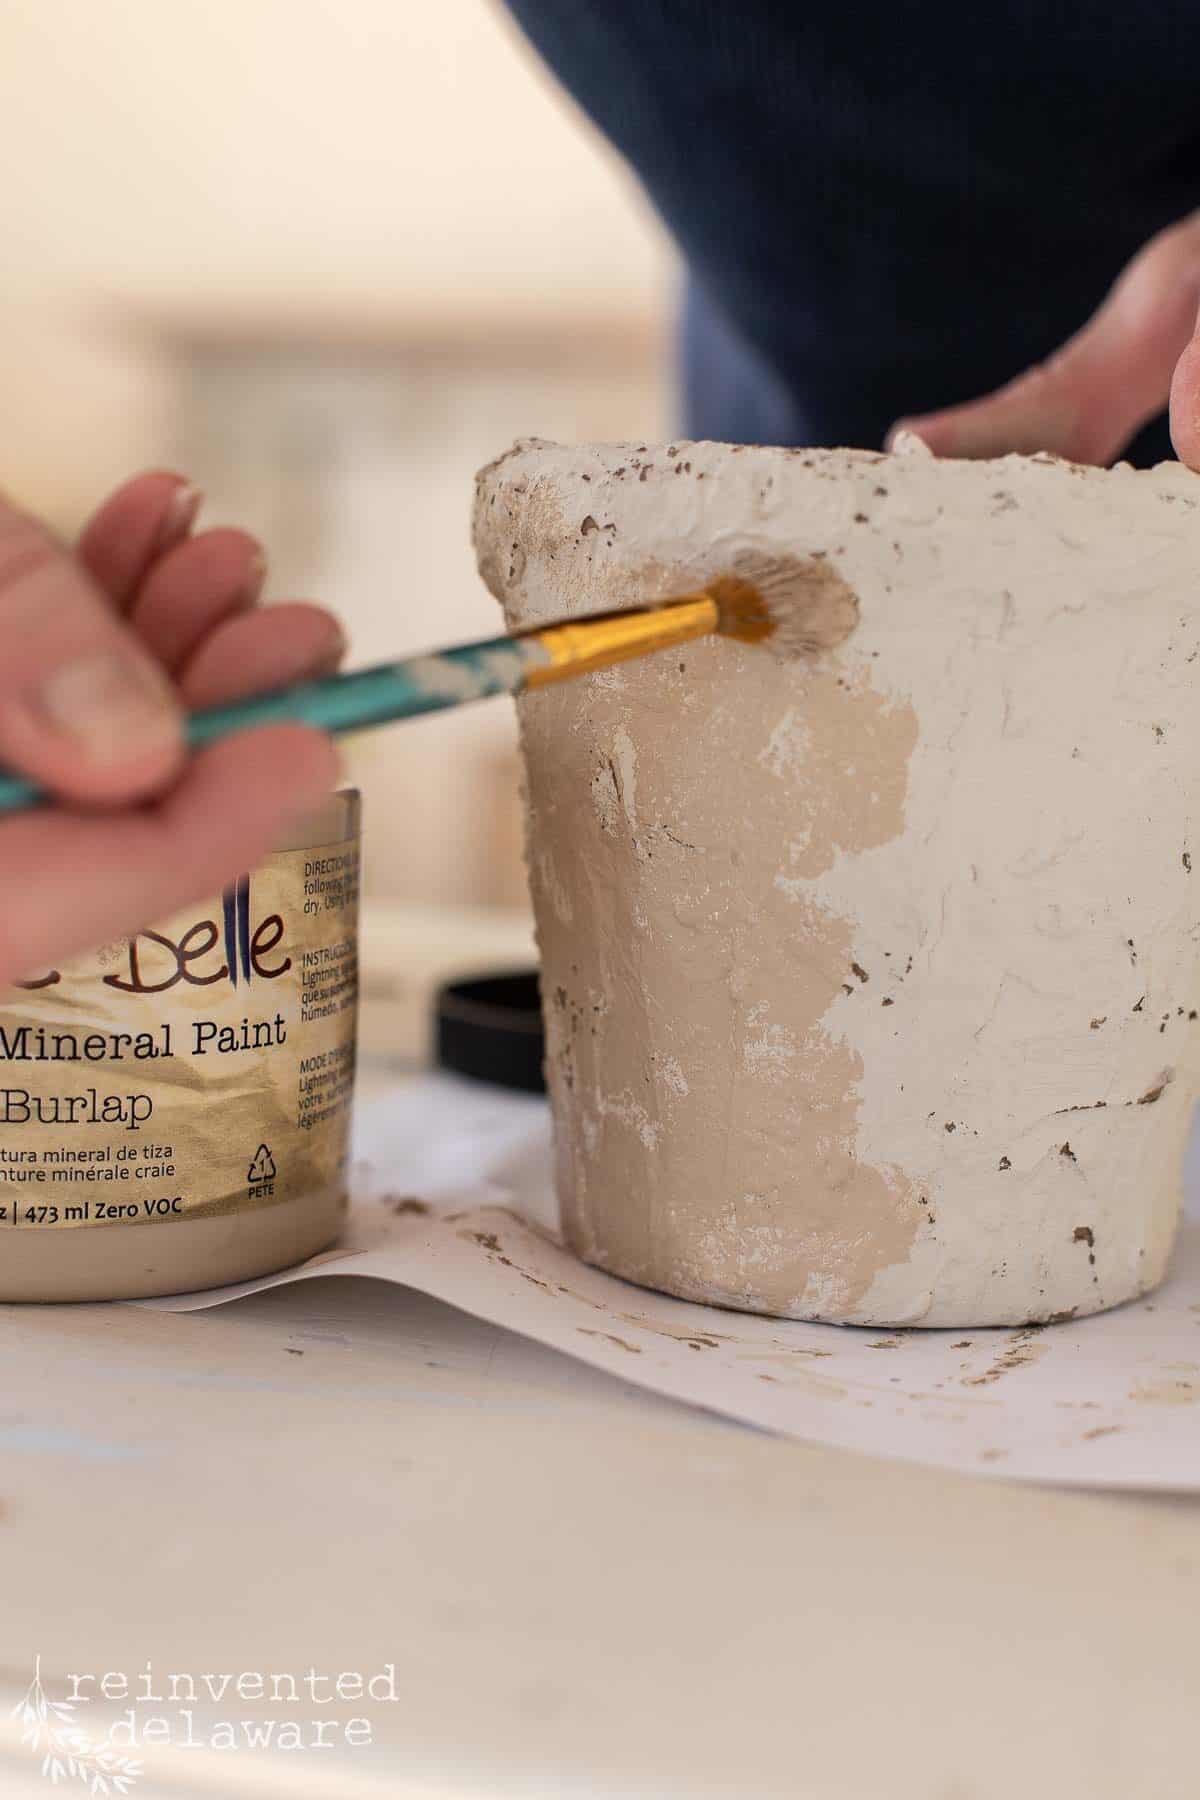
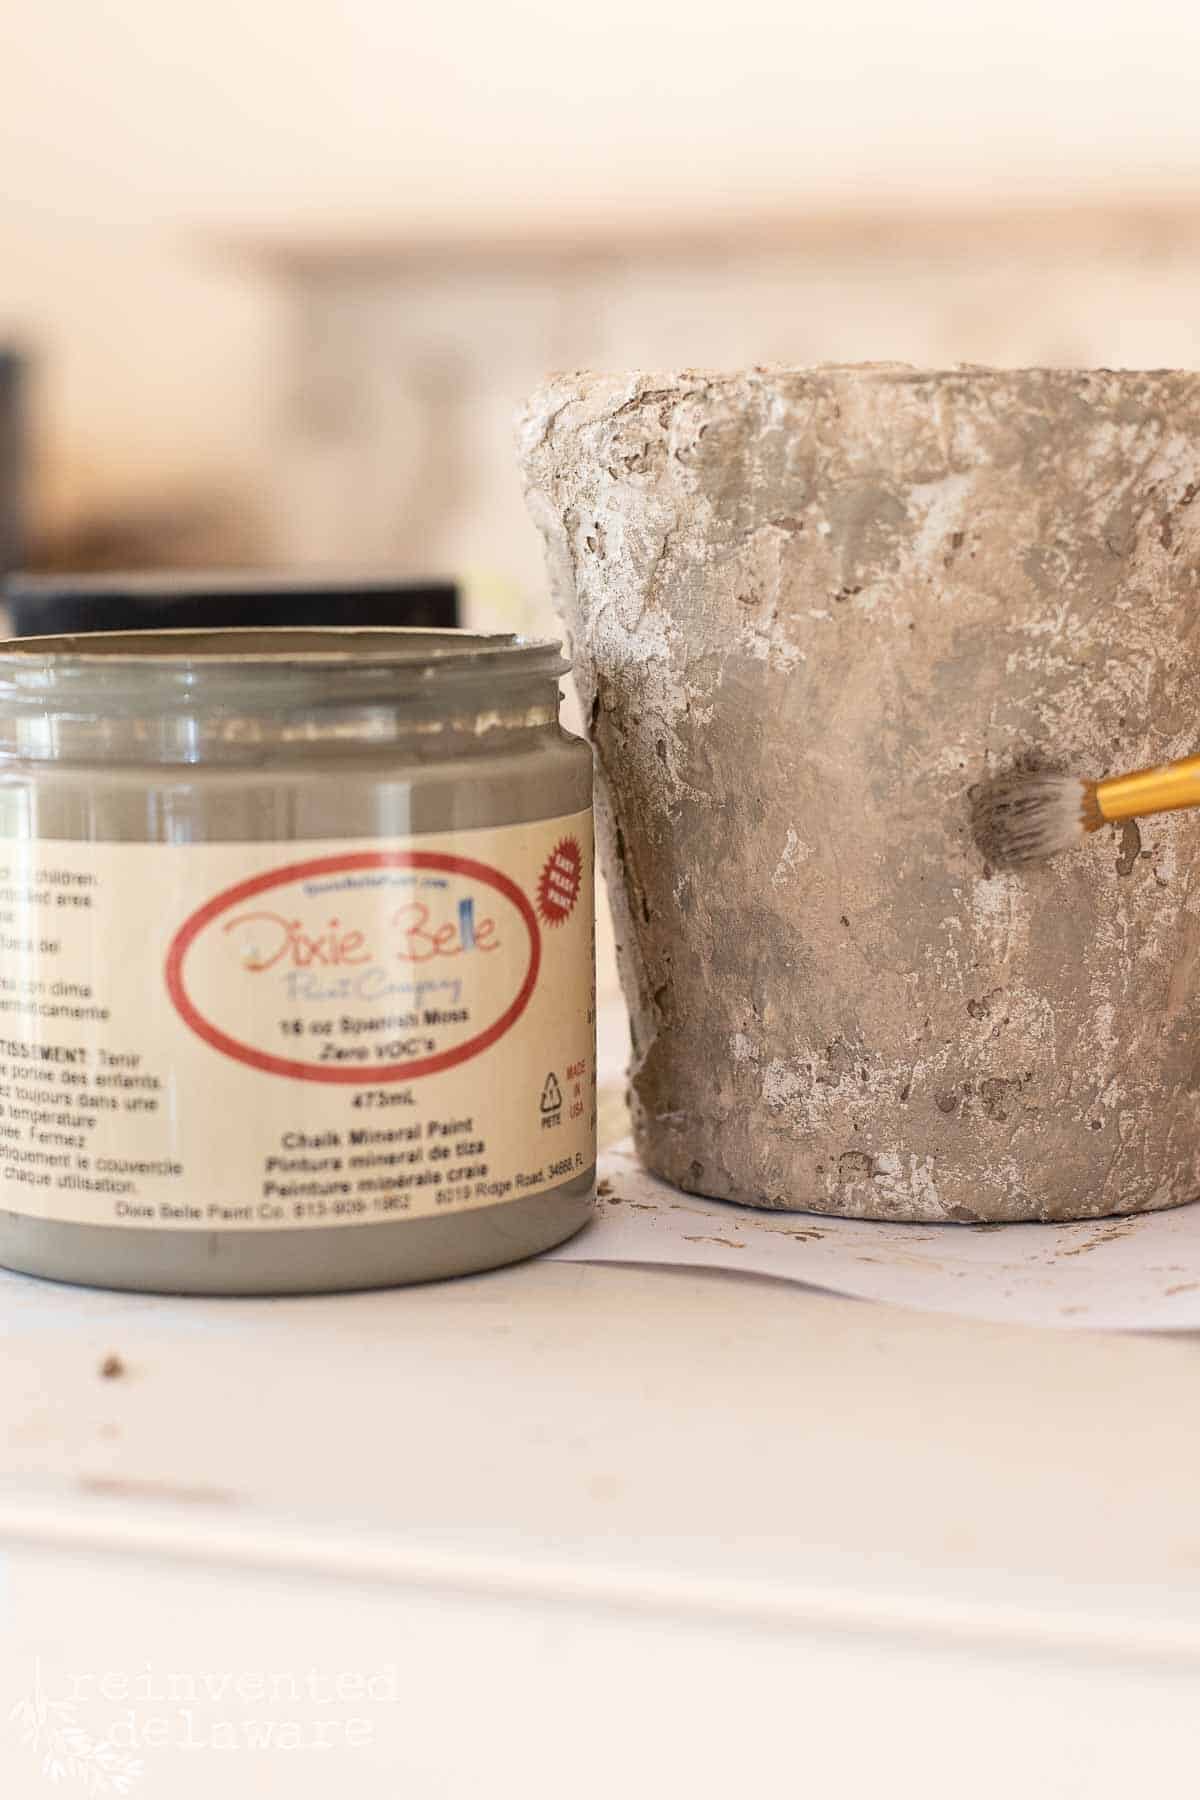
Drop Cloth, Burlap, and Dried Sage would create a natural-looking finish on this rustic potted home decor piece. The different colors will also help to add the appearance of texture to this little planter.
The lightest color, Drop Cloth, went on first. As I moved around the little pot, some of the paint pulled off exposing the brown color of Dixie Mud. That was perfect!
Once that color was dry, I added a little paint from each of the other two colors, Burlap, and Dried Sage to add the right amount of color variation. One of my favorite things about this color scheme is how well they look together.
Using a crumpled paper towel helped to blend and soften the harsh lines that the artist’s paintbrush created. After I had a look I liked, I allowed the paint to dry completely. Then I sealed it with a flat paint sealer.
separate the flower stems
Now for the new items I purchased: the flowers and greenery. I’m only showing a few of the beautiful spring flowers I purchased at Hobby Lobby. The other flowers will appear here on the blog and on my YouTube channel during the spring season!
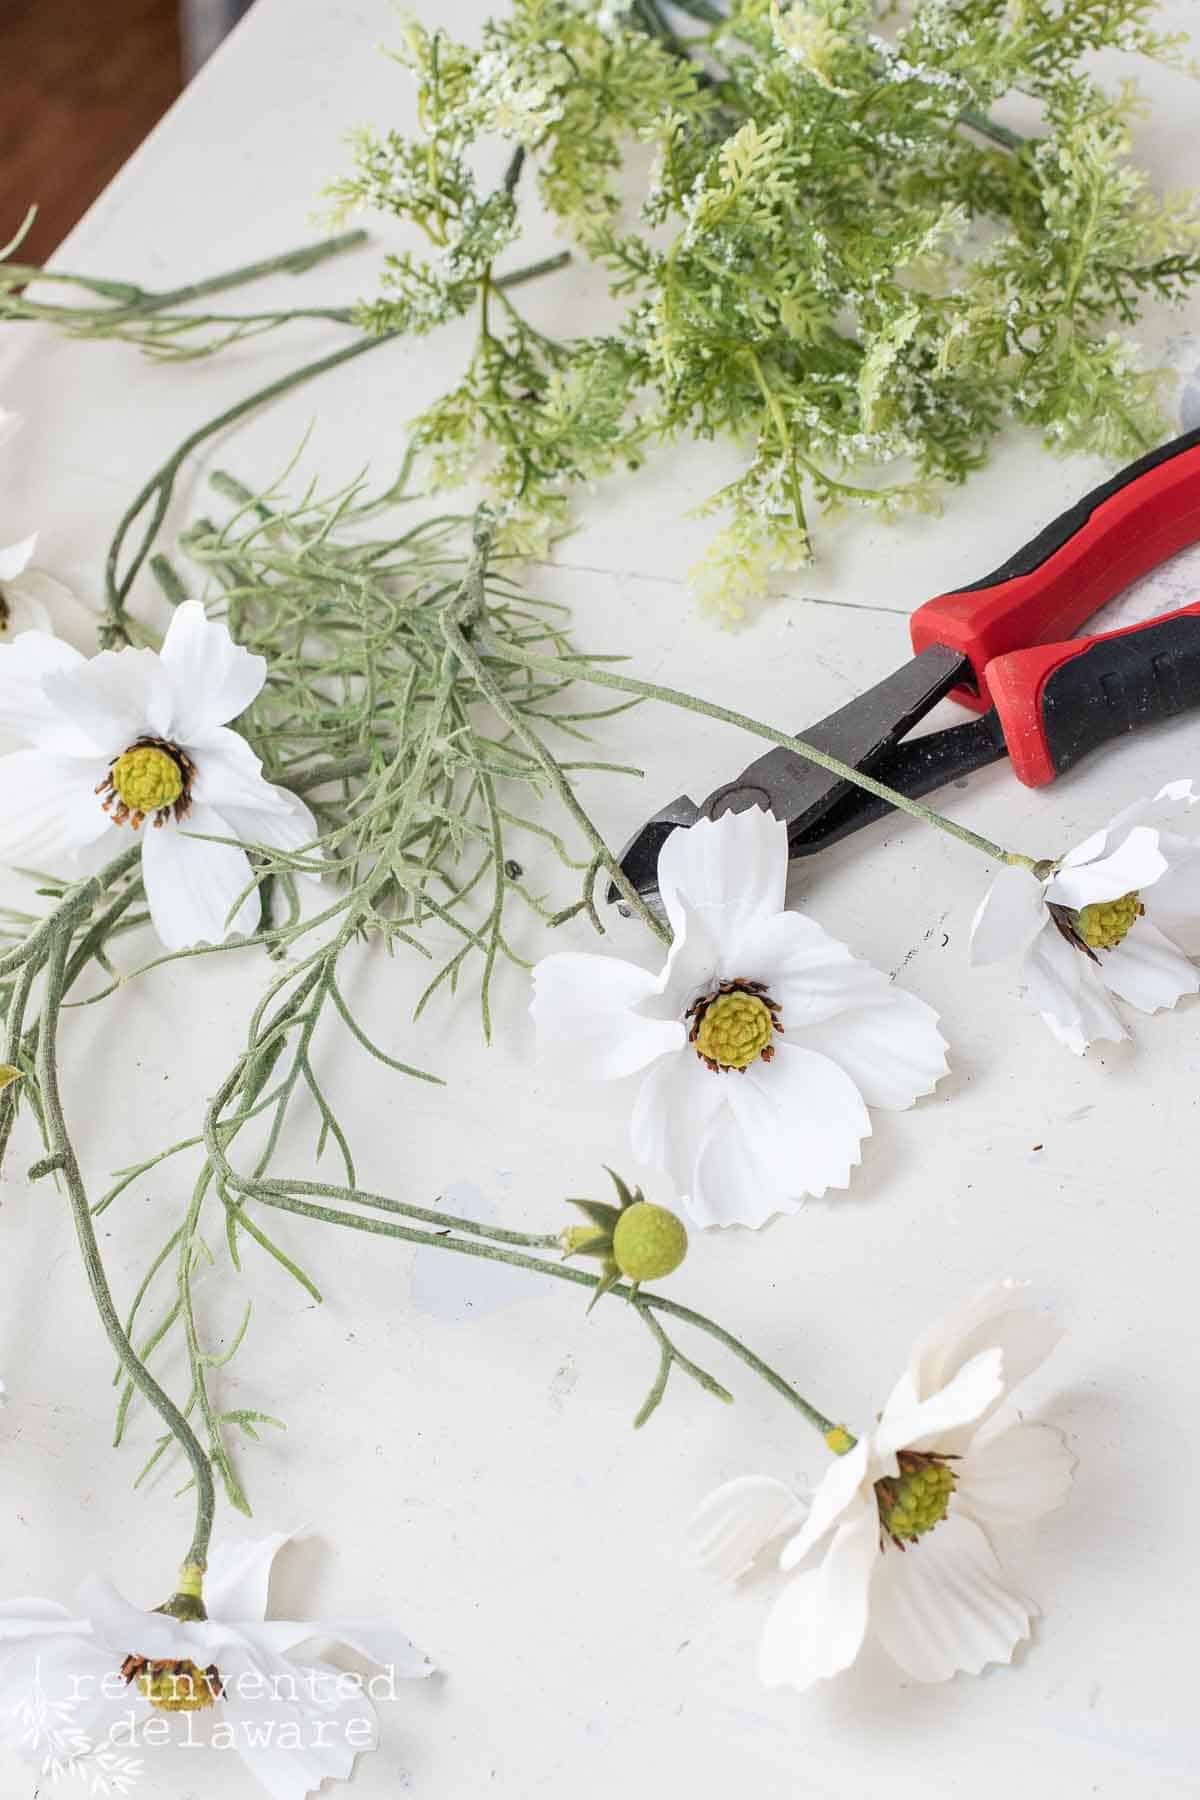
Using my wire cutters, I separated the flower stems. The poppies (or maybe they are anemones? Let me know in the comments what you think they are) had about five blooms on each stem.
Handy tip: Use small wire cutters to separate the floral stems.
Here is a little tip for you when you are purchasing florals any time of year, check to make sure you are not missing any of the blooms. Compare to the other stems within the container you are purchasing from. If the other stems have five blooms, make sure the one you pick has five! Too often, I have bought the stems only to get back home and realize some of the blooms are missing! Agh!!
I also separated the sections of the greenery I bought. Starting at the bottom, I placed the poppies around working my way upward to be sure I would have enough. Then I did the same with the greenery. For our own home, I like a sparse look, especially where flowers are concerned. Fortunately, the two stems of poppies and the one stem of greenery were the right amounts for this easy DIY floral arrangement.
Before attaching the flowers to the grapevine topiary, I decided the styrofoam in the pot was too loose to securely hold the new spring floral topiary. With a little creativity and some thinking, I plugged up the hole that had previously held the large center stem of this topiary with another piece of floral foam. I also added E6000 to hold it in place. Then I allowed it to dry overnight to be sure the glue had set.
add a faux vintage brass look
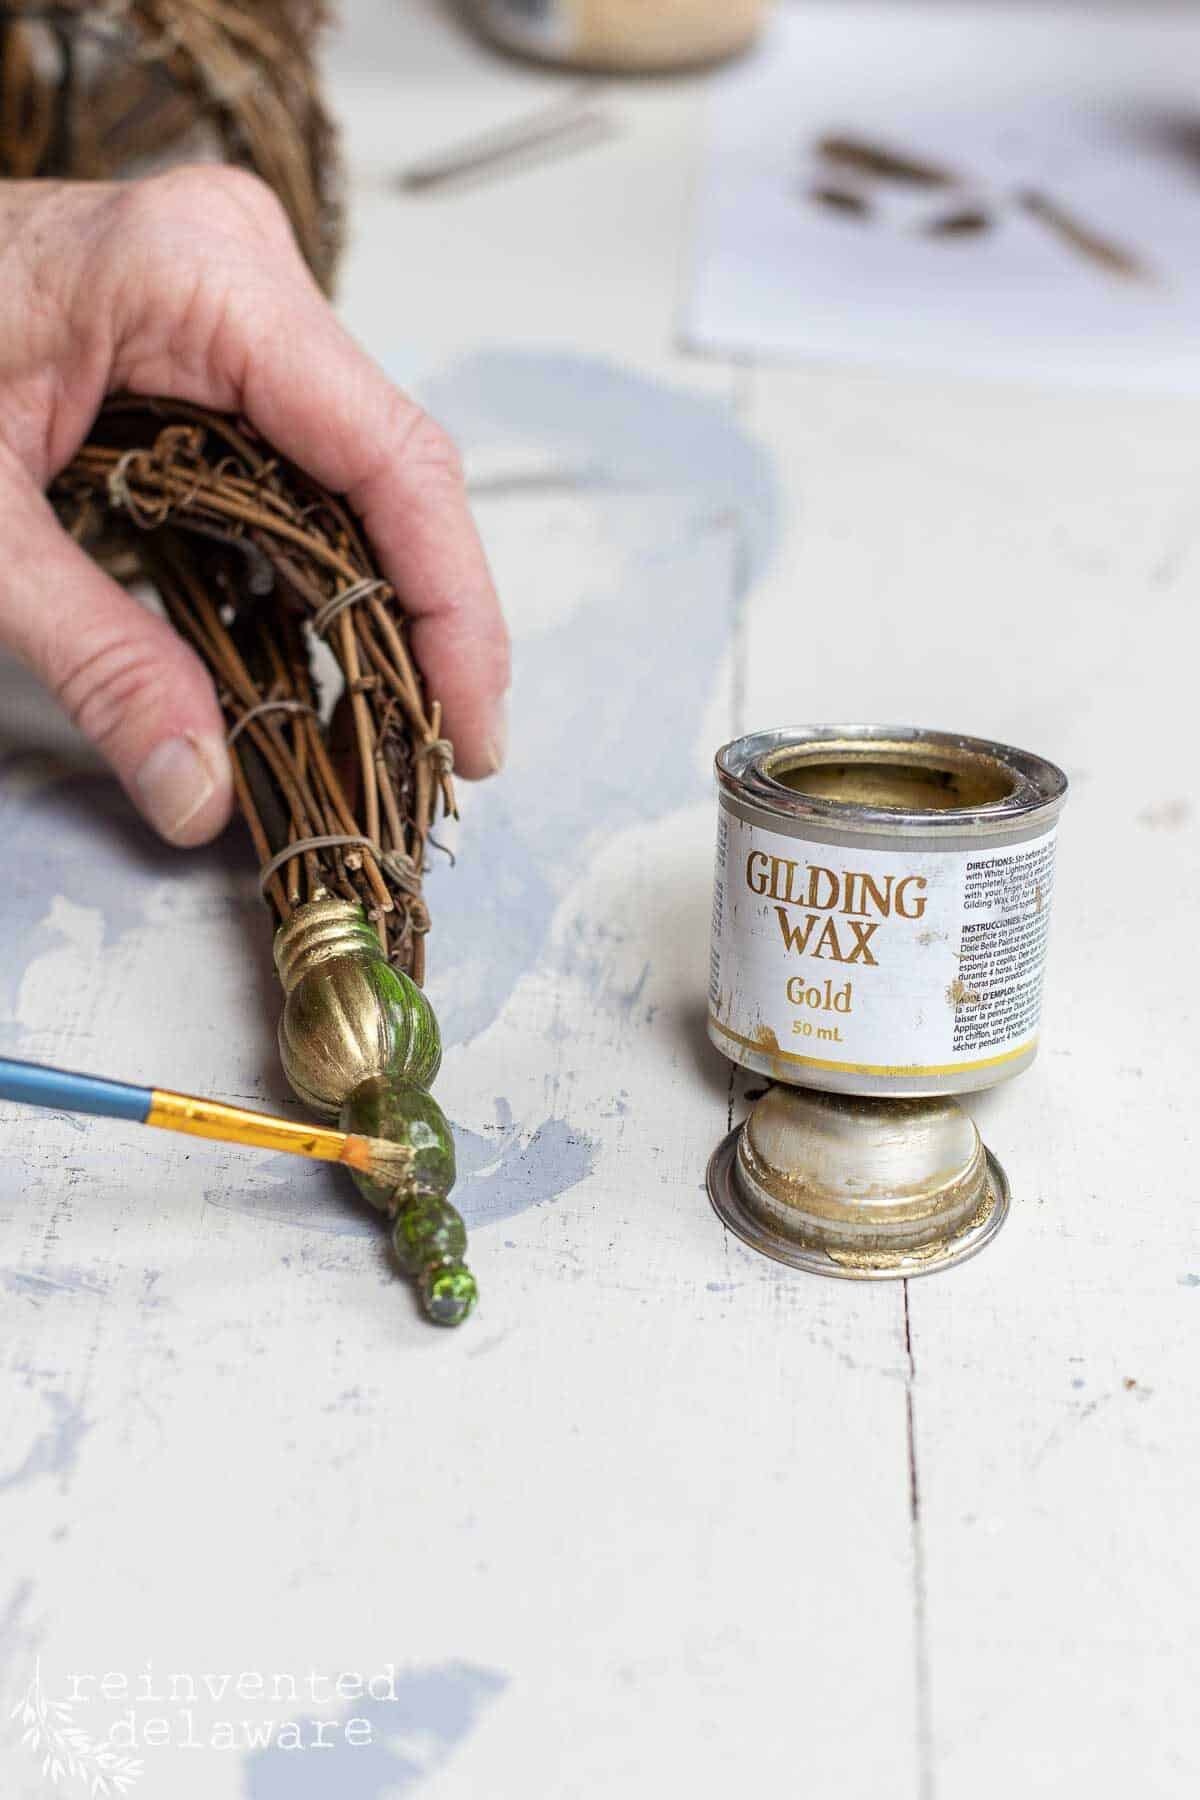

Allowing it to set overnight to dry all of the paint and glue also allowed my creative juices to get flowing. I spotted the bright green finial at the top and decided that had to go! It would not look good for the look I wanted for our own home.
Gilding wax in gold fixed that bright green problem in about 1 minute! I’ve used the gilding wax on other thrift store upcycles and I love to use it. It has a huge impact without much time! Especially on thrifted finds that have outdated colors like this flower arrangement!
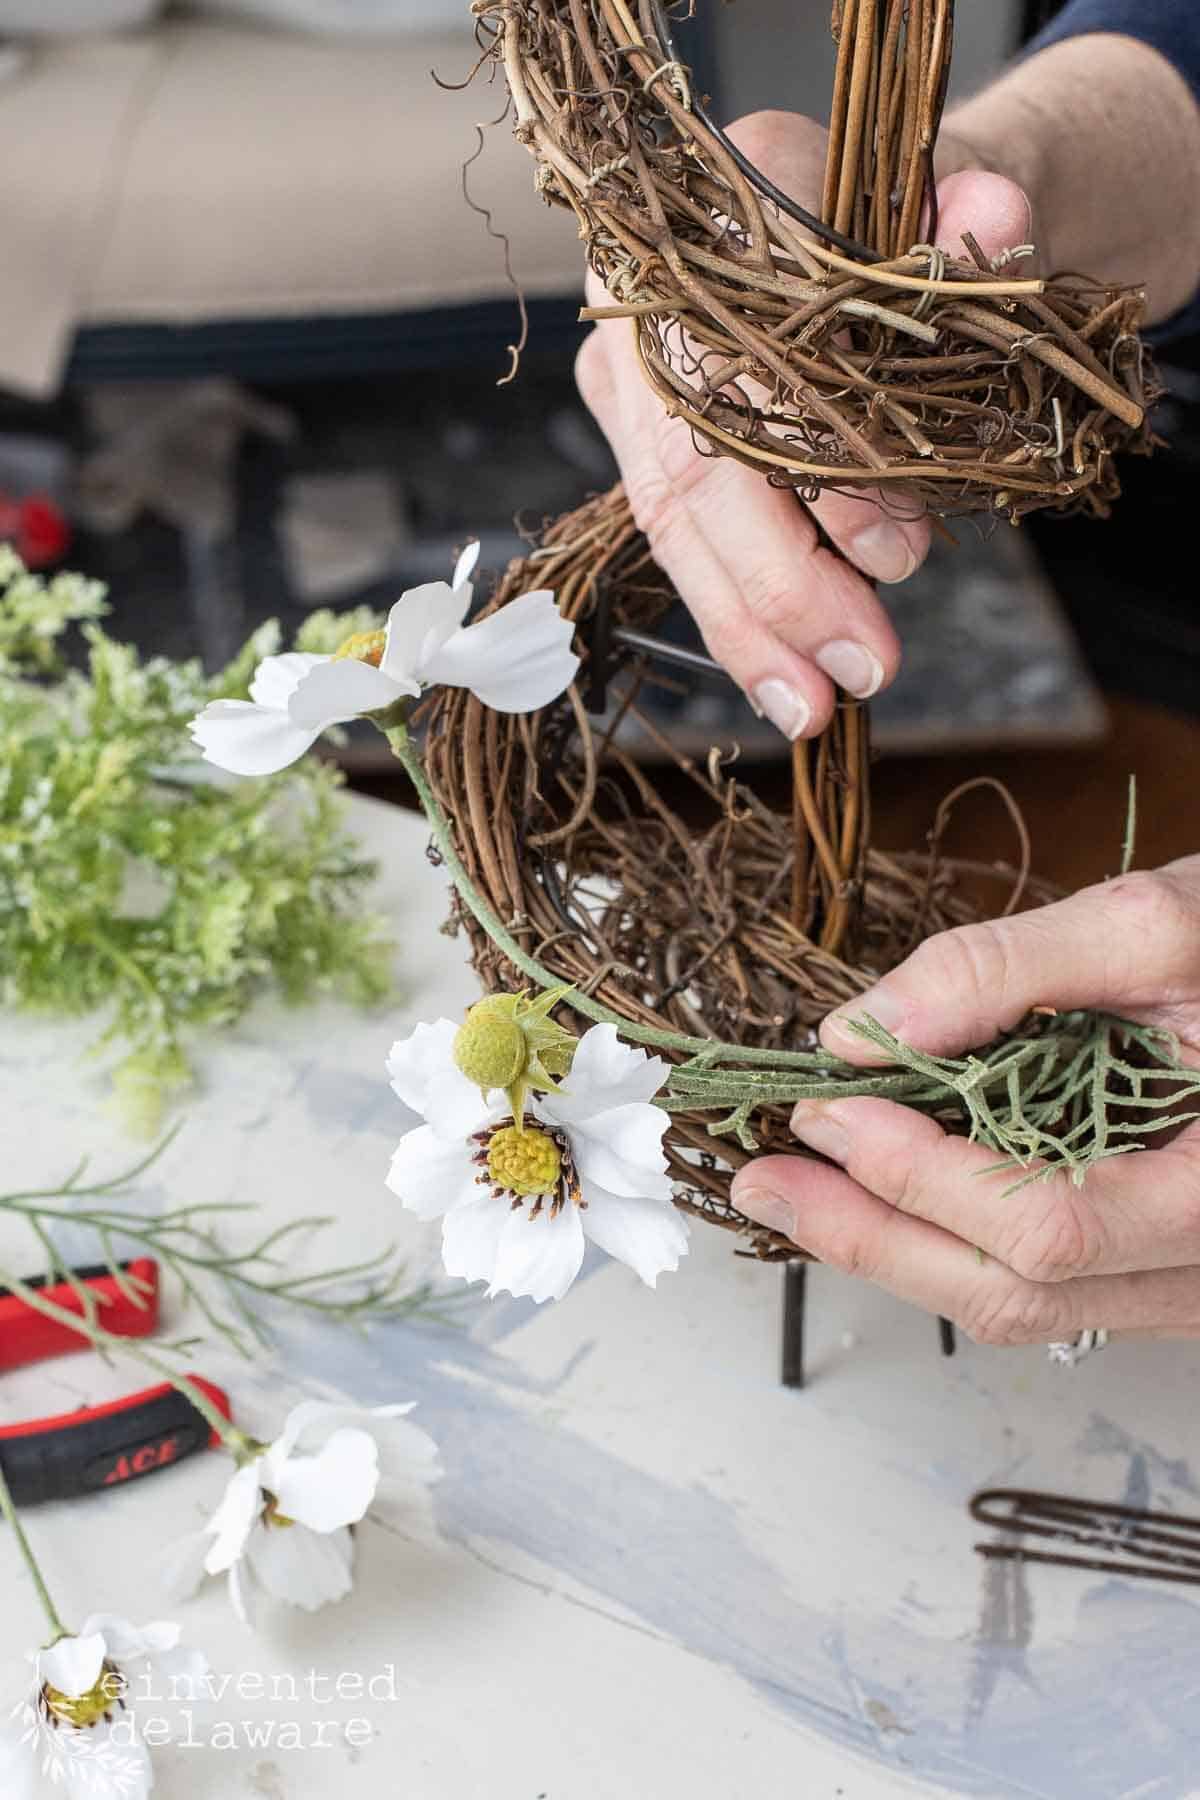
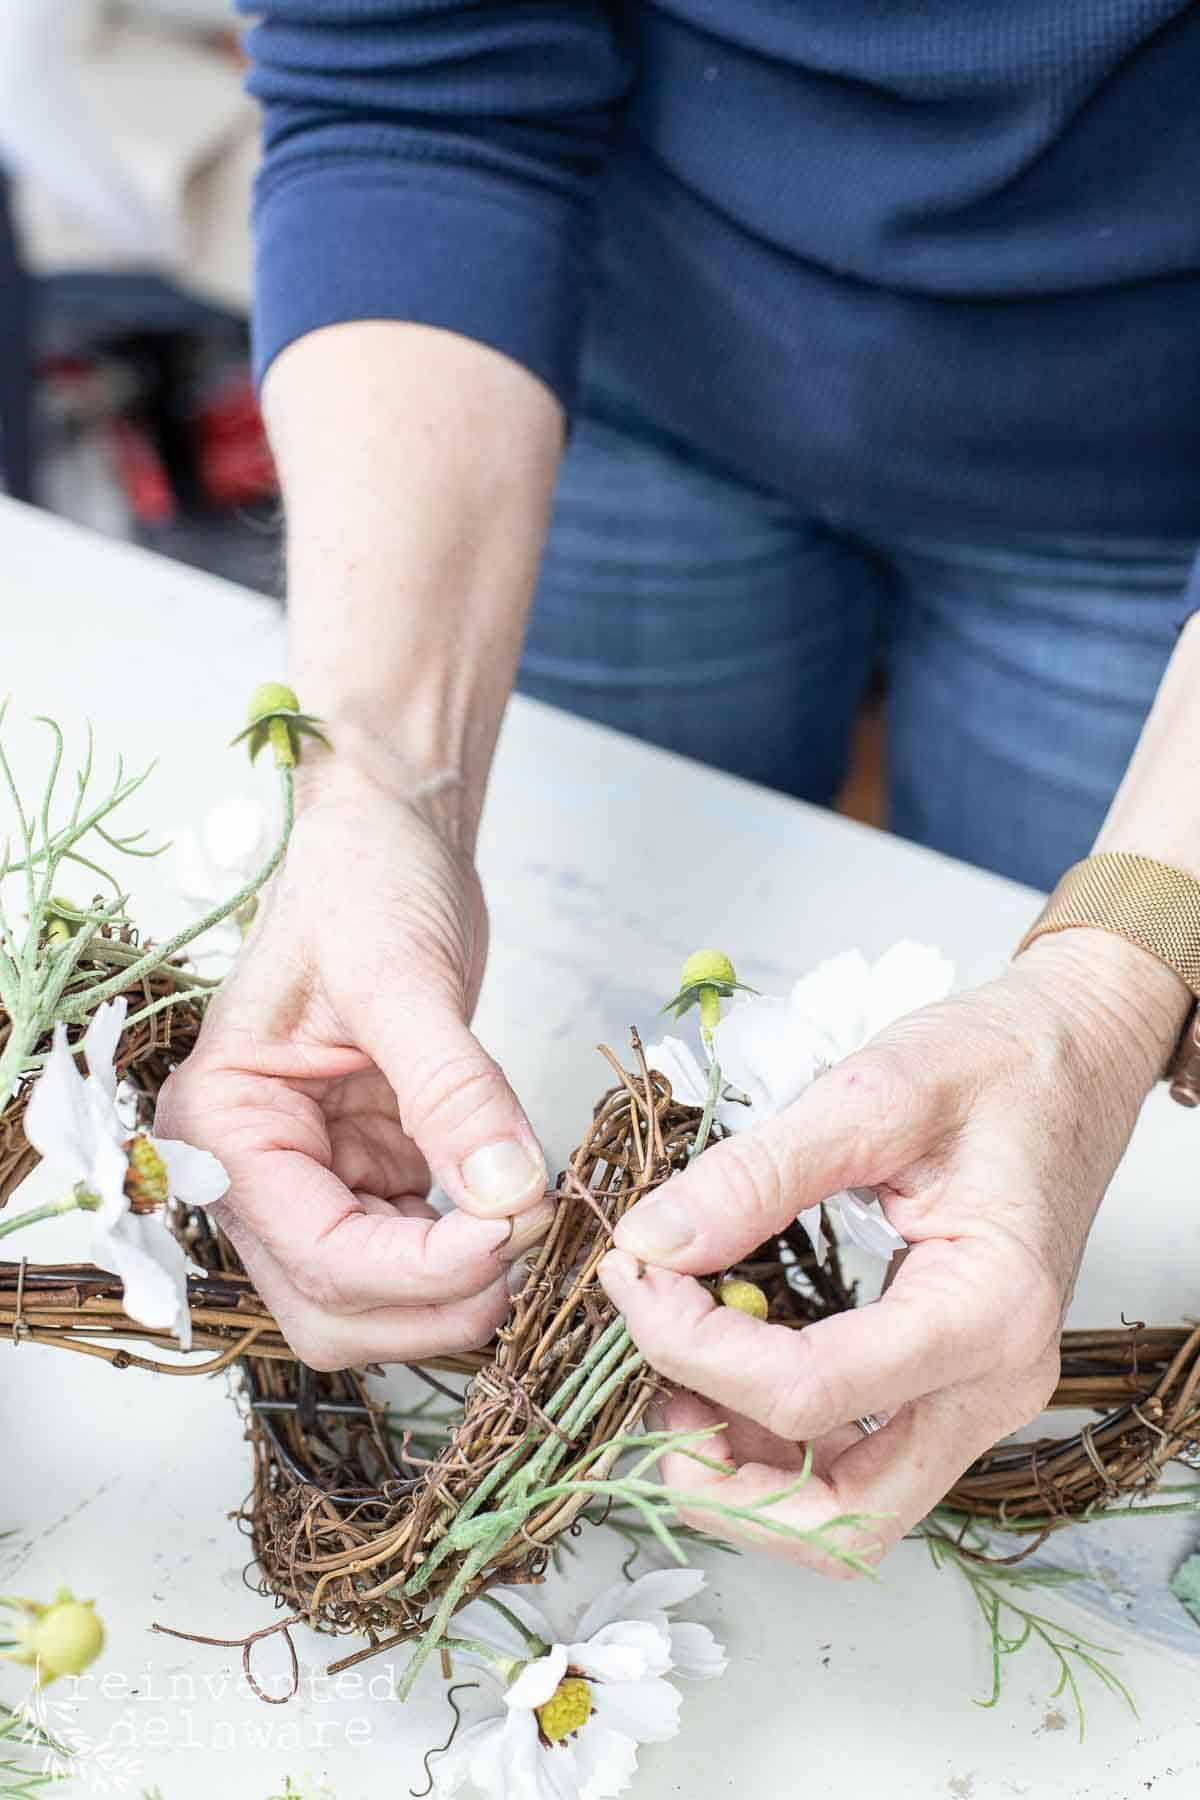
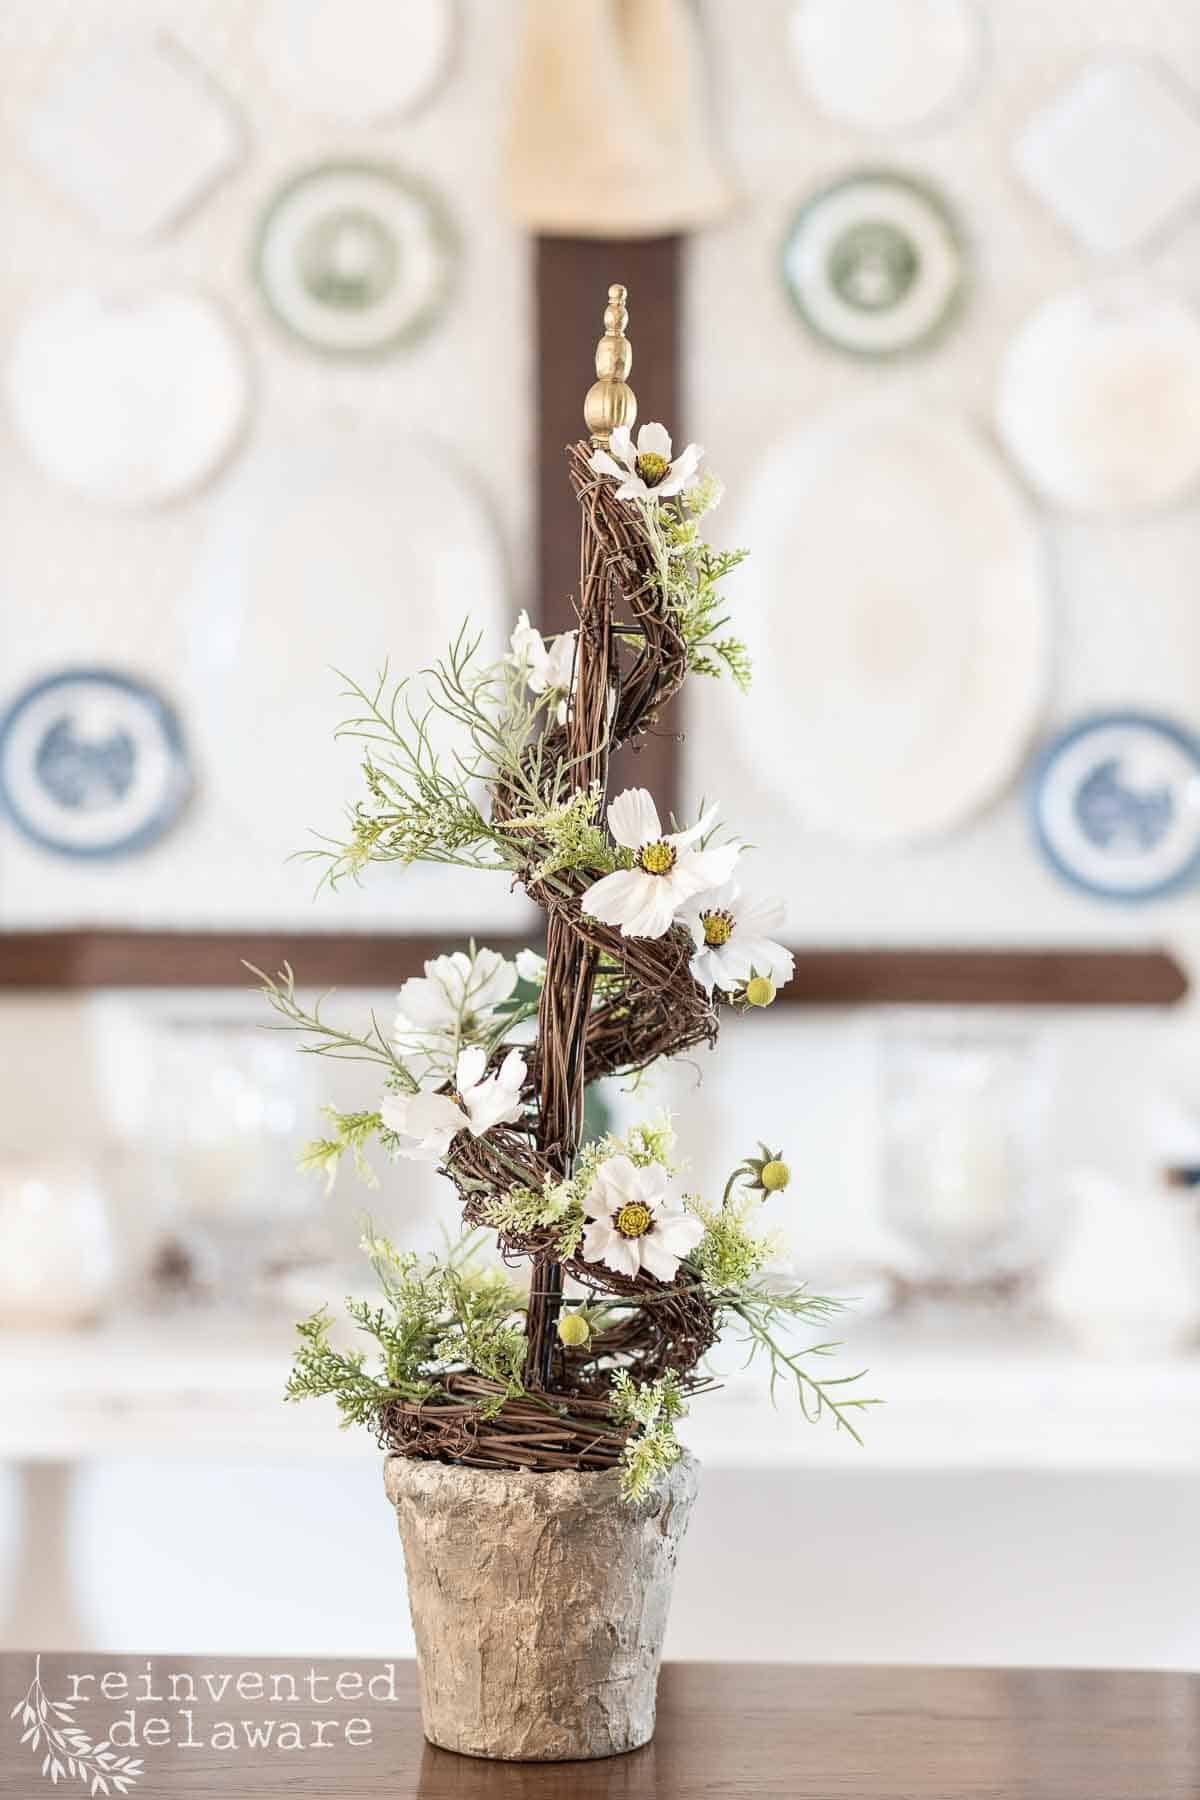
The last step was to assemble all of the parts. I used brown floral wire to secure the individual stems onto the grapevine topiary. The larger flowers were towards the bottom and I placed the smaller blooms near the top. Then I filled in with the greenery.
Next, I stuck the whole topiary arrangement into the new piece of floral foam I had already glued in. It fit like a glove and was no longer loose!
Now for the fun part! Where to put this adorable spring home decor piece! It started on our dining room buffet. This little area is one of my absolute favorites in our home. It looks good there, don’t you think?
thrift store makeover for spring decor
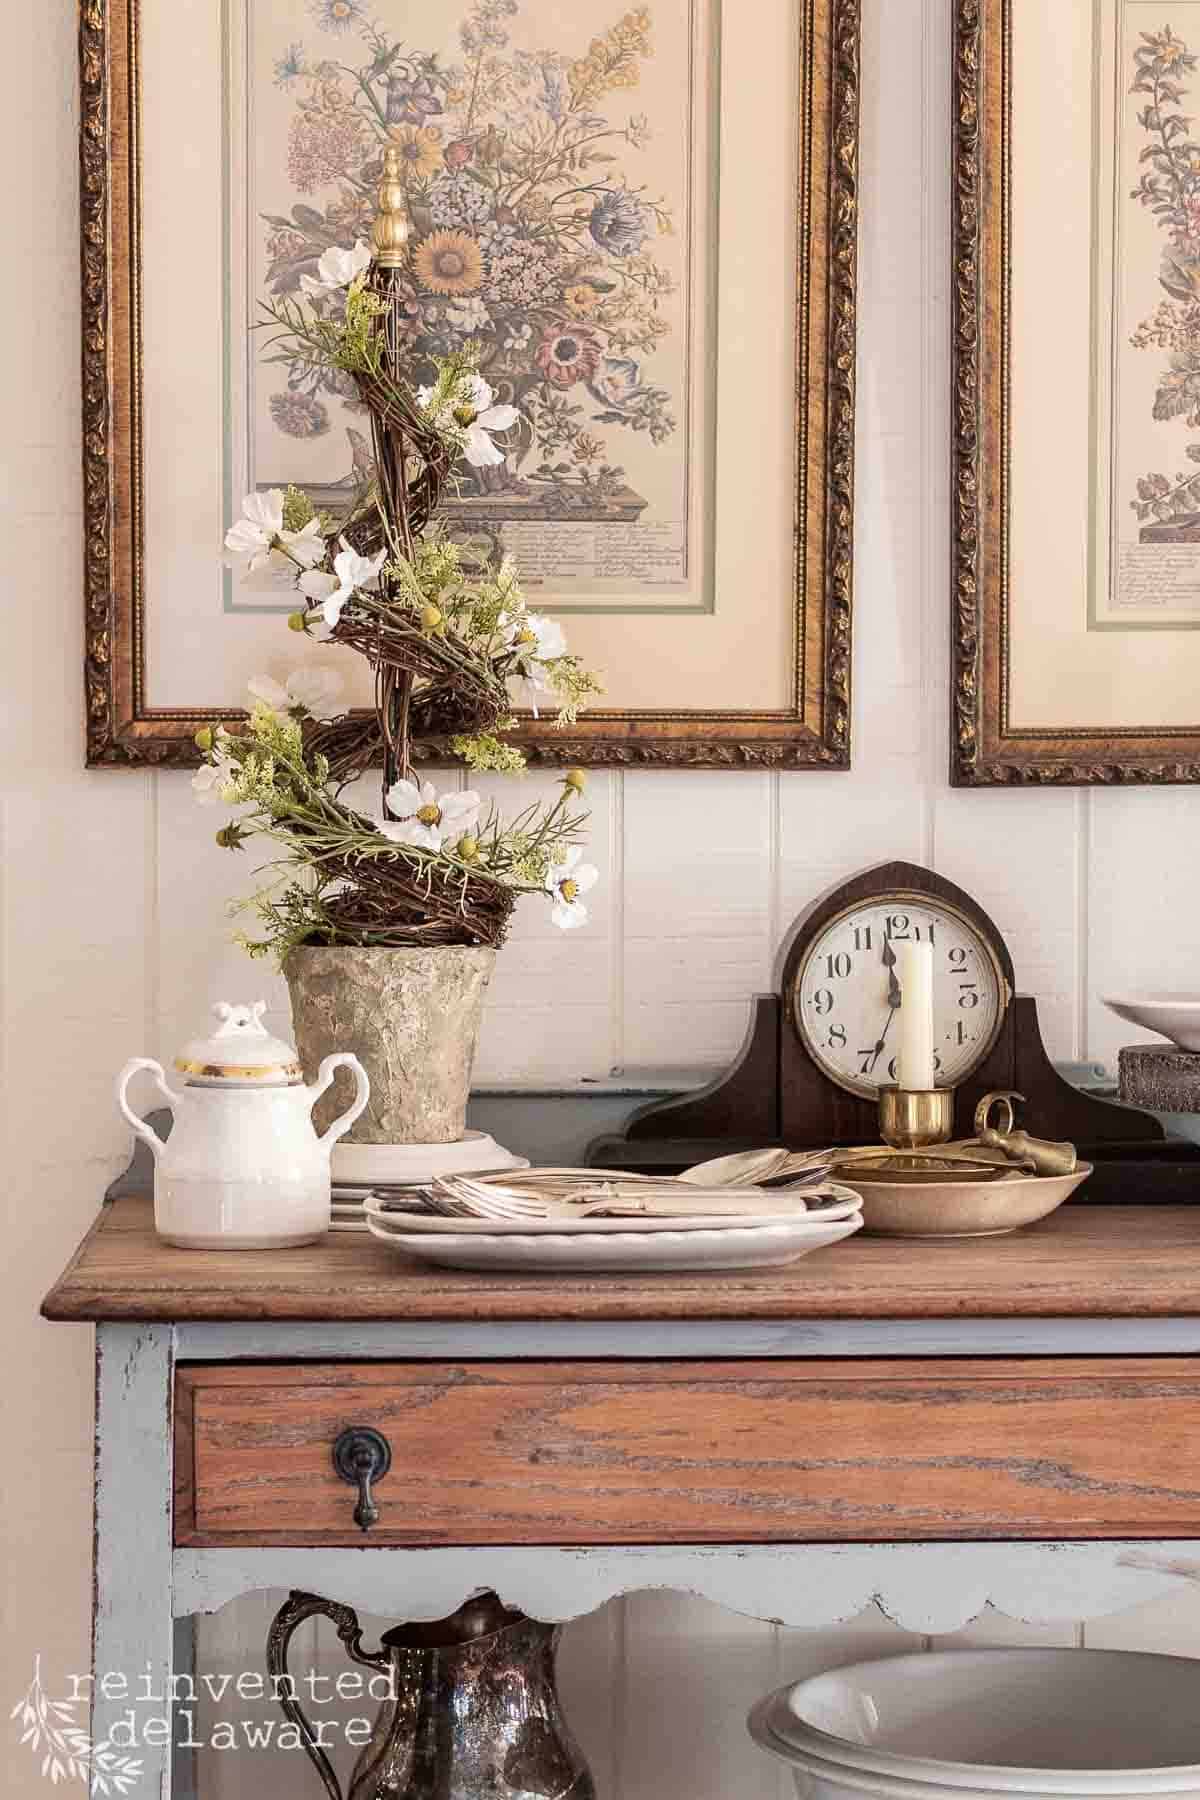
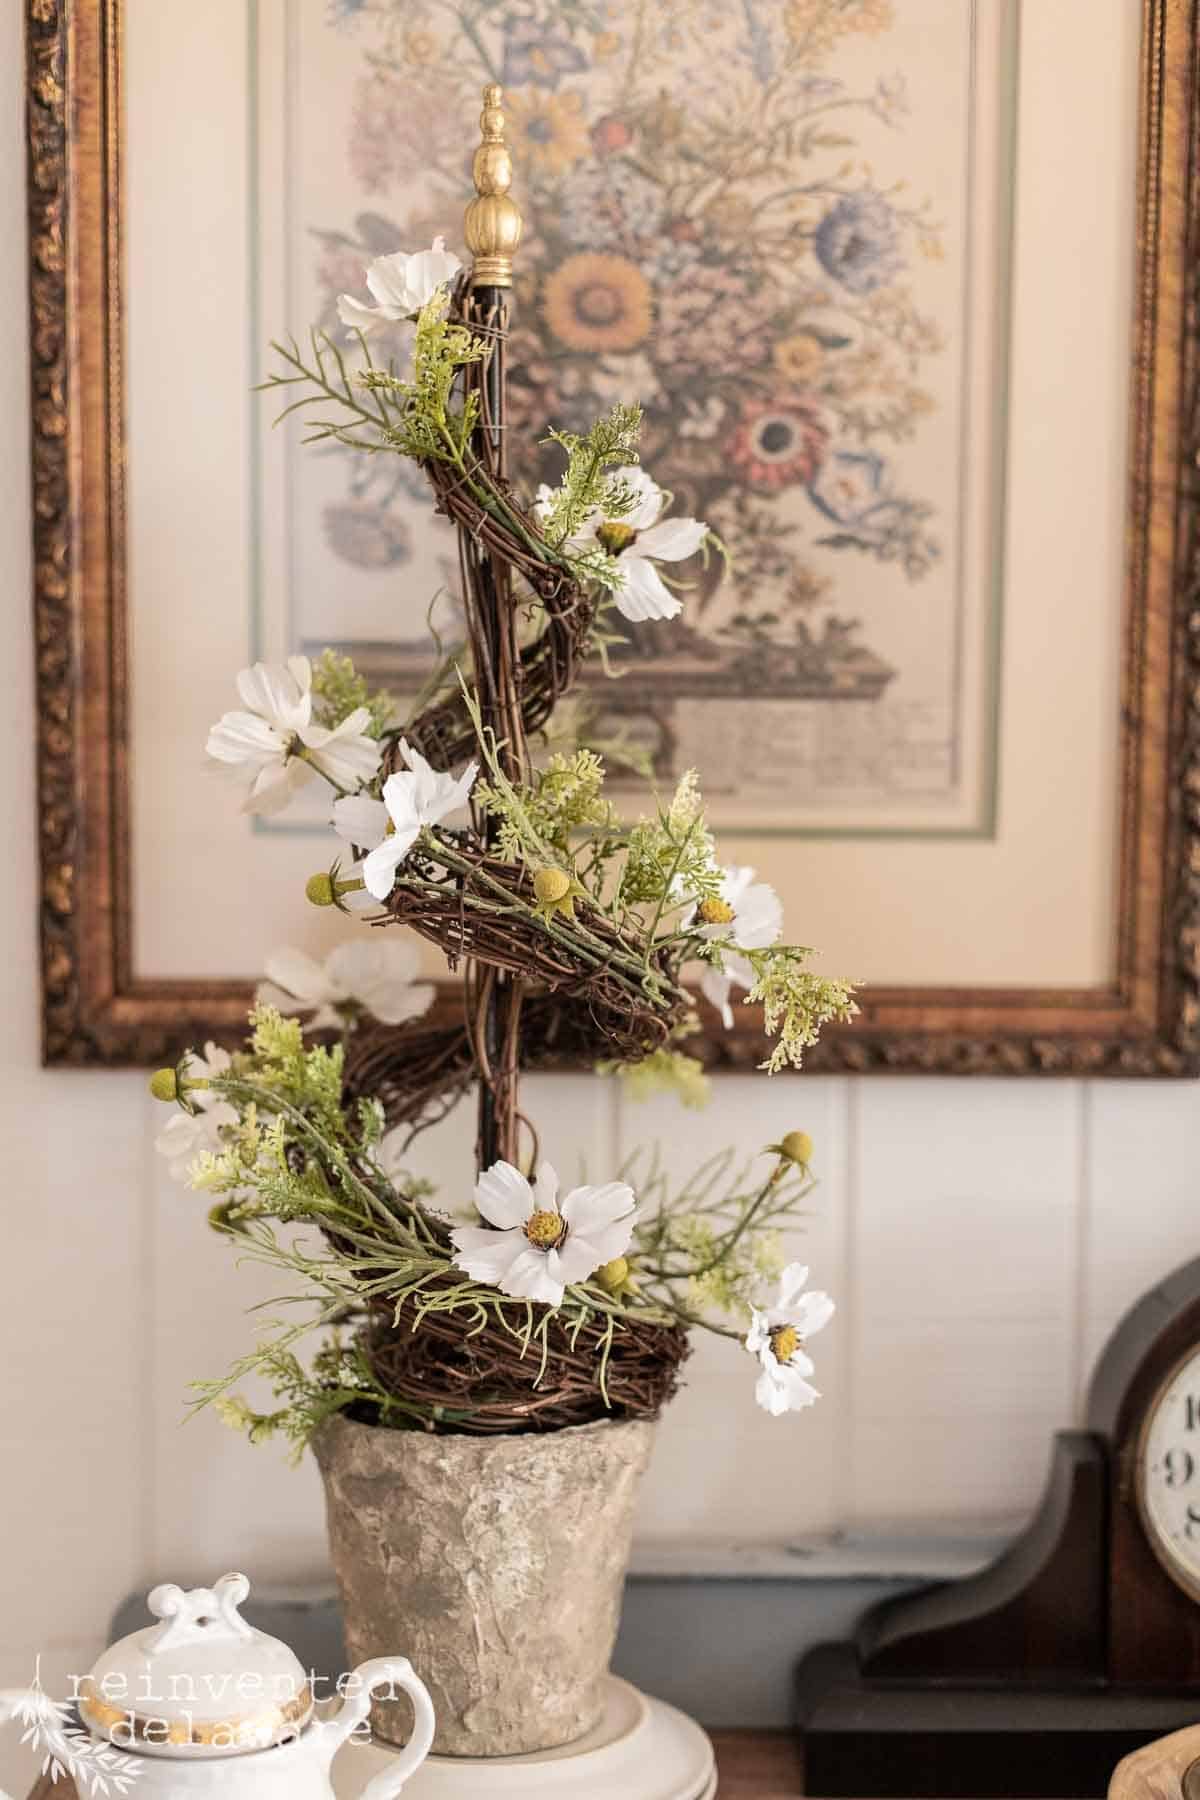
Next, I placed the spring flower arrangement on our vintage communion table with several of the white pitchers and ironstone pieces I’ve collected over the years. I’m not sure where I like this arrangement the best! As I am writing this post, I think my home office needs a touch of spring! If I had two of these gorgeous spring topiaries, I would put them on our fireplace mantle in our living room!

Let me know where you think I should put this lovely spring topiary! Here are a few more pics to inspire you to head out to your local thrift store and find outdated floral arrangements to makeover for your spring home decor!

more awesome thrift store makeovers
Each month I join several other bloggers who love to do fun projects, simple thrift store makeovers, and their great ideas for upcycled projects.
I’m sure you will find so much creative inspiration as you go through each of their posts! Just click the links below and be ready to get creative!
Our monthly edition
Thrift Store Decor Team
- My Repurposed Life – Upcycled Glass Chandelier
- Petticoat Junktion – Chicken Wall Decor Ideas
- Sadie Seasongoods – St. Patrick’s Day Wreath
- Shop at Blue –Thrift Store Painted Side Table
- Organized Clutter – Old Coffee Pot Upcycled As A Flower Pot
- Our Southern Home – Whitewashing Home Decor
- My Uncommon Slice of Suburbia – Pallet Herb Garden
- Domestically Speaking –How to Update an Old Mirror
- Reinvented Delaware – that’s me! Hope you enjoyed all of the projects!
more from the thrift store decor team
No posts
list of supplies:
Use the links below to purchase some of the supplies for this project! You are helping to support this blog and all the free tutorials we offer here! Thanks so much!😊
- Dropcloth Chalk Paint
- Burlap Chalk Paint
- Spanish Moss Chalk Paint
- Dixie Belle Mud
- clear coat in flat
- gilding wax in gold
- small paintbrushes
- poppy floral stems
- greenery stems
- floral foam

Pin the image below to your home decor and furniture boards! Just click the pin button at the top left corner!
thanks for joining our journey!
Thanks so much for joining us for this post! Join our journey so you don’t miss any of the fun projects, tutorials, and inspiration that we share with you each week! You can follow us on Instagram, Facebook, and YouTube. We share even more inspiration on Pinterest!
click below to purchase supplies!
Visit my Amazon Storefront!
Click the button below and head over to our online shop on Amazon!

What a great inspiration ! Loved it on the buffet!
Thanks, Jackie! I love it on the buffet too. It’s feeling like spring around here!
So pretty Cindy! Your tired old topiary is now so cheery!
great tips about how to make this sweet transformation.
Pinned
gail
Thanks, Gail. The little topiary is enjoying it’s fresh look 🙂
What a beautiful transformation. I love it.
Thanks, Renae! It brings a bit of spring into our home 🙂
Hi Cindy. I would have never thought to give that topiary a makeover. I love it. And at first glance I thought those faux flowers were Cosmos. Doesn’t matter really, I love those too.
I think you might be right – they do look like cosmos! Thank you 🙂 So glad you enjoyed the post!
This turned out so pretty! I love the faux cement pot makoever and it’s just perfect for spring! Gosh, I had so many topiaries from the 90’s I regret giving them away now. Beautiful makeover!
I think I threw out a bunch of 90s topiaries also Kristin! But there are plenty at the thrift stores! Thanks for stopping by!
I would have passed the topiary up at the thrift shop! You did a great job on it. Pinned!
Thanks Carlene!
Oh that turned out perfect for Spring! Love how the pot turned out.
Thank you Maryann!
What a great transformation Cindy, I love it. I especially love how you gif the look in the pot.
It was an easy faux concrete look to create. I will def use this method again!
Cindy- This is so creative and it turned out great!! Thank you for the step by step tutorial. Pinned!
Thanks, Anna! I appreciate you pinning this post 🙂
I don’t think I would have stopped at this piece in the thrift store. Love that you looked past the dated floral elements and straight to its bones. I really need to try Dixie Bell products. That mud looks fabulous.
I almost passed this piece by Christy. But I ended up going back to grab it and I’m so glad I did. Give Dixie Belle a try – their paints and other products are amazing!
Cindy, what a great thrift store find! I love the new Spring update and the way you created a concrete planter. Pinned! -Meagan
Thanks for pinning Meagan! Sp glad you enjoyed the project 🙂
Cindy, I love this upcycle project! What a great transformation…it’s beautiful. I love it on your dining room buffet the best, I think. I’m sure the original owner would kick herself if she saw the potential this topiary had. Pinned!
The topiary had such good bones, especially for only $5! Thanks for pinning Crissy!
I LOVE this, Cindy!! I bought those same exact flowers from Hobby Lobby and just love them. They look SO pretty on that thrifted topiary! What a difference some paint and a few flowers can do. It’s gorgeous. Pinned!
Holy cow, Cindy, what a transformation…you definitely spied a diamond in the rough there! It came out so pretty – I scrolled thru to the bottom before I read your instructions becasue I couldn’t wait to see what you did with it LOL. Happy spring!
I really love this Cindy! Your creativity always amazes me 🙂 Pinned!
Thanks Melanie! It was a fun project!