
Standing Floor Mirror Minus the Mirror | Transformation
Remember the standing floor mirrors that were popular in the 80’s?
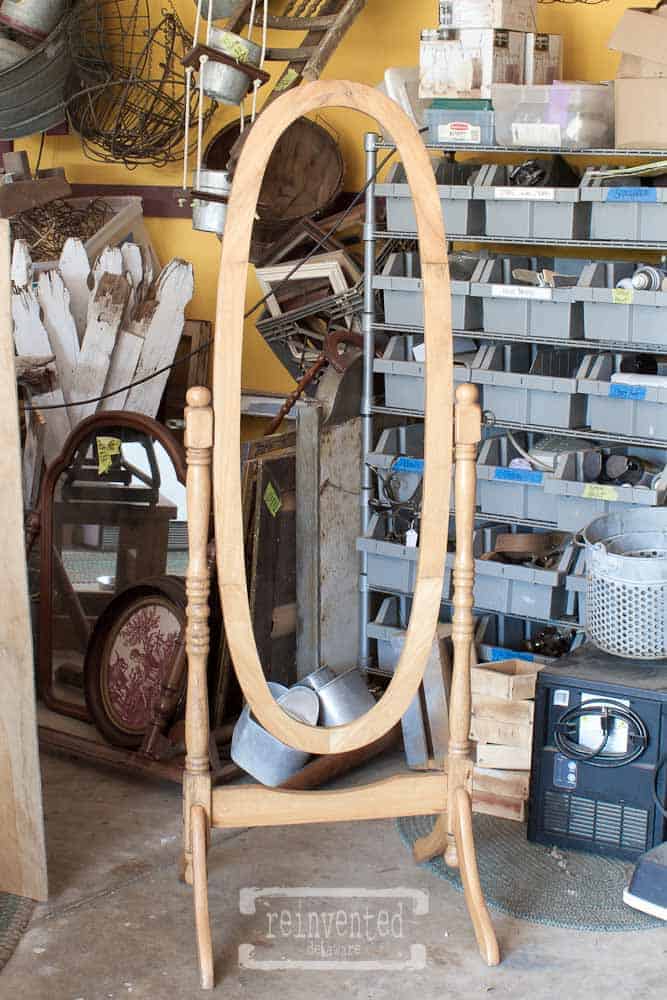
I was literally driving down the road the other day when I saw a pile of junk along the side of the road. On top of the pile was one of those outdated standing floor mirrors! The mirror was missing completely which was no problem for me! Fortunately, I had room in the back of my truck for it.
I wasn’t quite sure what I was going to do with the standing mirror frame so I decided to ask my followers on Instagram. I gave my Insta-friends two ideas to choose from for this reinvented project. The options were
- use hardware cloth to make a photo display in the open space or
- make that empty space a chalkboard.
Hands-down the chalkboard was the winner!
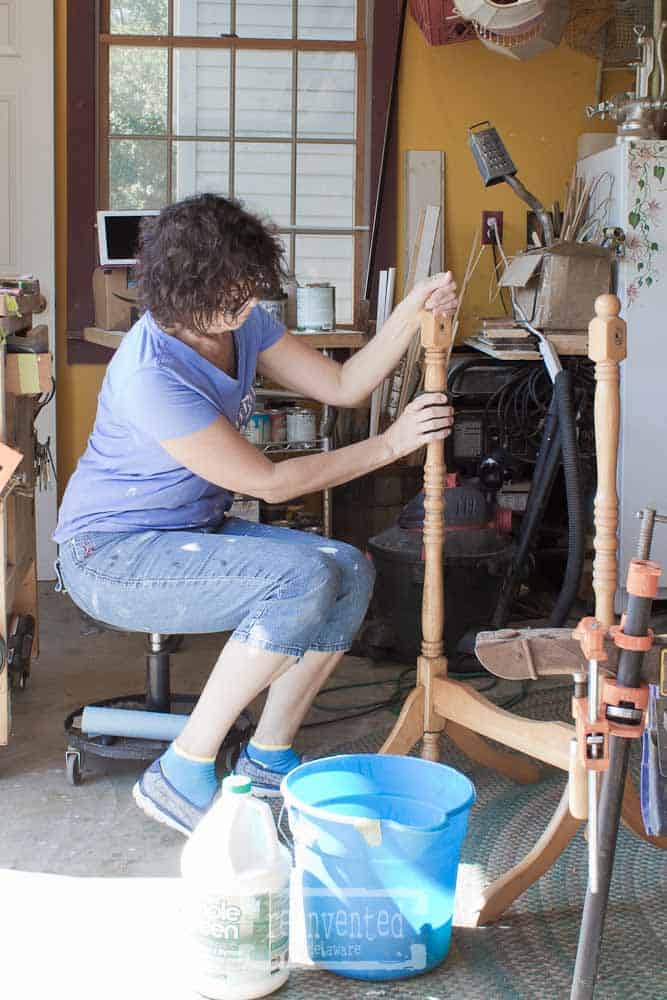
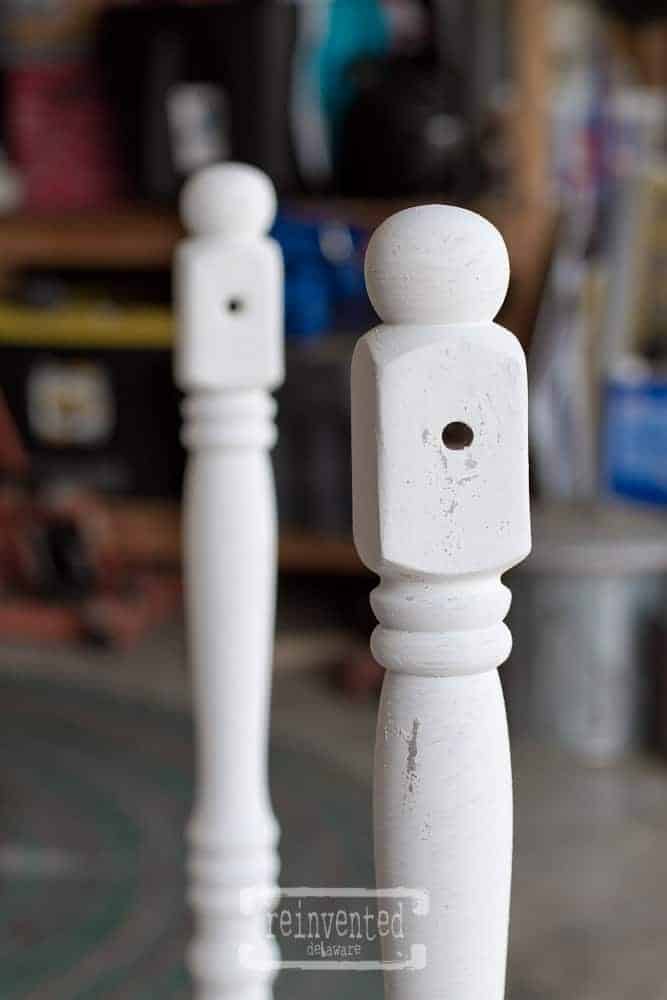
First thing I needed to do was to clean the stand.
I started by removing the oval section that would’ve held the mirror from the base of the stand. Then using a solution of Simple Green and warm water I got to work with a microfiber cloth over the whole thing. I also used a rough Scotch-Brite pad as a sander. It does a great job at getting all of the gunk off and the scratchy surface of the Scotch Brite pad knocks off some of the shine.
Check out those socks! Girl, fashion is definitely not my thang!!
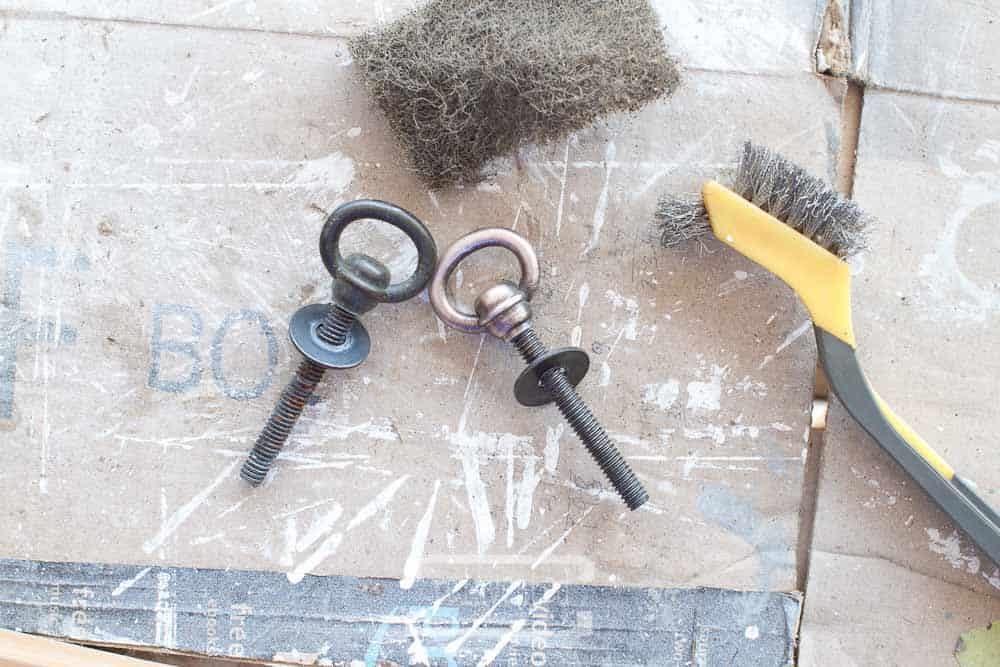
The hardware on the mirror was especially adorable. A wire brush cleaned up the hardware perfectly! See the difference?
I wanted to keep the stand neutral in color
so the plan was to paint the first coat in a gray tone. I chose Miss Mustard Seed Milk Paint in Schloss. It is a beautiful warm gray tone. You can see in the image below the part of the stand that I painted this color. I almost forgot to photograph the first coat of Schloss before I started to paint the final coat in Farmhouse White!
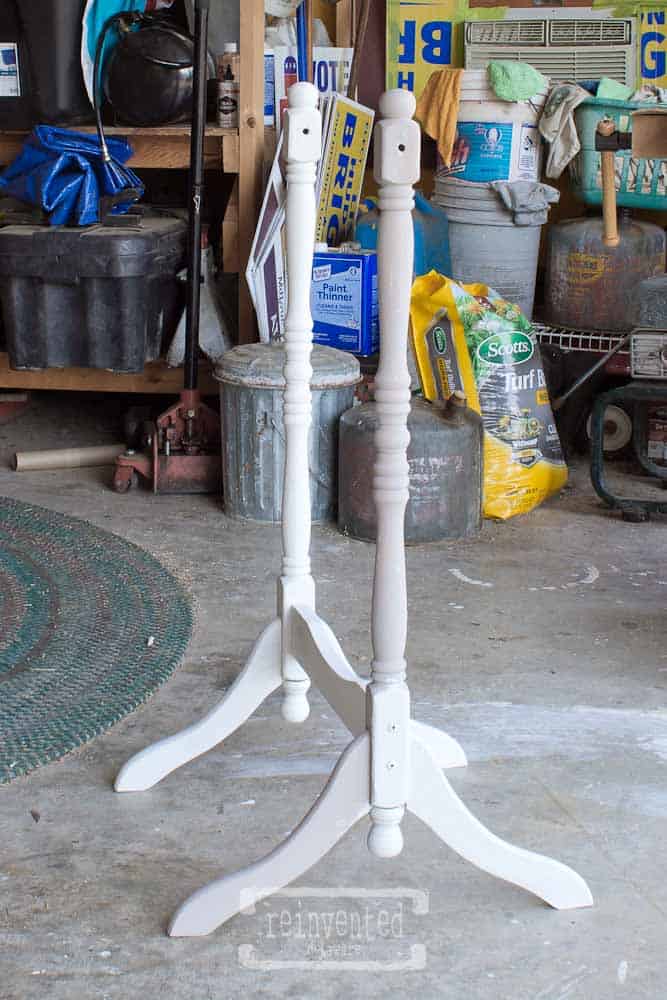
Before painting on the second coat, I used beeswax in areas on the stand as a resist. This will make the distressing so easy. See the places I rubbed the beeswax on? Those areas will allow the gray to show through!

Two coats of Miss Mustard Seed Milk Paint
in the Farmhouse White covered the warm gray Schloss perfectly. I use the flat edge of a knife to distress the piece in the spots where I have the beeswax. Isn’t that such an easy way to distress furniture? It brings such a farmhouse touch to any piece!
To make the chalkboard
part of this project I used a sheet of underlayment to cut the oval. We had the underlayment left over from a home reno project and it was the perfect size! Just needed to cut it into an oval. Trace the oval shape onto the underlayment with a pencil and then add about a quarter of an inch on the outside edge to make it a bit larger then the actual oval. This will allow the underlayment to lay in the grove that the mirror would have been in. I used my Dewalt palm sander on the front and back to smooth both sides using 150 grit sandpaper. Be sure to wipe the dust away with a tack cloth or microfiber cloth.
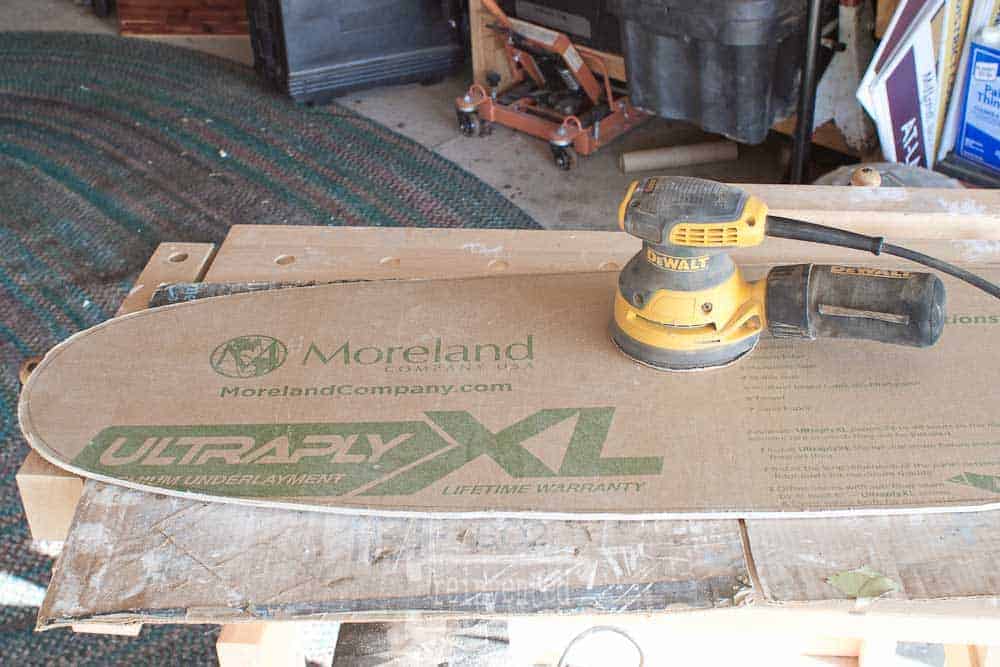
Kilz 2 is a great primer on raw wood so I primed both sides of the underlayment.

The next step is to paint the chalkboard
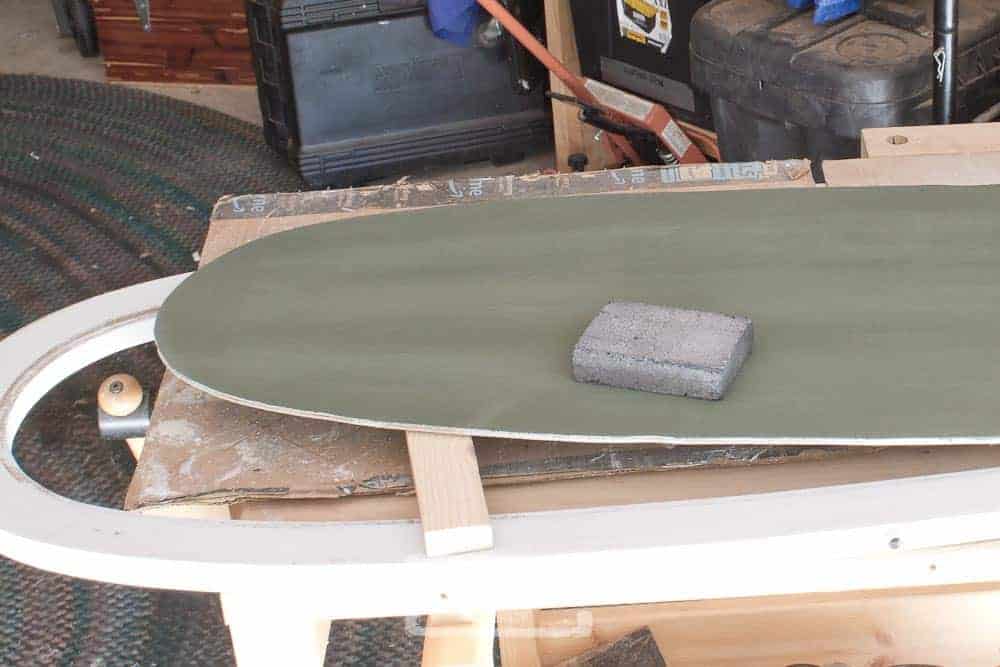
I love the vintage green chalkboard of days gone by and wanted to replicate that color in this chalkboard.
Sometime last year as I was searching Pinterest, I came across a Miss Mustard Seed Milk Paint recipe for the vintage green chalkboard. I was so excited! The recipe is two parts Artissimo and three parts Boxwood. Both colors are found in the Miss Mustard Seed paint line.
This is the perfect combination of colors to make the vintage green. Be sure to sand with the 220 grit sandpaper in between coats. I use a worn out sanding sponge for this step.

Attach the chalkboard to the mirror frame.
First run a bead of wood glue in the groove of the frame – you know where the mirror would’ve been? Plenty of clamps will hold it down while the wood glue dries!
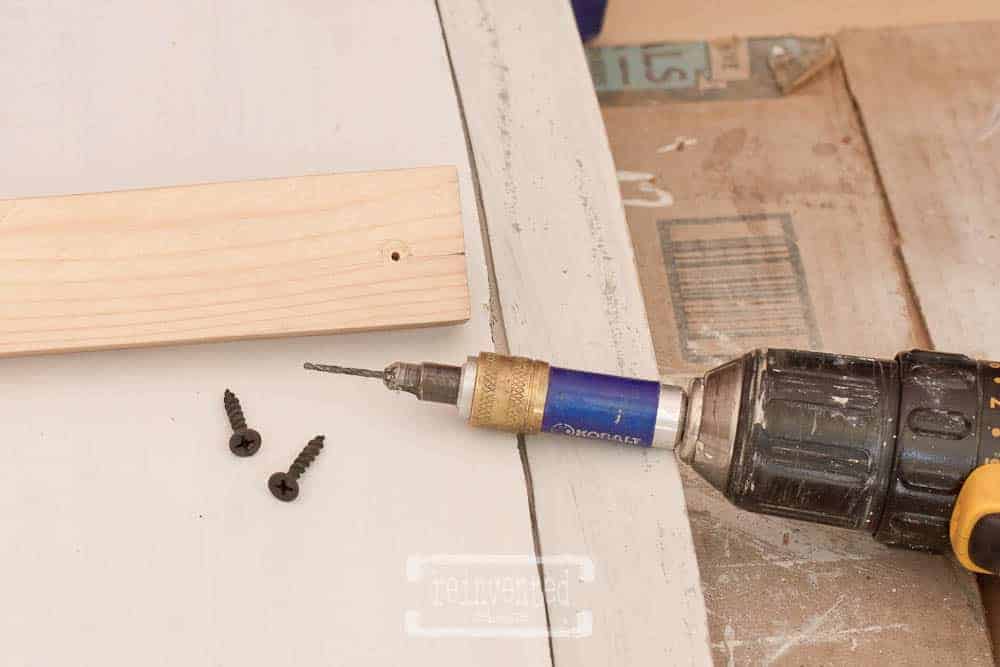
Two scraps of wood cut to the width of the oval frame were used as additional support.
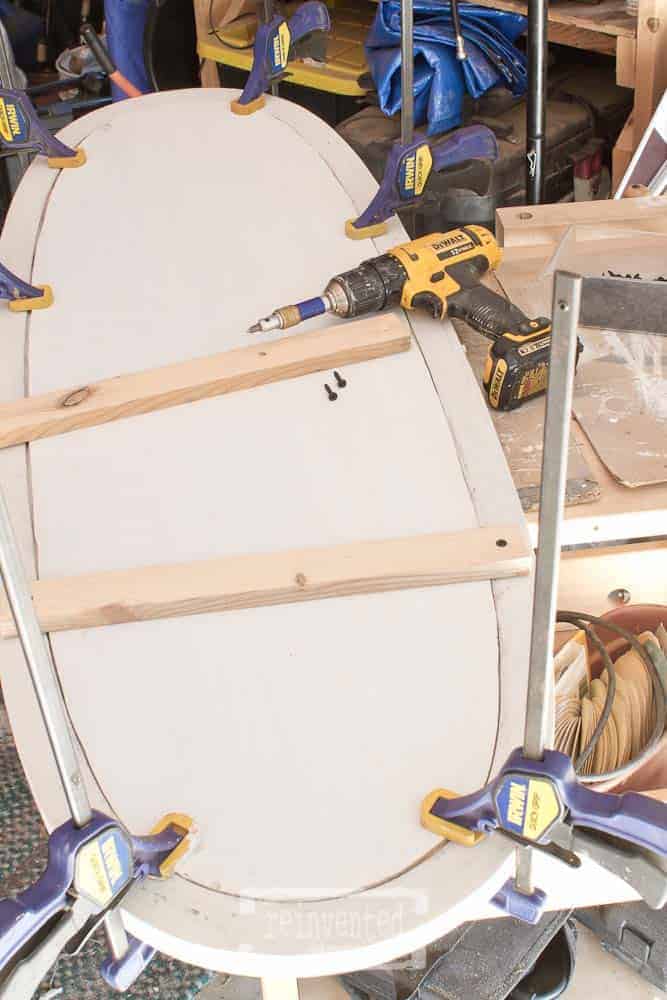
A counter sink drill bit will allow the screw-heads to recess into the wood. Be sure that you use screws that will not go all the way to the front of the frame. I’ve made that mistake before and it is no fun!
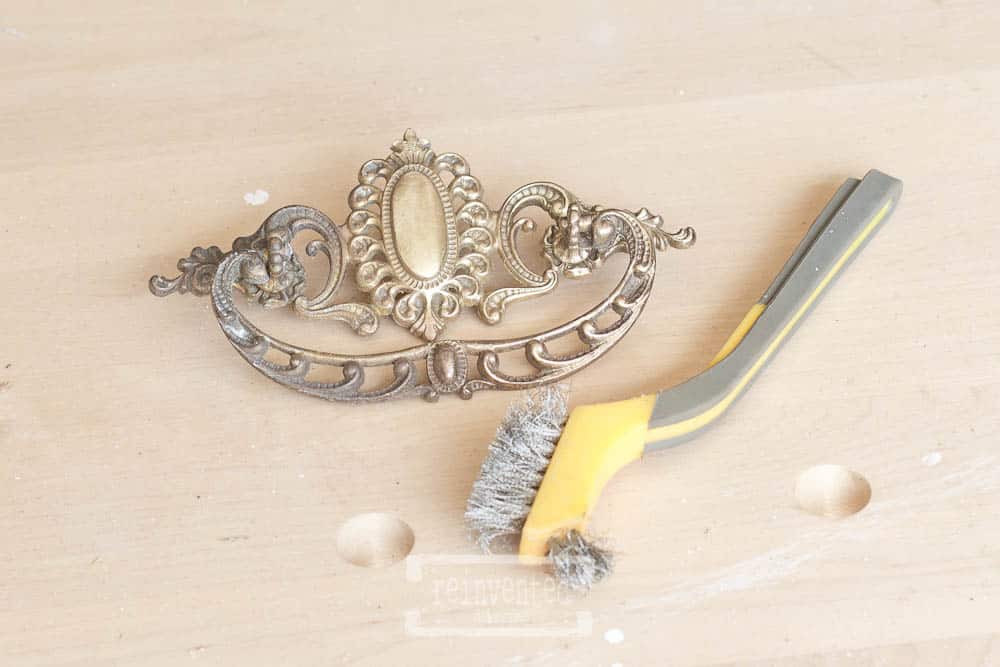
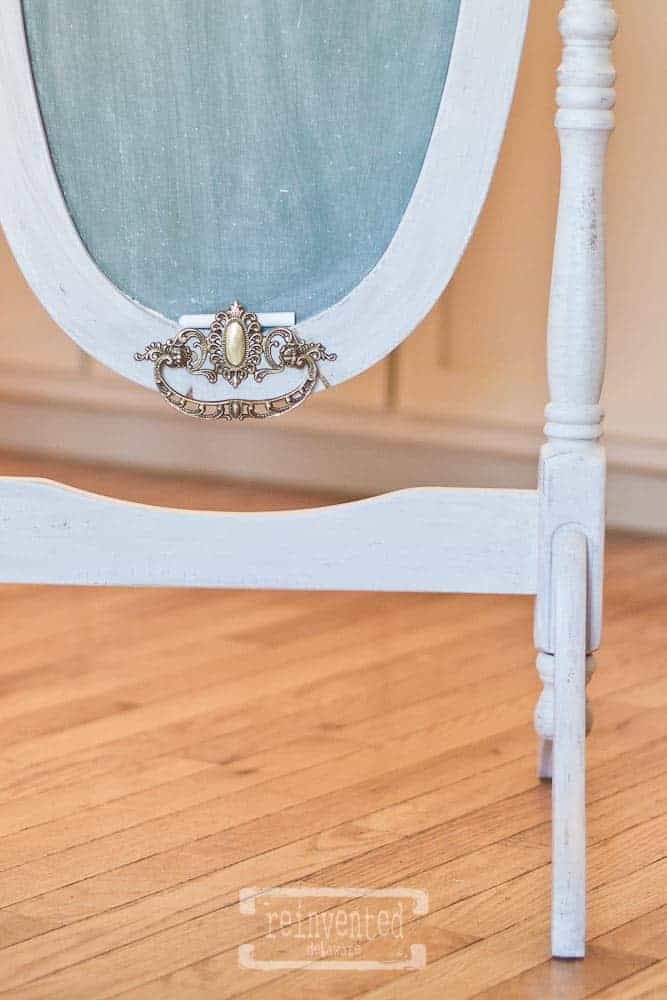
I love having a fun chalk holder for these chalkboards
Digging around in my hardware stash, I found a vintage brass draw pull. A wire brush and some elbow grease cleaned it up so nice! I attached the drawer pull on the bottom of the frame.
A finish coat of Miss Mustard Seed Hemp oil sealed the milk paint. See how the hemp oil darkens and enriches the look of the milk paint?
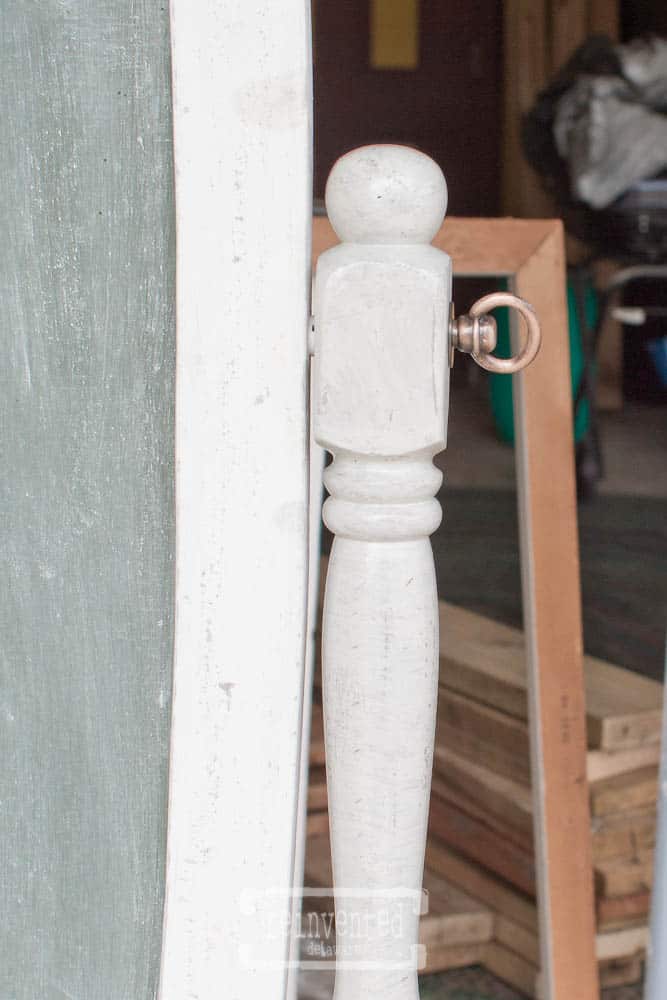
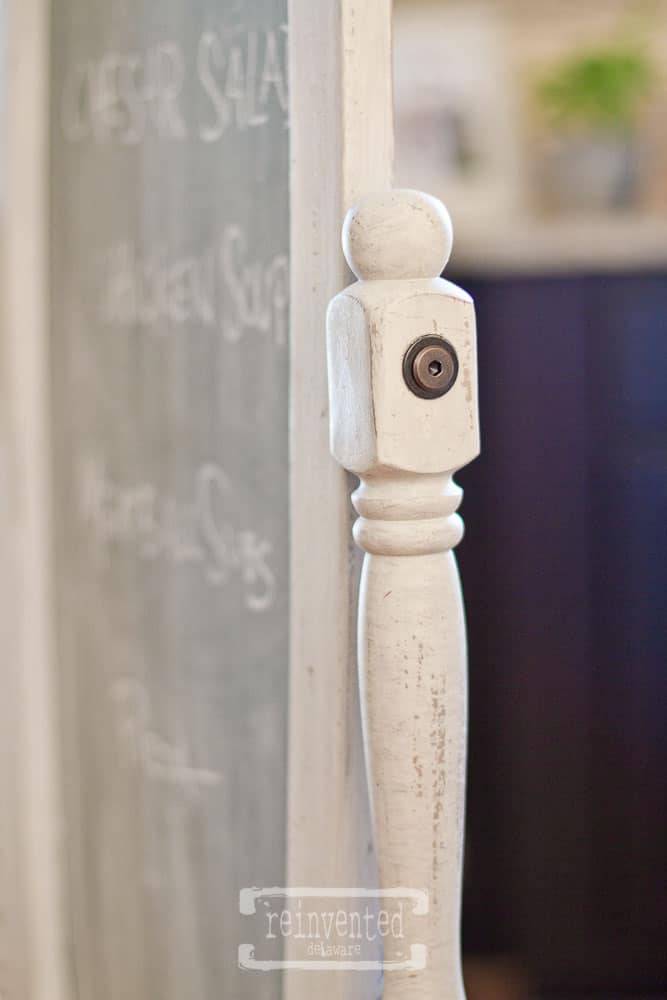
Unfortunately, the original hardware that held the mirror to the standing frame wasn’t working very well. The threads of the bolt had been stripped and would not hold the swinging oval frame in place. So the decorative hardware had to be replaced with standard bolts that we found at Ace Hardware. If you ever have to replace hardware like this, take the old hardware into the store with you to find the exact size you need.
To create the chalk-dusty appearance on the chalkboard, use the side of a piece of chalk all over the green surface. Afterwards, wipe it down with a dry paper towel. Do not use a wet paper towel to clean the surface. If the chalkboard does get wet, use the side of the chalk again and a paper towel to smooth it out! Super Easy! If you need a bit of help with this step, check out my Tutorials Highlights tab on Instagram!
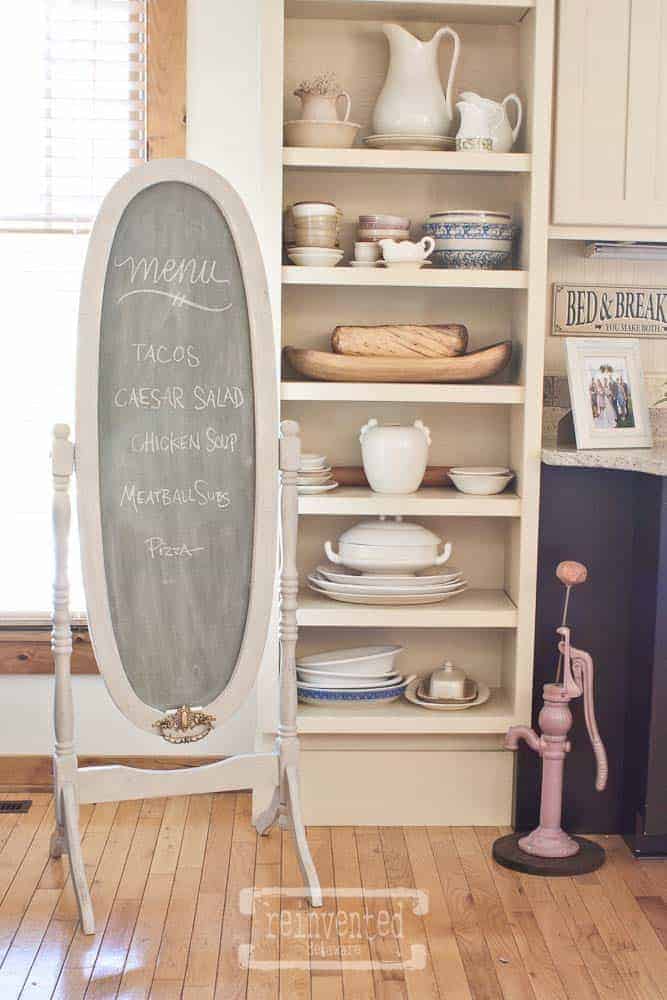
And here it is!
Isn’t this the cutest chalk board you’ve ever seen? This could be used in the kitchen as a weekly menu board or leave it blank for family to post a messages to one another! This chalkboard could also be used on a covered front porch as a welcome sign!
Even though we could not use the original hardware, I’m very satisfied with the replacement hardware we found at Ace Hardware. It keeps the oval part of the chalkboard steady as she goes!
The beeswax worked perfectly as a resist for the distressed look! The Schloss gray peaks out in all the right places!
Doesn’t the vintage brass drawer pull make the cutest chalk holder?? I just love it!!
Thanks to everyone who voted on Instagram! And thanks also for watching my stories about this project! Be sure to follow me on Instagram for more projects 🙂
How would you use this chalkboard in your home? I would love to hear your ideas!
![]()