
Sanding Through the Grits
Hello friends of reinvented delaware! For several weeks, Mrs. reinvented delaware has been talking to me about posting on the blog. Well, here goes, but first, a little about myself.

I’ve been married to my lovely bride for 35 years. In that time, I worked as a mechanic, a truck tire technician, 28 years as a police officer and currently, I teach Criminal Justice at a local high school. When I was a kid, my father worked as a custodian at our local middle school. He could do just about anything and as a kid, I didn’t pay much attention. As an adult, raising a family, it became more and more pressing to save money. I don’t know any cops who became millionaires! To save where we could, I did as many home improvement jobs as I could. This often meant relying on family and friends with some expertise. Usually, it meant a call to dad. I often provided the labor, and someone told me what or how to do something. I learn by doing, so once I did it, I could figure it out (or call dad again).
A childhood memory is my grandfather’s workshop which was a small building attached to a barn. I can still remember the smell of fresh lumber, and seeing his drill press, which I was sure provided weaponry for Civil War soldiers. My grandfather built all kinds of things like tables, chairs, bookshelves, a stand for this, and a box for that. His tools were always strewn about his workbench, covered in sawdust.
As an adult, in my 40’s I began to buy some more advanced tools like a table saw, router, band saw, sanders, wood planes, and the crème de crème, a 1950’s Atlas wood lathe! The more I worked with wood, the more I learned. At 55, I still am scared to death to work with expensive woods like oak, pine and walnut. I figure screwing up a piece of pine is less of a costly mistake. Take my word for it, work with some better lumber, it will improve your projects and your confidence level.

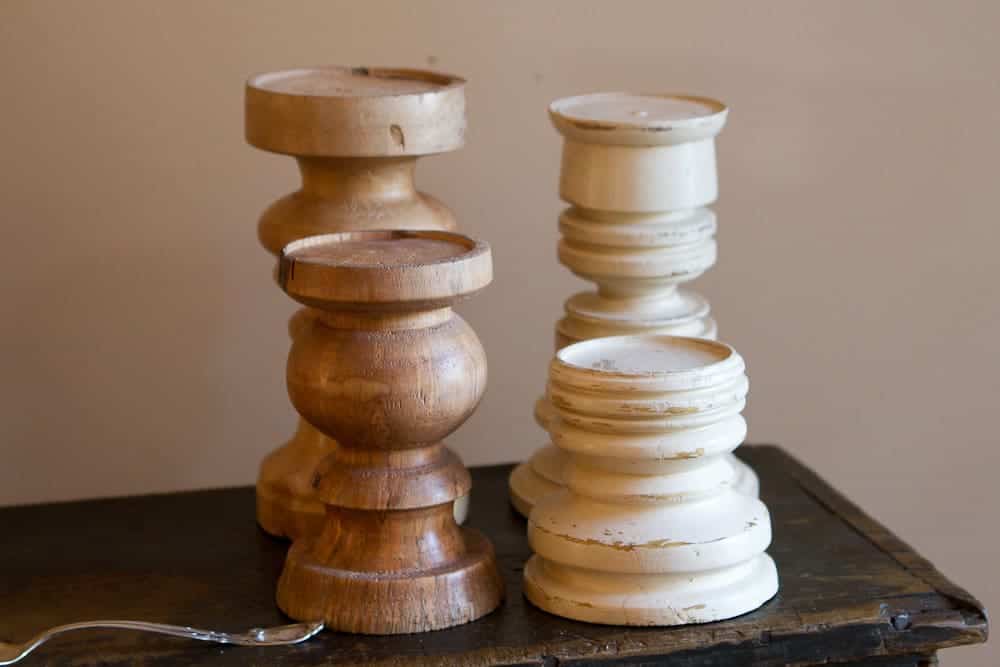
The lathe is one of my favorite tools to use. For those who don’t know, there are two ways to make square lumber round, a draw knife and a lathe. The lathe is much better! Ask my wife, when I first got it, I would stay in my shop until after midnight, often to the dismay of my bride. It is one of the most addictive habits ever. Mindless work, but fascinating. I love to make things like bowls, candlesticks, and most recently, an oak walking stick for my brother.
I am going to write about finishing wood. If you want a great finish, it will take some time, but there is a method to get where you want to be. I first learned of it as “working through the grits” and read many articles about how to do it. It is an age-old woodworking equation, woodworking minus patience=firewood. Working through the grits requires patience, but it is well worth it. Take your time.
Grit refers to the coarseness of sandpaper. Sandpaper comes in a variety of coarseness so that you can accomplish the job you are trying to do. Sandpaper is essentially heavy grade paper with fine particles of aluminum oxide adhered to it. The finer the paper, the finer the particles adhered to the paper. Sanding can also be done with Emery Cloth, which is a cloth material with abrasives adhered. Emery cloth is more commonly used on metal, but will work on wood as well. Cloth is good for cutting into strips to sand curves.
On a freshly turned piece, such as the oak candlestick in the photos, I like to start out with 60 grit paper, which is very coarse. The lower the number of grit, the coarser the sandpaper. Be careful, using coarse paper on soft woods such as pine or cedar can cause deep gouging. For softer woods, start with 100 or 120 grit.
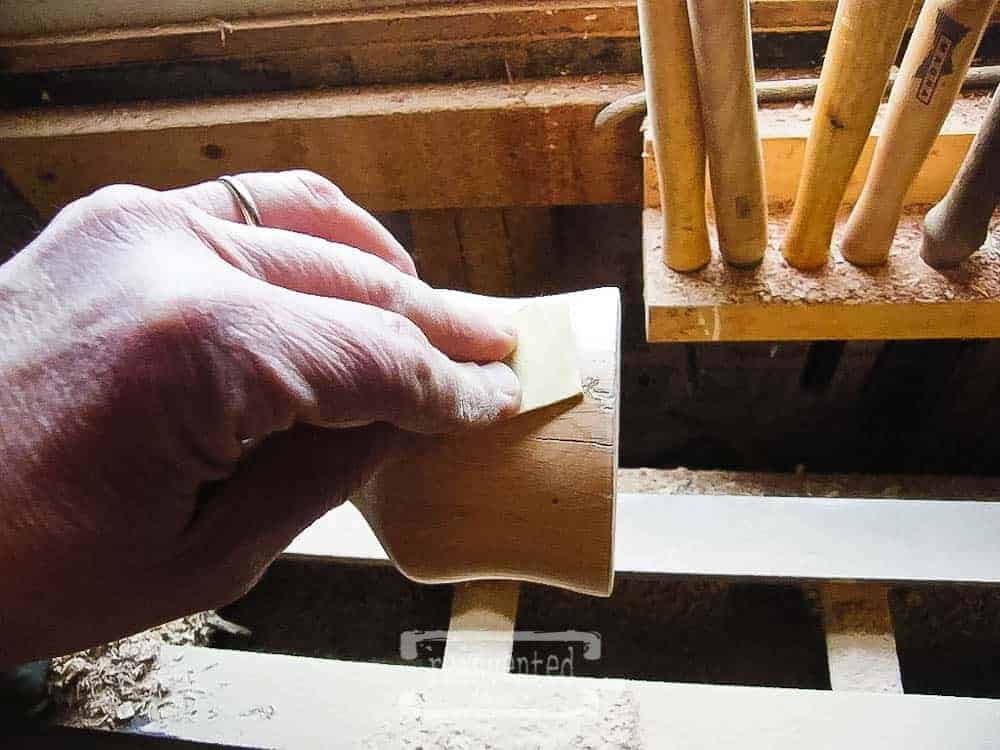
For the first sanding, 60 grit paper will allow you to sand out any imperfections in your work. You can smooth out chips or insect holes in your project fast. Take a good look at your project. If there are many imperfections, or if the wood is rough to the touch, coarse paper will smooth it very efficiently. Know when to stop though. It is easy to erase fine details with coarse paper. Think if it as shaping paper, and use it to refine your work.
Next, use 120-150 grit paper to sand out any imperfections left by the coarse paper and also any moderate scratches or dents in the wood. When smoothing a high spot, use care not to sand the low spot as this just makes it lower. Sand the high spot only. You should not be able to feel waves, cracks, or joints with your bare hand. If you can feel it, you will see it when the finish is applied, regardless of whether you use paint, stain, oils or poly. For deep imperfections, you might have to return to the 60 grit and work on the imperfection a little longer. Return with the 120-150 grit to further refine your project. If you want to check the appearance, wet a cloth with mineral spirits and wipe the surface. You will see imperfections clearly and the mineral spirits will evaporate quickly, leaving no residue.
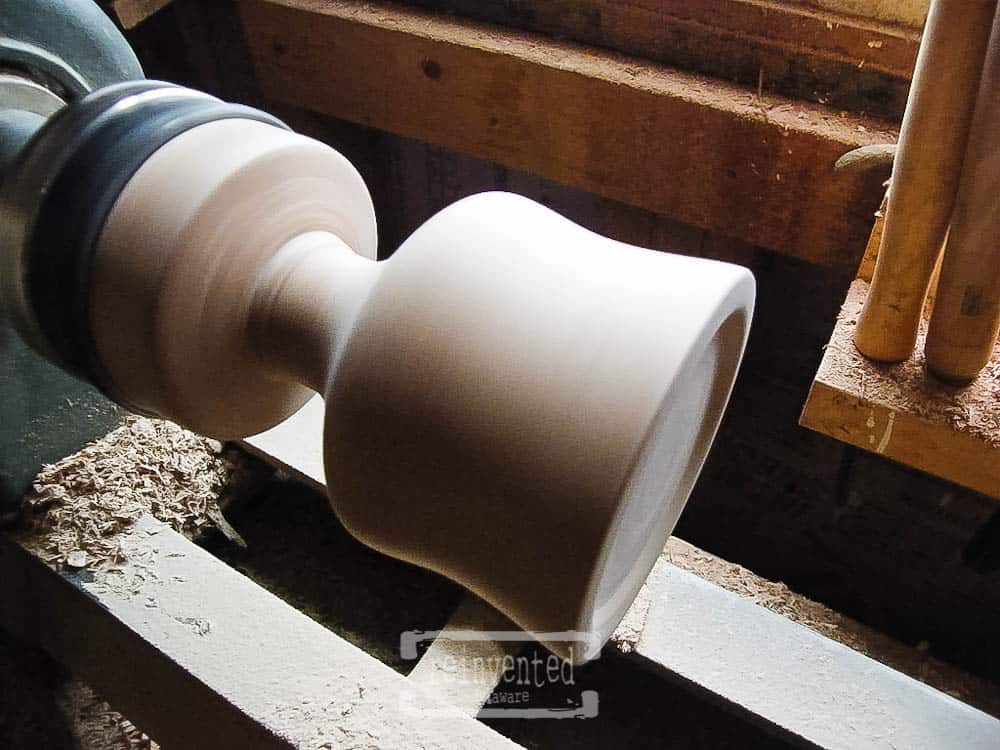
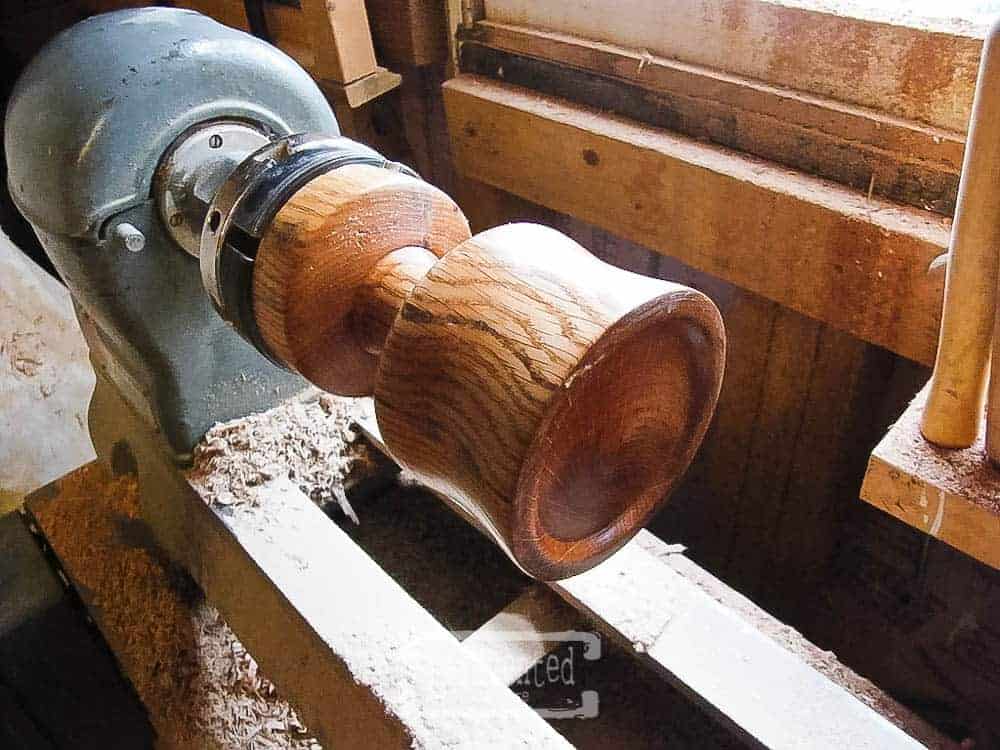
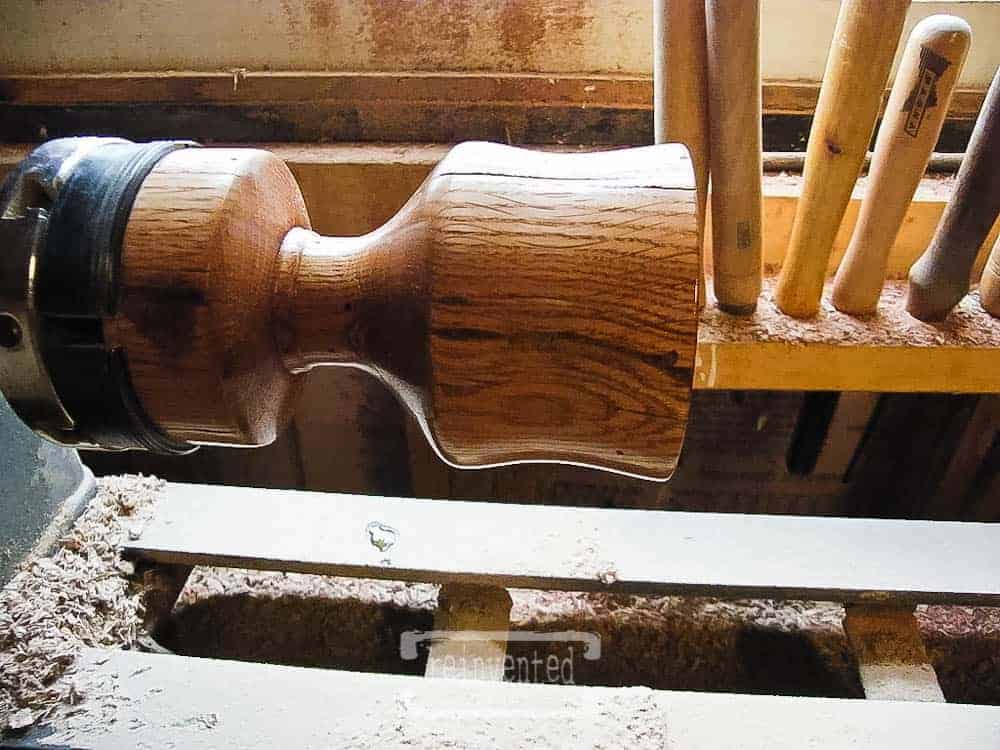
In this photo, the lathe turns at low speed. Make sure everything it secure before you get your hand near the spinning piece. Also, beware of clothing that fits loose or dangles (Drawstrings on a hoodie for instance)
When the imperfections are minor, switch to 180 grit and refine these marks even more. Use 180 grit to get your project to the finishing stage. In other words, when you are finished with the 180 grit, your project will be ready for paint (if that’s what you want to do. Always wipe with a dampened cloth before applying any finish, even paint. Check your project and remove any imperfections you don’t like.
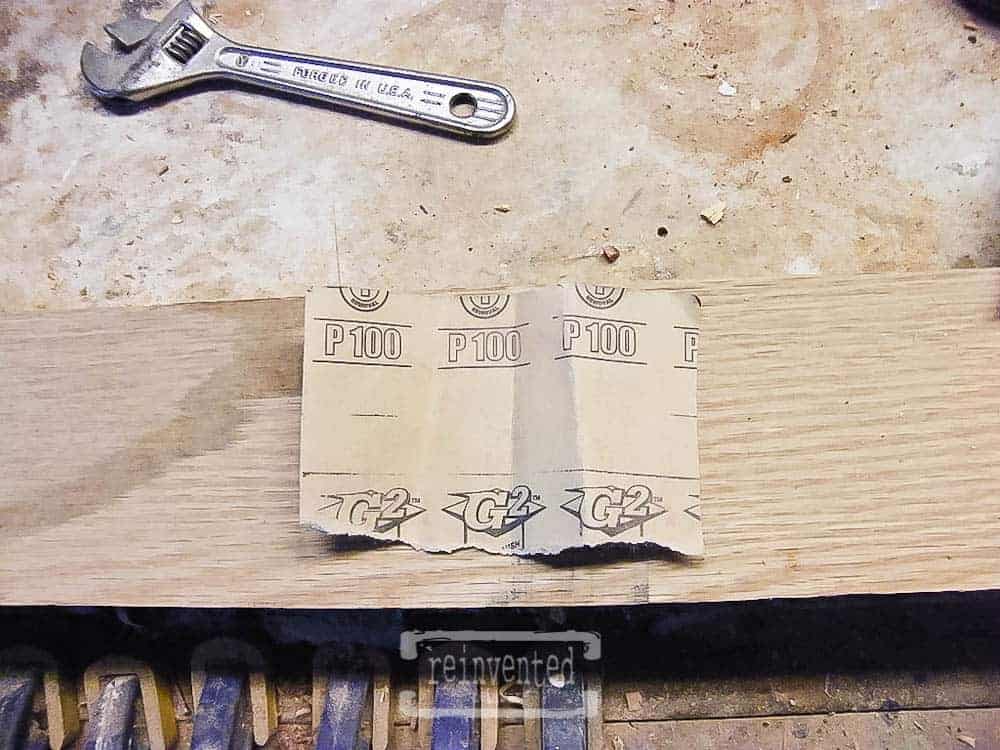
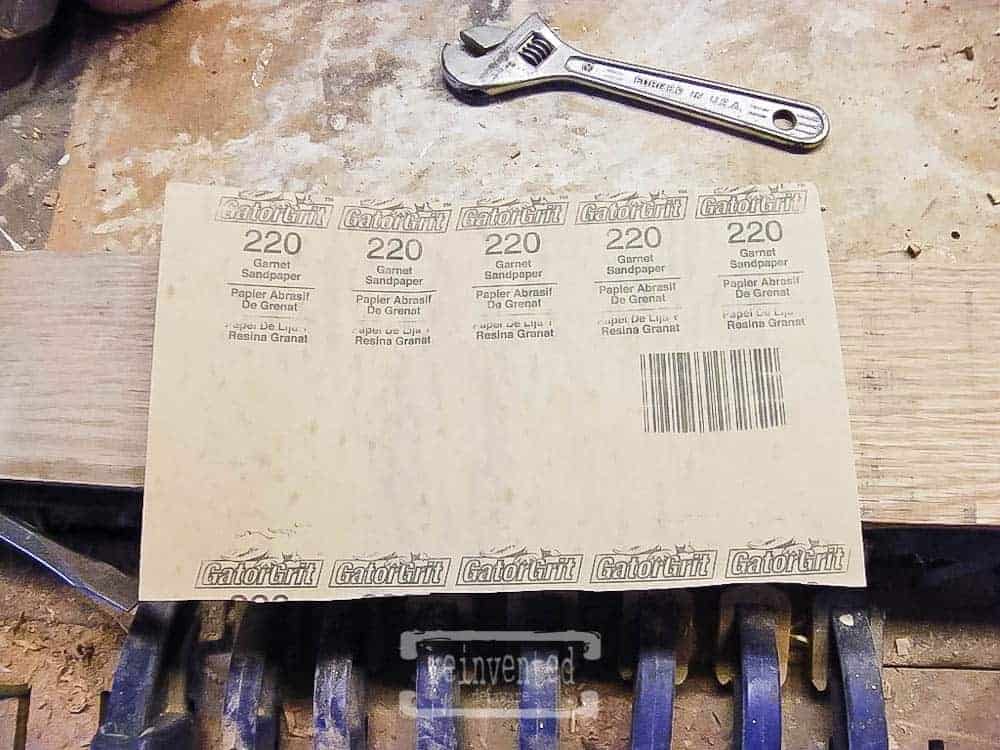
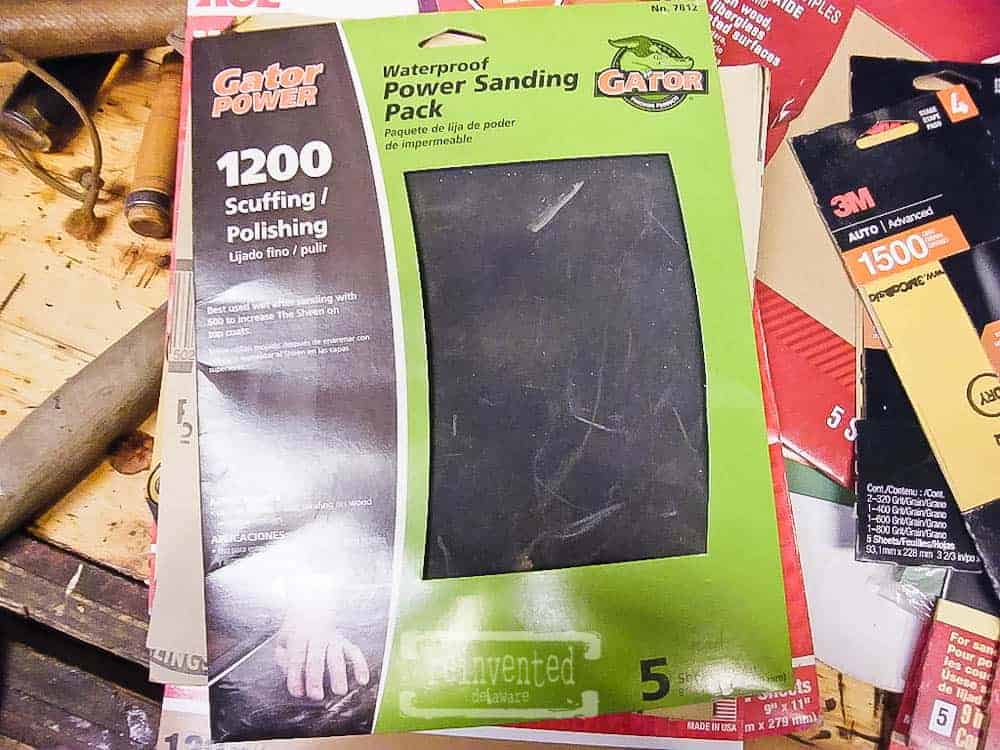
The photos below show the back side of sandpaper which usually has the grit printed multiple times across the sheet.
I like natural wood. I turn and sand projects on the lathe and the most enjoyable part for me is applying an oil finish. I am always amazed that what was once a piece of firewood (like this candlestick) can be refined into something beautiful. For me, that is a lot like salvation. We were once as a chunk of wood, not very pretty and not good for much. We are turned, shaped, sanded, and all or our imperfections removed (life). When God applies the finish coat, we are made into something beautiful and unique. Even our knots and termite holes are beautiful!
The gum turpentine was in an auction find. It was still good after many years somewhere. The linseed oil is available at most stores with a paint department. It can be purchased in smaller or larger sizes. Also try Tung oil, Danish oil, and raw beeswax. You may find you like these finishes better. 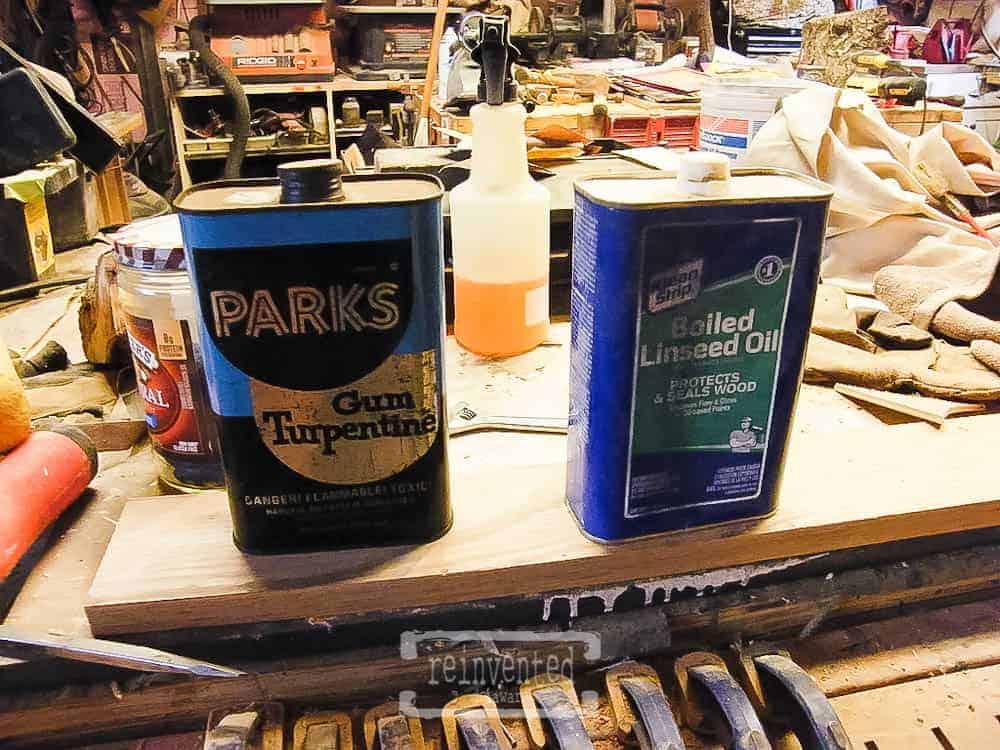
OK, back to the grits! When you are applying a stain, oil or poly finish, you will want to keep sanding. Move to 220 grit paper and sand. You will see a light sheen start to appear in the wood. I consider the higher number grits, polishing grits. You are polishing the wood. 220 will remove light tool marks and imperfections without gouging the wood. It is great for table tops and flat surfaces. Sand until you see a sheen appear on the wood. Once you have it, move to 400 grit and do the same thing. You will see more of a sheen appear on the surfaces. Keep going until the sheen is equal across the piece. For this project, I finished up with 1200 grit which feels like notebook paper. You won’t think it capable of doing anything, but as you sand, the sheen will become more lustrous. Again, sand until the sheen is equal across your project. Depending on your desired finished look, you can move through the grits all the way through 3000. These papers are available at auto parts stores because they are used to remove scratches from automotive paints. I have seen them at big box stores though.
When I finished with the 1200 grit, I wipe the project down with mineral spirits and a micro-fiber cloth. Now, I’m ready for Boiled Linseed oil, a trusted finishing oil for woodworking. It dries fast and can be buffed to a nice “hand rubbed” sheen. More coats and more buffing results in enhanced shine. Do it as much as you want.
In this photo, the lathe is set to the lowest speed and mineral spirits are applied to clean and preview the sanded finish. The sheen you see develops after moving to the finer grits of sandpaper.

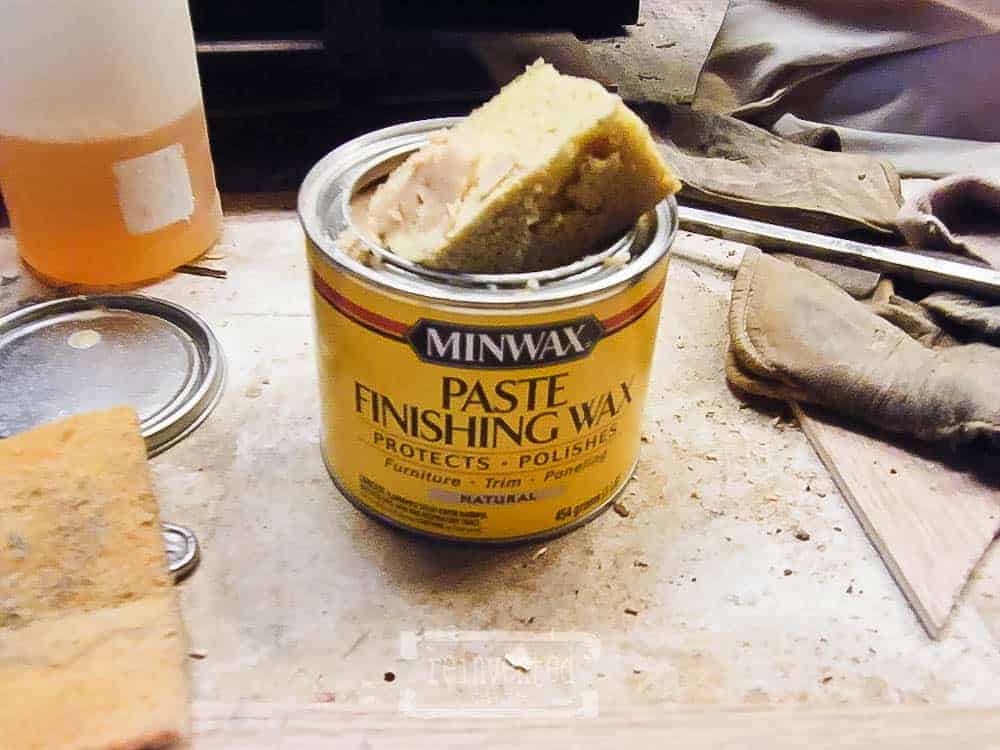
When I have buffed the linseed oil, I finish up with Johnson’s finishing wax. This will enhance the shine and offers some additional protection. Speaking of protection, think of where your work will be displayed. If outside, you will want something more durable such as spar varnish or exterior polyurethane. In fact, even if your project will be inside, linseed oil, tung oil, and Danish oil has to be re-applied occasionally. If you want a maintenance free finish, consider a sealer finish such as poly or varnish. Laquer works, but has a strong odor, dries fast, and usually has to be sprayed. Read the labels of the products you intend to use. There are some wax finishes that seal and finish the wood. Sealer means, no re-application. If you choose poly or varnish, finish your project and then return to the 400 grit sandpaper after the finish dries (usually 24-72 hours). Sand lightly with 400 grit until the finish becomes hazy and any dust nibs are removed. Don’t worry, you haven’t ruined it! You can remove small runs and even bugs stuck in your finish with this process
After sanding, apply the Finishing wax (Automotive Wax works on Poly), and let it dry to a haze. Buff with a micro-fiber cloth, old nylon, Tee-shirt, or other clean, soft cloth. Wax and buff until you get the desired finish. The more you wax and buff, the more sheen you will get.
On your next project, grab a variety of sandpaper and try “working through the grits”. I think you will find, as I did, that a little effort goes a long way toward a professional looking finish.
Thanks for visiting the blog! Hopefully it was helpful to you. Please leave a comment and let me know if you try this method. Stay tuned for a post on restoring old wood planes (another of my vices). If you’re in the neighborhood, stop by the shop and we’ll make a candlestick or something else that needs to be transformed from square to round. Just make sure you stop before midnight though. I’ve learned, “happy wife=happy life!”
Wow!! Your husband is really smart!! Handsome too.
Elmo Wayne
Congratulations Cindy, you have a beautiful site and maybe I will see you around the auction house (Wilson’s) sometime soon. Keep up the posts I look forward to seeing more inspiration.
Thanks so much! We love going to Wilson’s for all the goodies 🙂