
Reupholstered Antique Settee | Part Four
Woohoo for finished projects!! This reupholstered antique settee is finished and I can’t wait to share all the gorgeousness with you!
steps to reupholster a settee
Here are the first three posts in this series:
- How to Reupholster | Antique Settee
- Antique Settee | How to Reupholster
- Reupholstery Tutorial | Antique Settee
tools & supplies:
- pneumatic staple gun
- air compressor
- shop vac
- sewing machine
- tack remover
- needle nose pliers
- scissors
- steamer
- rolling stool
- glue gun and glue sticks
- webbing
- jute braid trim
- batting
- cambrick/dust cover
- staples
- fabric of choice
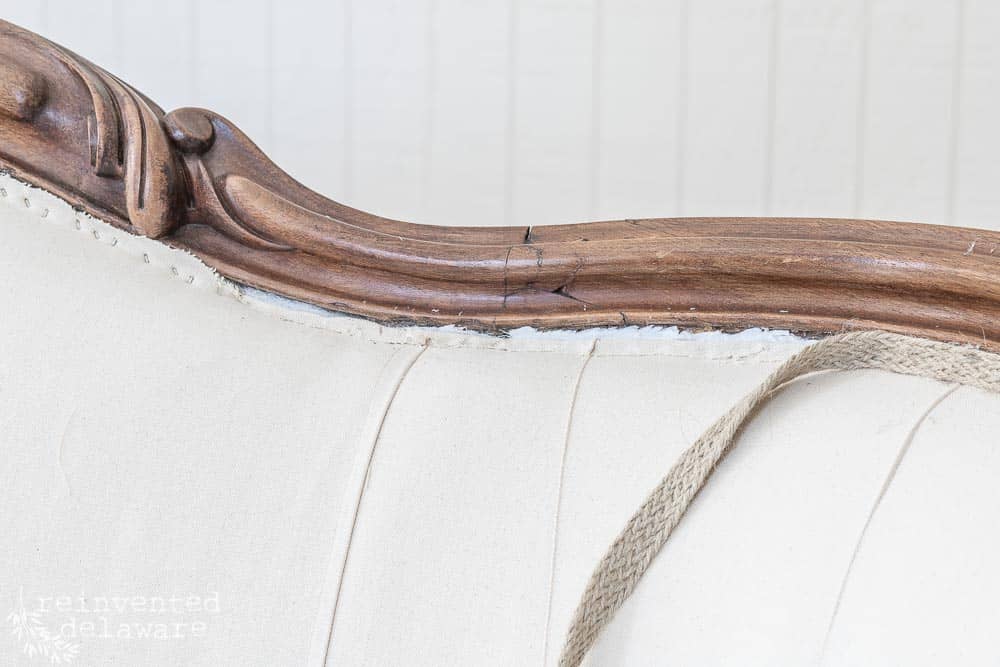
attach trim to upholstery
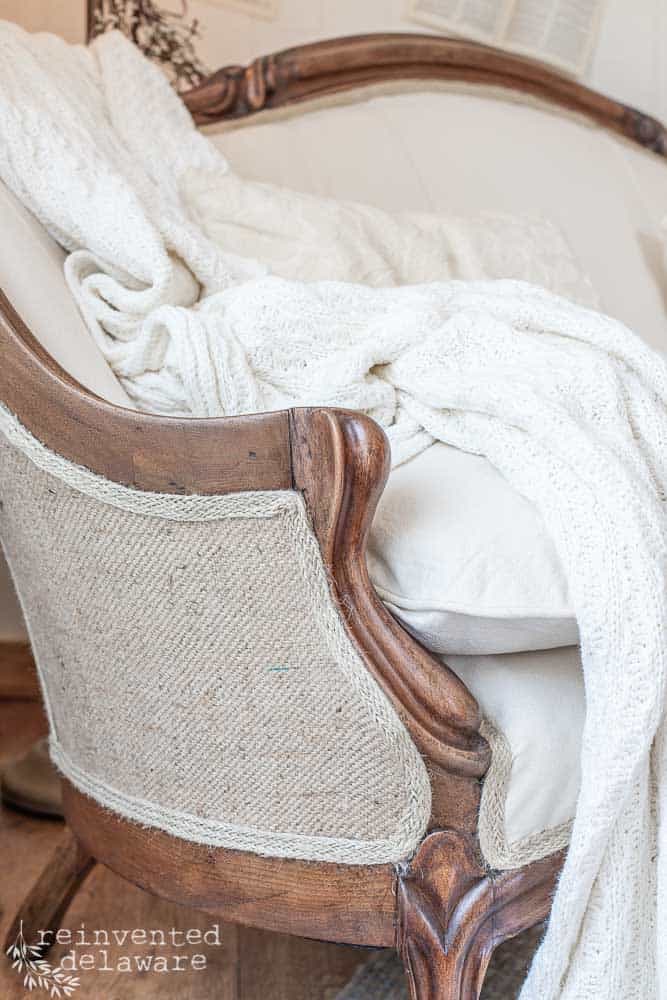
But first, let’s add the finishing details to this lovely antique! The trim I chose for this vintage farmhouse style transformation is a braided jute trim. It is fast becoming my favorite look and I can hardly resist putting it on everything I reupholster!
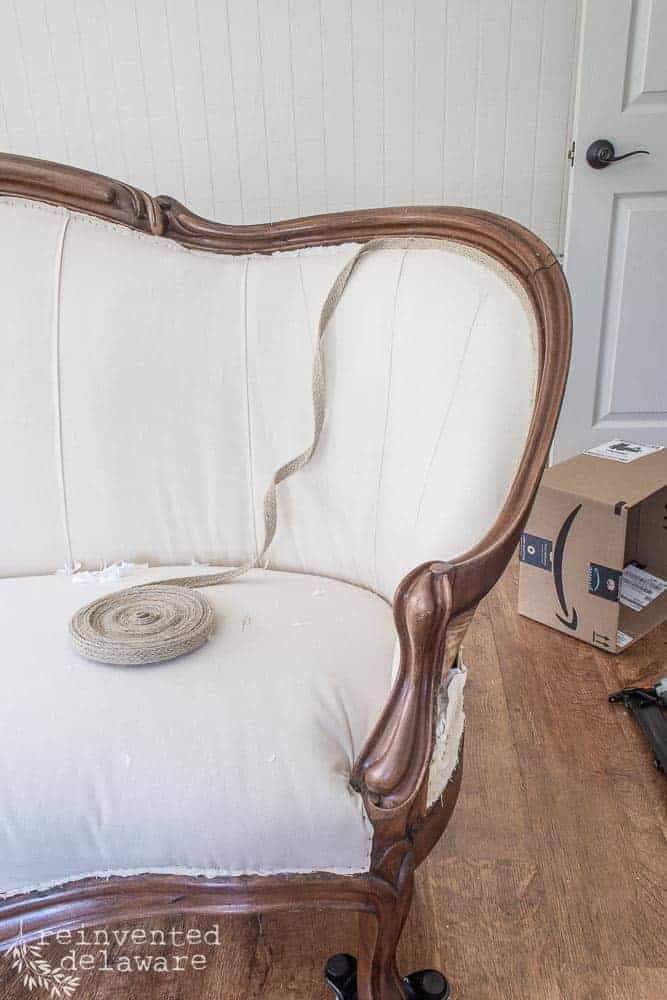
The trim really does look so good with the natural canvas fabric I chose for the settee.
I used hot glue along the long edges in about 3-4″ sections along the staple line and then held it down until it was set. I moved slowly and carefully to hide all the staples and kept the trim neat and tidy!
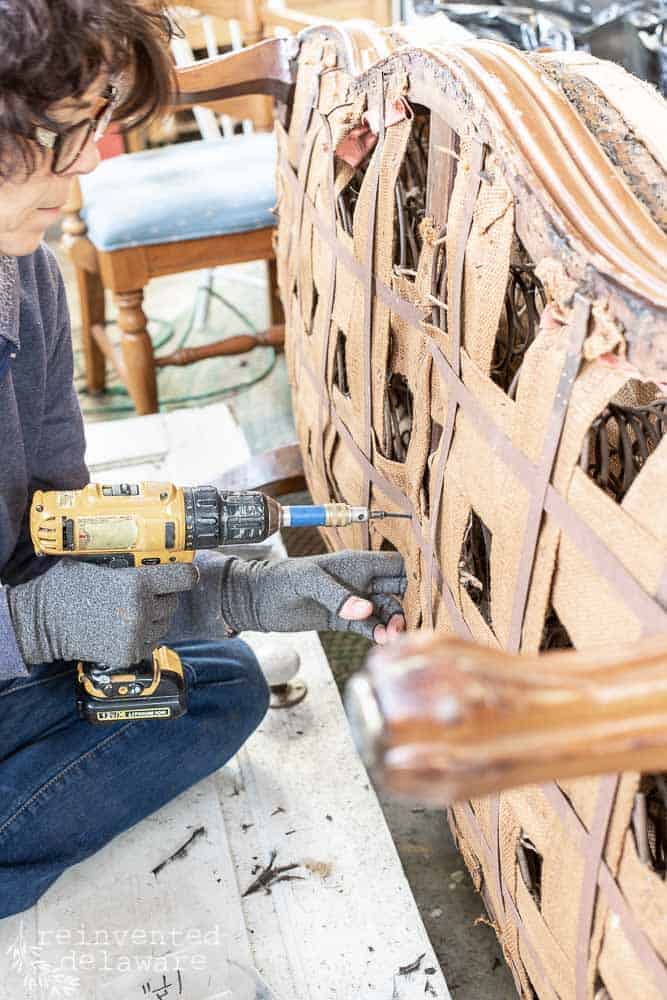
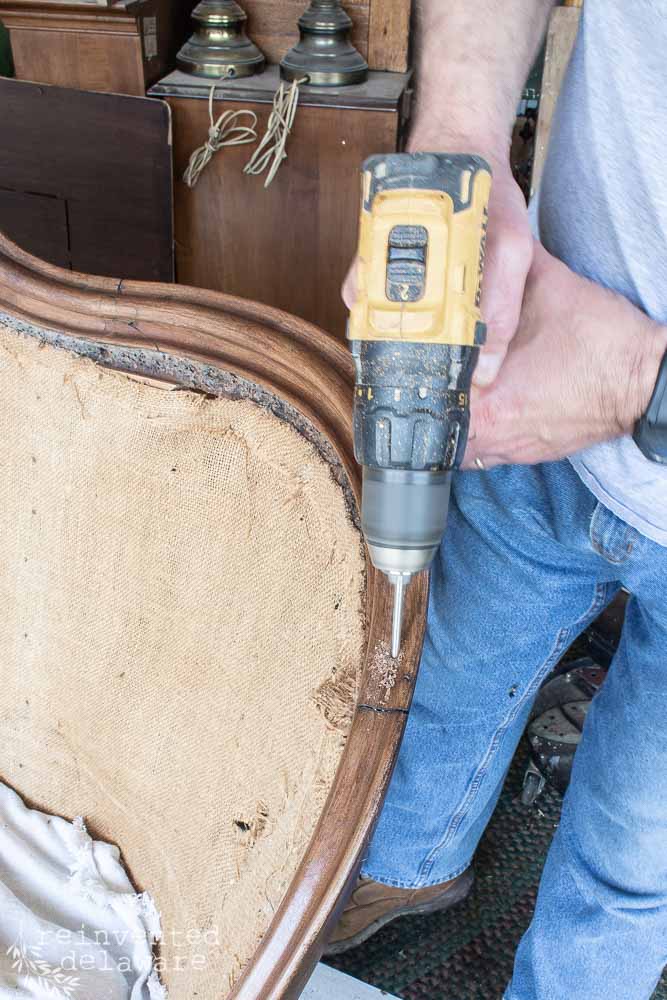
upholstery backing fabric
Ok, so I got a little ahead of myself! I probably should have waited to start applying the trim on the front until after I had the backing on. But I never said I was patient!
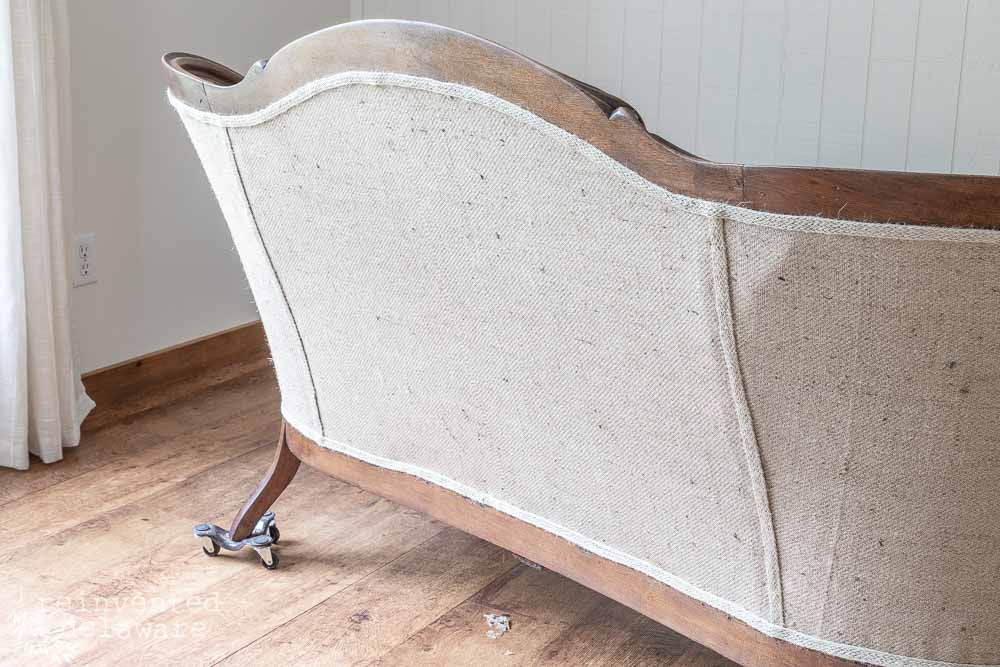
This sag-less burlap is so fun to work with! It is much heavier than the burlap you see at the fabric counter of your local Walmart and is so easy to work with. It does put off quite a bit of fibrous burlap dust so if that bothers you, wear a mask! And have your shop vac handy for cleanup!
I cut sections of the burlap to fit the areas of the framing on the settee. You can see what I mean in the image below. Notice also that I allowed plenty of excess. The extra will be cut off after stapling!
Packing tape came in handy to roughly hold the burlap in place while I cut.
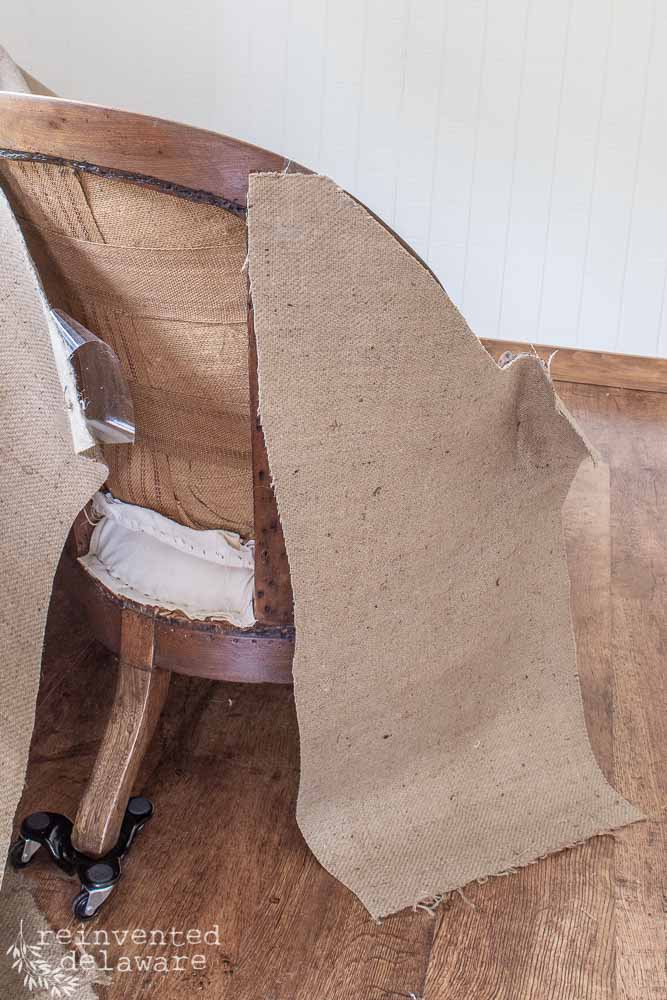
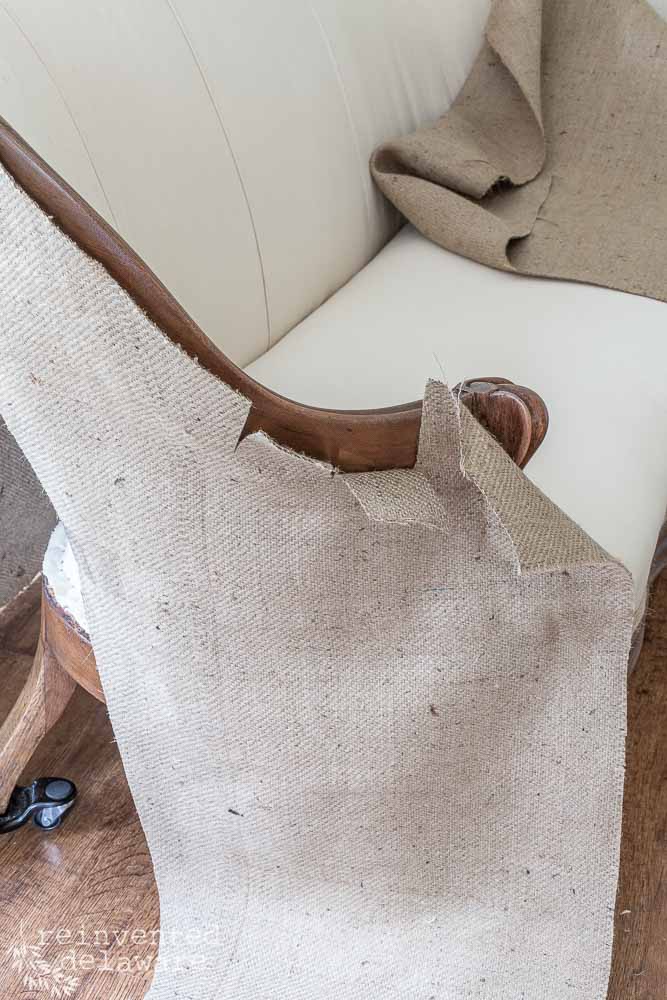
I had to make some relief cuts around the curves of the settee. I was careful to think through each cut before actually cutting it. This meant I had fewer mishaps 🙂
Once all the burlap was attached, I continued on with the jute trim.
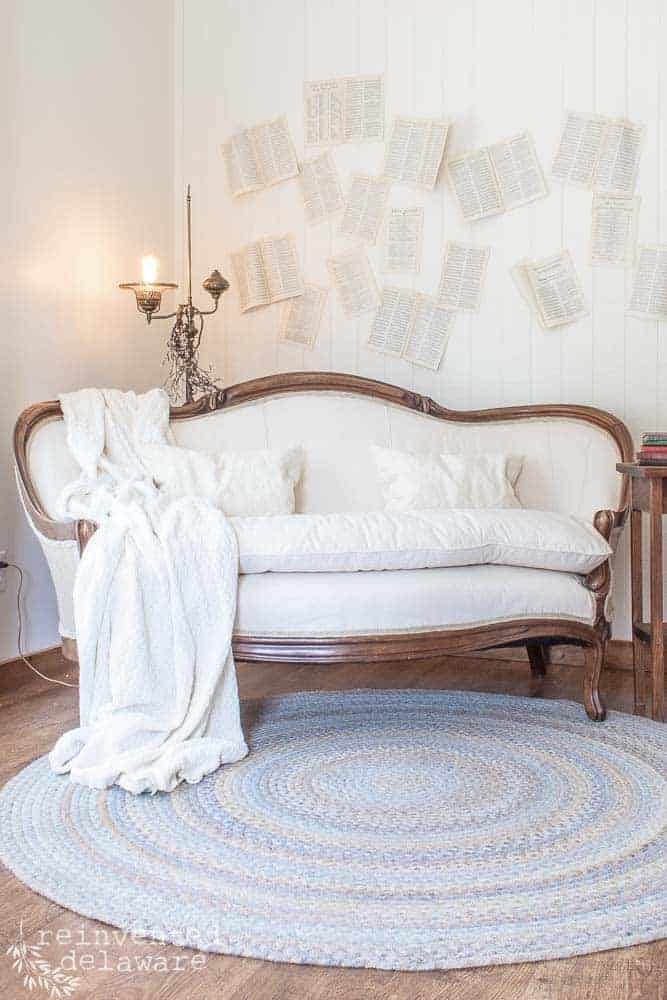
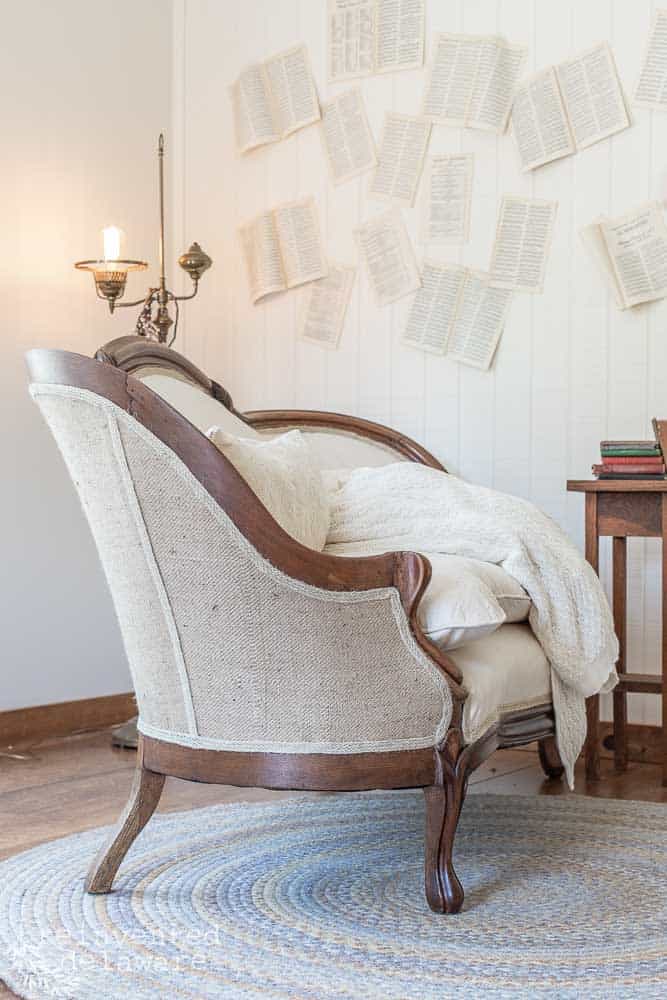
vintage settee makeover
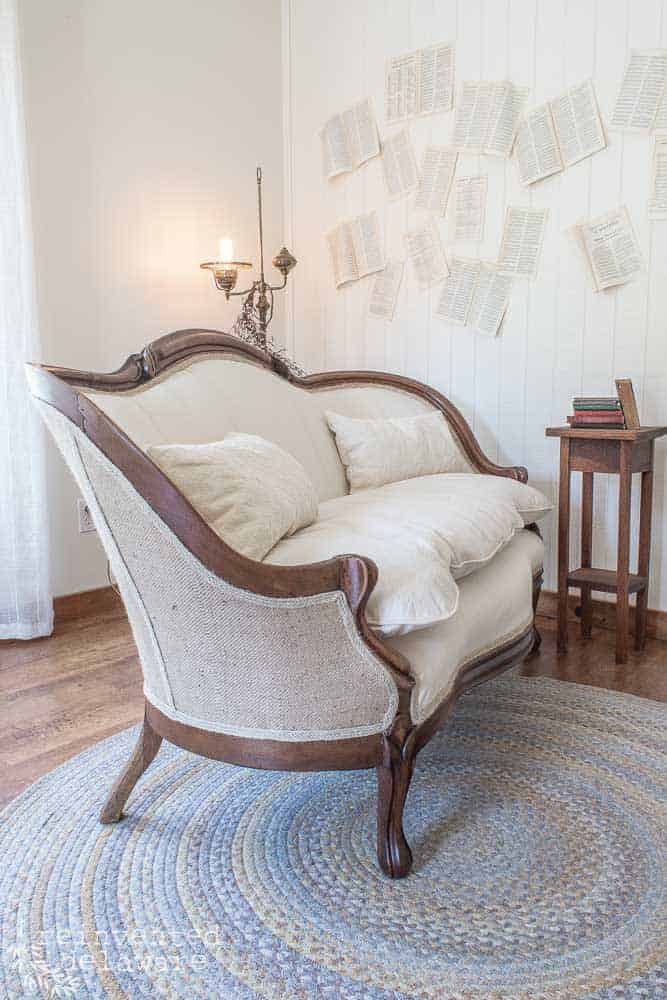
And here she is! Omgoodness, I just love this reupholstered antique settee, don’t you???
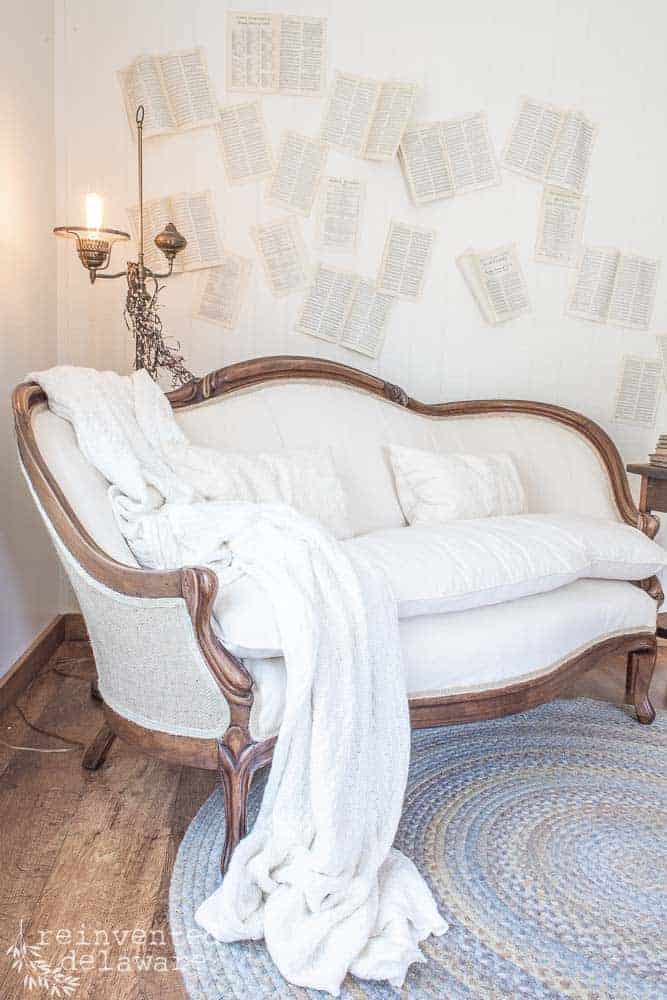
antique victorian settee
I pulled out a vintage brass lamp to add to the look of this settee. And the book pages on the wall just added whimsey to the whole vintage scene! What do you think? I kinda like the pages on the wall and would love to find a spot in my home to do this too!
Look how good the dark waxed wood looks next to the burlap!
tea time anyone?
The curves of this settee are just phenomenal! So graceful and lovely, I feel like sitting down for a cup of tea with my pinky in the air!
cushion options
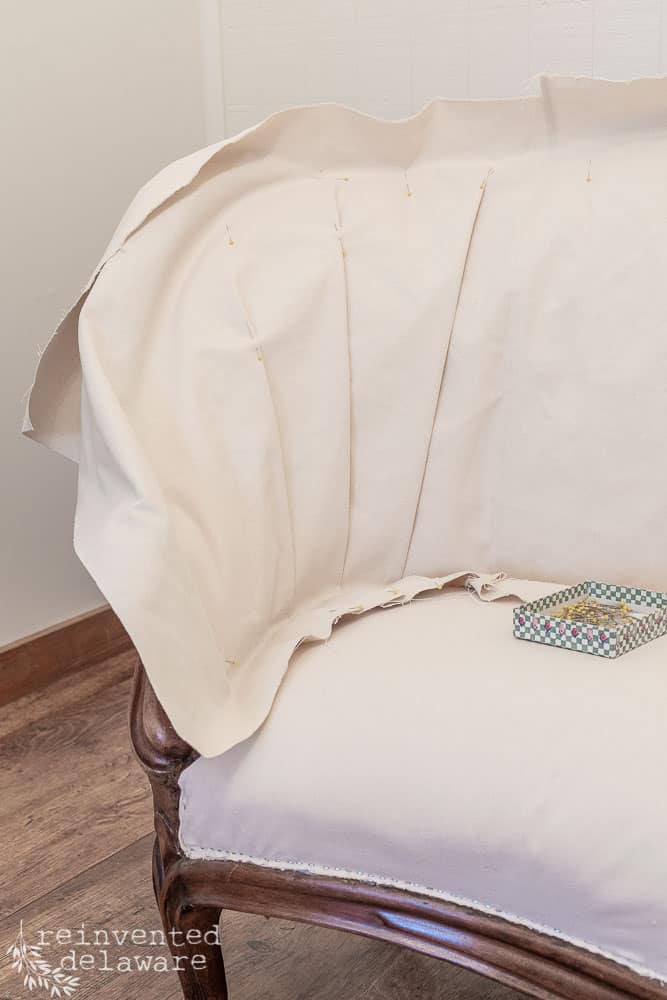
I didn’t mention the cushion. Originally, I made a foam cushion with a zipper closure. But after putting it on the reupholstered antique settee, I just didn’t think it looked good.
So I did a bit of research. The antique settees that kept coming up in my searches had more of a pillow-type, squishy cushion. That made total sense! They didn’t have foam 100 years ago!!
The cushion could also be removed. I like it both ways! We’ll let our client decide how she wants to show it off in her home!

Let me know your thoughts!
Well, there ya have it! A gorgeous reupholstered antique settee! I would love to know what you think of it – or even what you think of the book pages! Let me know in the comments!
I hope you enjoyed this series. And if you ever tackle such a big project like this, please let me know! I would love to know that this series was helpful and inspiring to you when tackling your own reinvented projects!
more posts in this series:
join the journey!
Won’t you join us on our reinventing journey?? It’s easy! Just sign up below and I will send you our tutorials right to your inbox!
follow along on the socials!
You can also join our journey on Instagram and Facebook. And Pinterest is a great way to organize all of your inspiration! Feel free to pin any image in this post so you can find it quickly!

I’m working on my settee now. Does the dropcloth stain or do you scorch guard it? I too, am using dropcloth, but I died it blue. I left it natural when I did some dining chairs and they are dingy.
Hi Rachel, I’m so excited that you are working on your settee! Dropcloth can pick up a dingy look from use like any other cotton fabric. I would recommend using Scotchguard but test it first on a scrap of the fabric. On a side note, I thought I would mention what I have done many times for dining chairs. I recover them as usual and then I make ‘sit-upons’ as an elderly lady called them. They are basically large placemats made from the same fabric as the recovered chairs and they are long enough to hang over the sides a bit. They can be tossed in the washer very easily! Hope that helps! Feel free to email me anytime with more questions – I would love to help you out the best I can 😊
Cindy, you did beautiful job on this settee. My mother has Louis XIV furniture that is so pretty. You are right the cushion is more flat.
Your client is going to love it!
Thank you, Tammy! She was a lot of work but so worth it!!
It looks amazing, Cindy! I love your post. Upholstery projects are my favorite!
Anything with fabric is fun – upholstery is one of my faves too! Thanks for stopping by Marieza 😊
Very gorgeous. I definitely agree that I’d sit in this beautiful vintage piece and drink a cup of tea with my pinky in the air!
We would be sitting together for tea and some amazing dessert you made!
Cindy,
This transformation is amazing. You’re amazingly talented.
We think we’re cool because we recover dining room chairs.
Give me paint and I’m good. This series us so amazing. The end result, gorgeous
Pinned a few times!
Thank you for pinning the posts! I appreciate it so much! 😊
Cindy is there anything you cannot do??? This looks amazing!
Well, that’s the sweetest thing to say Elizabeth! There is always more to learn 🙂
You do the best work, Cindy. I predict that this will sell very quickly in your shop.
Great prediction Paula! It sold!
Oh, how I love this! I totally want this in my house. You do amazing work. Hugs to you.
It would look beautiful in your home Renae!
You did a great job Cindy! I need to go back and read how this settee came to be in your life. Upholstery projects really intimidate me. I have a sofa with similar curves and I love it!
Upholstery is something I’ve always wanted to learn to do. This is great.
Thank you, Rosemary! I would suggest you start small – look for a simple footstool, the are a great place to start!
How beautiful! What amazing work you did with the upholstery. I really love the pillowy cushion on top. Setees can feel still and formal and this really softens it up and makes it twice as inviting! xo
Our customer agrees with you Juliet. She loved the soft cushion and pillows for the settee. Thanks for stopping by😊
Cindy,
This turned out beautifully! I love the “cushy” version as it looks so cozy. Lovely share.
It was a labor of love to breathe new life into this antique settee! Thank you for stopping by today Libbie! 😊
Wow, Cindy! You did such a beautiful job on this settee. I have never done an upholstery project before and would love to learn!
So glad to hear that, Lynne! I suggest you start small with something like a footstool. I have a post and a video showing a reupholstered footstool if you need a good starting point. 😊
Your settee looks beautiful! I have one just like it that desperately need reupholstering. Thank you for the inspiration :).
So glad you were inspired! I would love to know how you make out upholstering your settee! Thanks for stopping by 😊
I love your it & the squishy cushion makes it. I covered a similar one with a green velvet back. I would love to make the pillow cushion, can you tell me what you used inside the cushion, any directions? A great job.
I’m so glad you enjoyed the tutorial! The cushion “insert” is made from several layers of upholstery weight batting with poly-fil in between the layers. It’s basically a big pillow! Thanks for stopping by! 😊
I’m curious I’m interested in purchasing a 7’ Victorian piece and it’s got some minor damage to the original upholstery that i think I’d like to reupholster. About how much money in all do you think it would cost? For materials and such (excluding labor) – will also say it’s in much much better condition than this piece started out at
Hi Marisa! Sorry for the delayed response. I wish I could give you a guess at the cost of supplies but there are so many variables. Fabric, batting, webbing just to name a few! I keep these supplies on hand and usually order fabric for each project. If you are interested I have a video series on YouTube showing how to reuphlster an antique chair. It might be helpful for you! Look for Reinvented Delaware on YouTube 🙂 Thanks for stopping by and I’m sorry I can’t be of more help!
This is beyond beautiful and so helpful for the project piece that I just picked up! Thank you for the guidance/inspiration – can’t wait to tackle my own!
You can do it Penny! I’m so glad you found inspiration here!
It’s beautiful! It turned out amazing!!
Thanks Liberty! It was a labor of love for sure!
Thank you for sharing this project. It was quite helpful. I am doing one very similar, I’m very concerned about the wood where the stapling will go. It’s extremely pocked. If I fill the holes with a wood filler would I have a stronger surface for the staples to stay planted in. I’m worried they will pop out over time.
Hi! I’m glad you found my post helpful! As for the damaged wood surfaces, you might want to try Bondo Wood Filler. It is strong and durable. I will email you more info!
Great job! I would like to know where you purchased the jute trim and the burlap. Thanks
Hi Amanda! Sorry for my delayed response. I have been searching online for th exact burlap and trim I used. My sources no longer carry the exact products. I will send you a link for the sagless burlap to your email. I’m not allowed to send a direct affiliate link to your email. The jute braid trim is linked in the list of supplies within the post. Please let me know if you have anymore questions. I would love to help the best I can.😊