
Reclaim Picket Fence Sections
Today, I want to show you how we reclaim picket fence sections that we use to make many of our reinvented farmhouse style projects!
The following post may contain affiliate links. That means if you click and then buy something, I will make a small commission at no additional cost to you! Thank you for supporting my blog. full disclosure here.
a little backstory…
When I first started this reinventing business, I would spend countless hours brainstorming ideas and projects to reinvent.
Of course, furniture came to mind but I wanted to stretch outside of my comfort zone of painting furniture. That is still one of my favorite things to re-create but what other projects could I add to that.
And then there was the day I walked by the picket fencing that lined our side yard.
It was a chilly, misty fall day and for some reason the idea of building things from those adorable, perfectly chipped pickets just struck me.
Really no rhyme or reason to my thought process.
My hubby came home that day to see me tearing that fencing down!
Our fencing looked similar to this:
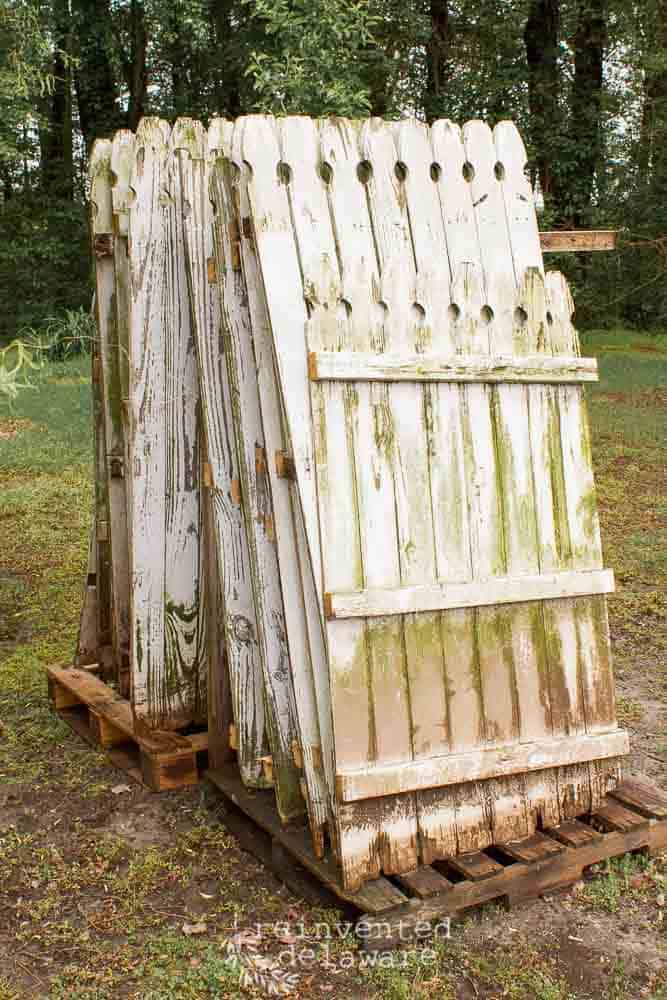
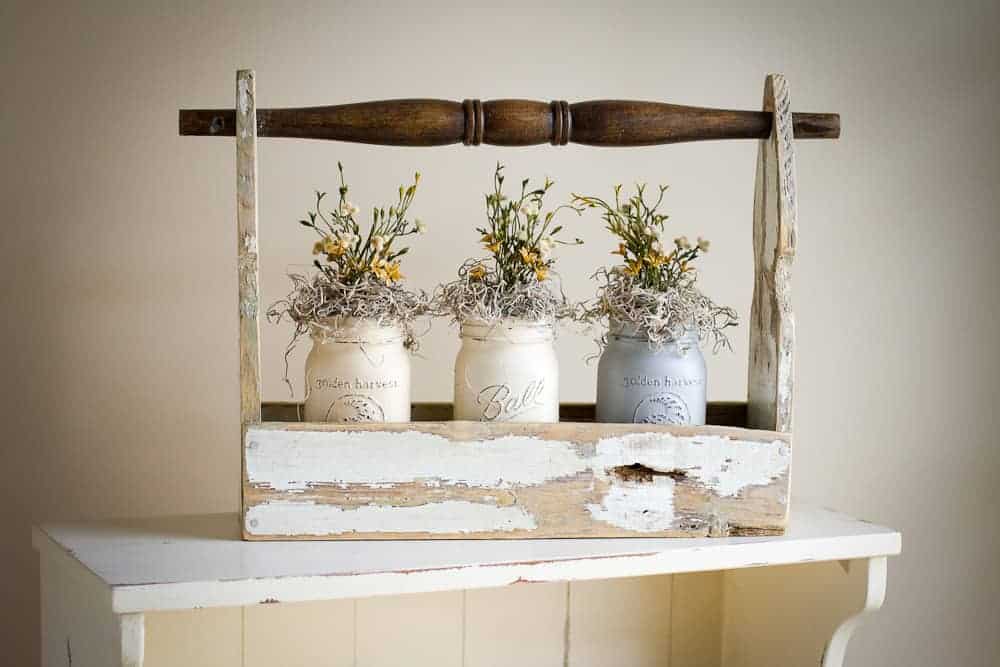
We made so many projects from those pickets – hand-painted farmhouse style signs, small and large crates, decor pieces that included rusty bedsprings & pickets and the cutest picket crates you’ve ever seen!!
You name it and we made it!
time to take it apart!
Let me show you how we take the sections apart.
The sections usually come in eight foot lengths. This one had been cut into smaller sections by the homeowner.
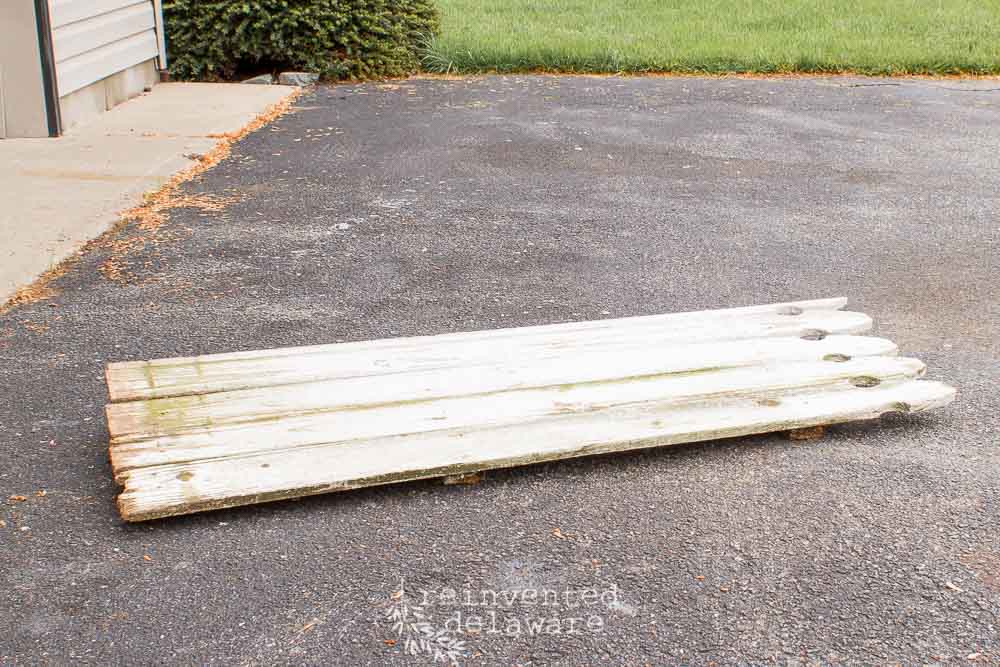
They are held together with railings – boards that are approximately 2 1/2″ x 1″. We use the railings as well as the pickets for projects!
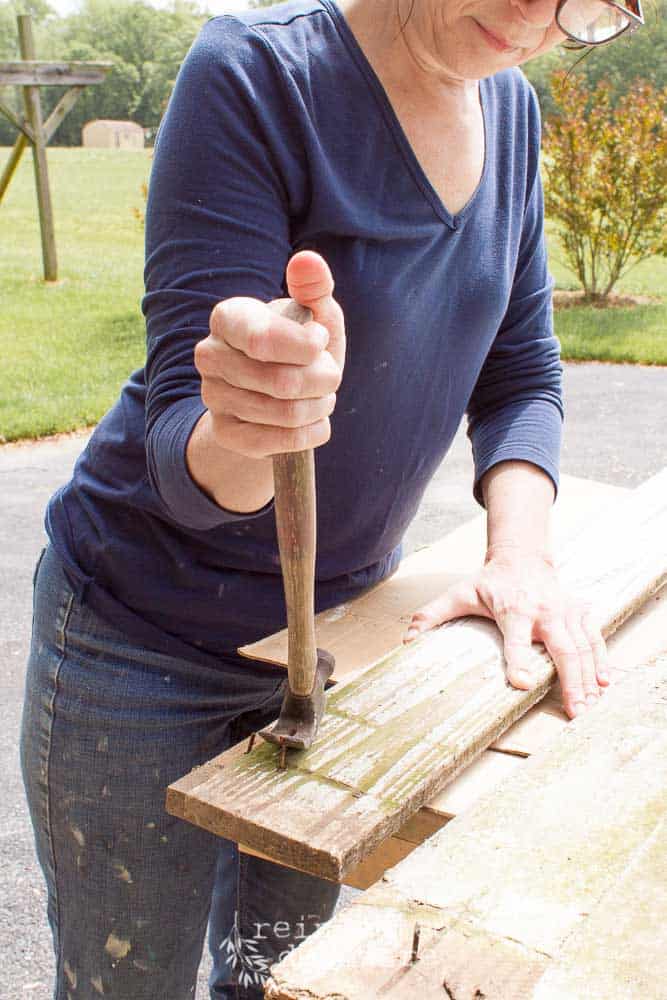
muscle power
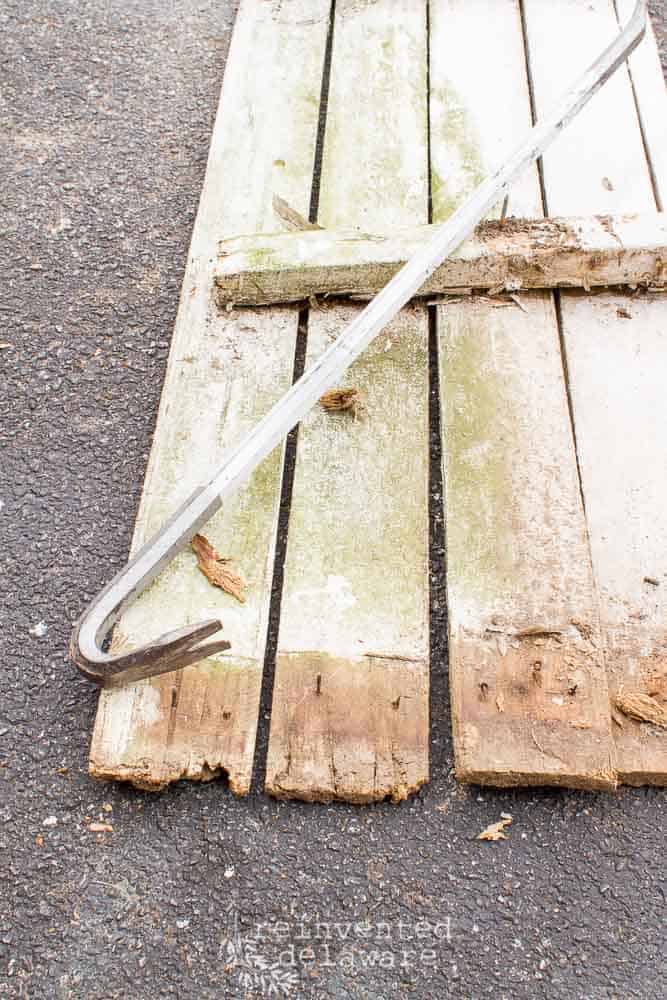
A crow bar is handy to separate the railings from the pickets. Often the fencing is old enough that the pickets are loose.
If they are a little tight, just use a mallet to tap the crow bar between them to help loosen them up. The crow bar gives leverage to pry them apart.
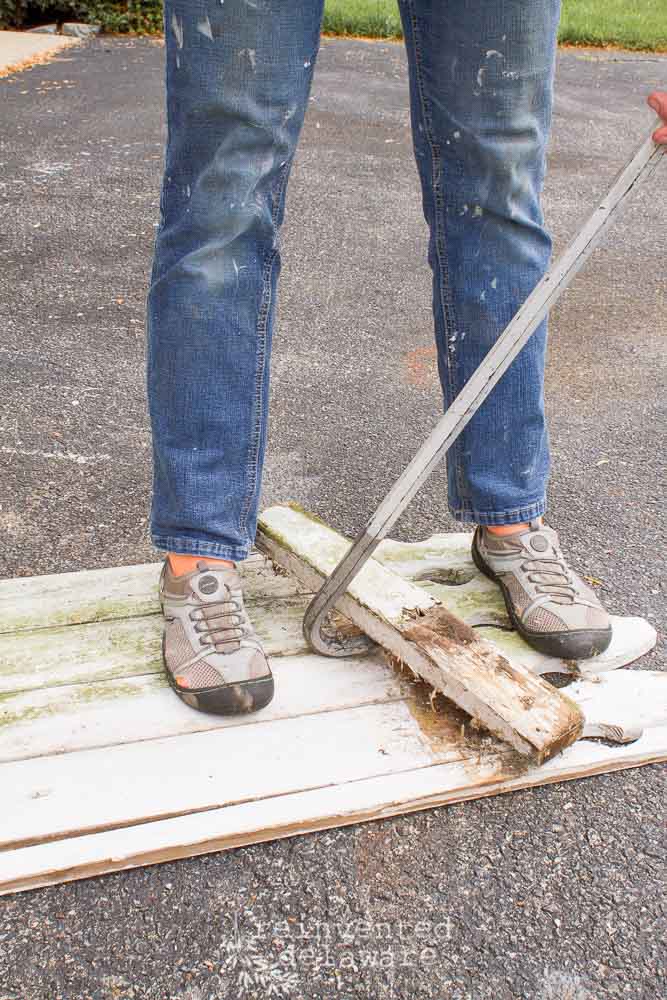
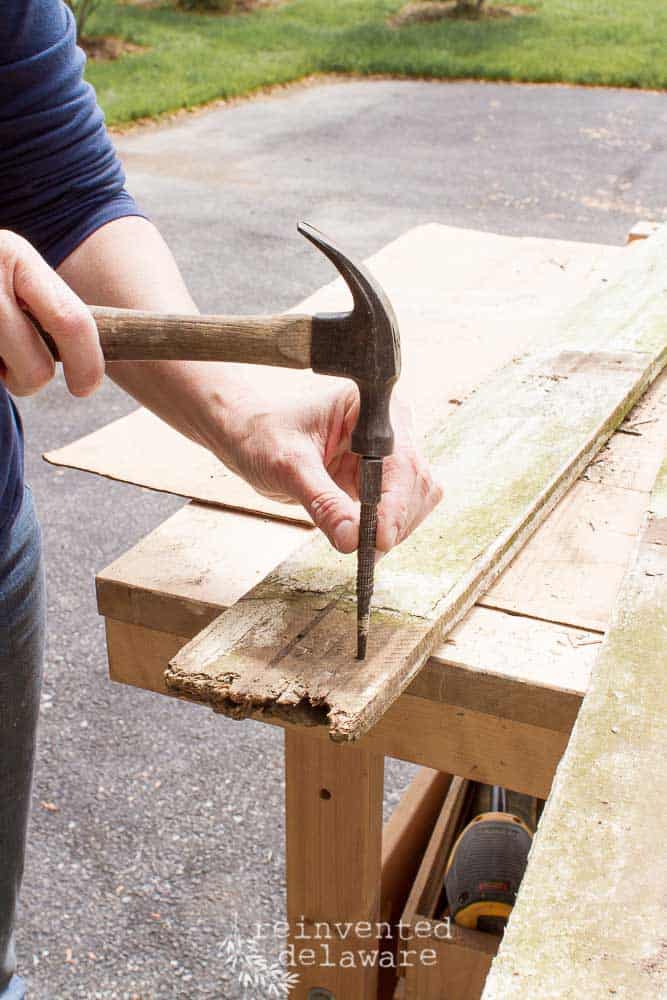
After separating the pieces, there will be nails left either in the picket or in the railing. Use a hammer to straighten and tap the nails enough that you can use the claw end of the hammer to remove them.

Keep a container handy for the nails – you don’t want rusty nails laying around!
Since the nails are usually rusted they can be broken off and hard to get out. A nail set punch can be used to get the broken nail out of the wood.
It is important to remove the nails because the wood will be cut with a circular saw. Nails in wood and a saw do not mix well ;). Think safety!!

so many project possibilities!
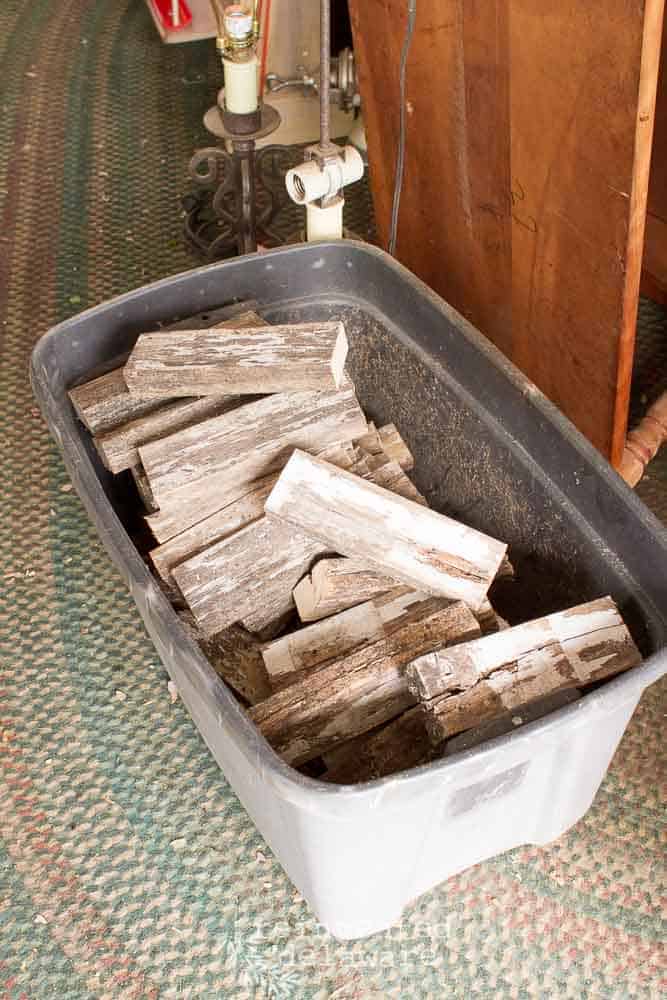
After all of the pickets and railings have been separated and the nails removed, we cut them up for projects!
This container is filled with the railings cut into 8″ sections for our block signs.
Aren’t these the cutest??
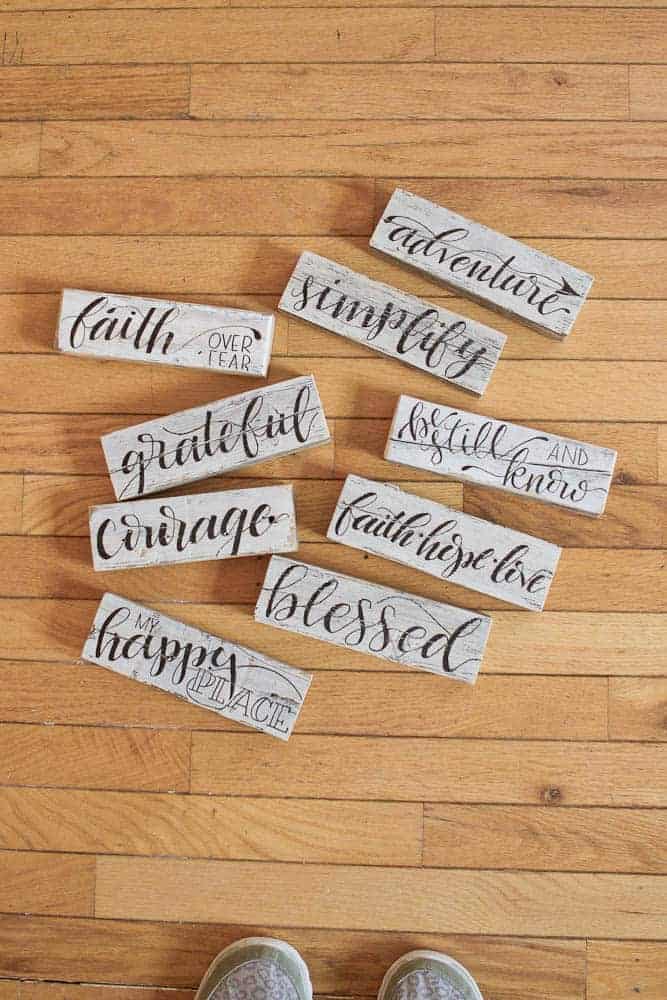
The pickets are used for a variety of projects including farmhouse style signs and crates.
I will share how we make our small picket crates from reclaimed picket fence pieces in my next post! Stay tuned!
Thanks for stopping by to see how we reclaim picket fence sections for adorable farmhouse style projects!
follow along!
Follow along our reinventing journey on Instagram and Facebook! Pin this image – you never know when you might find some pickets of your own!!

Until next time…
Hey Cindy!
That’s a nice stash of picket fencing! I love both the word blocks and the farmhouse style caddy you made – such neat ways to repurpose all that weathered wood. I hope you have a great week!
>>> Kim
Thanks Kim! The pickets have been fun to use in our reinventions!!?