
How to Make a Twig Wreath with Sparkly Pinecones
Let’s see how to make a twig wreath with sparkly pine cones using glass glitter for Christmas Holiday decor!
This rustic twig wreath has been around my house for quite some time. At some point, someone bought it at a craft store and then donated it when they were finished with it.
That’s where I came in! You know the saying, “someone’s trash is another’s treasure.” Or something like that, right?
The following post may contain affiliate links. That means if you click and then buy something, I will make a small commission at no additional cost to you! Thank you for supporting my blog. full disclosure here.
supplies:
- twig wreath (store-bought or handmade)
- greenery (faux or fresh)
- rose pine cones
- Diamond Dust glass glitter
- Milk Paint in Farmhouse White (or Ironstone)
- MilkMix EZ
- Mod Podge Outdoor
- brown craft wire
- hot glue gun and sticks
how to make a twig wreath
This rustic wreath would be so easy to make! It is basically a small store-bought grapevine wreath form with bundles of twigs tied to it using brown floral wire.
The wreath form is about 8” in diameter. The wreath size doesn’t really matter, it is your decision! A smaller wreath would be just as lovely as a larger wreath!
The bundles of tiny branches look just like branches on my river birch tree! They are scattered beneath my birch and would be so easy to collect for this project!
Let’s go over the steps to make this DIY twig wreath using supplies you might have in your craft room.
Purchase a small grapevine wreath from your local craft store. Then collect a largish supply of smallish twigs in appro 1/16″ and smaller in diameter.
natural twig wreath DIY
Here are some trees that you might have in your yard to use for this natural twig wreath:
- Willow
- River birch branches
- Lilac Bush
- Shrubbery from your landscaping
- Leyland Cypress
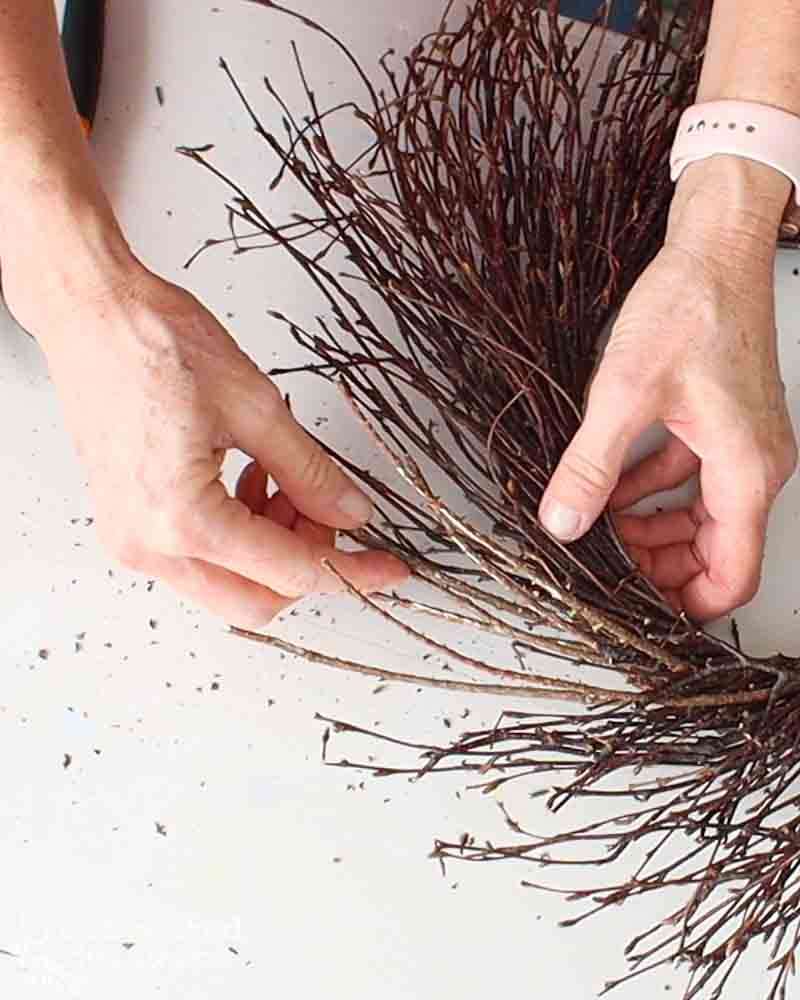
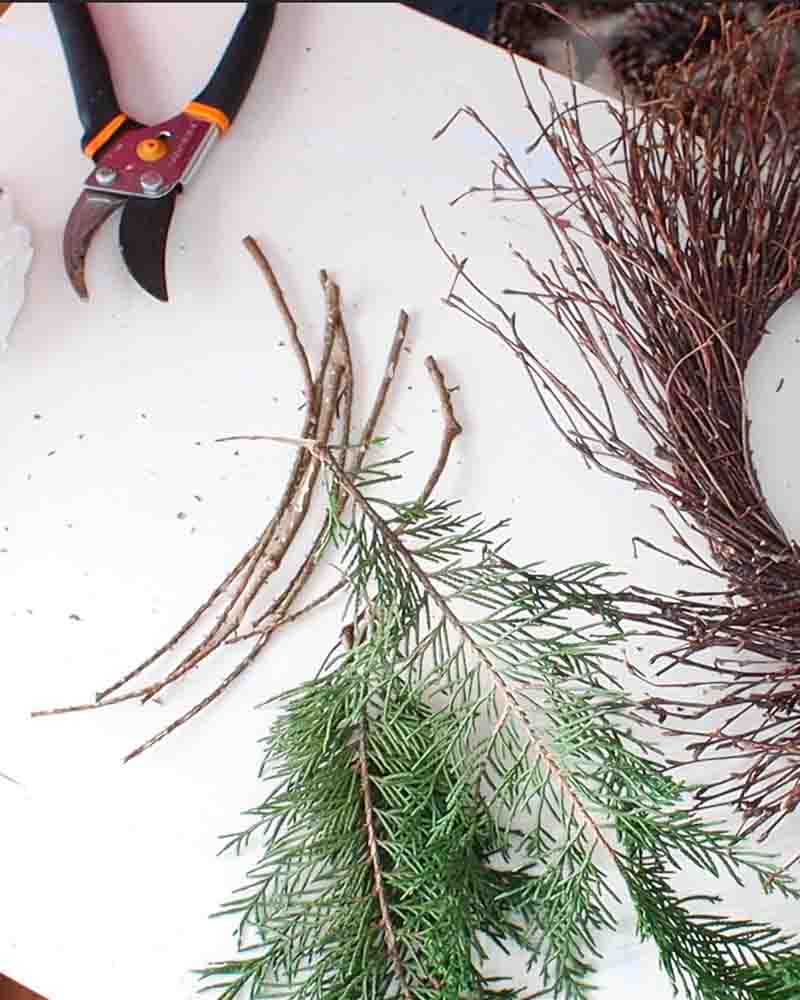
Go out into your yard and look for a tree or shrub that has tiny branches and flexible twigs. Don’t use the branches that are on the ground and already dried. You will most likely have to strip the leaves or the needles to get to the skinny part of the branch.
Cut the tiny branches into approx 8” sections using pruning shears or wire cutters. Next bundle the branches with the cut ends lined up together. Cut several pieces of the florist’s wire into sections at least 12” long.
Wrap the florist’s wire around the base of a twig bundle. Leave the two ends of the brown florist’s wire loose. The loose ends will be used in the next step.
Repeat these steps to make as many twig bundles as you need to go around your grapevine wreath form.
When you have enough of the twig bundles, use the excess florist’s wire on each bundle to secure it to the grapevine wreath.
beautiful wreath for your front door
That’s it! You have a beautiful wreath that you could use on your front door for any season!
Let’s dress it up for Christmas Holiday home decor and the winter season that is just around the corner!
Have you heard of rose pine cones? They are beautiful rose-looking pine cone that comes from the Deodar Cedar Tree and they are so unique!
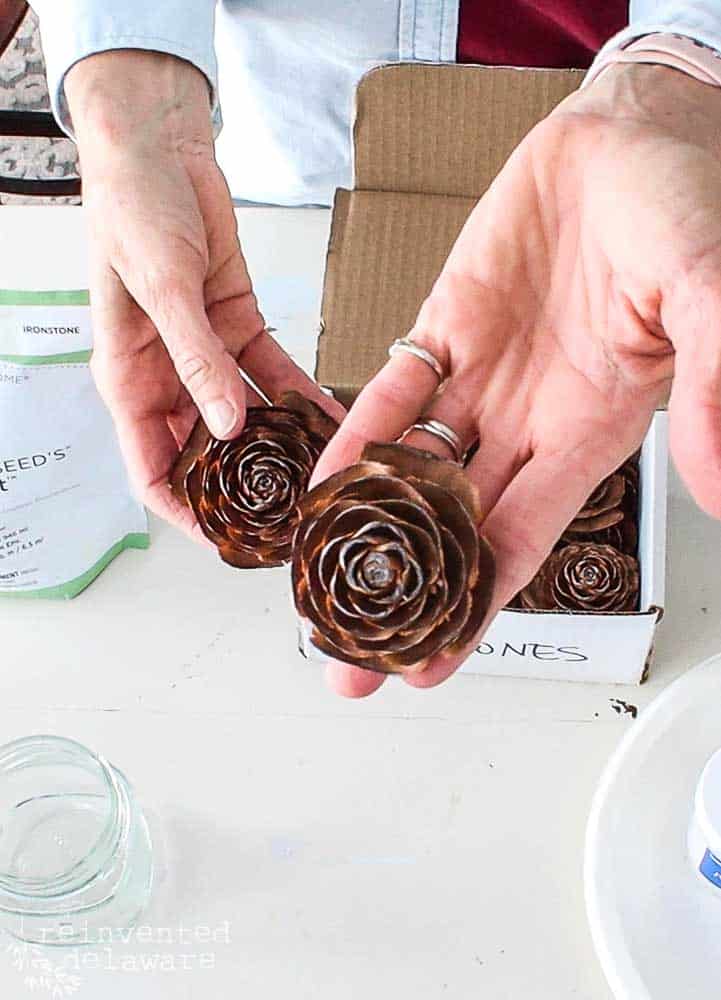
You might have a hard time finding them in your area but I found some on Etsy and they arrived at house within the week after ordering them!
gorgeous rose pine cones
The first step to jazz up these gorgeous natural elements is to lightly paint them. I used Miss Mustard Seed’s Milk Paint in Ironstone. Hindsight, I would have used a truer white like Farmhouse White paint so they would have extra pop.
Painting anything in my craft room is such a fun way to spend the day! When they were all finished, I allowed them to dry.
Meanwhile, I removed the faux greenery from the last time I gave this simple twig wreath a makeover. Then I noticed some of the branch bundles had bare spots.
So I did the same thing I mentioned earlier when making your own twig wreath, I gathered branches from my yard!
upcycled twig wreath
All I needed to do was to fill in the gaps with small branches I cut from our Leyland Cypress trees. I didn’t even have to pull out my hot glue gun! All I had to do was push the thin branches into the twig bundles that were already there!

Now back to the adorable rose pine cones. Milk paint dries really fast so the pine cones were ready to get their sparkly on!
add glitter to natural elements
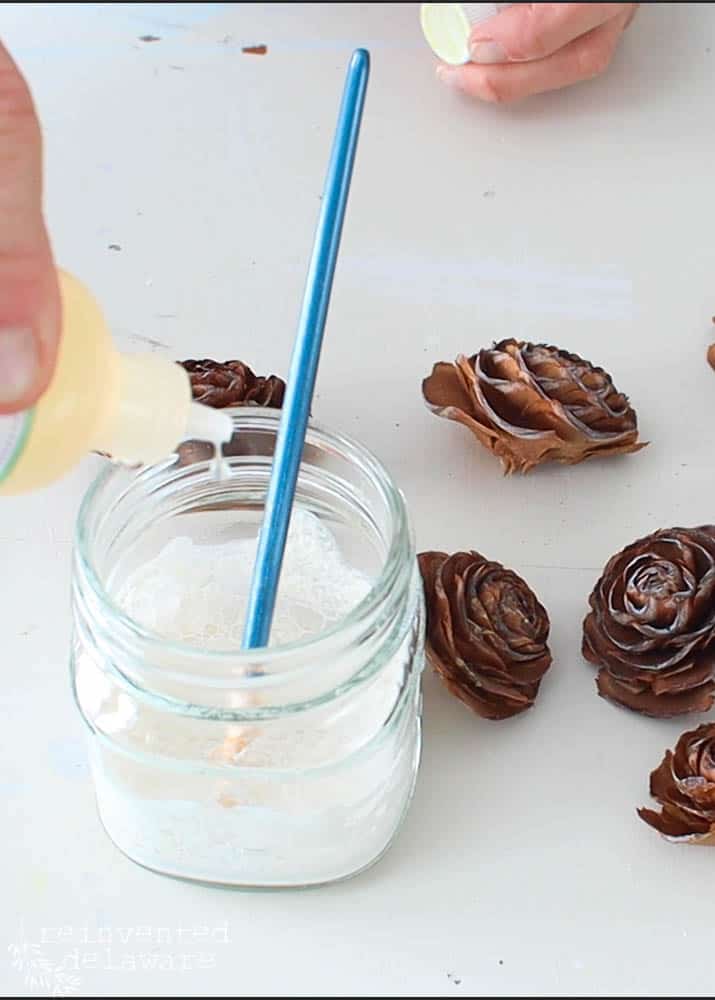
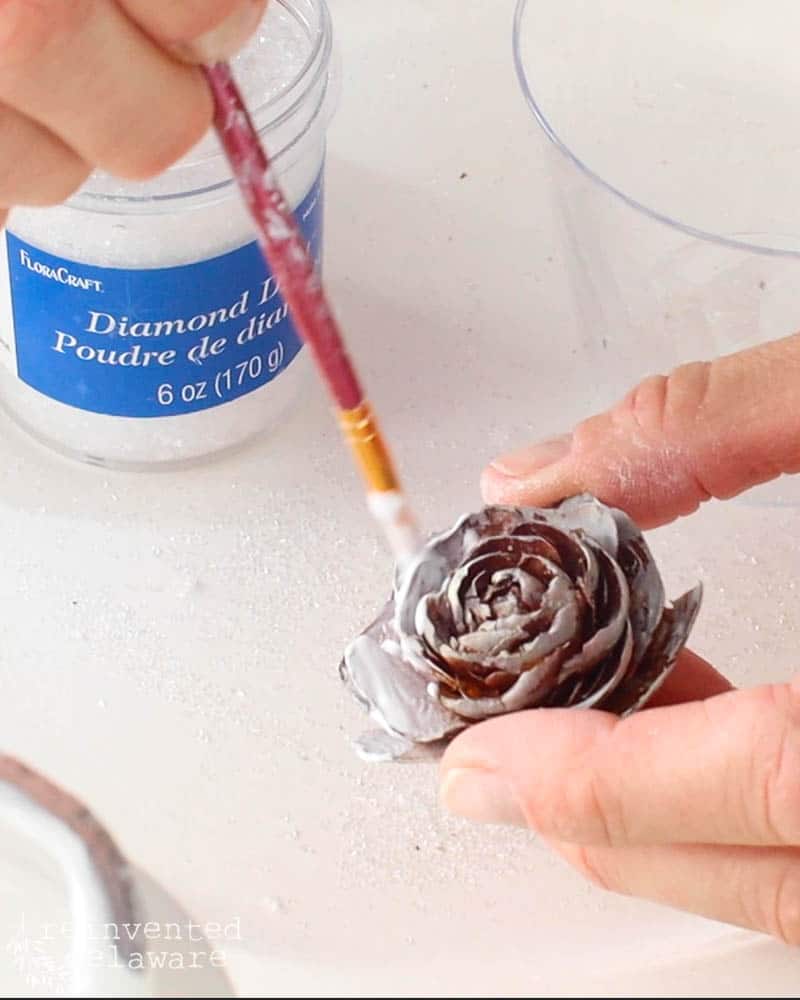
I applied Mod Podge Outdoor (just for added strength) liberally to the edges and a bit on the interior of the ‘petals’ of the pine cones.
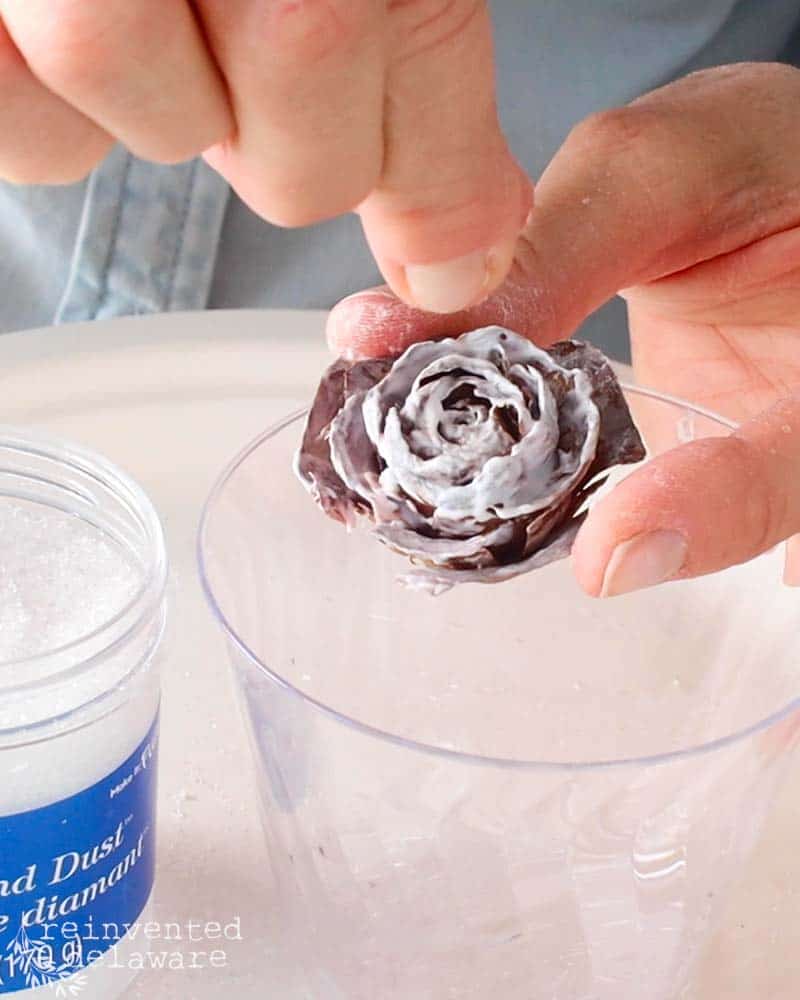
Then I held the pine cone over a small cup and sprinkled the glass glitter (Diamond Dust) over it. In fact, it was sorta like sprinkling salt while I am cooking dinner!
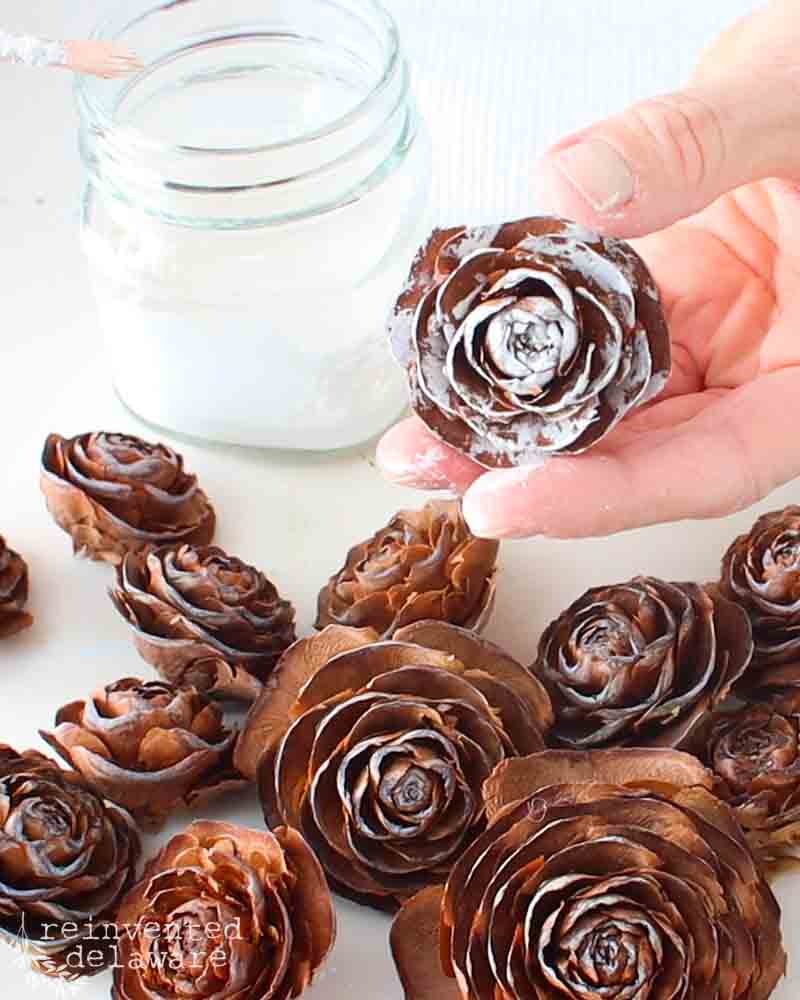
Then I laid the pine cones in a safe spot to dry overnight. The next day, I turned the pine cones over the cup to catch any loose glass glitter.
The glass glitter part of this whole craft project was the most fun! There is something festive about glitter and this glass glitter has extra sparkle.
I should mention, some Amazon reviews stated that they got glass splinters when using this Diamond Dust. But I didn’t get one little cut or splinter from making these gorgeous sparkly pine cones!
It’s probably not smart to do this project around young children so be sure to use some common sense with this craft supply!
rustic twig wreath with elegance
The look of the twig wreath was lovely but I wanted to add some natural color. So I headed back out to our Leyland Cypress trees and grabbed some fresh greenery. I’ve used this greenery for years when decorating our home and it really lasts a long time – several weeks in fact!
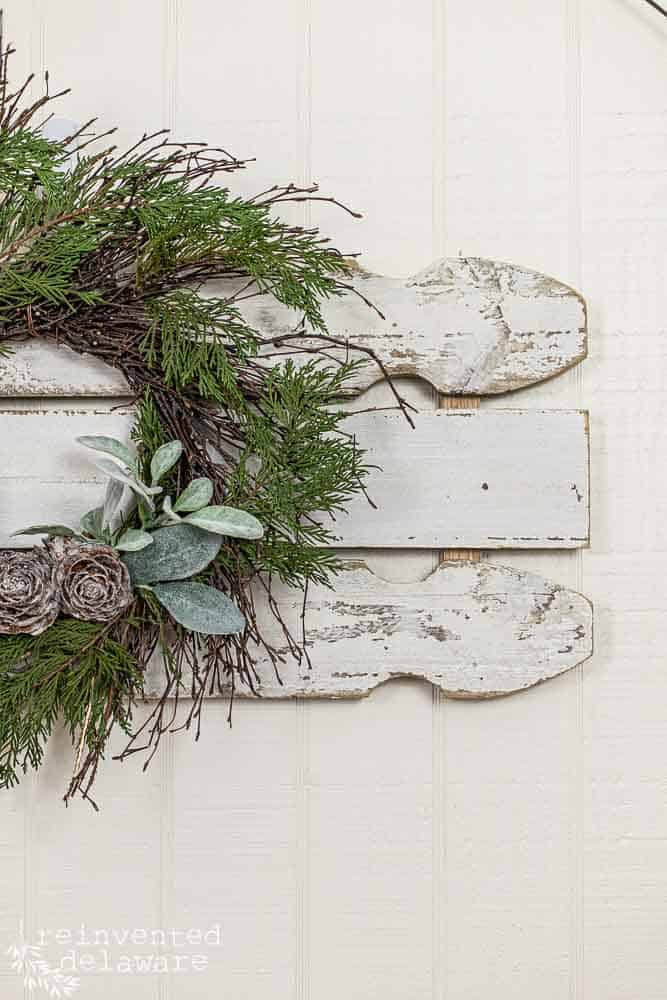
It was easy to secure the greenery to the twig wreath. All I did was wrap florist’s wire around the greenery and then secured it to the twig wreath! I repeated until the wreath was filled with the look I wanted, which was loose and sparse, and perfectly imperfect!
The pine cones were so sparkly and so pretty I knew I would want to use them from year to year in other makeover. So I didn’t want to use the hot glue gun to attach them to the twig wreath.

easy DIY Christmas home decor
So I came up with the idea of inserting some of the brown craft wire into the hole that was in the back of each pine cone. A bit of hot glue in the hole was just enough to hold the folded end of a long piece of wire.
Then I could attach the pine cones by wrapping the wire around the wreath form and twisting it on the back of the outer ring of the wreath.
I also added some additional greenery for another layer of texture to the wreath. You’ll have to watch the YouTube video below to see the epic fail I had with this step!
No worries, I figured out a different way to add the greenery. Sometimes craft projects don’t work out as planned!

DIY twig wreath for the winter season
The last step was to make a hanging loop. I used a long piece of wire and then made a simple loop. If you do this type of hanger, make sure your measure where you want to hang this wreath.
For now, my wreath is hanging in my craft room but I also tested it out in our dining room. It might end up on our front door since our front porch is covered.

Don’t you love this glass glitter on these adorable rose pine cones? They almost look like fake snow, don’t you think? I can’t wait to find other Christmas home decor pieces to use the glass glitter Diamond Dust on!
What project could you use this glass glitter on? Let me know in the comments below!
What do you think of this elegant wreath that also has a rustic look to it? I love it when two opposites like elegance and rustic come together in perfect harmony like this! The sparkly pine cones add a touch of elegance to the look of twig wreaths like this one.

YouTube video tutorial
This wreath has a high-end look without the high-end price! If you have some simple craft supplies on hand, a tree or shrub in your yard, and a little imagination, just think of the beautiful home decor pieces you could come up with like this beautiful DIY twig wreath with sparkly pine cones!
Remember I had a little mishap with the greenery part of this tutorial?
You can see the mishap I had when I made this natural twig wreath. Just click the image or button below to watch the YouTube video I made for you!


Thanks for joining our journey!
Thanks so much for joining us for this post! Join our journey so you don’t miss any of the fun projects, tutorials, and inspiration that we share with you each week! You can follow us on Instagram, Facebook, and YouTube. We share even more inspiration on Pinterest!
use code: 10OFFRD at checkout and save 10%!
Visit my Amazon Storefront!
Click the button below and head over to our online shop on Amazon!


Welcome Home Saturday

This week I was invited to join a lovely group of bloggers in their weekly Welcome Home Saturday Home Decor Digest! Thanks so much ladies for the invitation and for sharing your amazing talents with the world!
White Arrows Home / Welcome All Hearts Home for Christmas

She Gave it a Go / Christmas Home Tour 2022

The Tattered Pew / Our Red and Green Christmas Home tour

tatertots & jello / 15 Themed Christmas Decorating Ideas

Reinvented Delaware / How to Make a Twig Wreath With Sparkly Pinecones


This is so pretty Cindy. I had never heard of rose pine cones but now I am on the lookout for some. Thanks for the inspiration!
Aren’t the rose pine cones so pretty? I’ve linked them in the supplies list near the top of the post if you want to use them for one of your projects! 😊
LOVE the twiggy wreath. Guess I need to walk the fence row for some supplies. 😊Thanks for sharing 😘 pinned!
Thanks, Do! Have fun making one for your home 😊
Oh I love love this wreath. I think I bought the diamond glitter last year to doll up my ugly ornaments. I plan on making this with my DIL. Thank you for your tutorial. 😉 Cindy
You’ll have fun making this and spending time with your DIL 😊 Thanks for stopping by!
You have been killing it in the wreath department lately, Cindy! Wow, this one is so pretty. I’ve never seen rose pinecones like that before – they are totally gorgeous. Loving and pinning as always sweet friend. Can’t wait to see what you have in store this season, CoCo
I’m crazy over the rose pine cones too CoCo. They are so unique. Thanks for stopping by – your encouragement always brightens my day! 😊
Hi Cindy! I love this idea! Those rose pine cones are fabulous. The glass glitter adds the perfect amount of sparkle.
Thanks, Anna! I’m looking for more project to for the glass glitter – it’s so pretty!
Wow, Cindy!! This wreath is gorgeous! Those rose pinecones are incredible…I’ve never seen them before!! I love the simple sparkles on it too!
I’m crazy about the pine cones too!
Oh, my goodness! This is such a good idea. You know I love a good foraging adventure — especially with beautiful results.
This is so pretty, Cindy! I’d never heard of rose pine cones, but they are fabulous…now I’ve got to find some!
Hi Janet! You’ll love making projects with these rose pinecones!
Hey Cindy!
I just wanted to pop by to let you know that I will be featuring this wreath at the Home Imagined link party next Tuesday!! I just love it!