
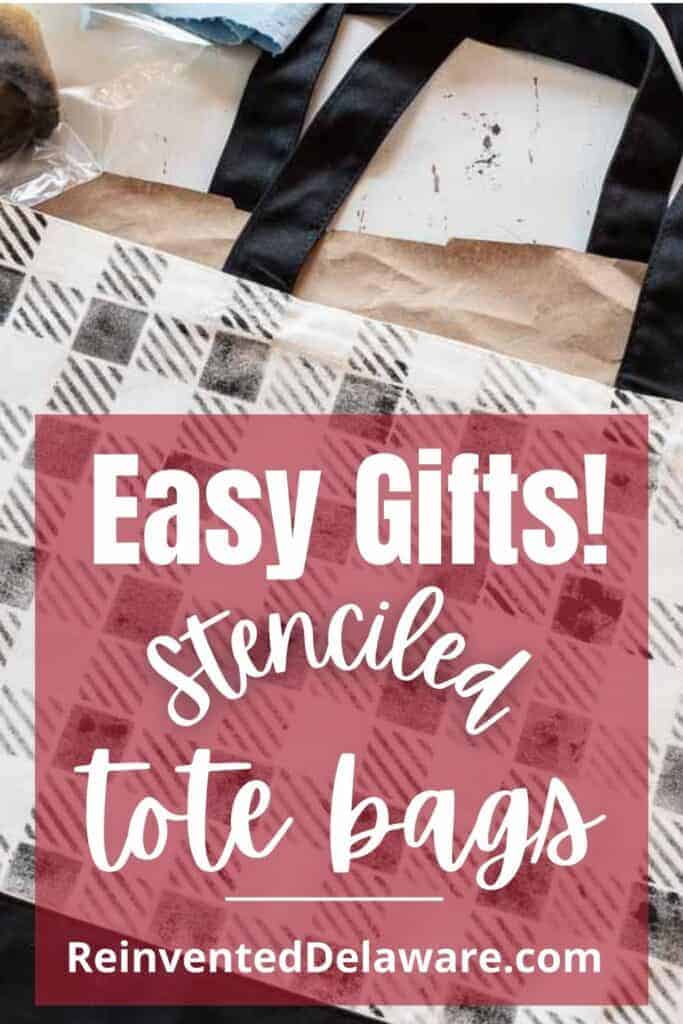
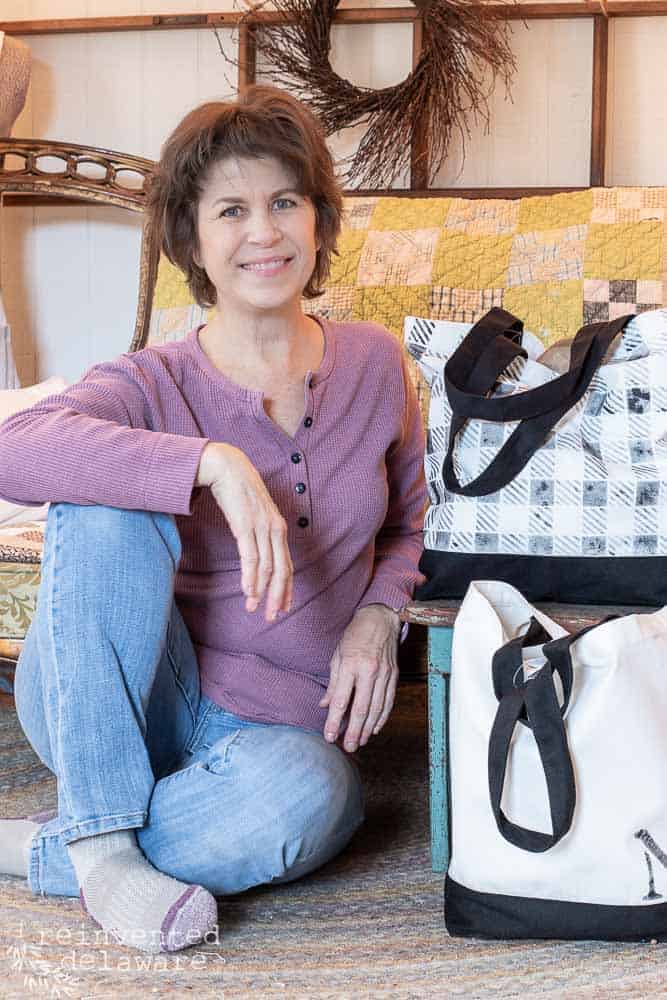
Fabric Stencils with Dixie Belle | Tote Bags
You won’t believe how cute this tote bag turns out after using fabric stencils with Dixie Belle Chalk Mineral paint! And it’s a fun project too!
The following post may contain affiliate links. That means if you click and then buy something, I will make a small commission at no additional cost to you! Thank you for supporting my blog. full disclosure here.
how to stencil on fabric
Stenciling on fabric is so easy! Especially when you use quality paint that has some body to it. Dixie Belle is just that paint.
If you use paint that is too thin, it will run underneath the stencil and create a mess. Take my word for it!
Dixie Belle is the perfect thickness for fabric stenciling. Plus they have the cutest stencils! Like this Buffalo Check stencil.
Omgoodness, I am getting ahead of myself. I’m just so excited to show you this easy fabric stenciled project!
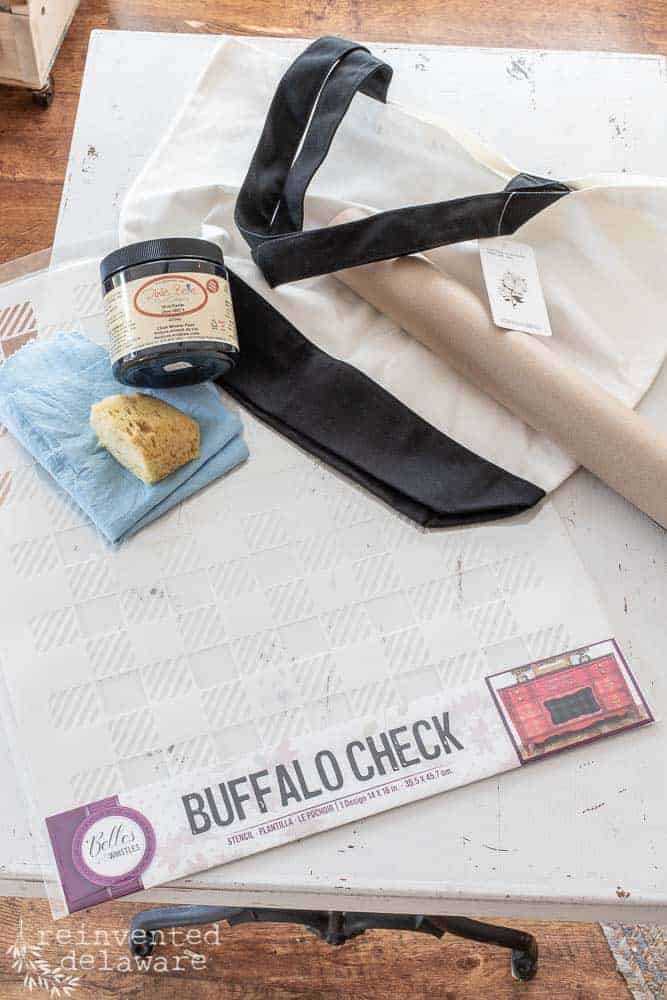
Let’s talk supplies first. You only need a few supplies and you might have some of them on hand.
The tote bag is one of the most important supplies. You want a quality tote bag that is made of durable canvas and is cotton. The cotton fabric will soak up the paint, whereas polyester could repel the paint.
Dixie Belle adheres very well to surfaces but let’s play it safe and use a cotton canvas tote bag. 😊
list of supplies:
- canvas tote bag (the ones I used are of amazing quality!)
- sponge
- blue shop towels
- craft paper roll
- iron (this is the iron I have and it’s the best!)
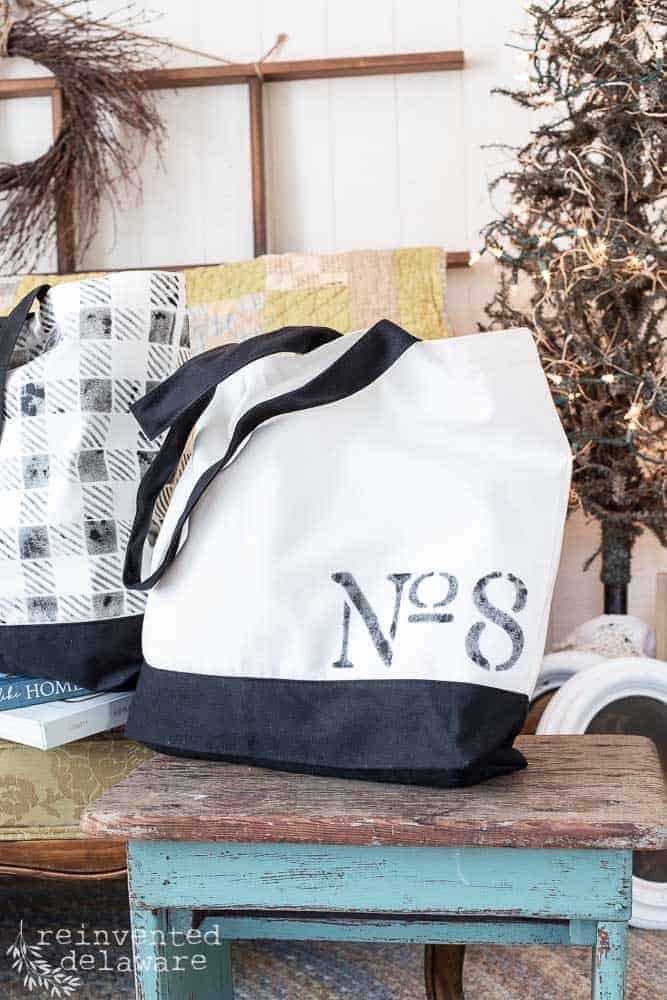
- stencil with numbers
Use the links below to purchase some of the supplies for this project! You are helping to support this blog and all the free tutorials we offer here! Thanks so much!😊
Dixie Belle supplies
prep the tote bag
Start off at the ironing board and iron the side seams to one side. Most tote bags are manufactured quickly and time isn’t taken to properly iron the seams. It’s best to iron them flat and towards one side before you begin to stencil the fabric.
You don’t want any pleats on the sides of the tote bag!
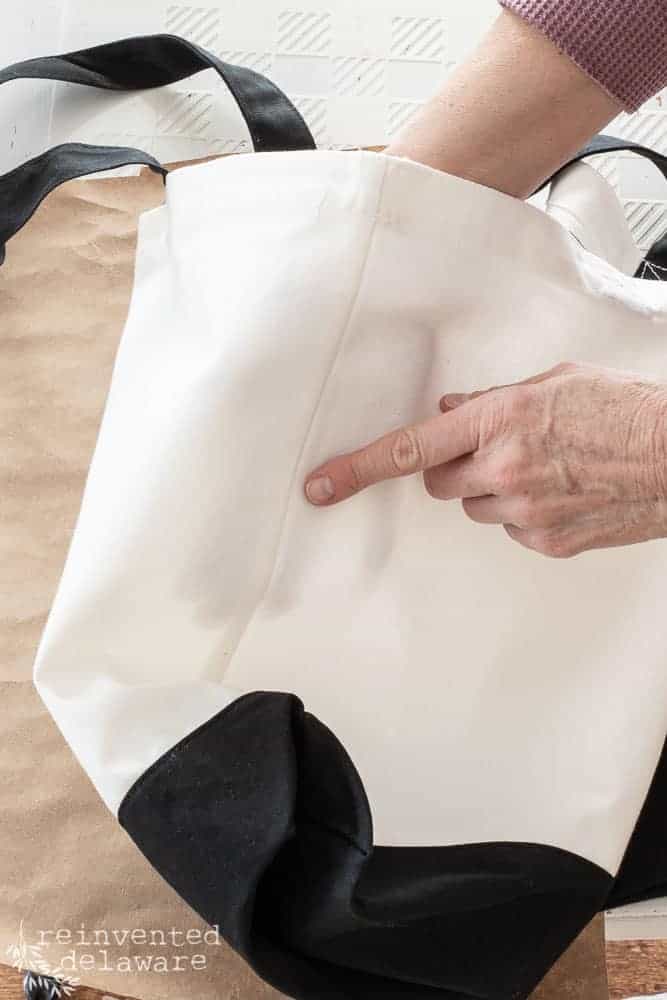
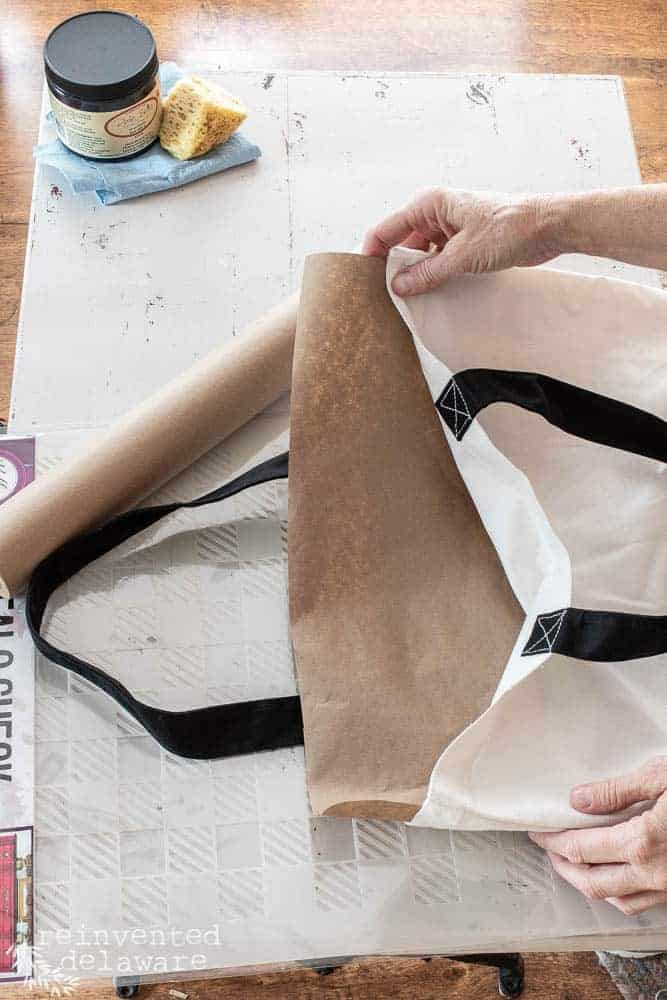
Next, cut off a piece of the brown craft paper and slip it between the layers of the tote bag. This will prevent any possible bleed-through of the paint.
I didn’t have any problems with bleed-through because the paint is thick but it’s always better to be safe than sorry!
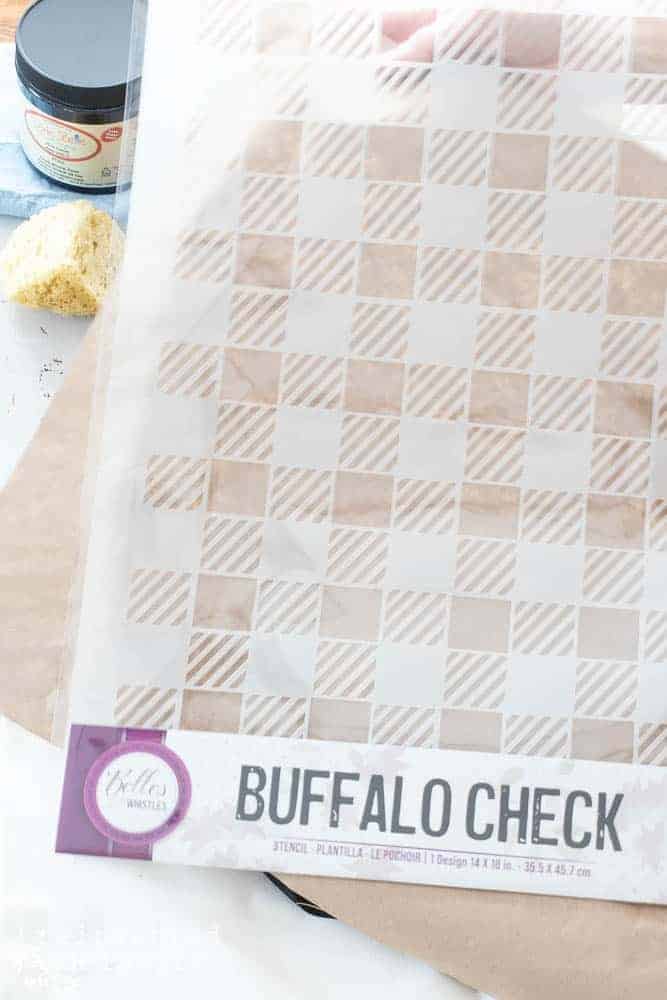
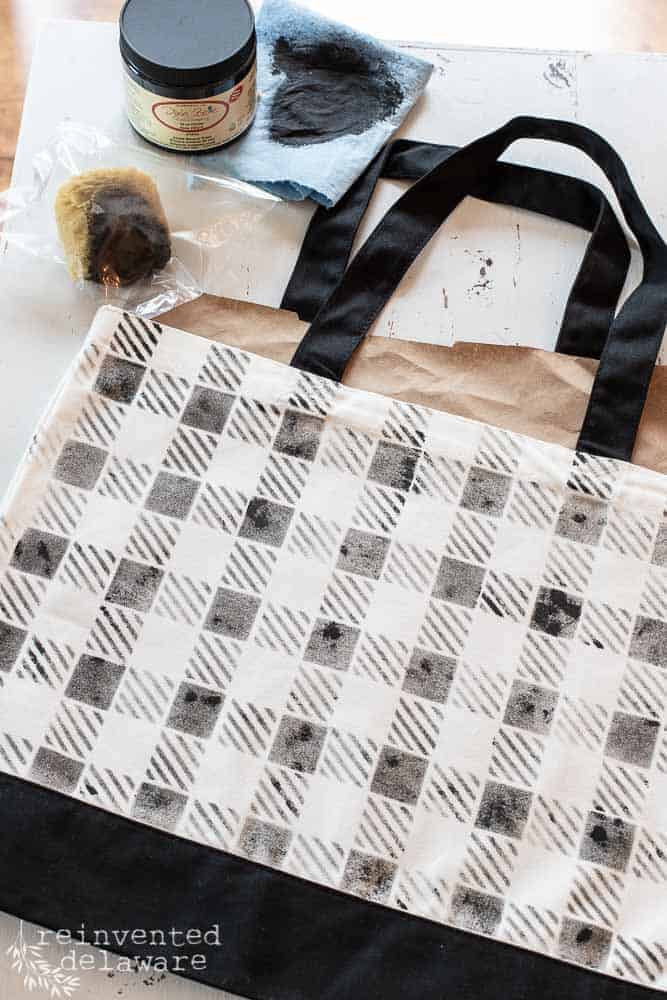
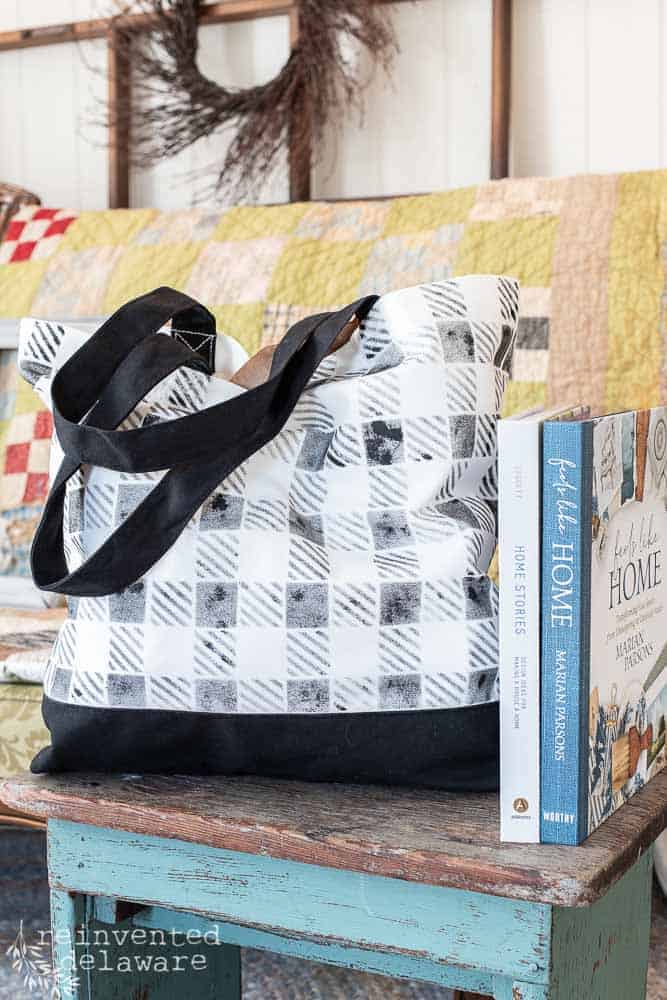
Look at that gorgeous stencil!! It’s called Buffalo Check and is THE PERFECT SIZE for the tote bag I told you about!.
You will get more use out of this Dixie Belle stencil, I have some more ideas in my mind to use it and I will be sure to share those ideas and projects with you when the time comes! 😊
stencil on fabric
Before you begin to stencil on the fabric, lay out the stencil to see how it will fit on the tote bag. I chose to line up the stencil squares with the top edge of the tote bag.
I also allowed some of the stencil to extend past the side seam of the tote bag. The plan is to wrap the stenciled design around the sides to the other side.
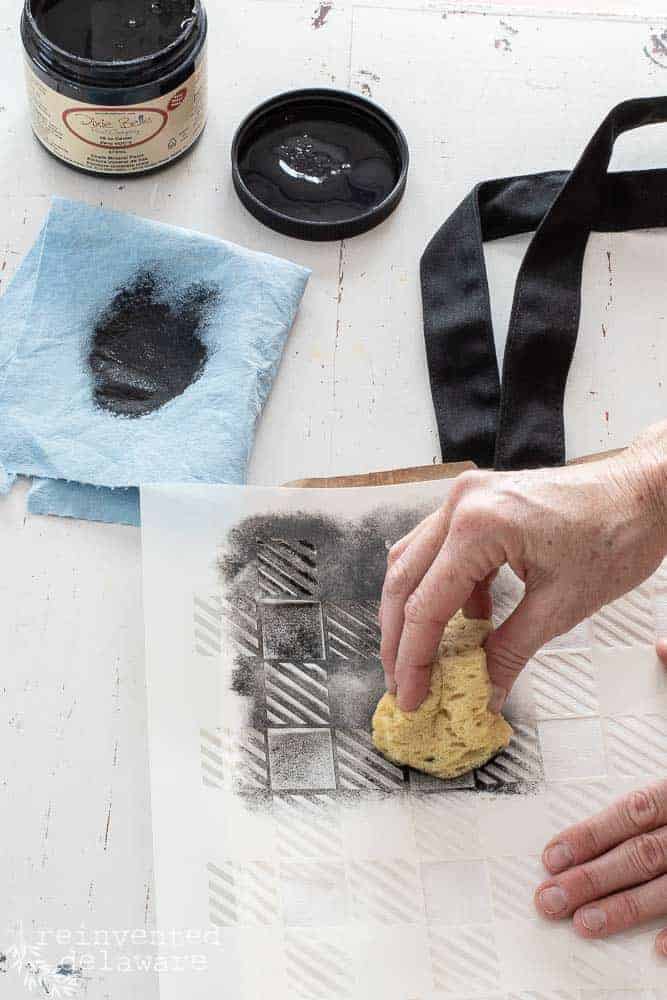
After shaking the paint up really well, with the lid extra tight of course!, I used the lid to lightly dab the sponge into the paint and then off-load most of the paint on the blue shop towel.
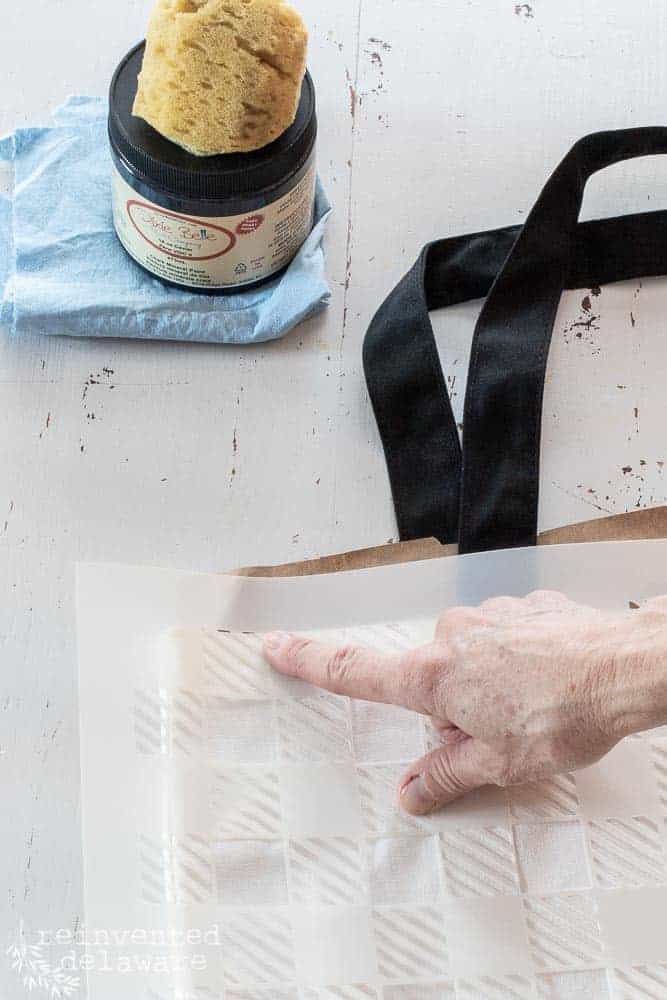
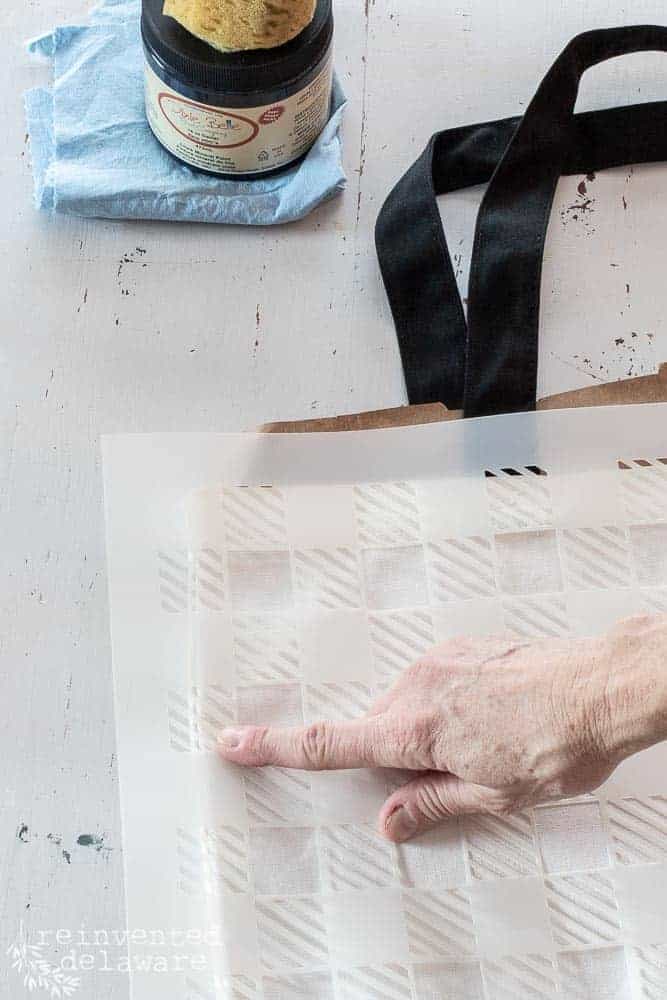
Stenciling on fabric works best if you use a dry-sponge technique. The great thing about stenciling fabric is that you can build up layers of paint to create the depth of color you desire.
You can see that I deliberately didn’t fill in all of the open areas on the stencil with paint. I wanted the vintage and worn look and I created that by applying the paint unevenly across the tote bag.
You’ll see more of the dry-sponge technique on the YouTube video I have for you further down in this post.
fabric stenciling techniques
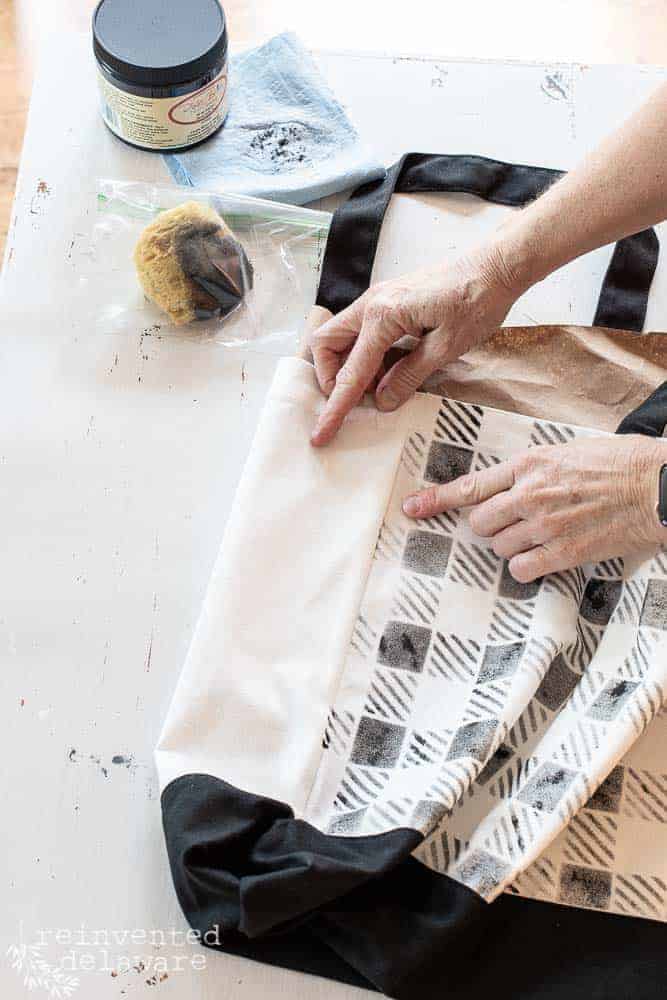
You can see in the image below that I stenciled up to the side seam and not beyond. I allowed the first side of the stenciled fabric to dry completely before stenciling the other side.
The paint needs a minimum of 30-40 minutes to dry depending on the temperatures and even the precipitation.
So, it was a good time to have lunch! I had my typical romaine, blueberries, almond slices, and avocado with Olive Garden dressing over it. Such a good lunch!
I also washed the stencil in my kitchen sink so that the paint would not harden on the stencil while the tote bag was drying and I was devouring my salad!
You’ll see how easy the stencil is to clean in the video. It’s soooo easy to clean Dixie Belle stencils!
plan for the end
Wow, that sounds serious!! 😉
In other words, plan for the end of the stenciling – the spot where the end meets the beginning!
Once the first side is dried you can do the second side. I stenciled the other side up to the point of the side seams. The first side seam I came to work out almost perfectly as far as matching the pattern.
The second seam area had to be finessed just a bit. After thinking it through before I started to stencil, I realized I would need to mask off some of the stencils so that I wouldn’t accidentally stencil over top of what was previously stenciled.
It’s harder to explain than it is to do. You’ll figure it out! I have confidence in you!

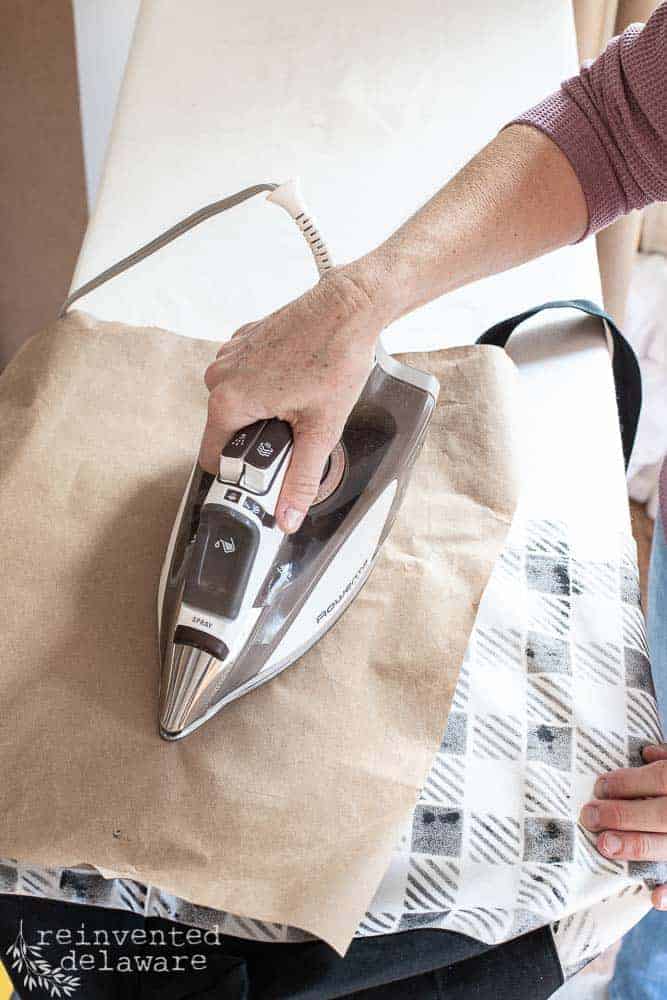
heat set the paint
From what I have read, Dixie Belle Chalk Mineral Paint does not need to be heat set. But I must admit, I am old-school and I have heat set other fabric painted projects.
So you guessed it, I pulled out the iron!
The brown craft paper that I used came in handy when I needed to protect the painted fabric from the direct heat of the iron. The iron is turned on high (because I am impatient and fast with the iron 😉.)
Speaking of irons, the Rowenta iron that I have is really the best iron I have ever had.
And I have had many irons in the 49 years I have been sewing! My Rowenta heats up so well and puts out a lot of steam, and I mean a lot! The steam button is my friend!
YouTube Video
Here is a video of the fabric stenciling that I did on these tote bags.
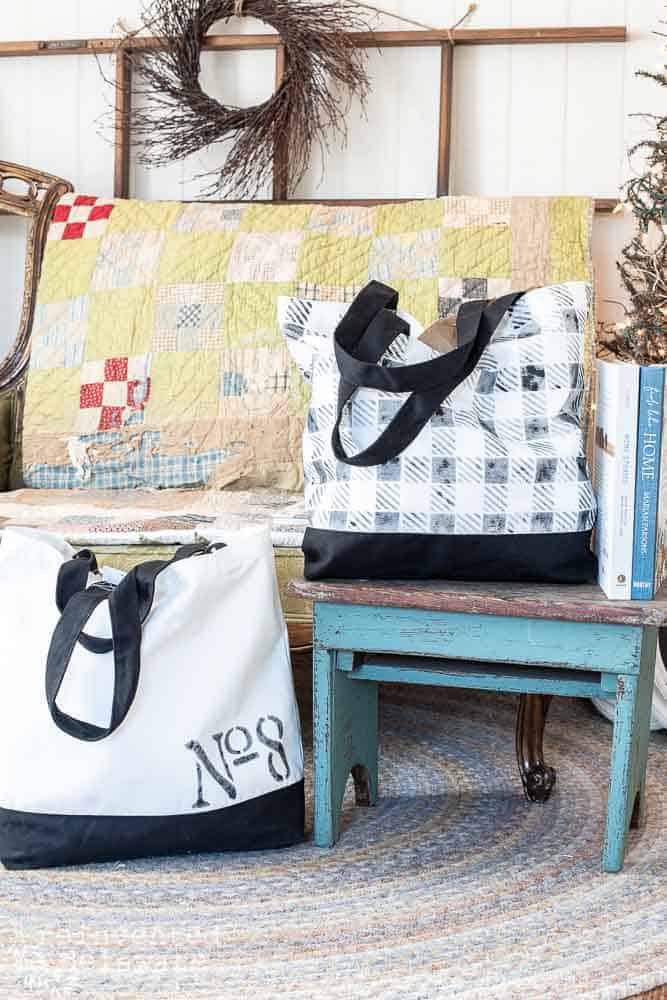
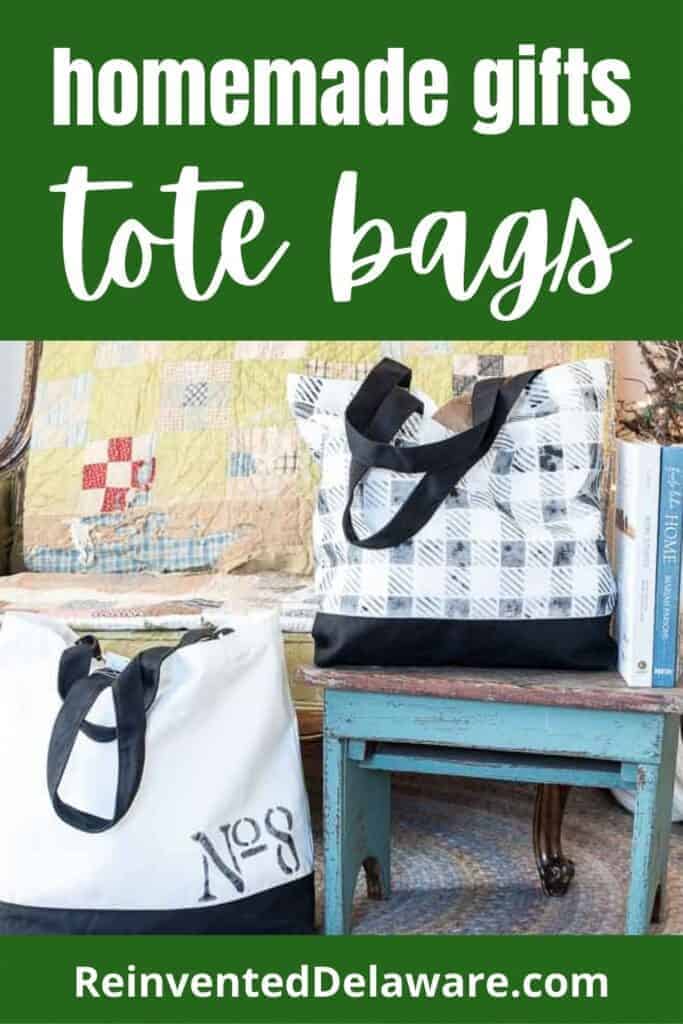
Yes, you read that right! I made two different tote bags!!
The second one is just as cute as the first.
homemade gift ideas
See what I mean?? Can you choose which is your favorite? I mean, really, they are both adorable!
Let’s think of some people in your life who would love a bag like either one of these! I know I have several people who would love one. And since they are so easy and fast to make (and inexpensive to boot!) you could whip up several in one weekend!
Ok, let’s get our thinking caps on and think of all the people in your life who could use one of these bags!
- your child’s teachers
- your girlfriends
- your mom or mom-in-law
- your crafty friend who loves to knit
- your babysitter
- your co-workers
- your neighbor who is a nurse
See what I mean??? Certainly, the list of the ones who could use a bag like this is endless!
And here’s the best part about these amazing heavy-duty canvas tote bags: they are only $8 bucks each!! Seriously, you would pay a lot more for a bag that looks like this in a shop – at least $25!
The ladies in your life will be so impressed with you!!
more inspiring posts!
If you are looking for another project to stencil on, you will love these easy envelope-style drop cloth pillow covers. Just make the pillow covers and stencil the fabric!
And you have to check out the image on the right – you will see just how versatile and easy Dixie Belle paint is to use!!
Click either image to head over to the posts!
let’s chat about it!
So, what do you think of these adorable handmade-with-love stenciled fabric tote bags? Fun for you to make and fun for the receiver to use!
Let me know what you think of this project in the comments. What would you use this fabric stenciled tote bag for? Groceries? Library books? Beach supplies? Tell me in the comments! I would love to know!

Pin the image below to your gift ideas boards or easy project boards! Your friends need to know about this DIY project😊 Just click the pin button at the top left corner!
Thanks for joining our journey!
Thanks so much for joining us for this post! Join our journey so you don’t miss any fun projects, tutorials, and inspiration we share with you each week! You can follow us on Instagram, Facebook, and YouTube. We share even more inspiration on Pinterest!
Until next time…
The bag is adorable! That’s one of my favorite stencils too. Thanks for sharing. Pinned! xo 😘
Thanks, Do! That stencil is so easy to use!
Cindy, you come up with the best projects! I would never have thought to stencil a bag, and my favorite thing it that you are always so conscientious when you explain things, the side of the bag would have stumped me! Have a wonderful week,
Thank you for the kind words Elizabeth! I try hard to be thorough 😊
I am such a tote bag fan! Love the stencils and great to know that Dixie Belle paint is perfect to use. Pinned!
Dixie Belle is so versatile! Thanks for stopping by Leslie!😊
What adorable bags! These are easy to make and would make wonderful gifts! Thanks for sharing!
Wouldn’t they make great gifts for so many peeps in our lives?? Thanks for stopping by Kim!😊
I love this tote! What a great gift idea, I have pinned for later. 🙂
I love the look of your totes and they definitely would make a great gift.
Thank you! I appreciate the encouragment!
Amazing project. I love both stencils. Pinned!
Stenciling is fun, isn’t it? Thanks for pinning!😊
I watched your video on Youtube and loved this project. These really make such great gift ideas for Christmas.
Thanks for watching the YouTube video! It was a fun project that I am sure I will do again! 😊
Amazing! I love the bags! I can’t wait to watch your you tube now!
Thank Melba! And thanks for hopping over to YouTube!
These are great, Cindy! I just started using Dixie Belle paints and I was eager to try them on fabric. Your tutorial is so helpful! I feel ready to try it now! Thanks so much.
So glad you found it helpful! Dixie Belle is really amazing paint 😊
The pattern you chose is so cute! Definitely would make a sweet gift!
Thanks Marie! So glad you enjoyed the post!