
Easy Farmhouse Style | Lamp Makeover
Today I am sharing another quick and easy way to add the farmhouse touch to your home. One of the great things about this style of decorating is the ability to take what you already have and transform it. That is what I have been doing around my house. Fortunately, we have acquired vintage decor or vintage look a-likes over the years.
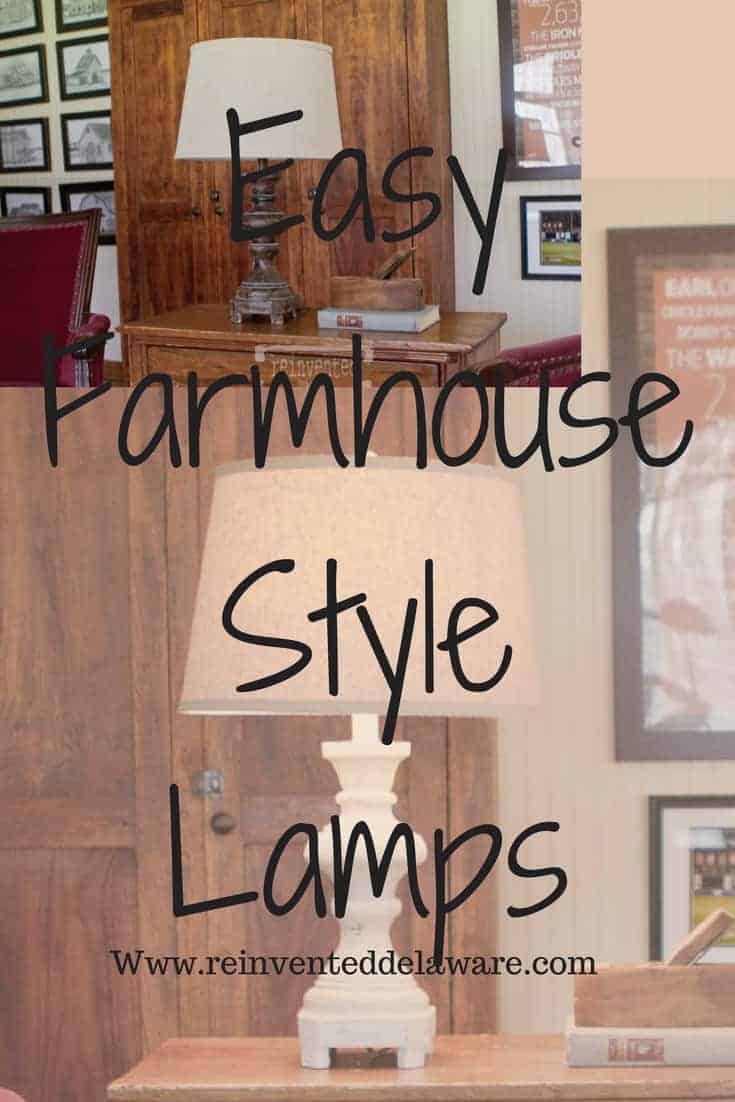
Take these lamps for example. I bought them a few years ago mostly because of the price. I love shopping at Marshalls and their sister store Home Goods because they have unique items for great prices. I usually head to the clearance section of almost all of the departments before I shop the regular priced items.
That is exactly how I found this set of lamps. I bought the pair of small ones for $49 and the larger matching lamp for $35. I could hardly believe it! What a deal especially considering that shades alone can be anywhere from $15-40 each! The shades were in a perfect neutral linen-looking color and texture so I know they would go with my destination theme for my home of neutral tones.
Let’s get into the transformation! Remove the shades and in my case the finials that hold them secure. This might seem obvious but I wanted to mention it so there is no chance of paint splatters on the shade.
Clean the lamp bases well. Remove any dust bunnies that might be under the lamp base. I speak from experience ;). If your lamp has a shiny surface, you should probably do a light sanding as well.
Don’t mind that random desk and chair in the middle of my kitchen. That is my latest project for one of my shops. I will share that transformation soon! Also see that long sign on the left hand side of the image? That is a bed rail sign hand painted with inspirational words. It would be lovely in a family gallery wall collage or atop a fireplace mantel. Distractions Cindy, let’s get back to the project!
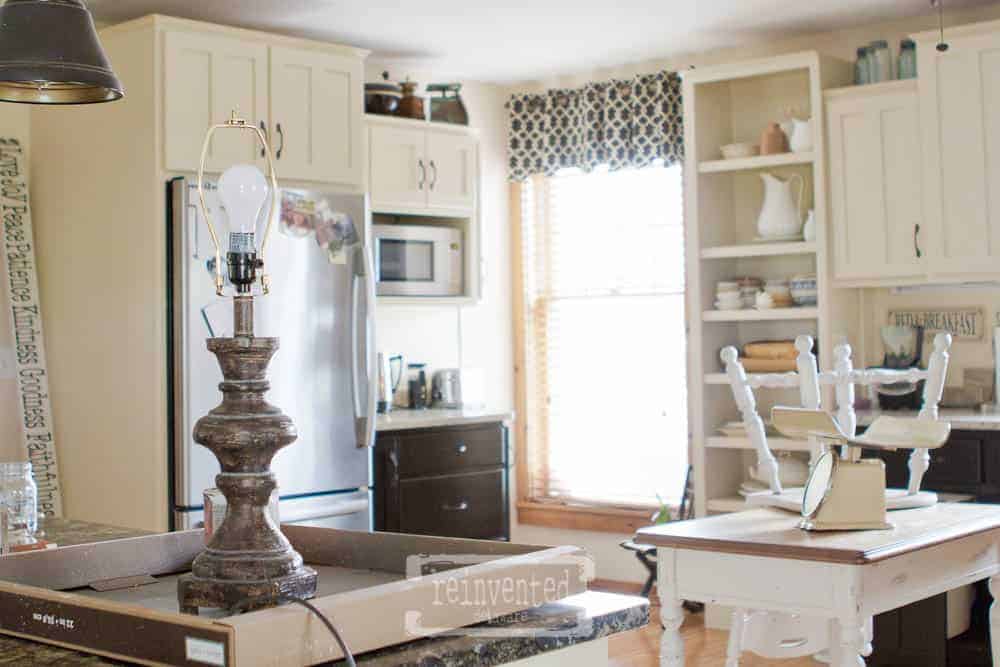
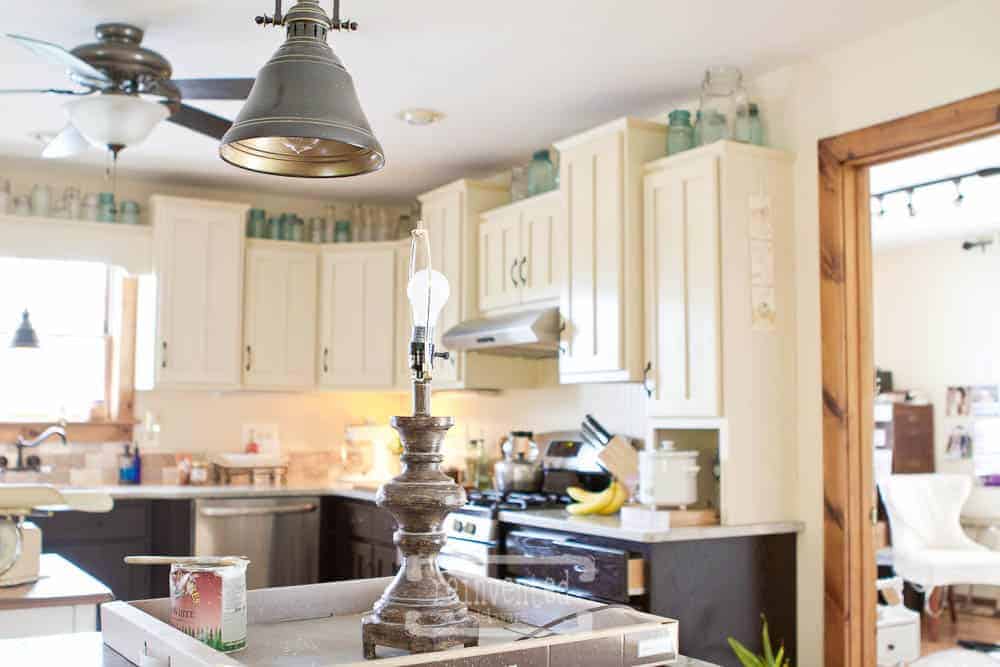
I am using my kitchen counter to do the project because there was a series on TV that I wanted to watch ;). I did lay down a nice flat box that I had from a clock purchase. If you don’t have any cardboard, a pizza box works well! Or flatten one of those Amazon boxes we all have!
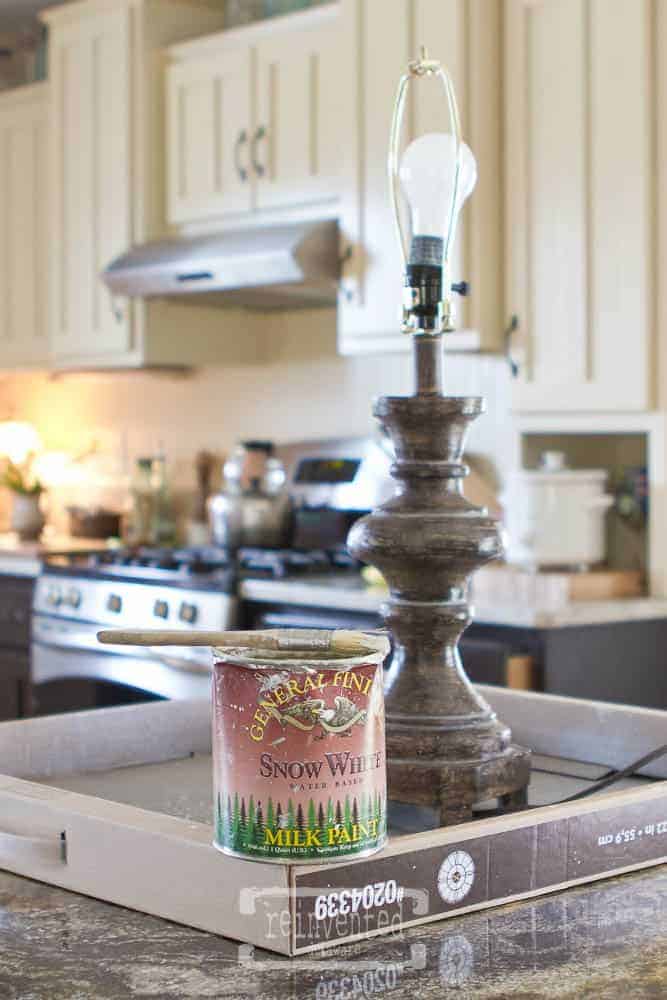
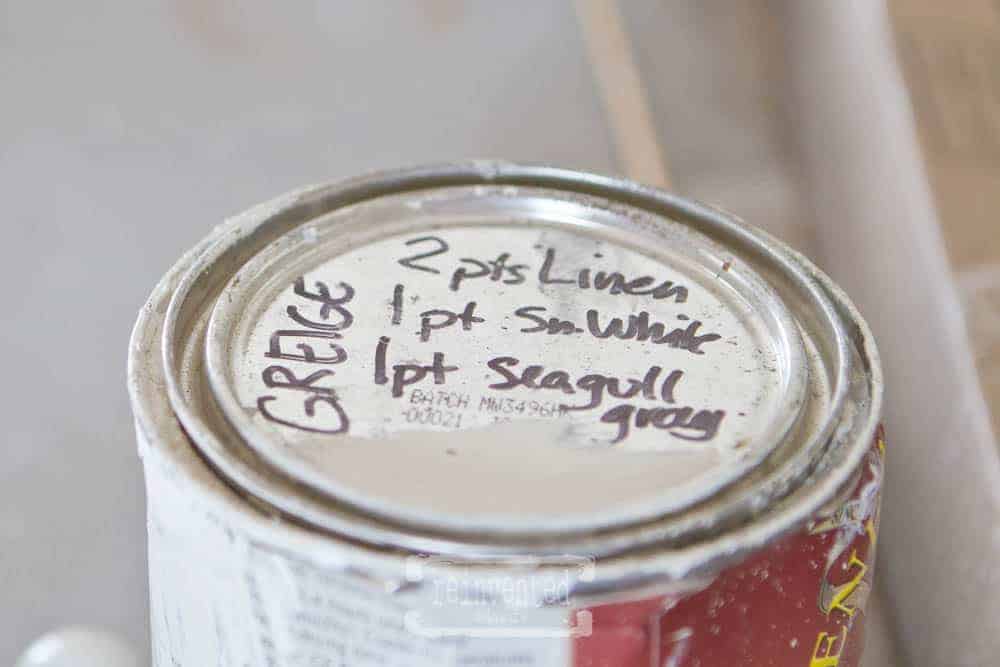
I decided on a custom mix of paint that I am loving lately. It is equal parts of General Finishes Milk Paint in Snow White, Seagull Gray and Linen. I know, I know…the lid says two parts linen and one part each of the other two colors. I need to change he lid!
Having all three tones will make these lamps fit in any decor so I love the versatility of it. I keep an ongoing mix of this custom color in a paint can marked on the top with a painted swatch. If you don’t have these exact colors, I would recommend purchasing sample sizes of similar colors in other brands. Look for a cream color, a pure white and a gray. It is an economical way to have a custom color! Walmart carries small samples for about $2 each.
You can do your own custom chalk paint with your color of choice also. I have a recipe for that here. I used General Finishes Milk Paint which has incredible sticking power. If you use a chalk paint you probably won’t have to prep the surface other than cleaning. If you are concerned that the paint will not adhere, I suggest you prime first.
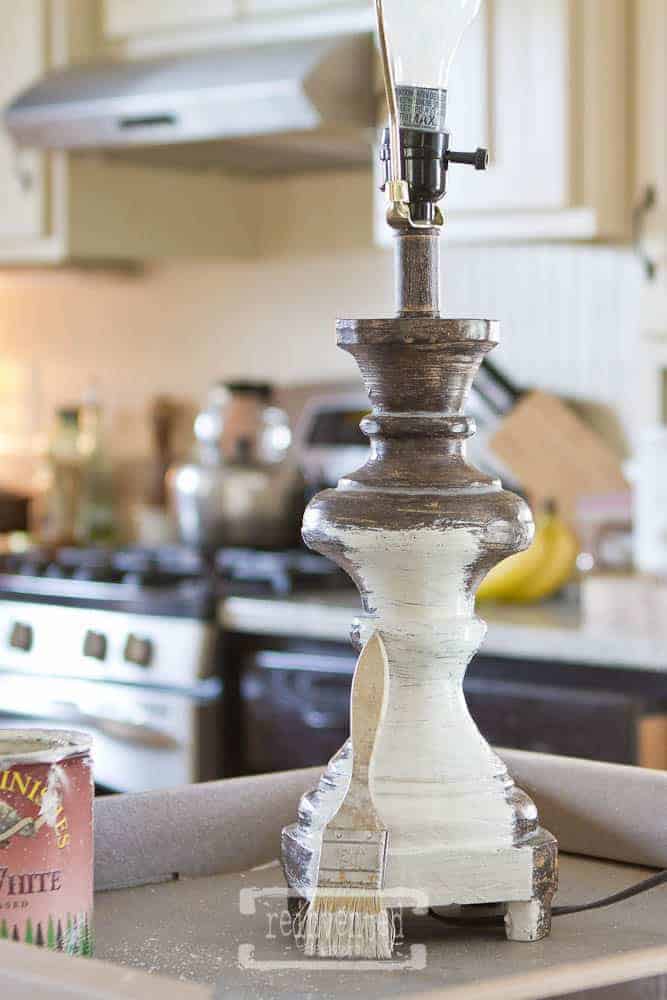
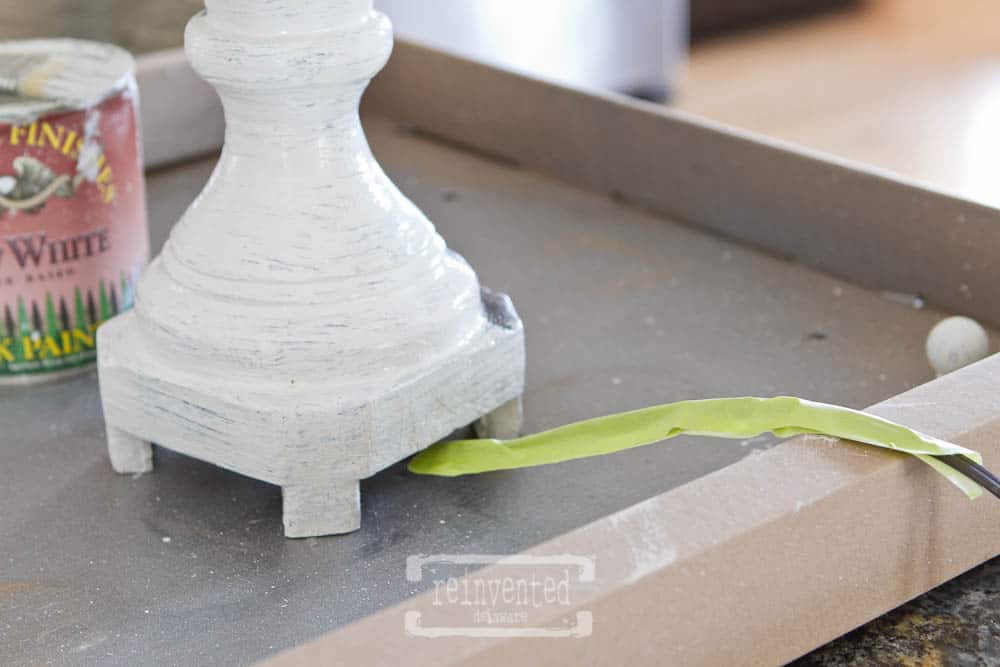
I painted the first section of the lamp when I realized I had forgotten to tape off the cord. I like to do this so that I don’t have to worry about it as I go around the lamp base with my paint brush. A painted cord will look, well let’s just say don’t get paint on the cord 🙂 Just remember maintenance is easier that repair 😉
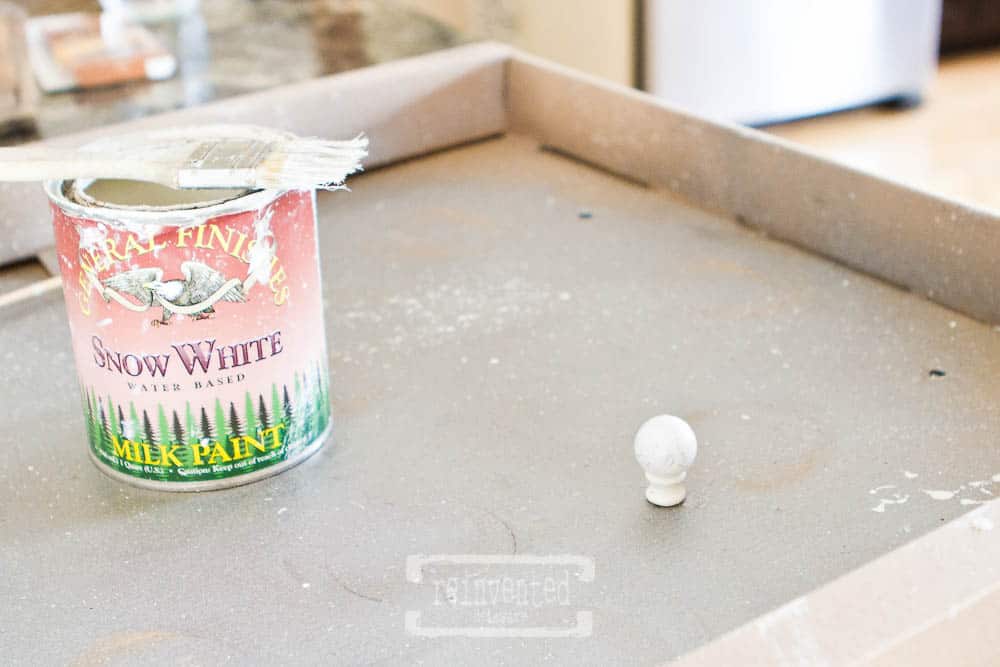
Don’t forget this little fella!
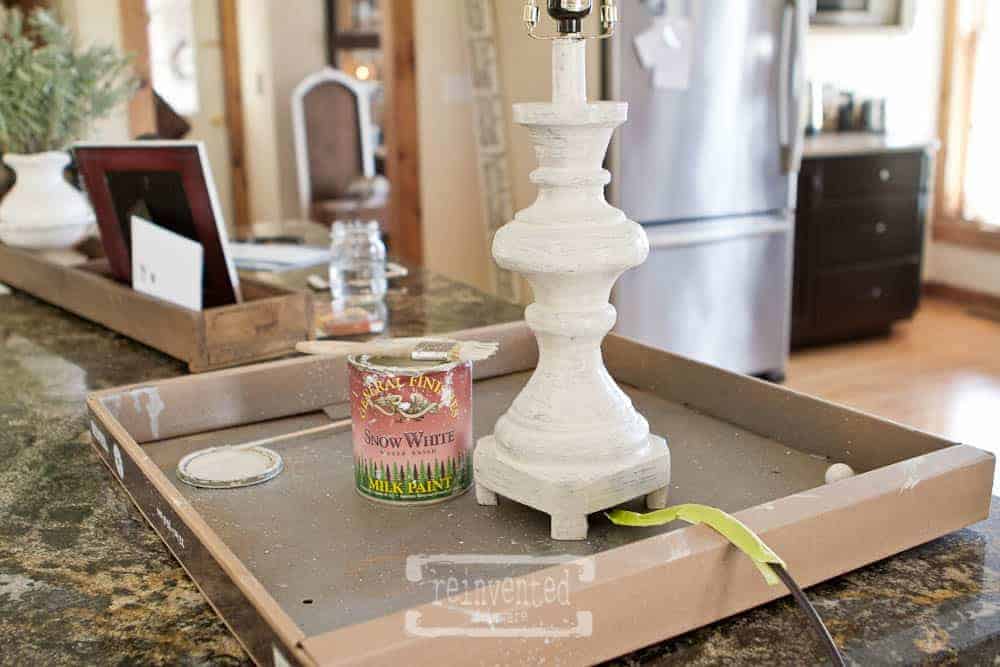
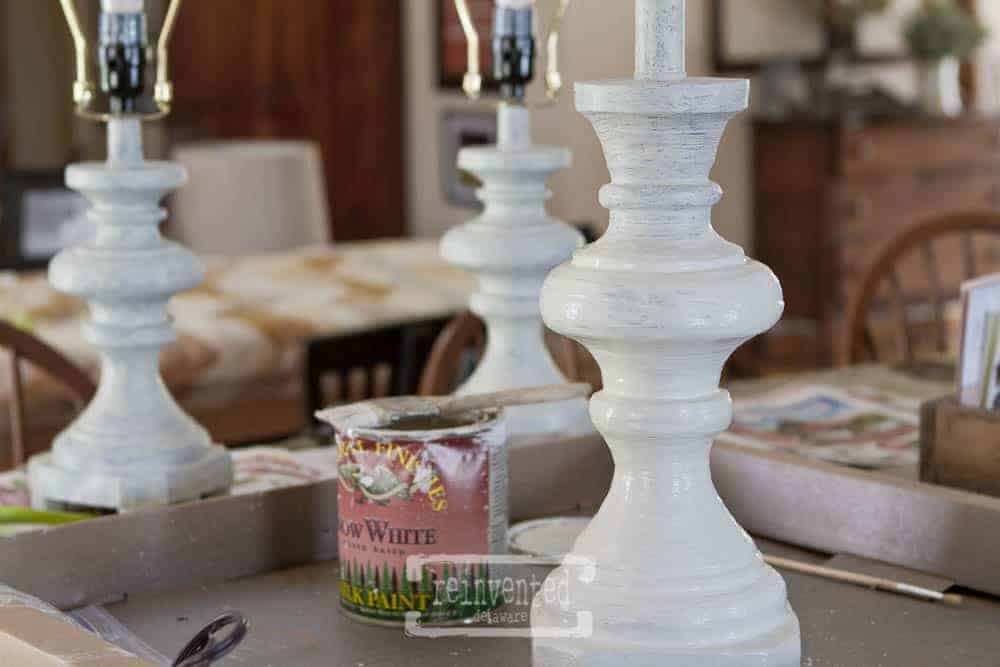
The first coat covered most of the dark brown but I decided that I wanted complete coverage so a second coat was needed.
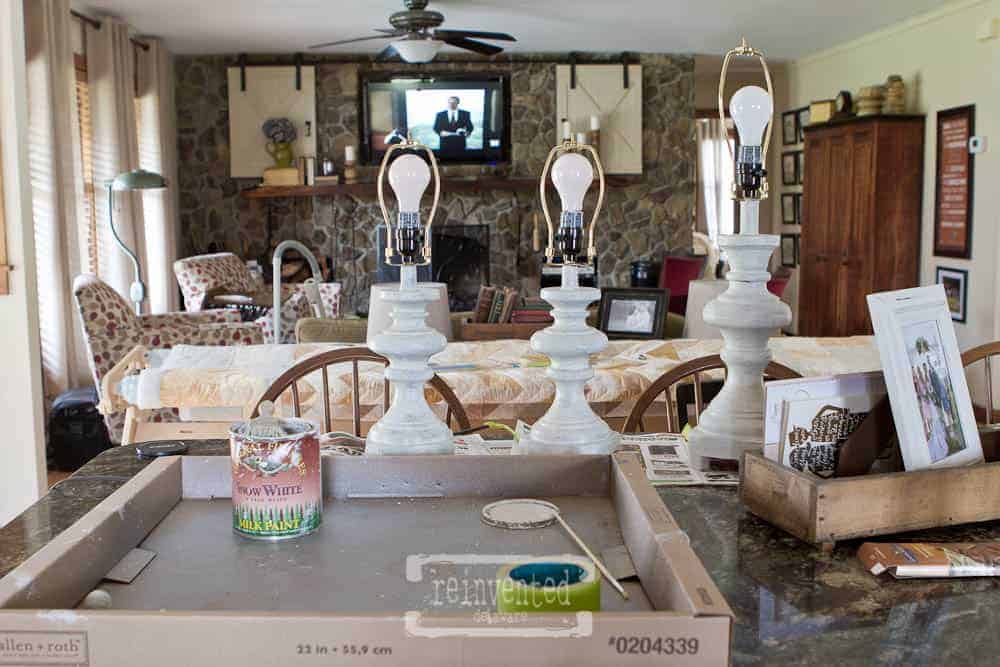
You can see the difference in the sizes of the lamps here along with my fancy set-up for TV viewing 😉
And yes that is a Ghirardelli Carmel Chocolate package on the right hand side of the image. And yes it is empty 😉
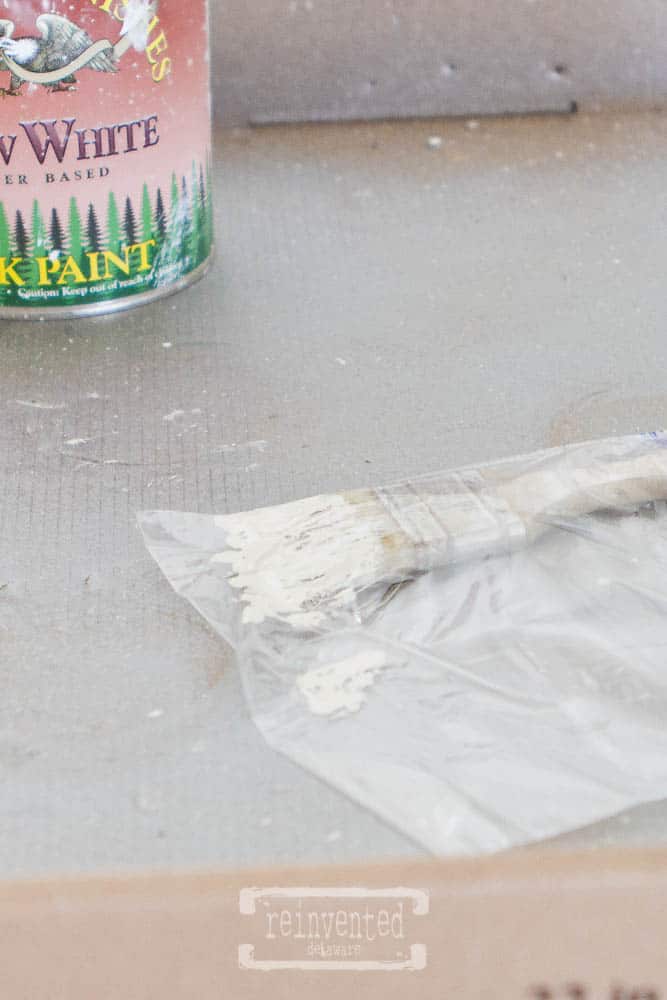
Here is a tip for any kind of painting that involves more than one layer of paint. After you get the first coat of paint on your project, get a fair amount of paint on your brush and put it in a ziploc baggie. I use the cheap brand of sandwich bags that I always have on hand. Then use your fingers and smooth out the bristles so they stick to the bag – think vacuum packed here. Zip up the bag as much as you can. The paint brush will be ready when the first coat dries and you are ready for the second coat!
You can see here the difference between the first coat on the top and the second coat on the bottom of the lamp. Two coats will do the job for me. Depending on the look you want, you could use one or two coats.
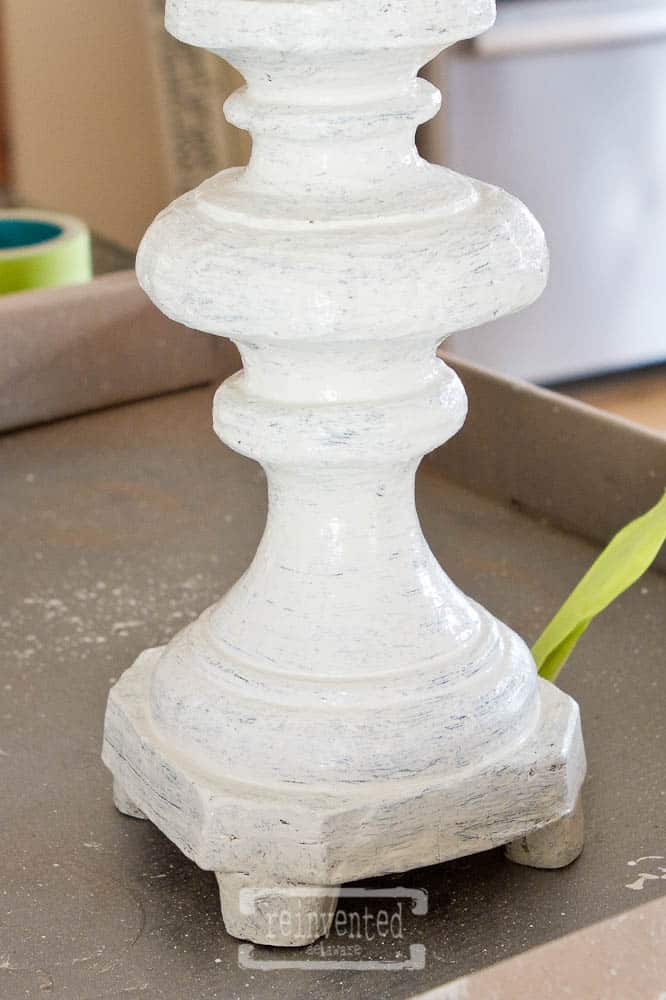
Now for the distressing. The lamps have a lot of ‘high points.’ They are made of a hard resin and have a kinda hand carved texture to them. I knew this kind of texture would look great distressed so that is the route I am taking. Plus since, the base color is dark, the distressed light color paint will highlight the texture of the lamps.
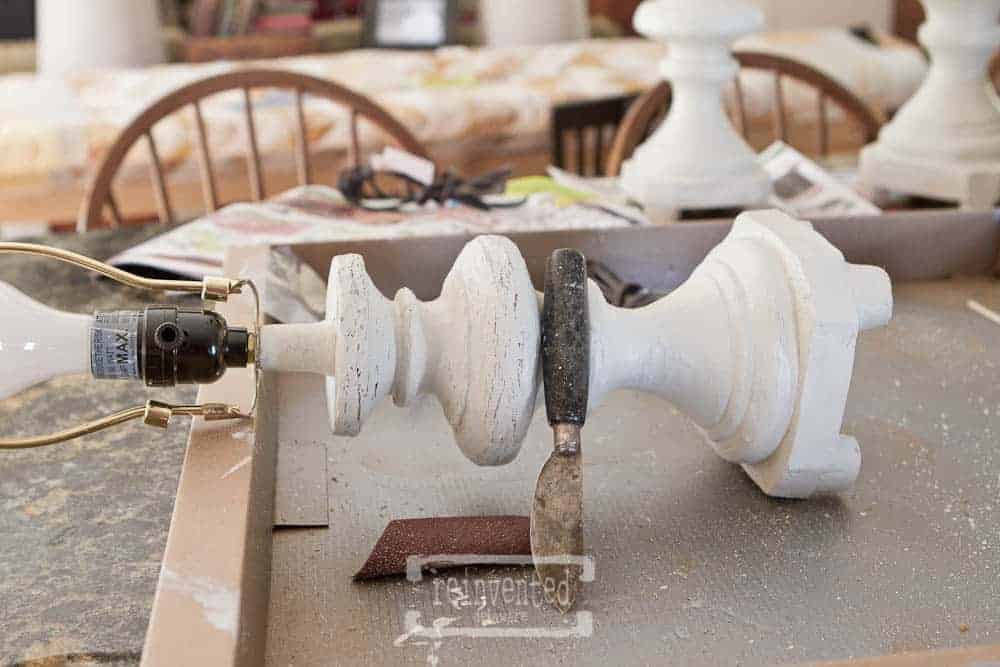
I use a curved knife for this step. I keep it sharpened using a hand sharpener. This kind of distressing is quick and in my opinion creates an authentic distress. I kept turning the lamp around and scraping off the paint on the high places. Since these lamps are made from hard resin, I am sure I won’t damage them. When I use this technique on wood furniture, I use a very light touch because I don’t want to gouge the wood piece.
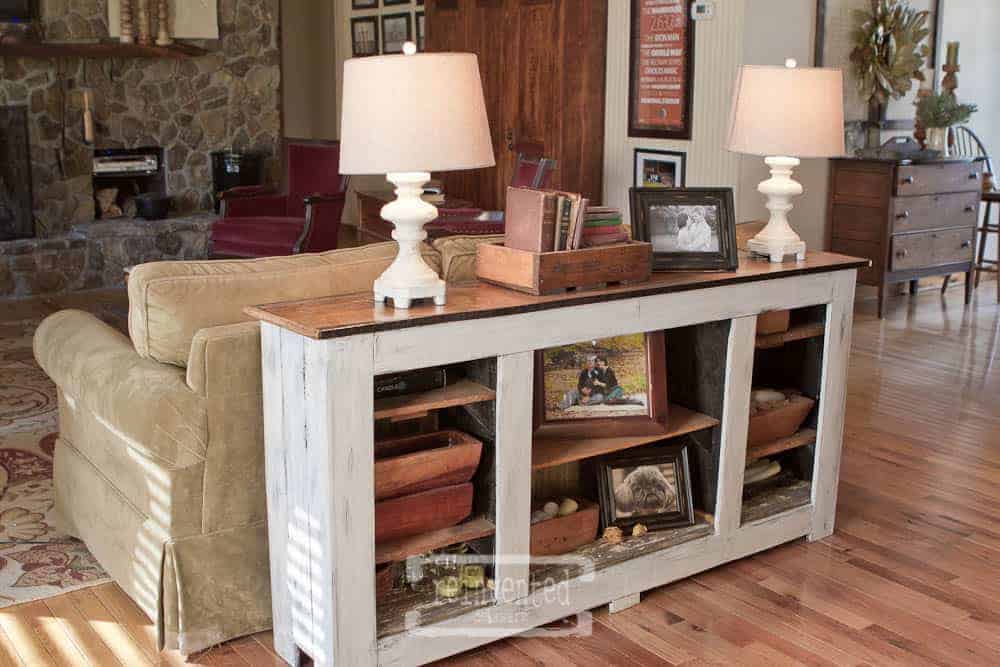
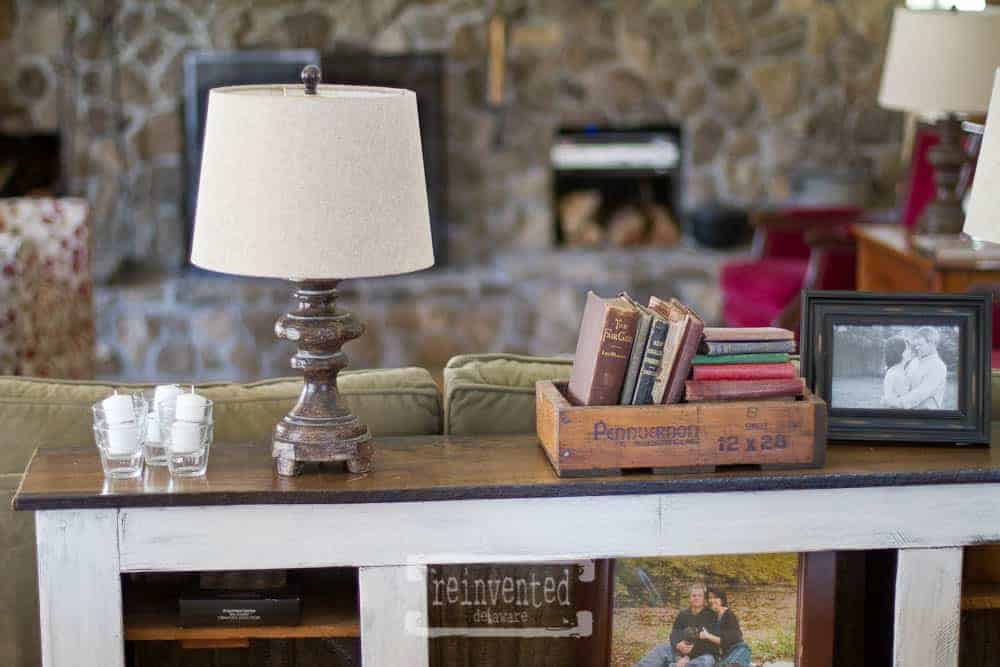
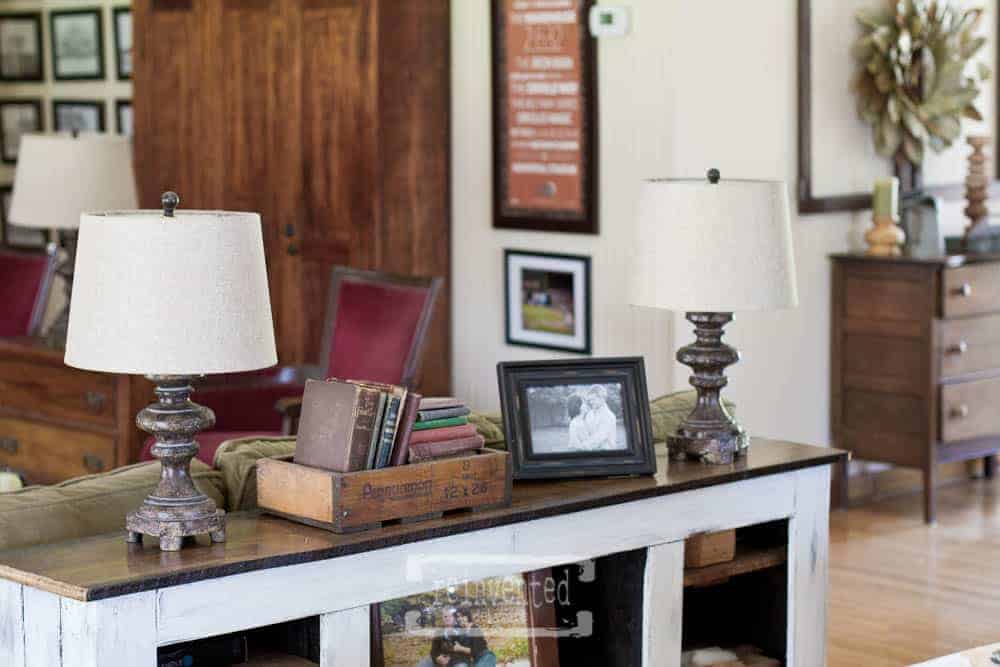
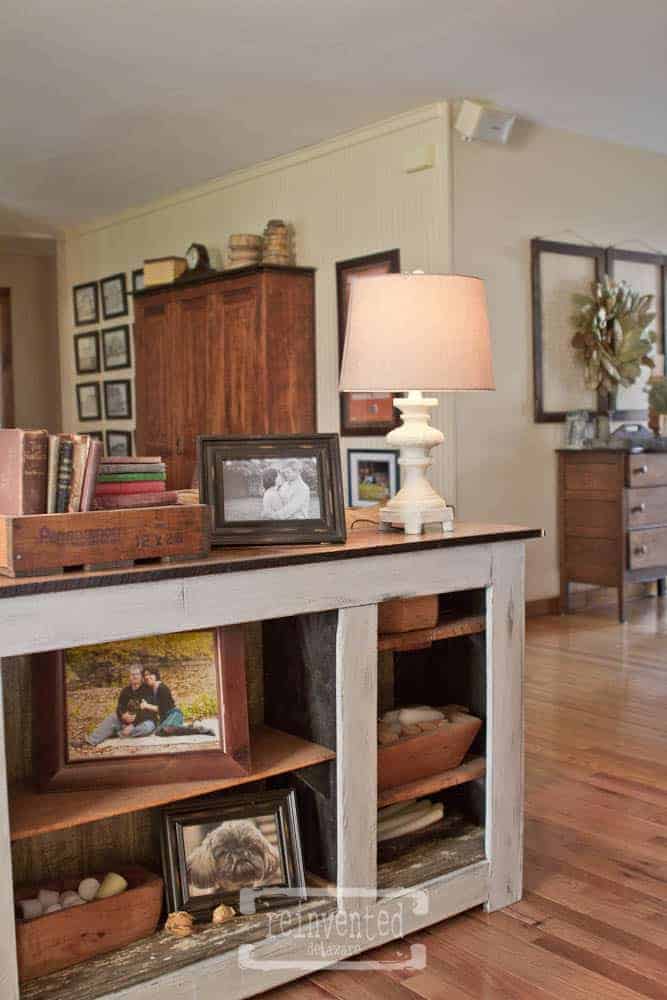
Here are the finished lamps! The two smaller lamps live on the sofa table that my sweet husband built a few years ago. Also I should mention that we have a floor electric socket under our sofa. I have these lamps on a timer that comes on at dusk and goes off at 10pm when we go to bed. Let me tell you, I have a slight obsession with timers! I use them in several places in our home. They have to be adjusted at Daylight Savings Time two times per year, but I don’t mind. The benefit of the the lights just coming on is worth it! You can pick up inexpensive timers for about $5. So worth it!
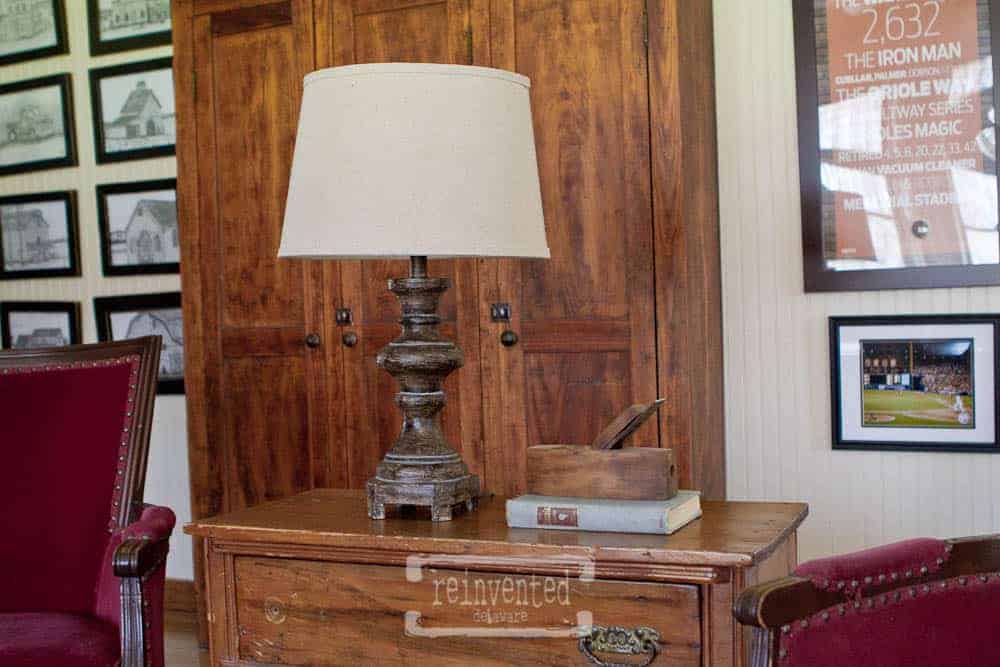
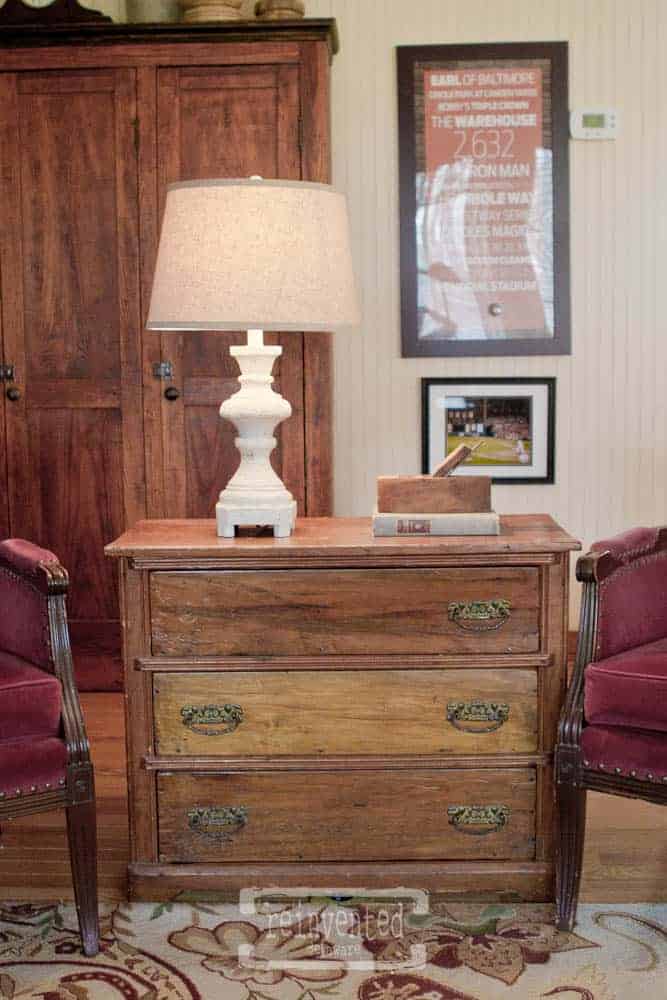
Here is the tall lamp. It lives on top of one of my favorite pieces of furniture – a washstand and between two vintage (1940’s!) red velvet chairs. I have plans for those chairs someday ;). For now, they are perfect! And as for the missing hardware on the top drawer of the washstand – it is in the drawer waiting on me 😉
Thanks for stopping in for this transformation! I hope you enjoyed it! It is amazing how such an easy project can change a room. Just painting these lamps has brought a bit of light to our living room. No pun intended! When the lamps are on they seem to put off more light because they are reflecting light off of the light colored base!
Feel free to pin this image for future reference. I would love to hear from you if you do this project at your home! Comment below or look me up on Instagram! Have a great day!