
Early 1900’s Dining Table and Chairs Refinishing Series – Part Three

Now we are down to the home stretch in the How to Refinish Furniture Series! Click here for part 1 of the series and here for part 2 of the series! Today we will learn how to reupholster chairs! This is definitely a simple project and one of the first things I learned how to do 30+ years ago as a young wife and mother. I don’t have any photos to show, but my memory is strong about the first time I recovered seat cushions for a dining set. We had only been married for a couple of years, one baby and one on the way. Money was tight as it often is with newly married couples so if I wanted a new dining room set my only option was to update what we already had. This was the beginning of a lifelong skill of using what I have one hand. It was a 5-piece dining set that had been given to us. The wood was in good shape but the upholstered cushions were hideous! I removed the seat cushions with a screw driver and pulled out the tack nails used to hold it in place. I think I even reused the tack nails! We were repurposing and reusing even before it was the thing to do! The only fabric I had was a large blue percale flat sheet that one of my sisters had given to me. The color matched our dining room (think 80’s color schemes 🙂 so it was perfect! Using a hand stapler – no air pressure to assist me – I hand stapled the fabric to each of the chairs. I was so proud of those chairs and I thought we had the most beautiful dining set I had ever seen! Doing little fix-ups like this for your home is so important. It helps us to feel connected to our surroundings as we add the little touches 🙂
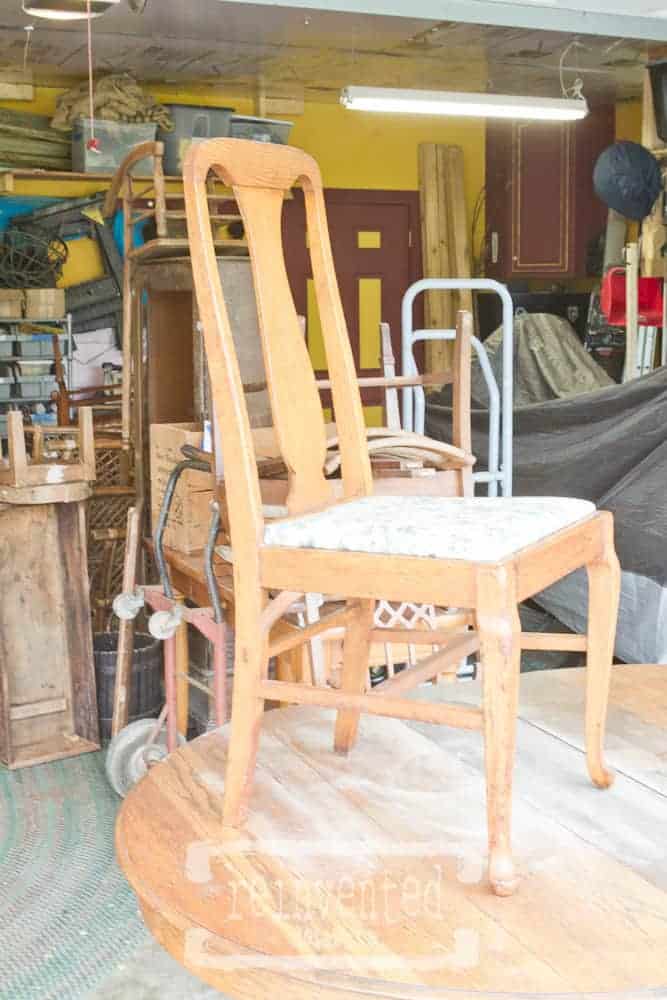
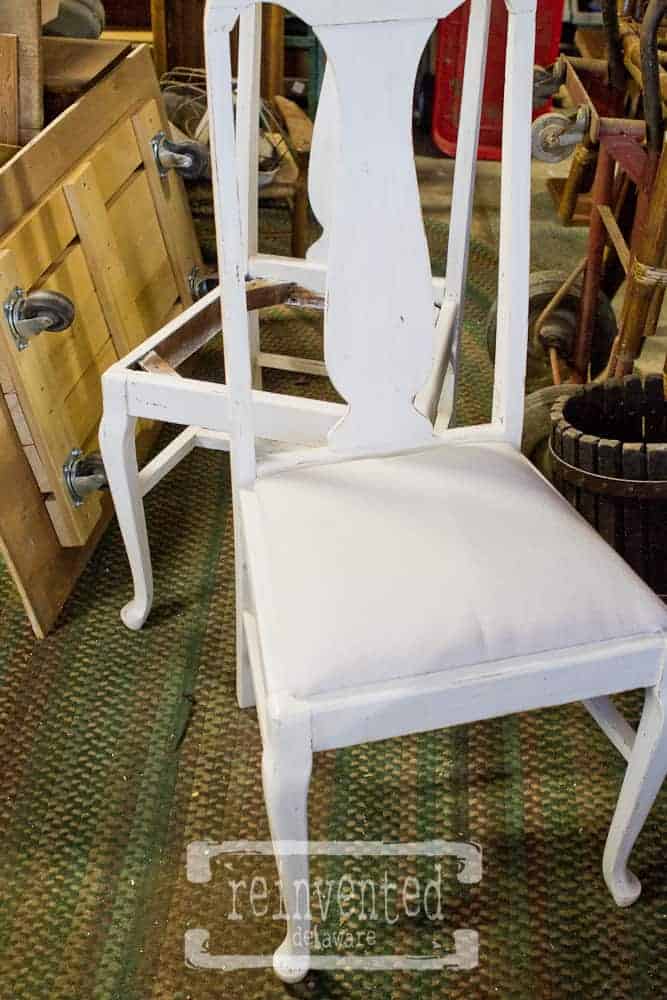
Lets take a look at what we started with – a beautiful set with strong bones. This early 1900’s dining table and chairs had been in the same family for a few generations. Moms and Dads, siblings, aunts and uncles, cousins, grandparents and a myriad of friends had gathered at this table to eat, to share, to cry, to laugh, to color, to do homework, to pay bills, to play board games, to drink coffee and to experience life together for years and years. So many memories are made around the family table. This is really a sacred place. It is a place where relationships are made and grounded. Think of your own experiences in life – so many of them were created at the family table. What a privilege it has been to refinish this set so another family can do the same. I may never meet the family that will enjoy this dining set but I have prayed for them – that they will use it to it’s fullest in making their house a home.
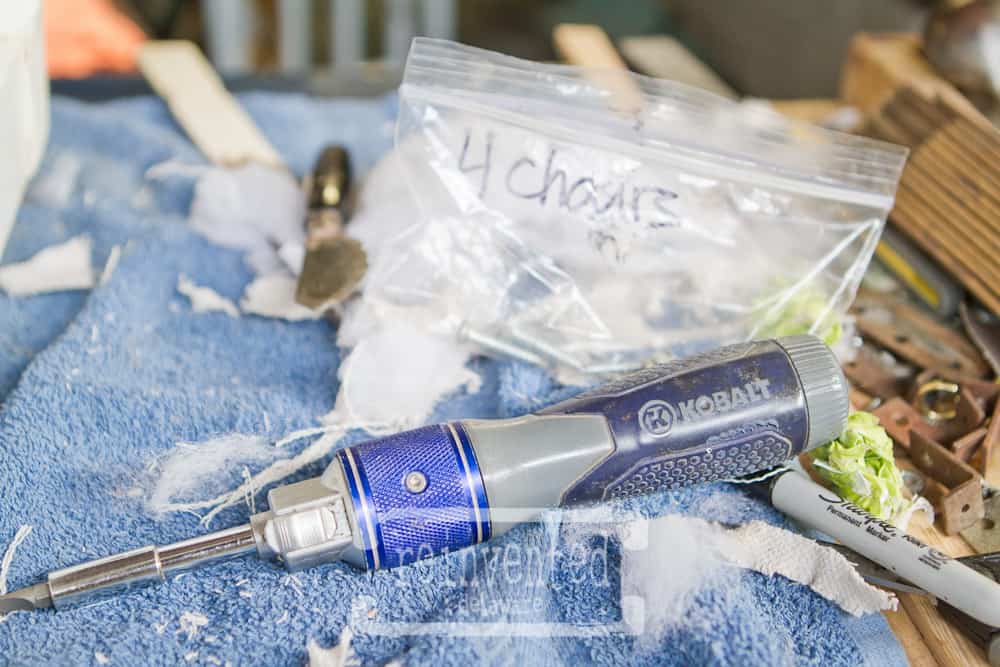
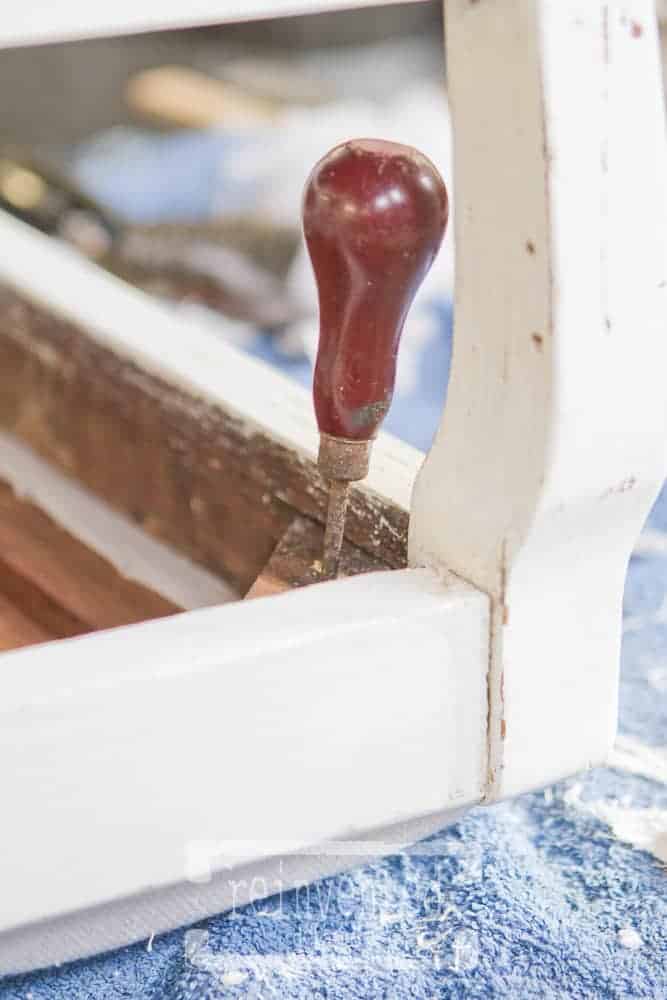
I removed all the screws with a ratcheting screwdriver like the one in the image below. Use a small ziploc bag to hold onto the screws – it is much easier to do this than to find screws later that fit just right. I was fortunate that the screws came out very easily and were in good shape. I labeled the bag because I typically have several projects going at once.
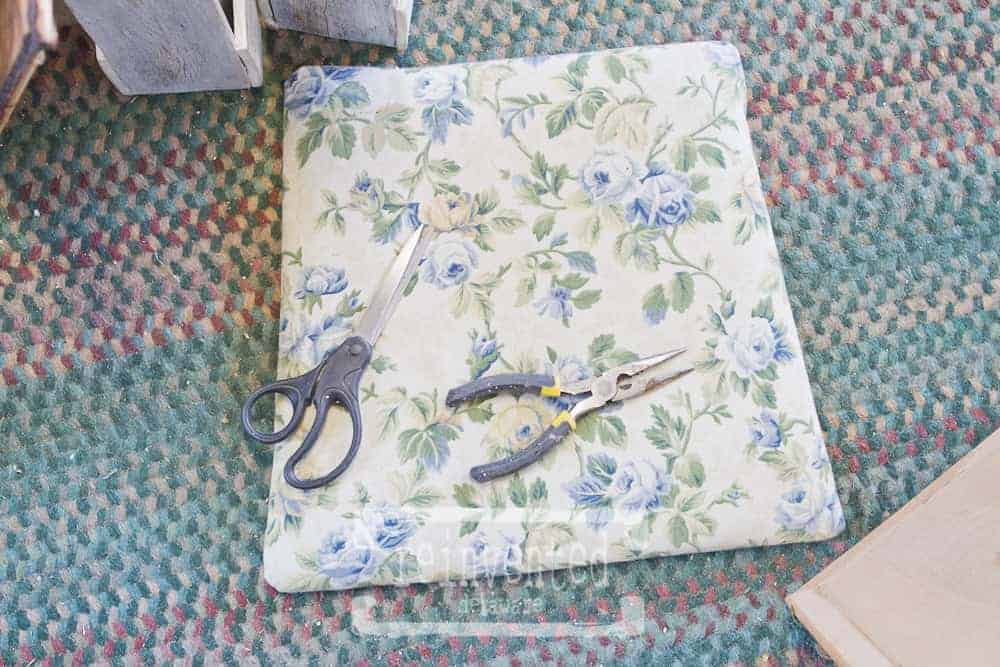
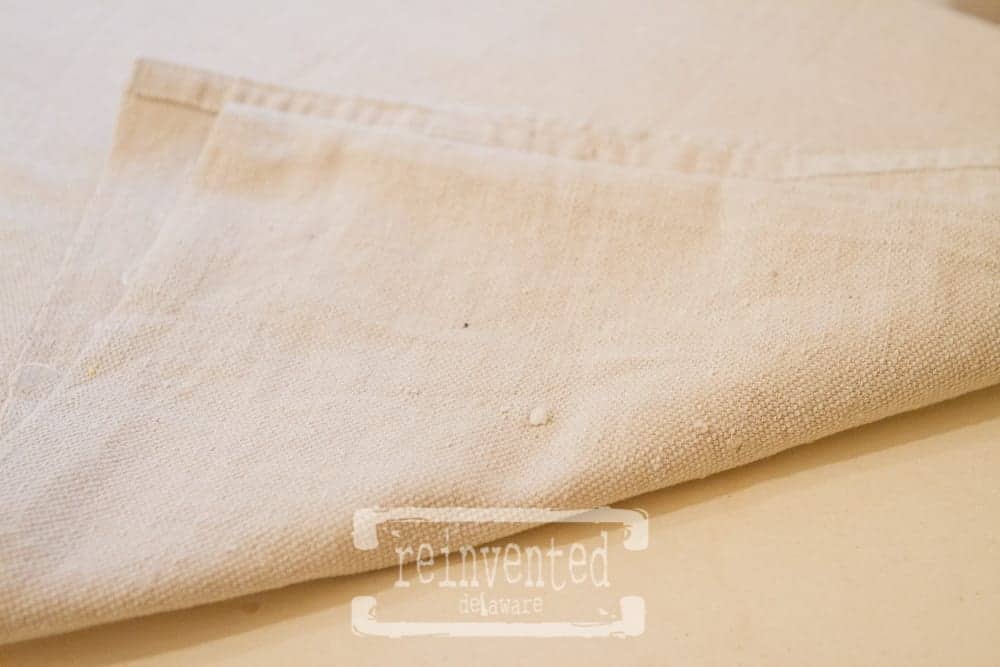
The cushions had been recovered back in the late 80’s. This type of fabric was very stylish! It was actually in good shape – not much wear on them. But they really needed to be updated in a neutral color. So off came the fabric using pliers and a little tool that would pry from under the staples to loosen them. I didn’t photograph the tool but it looked like a short ended ice pick. Whatever you use, please be careful. Applying the pressure required to loosen the staples can cause your hand to jerk and possibly injure yourself. Always use force away from your body – never towards! Lets think safety here people!!
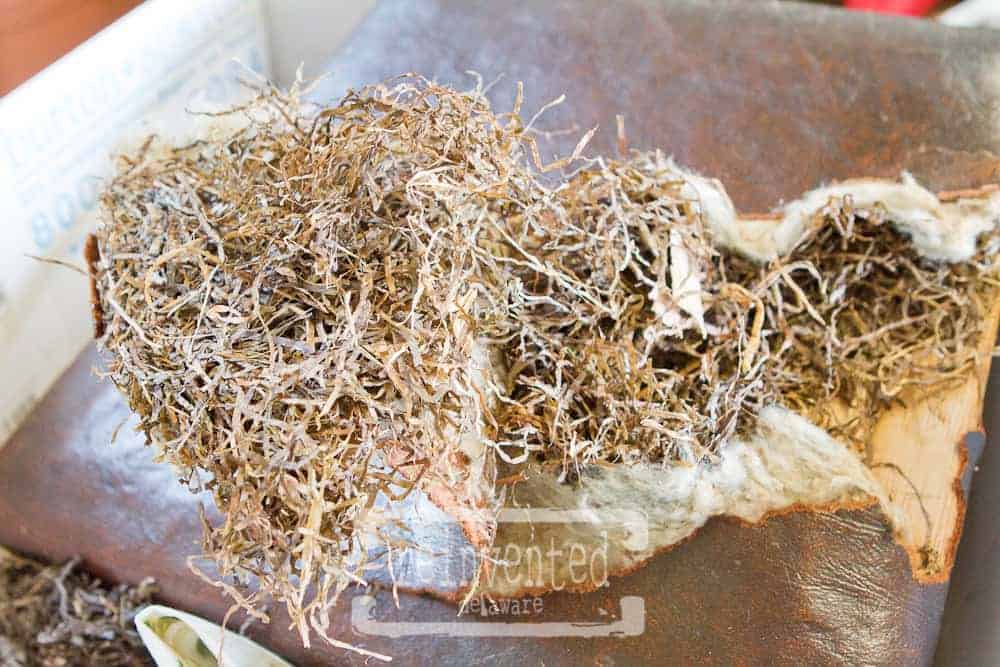
The original fabric and stuffing was still in tact! The dark brown exterior was dry-rotted leather. I never expected that! Also the stuffing/padding was shredded paper! It is amazing how things were done years and years ago. They had also used some cotton batting that was falling to pieces. They were recycling in the early 1900’s!! It was very dusty while I was taking the stuffing out and admittedly I should have worn a mask so I didn’t inhale all of that. But in my defense, the big garage door was wide open so at least I was in a well ventilated area. If you find yourself with similar circumstances, I would recommend a mask. I did a fair amount of coughing while I was completing this step.

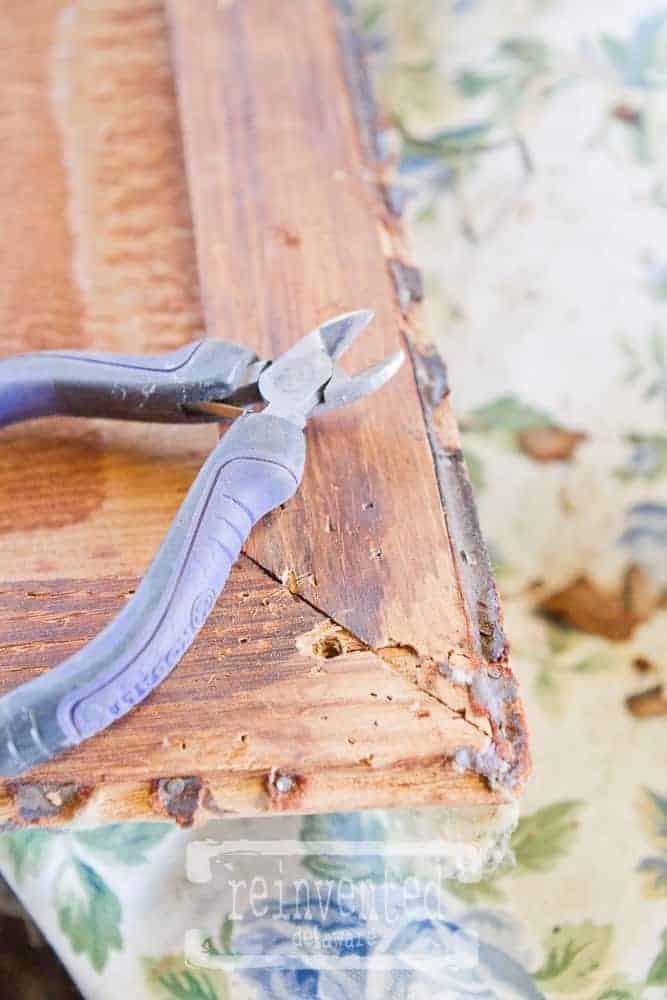
After removing all of the inside parts, I was left with a row of tac nails. I did not save these like I had done 30 years ago because I would be using the air pressure staple gun! I didn’t want the nail heads to get in the way so they had to be removed. As it turns out, I did not staple in the groove where the nails had been so removal wasn’t completely necessary. But like I said in the last post about drips under the table top, I just like being tidy 🙂

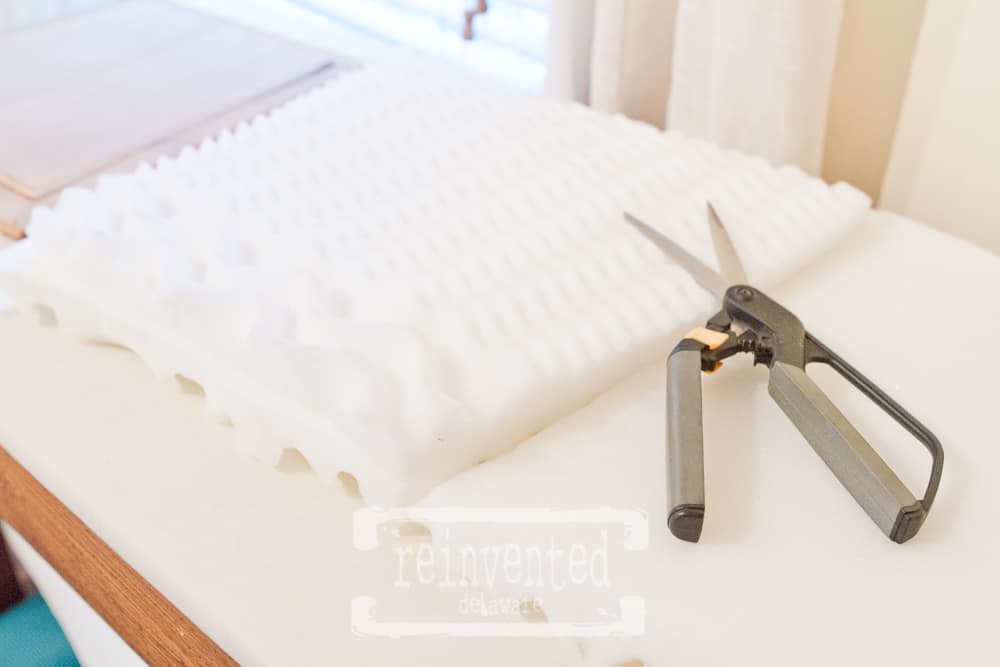
This set of wire clippers were very useful in getting under the head of the tac nail especially in the very hard solid oak wood. As a reminder though, use these tools with caution and push the tool away from your body. A sudden jerk can happen when removing this type of nail and can cause skinned up knuckles. I was very careful in applying even and steady pressure to the nails to loosen them. If you get in a hurry you are more likely to hurt yourself. We don’t want that! So take your time! Ok, I will stop being your mama now 😉
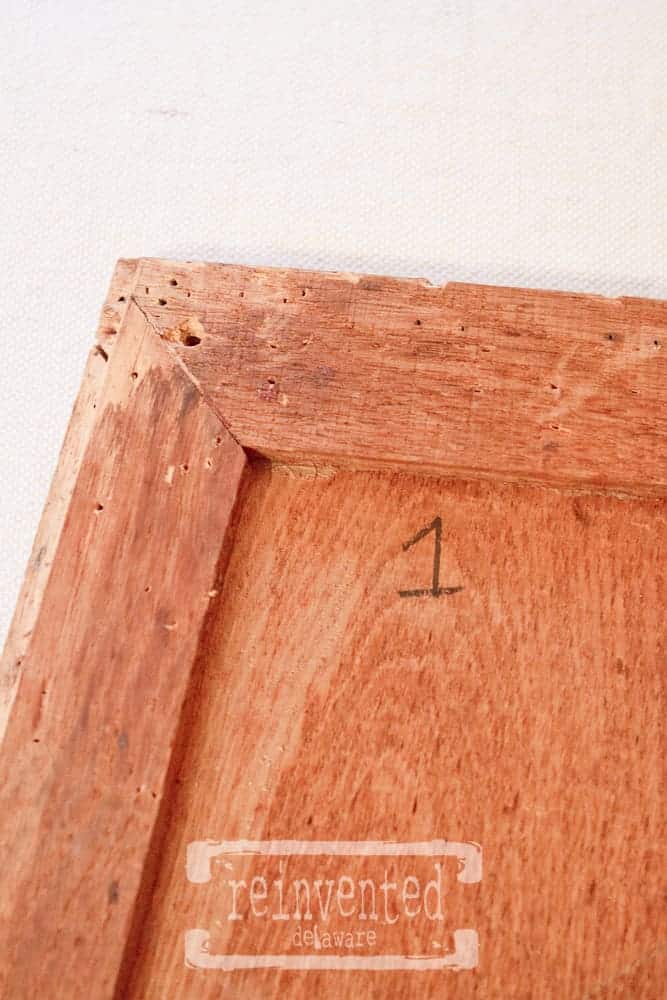
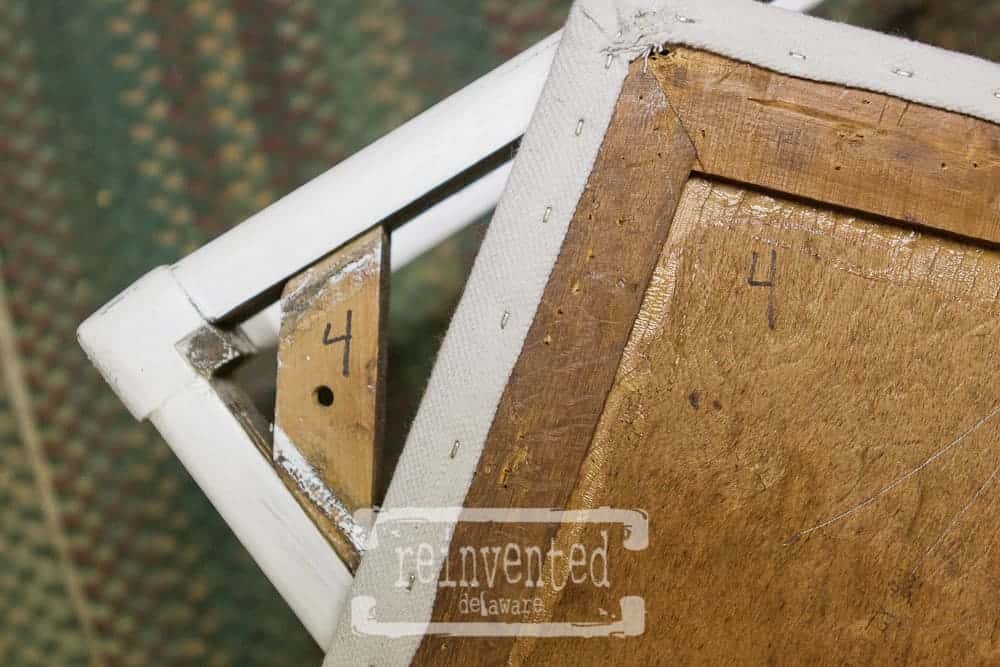
You can see here that I labeled all of the chairs with it’s matching seat base. With older pieces that are not factory built you can have some irregularities with screw holes and placement. It’s is just easier to use the same seat base with the chair it came off of. Be smart and number them. It will save you a lot of aggravation later. Trust me. 🙂
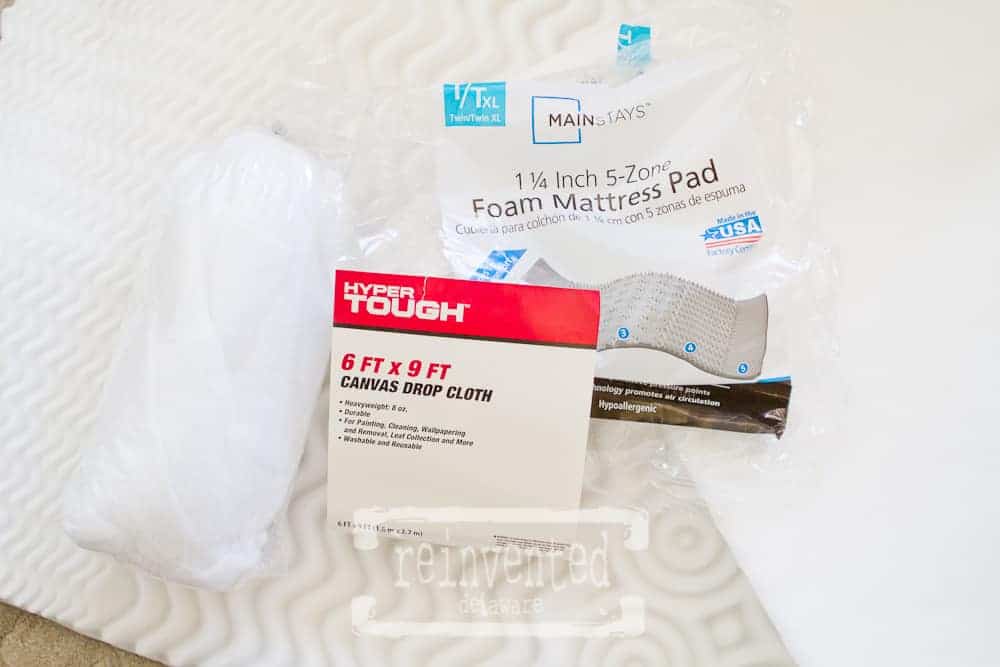
Thrifty and practical are my middle names. I love a bargain and I love to figure out how to accomplish a task as inexpensively as possible. I don’t necessarily mean cheap – I like quality products as you can tell from my love for General Finishes products :). But some things don’t need to be name brand. For instance, I shopped at our local large all-purpose store for the supplies I needed for the seat cushions. I knew I needed foam, batting and fabric, so I checked out the small sewing department this particular store has and found a fairly expensive pre-cut seat cushion foam in a package. It was a bit higher than I wanted to spend so I had to come up with an alternative. Think outside of the box, Cindy! And boom, a foam mattress pad came to mind! Twin size would be plenty. Over to the bedding department! It was about 1/3 of the cost and I had some left over for another upholstery project! Next decision was the fabric. I knew I needed upholstery weight and good quality so from the bedding section I headed back to the sewing isle. It left a bit to be desired – the selection of neutrals was not the greatest. So once again I started thinking how to get a large piece of fabric that was a quality item for not too much money. I went to my old stand-by of sheets but nothing screamed ‘buy me’ while I perused the bedding isle So stretching my mind a little bit more as I walked around the store, drop cloths came to mind! I headed over to the hardware department! So much is being done with this fabric these days – curtains, slipcovers (some tutorials on that coming soon!) tablecloths…… it’s endless! The amount that I needed would be completely taken care of with the 6’x9′ section that the smallest package offered! The last thing I needed was quilt batting. Back to my original spot – the sewing department! Hind sight I could have used an old (clean) mattress pad I had at home. It would have been even more durable.
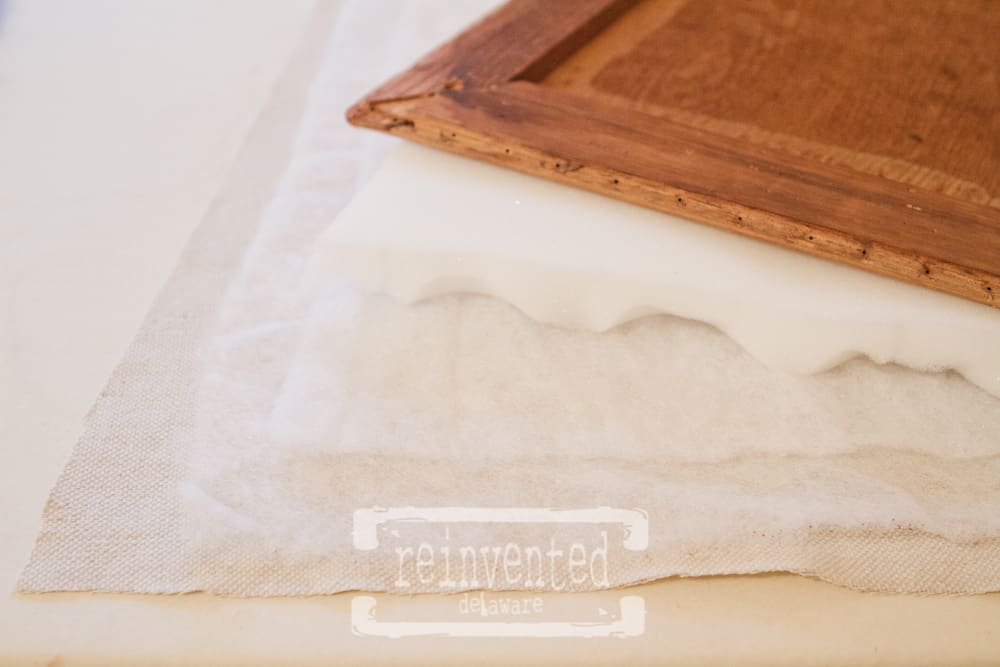
Using the wood seat as a pattern, I cut the foam the same size and dimensions as the seat. I cut all four the same but I used the first foam piece as my pattern for the remaining three foam sections.
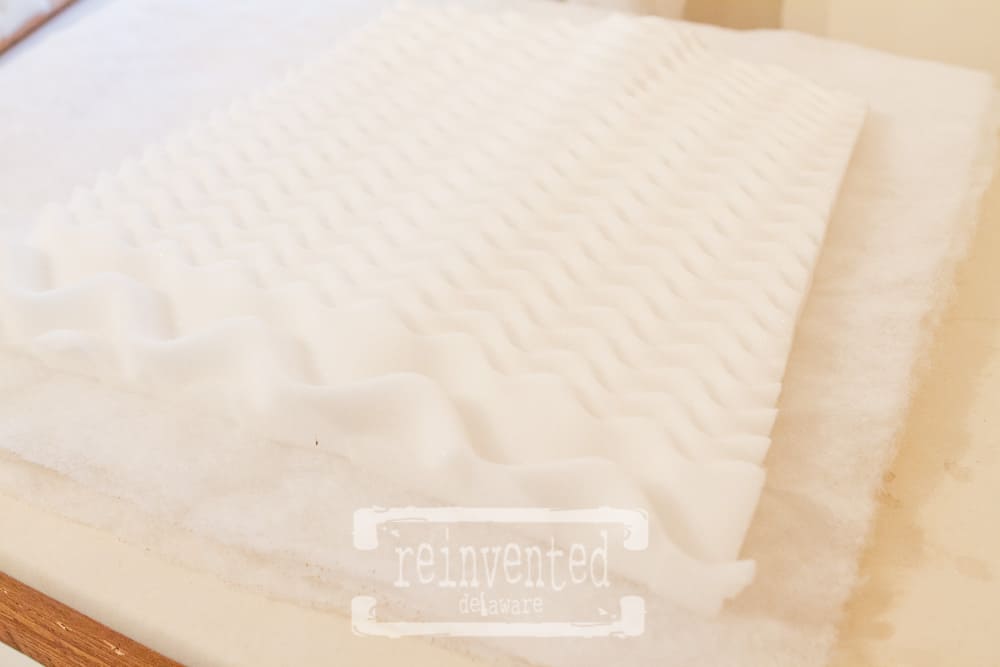
Next, I cut the batting. The foam was used as a rough pattern and I cut an additional 2″ on each of the four edges. The batting will wrap around the wood to prevent the exterior fabric from coming into contact with the wood. If the batting doesn’t wrap around the wood, over time the fabric would wear down. I used two layers of batting for each seat.
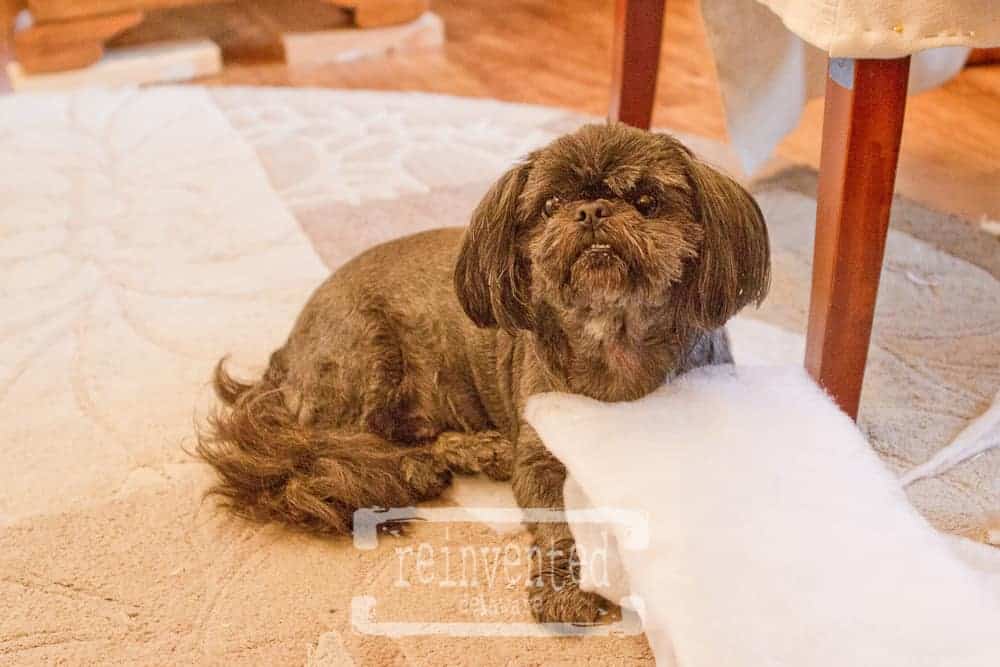
Little fella loves the pieces of batting that are tossed onto the floor 🙂 Such a cutie!
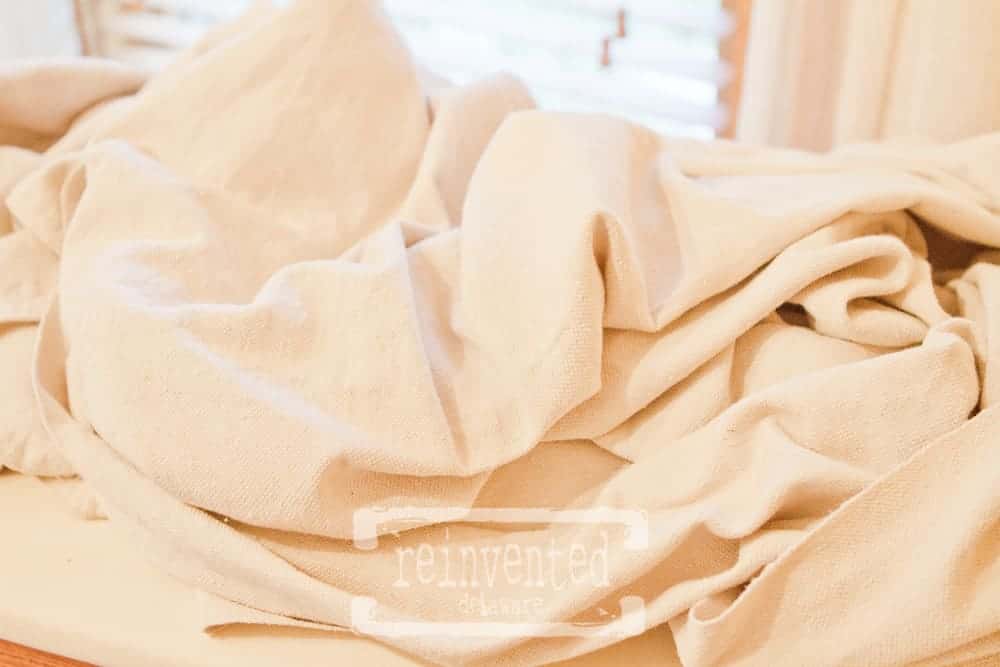
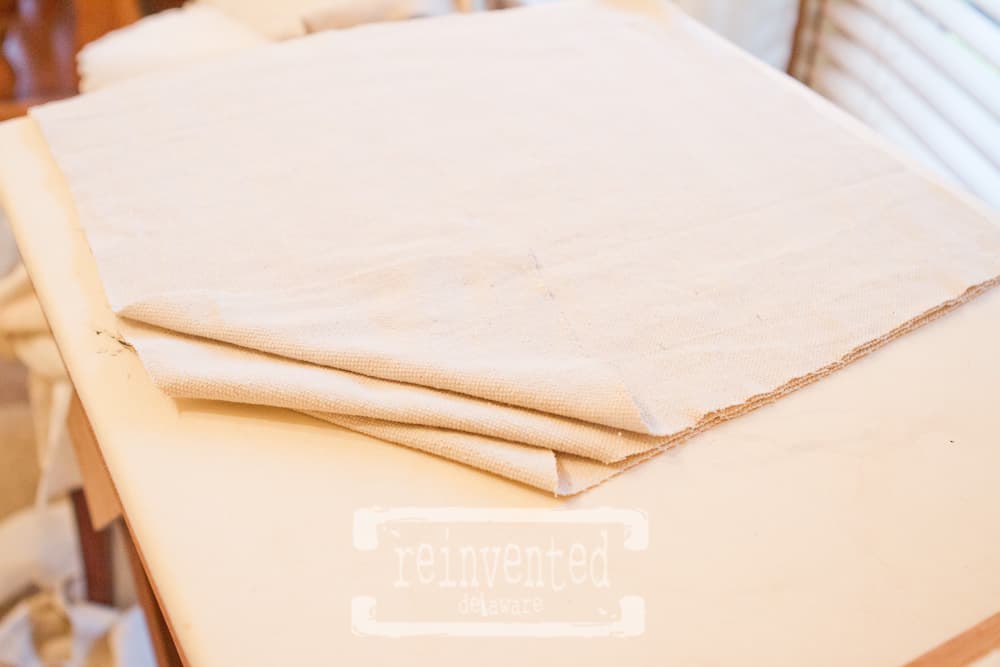
The drop cloth had been put into the washer as soon as I got home from shopping. Then straight into the dryer. Doing this will preshrink and soften the fabric. I used a hot water wash cycle and a setting on the dryer for wrinkle free clothes – my washer calls it ‘Casual.’ It is a low temp setting. I always advise you prewash the drop cloth with any project. This is a cotton duck/twill cloth and will shrink! Better to shrink it before you make something out of it.
Another thing to keep in mind when cutting out the pieces to recover the seat cushions is the little nubs that you will find in the drop cloth. This fabric wasn’t intended to decorate your home with so it includes a lot of these types of flaws. I just carefully placed the fabric so as not to include any little flaws like this.
The wood seat cushion was once again my template – cutting 2-3″ around the perimeter of it. This will allow plenty to wrap around and even to have a folded edge for an extra touch of tidiness. When cutting the drop cloth pay close attention to the sewn edges. That will help you to know the wrong side verses the right side of the fabric. In my experience, it really doesn’t matter which side you use, just stay consistent.

Here is a tip to to keep track of the right side of the fabric that I learned long ago in school: (yes I am old enough that sewing classes were taught in school! Something I am thankful for even today and a skill that I have used over and over in my 54 years!) turn a corner towards the right side as soon as you are finished cutting them. With most fabric the right and wrong sides are distinguishable, but not so with drop cloth.
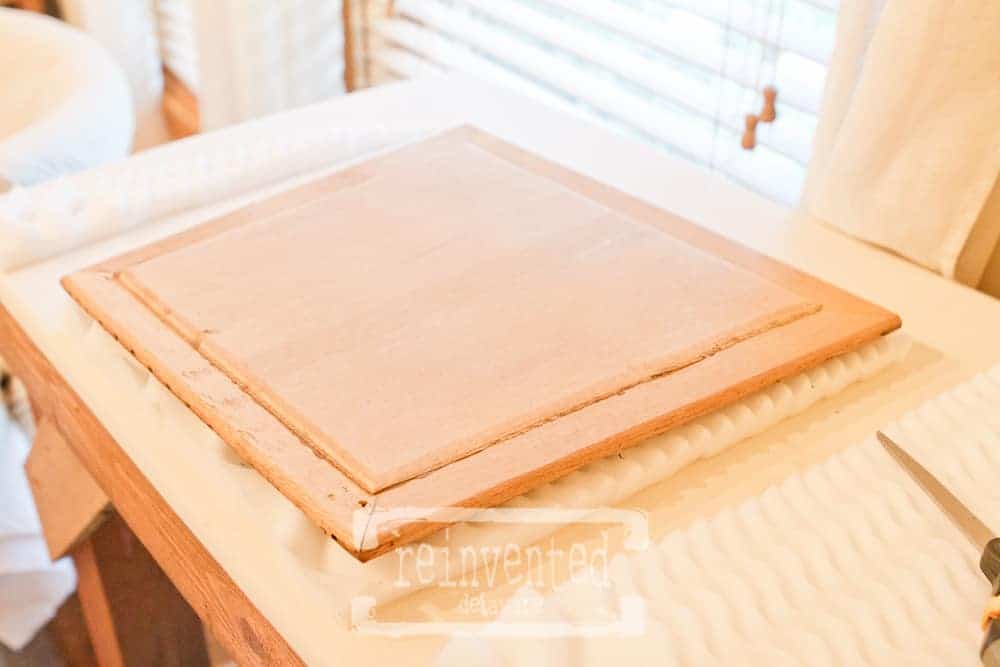
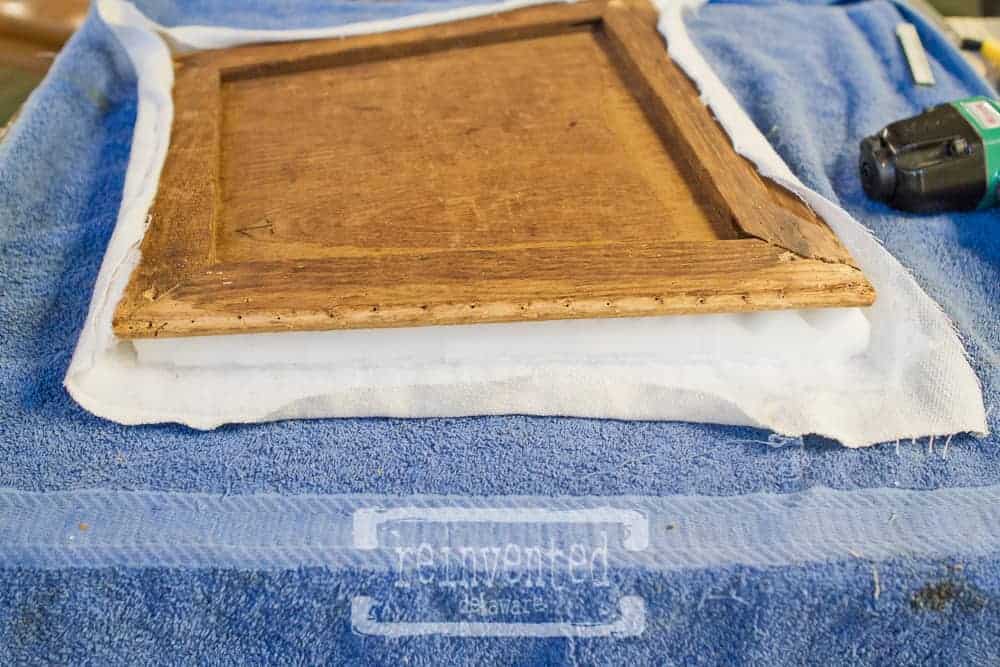
Layer the pieces this way – EXCEPT if you purchased the foam with the ‘egg crate’ detail like I did. Turn the egg crate side towards the wood seat. That way it won’t be bumpy on the top! I did noticed this little detail after I shot the image and I did fix it before I started with the staple gun :).
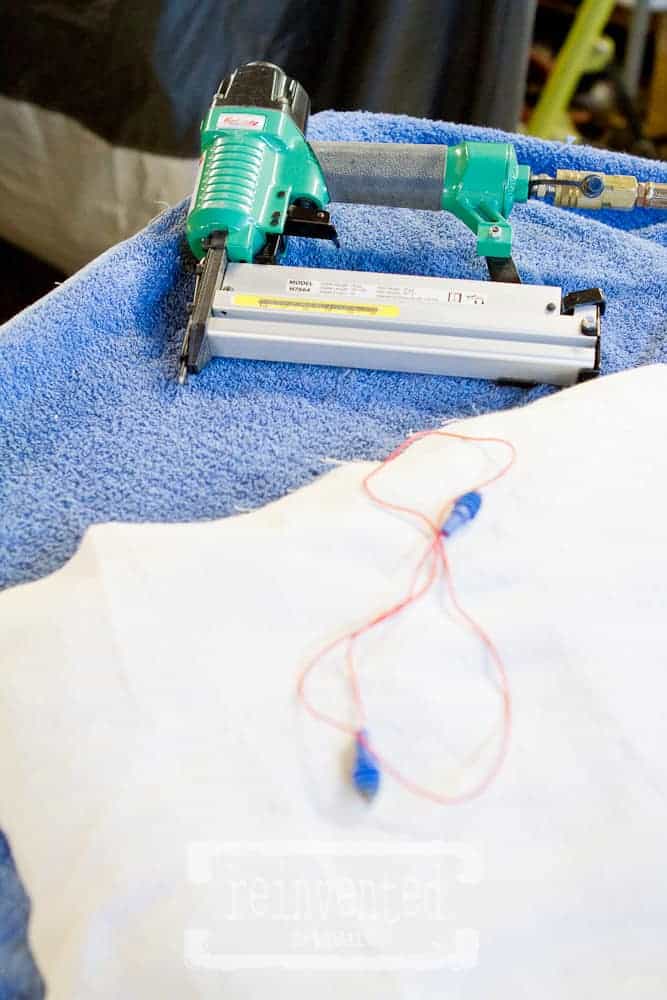
From my sewing room to my workshop. We have an air compressor for the staple gun/brad nailer. It really makes so many projects move along quickly. I have to use ear plugs – the sound of the compressor along with the loud shooting sound of the nail gun are too much for my ears! Half inch staples are just the right size for this project and will probably work for most seat cushions. Measure to be on the safe side – you wouldn’t want a staple to come through the side you sit on! I laid out a clean towel on my work bench to protect the fabric. My work shop is pretty messy and dusty!
I brought one seat cushion out at a time. I really wanted to keep them clean until I was ready to reattach them to the chair bases. Here you can see how I have them layered – I remembered to turn the egg crate foam in the right direction :). Folding the edges will create a nice finish on the underside of the chair seat. Begin at the center of one side and staple out towards the corners. Repeat on the opposite side of the center point, working towards the opposite corner. When stapling the opposing side, gently stretch the fabric. Pulling to tightly will create ripples on the top, not pulling tight enough, well it’s just not a good idea! Flip the seat over to check for tautness. Then turn the seat cushion and do the opposite side the same way. The other two opposing sides can be finished next. Remember to fold in the raw edges as you work around the seat. Staple close to the corners but not all the way.
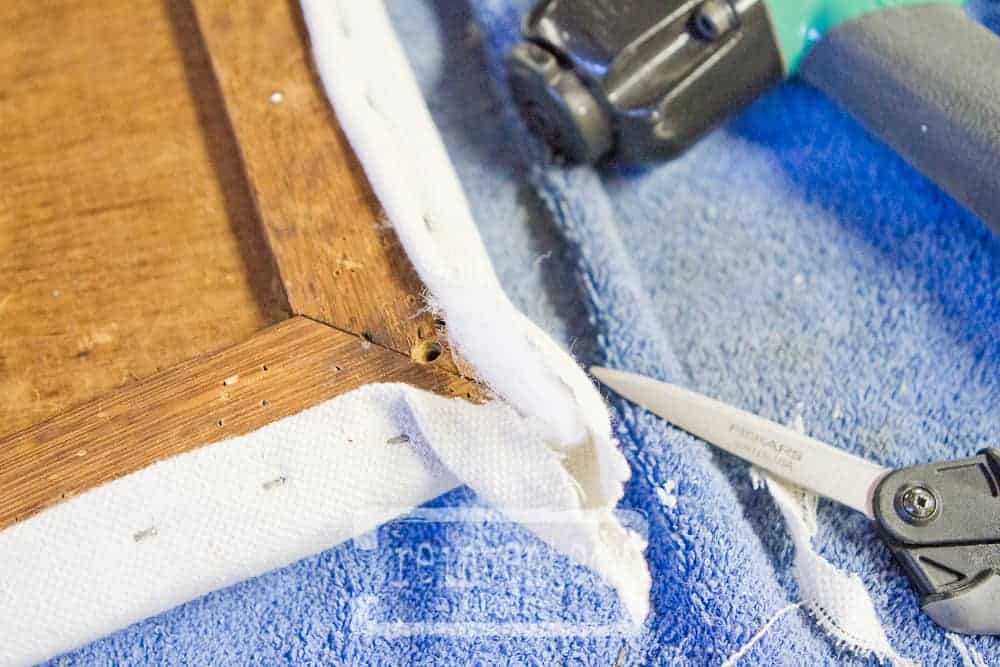
The corners can be a challenge. Here are some tips to get you through:
- stay consistent with each corner
- staple close to the corner
- keep the drill holes (for the screws ) exposed for easy attachment to the chair base
- clip excess to reduce bulk
- with the 90 degree edges touching, pull the corner as seen in the third image
- add 2-3 staples to secure it down and trim the excess fabric
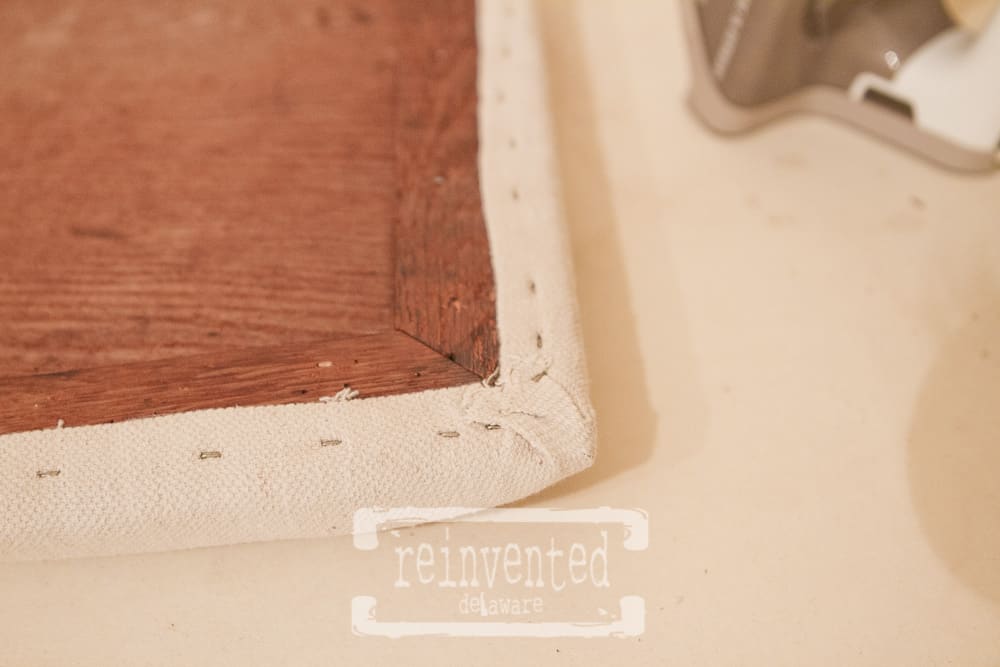
After the seat is stapled all around, I steam press with the iron to flatten the corners and the folds in the fabric. Don’t be shy with the iron and the steam. You want it as flat as possible so the cushion rests nice and flat on the chair base. Too much bulk of fabric in the corners especially will cause the seat to gap at the base where it should be touching.

Since the chairs and seats were pre-numbered, it will be a breeze to reattach them to the chair base.
I matched up the chair base with its corresponding seat and turned the chair upside down. I lined up the drill holes in the base and the seat by using an ice pick – be careful not to pock through the fabric. I was able to put the first screw in and from there the other three holes lined up fairly easily.
And here is the finished chair! Another pressing with the steam iron will remove any wrinkles.
Remember where we started??
Look how far we’ve come!!

I hope you have enjoyed this series on Refinishing Furniture! We covered a lot of ground. Be sure to pin this series for future reference. I will be adding to the tutorials on a regular basis. If there is a project that you need help with, be sure to contact me! I would love to help you! Have a blessed day!
Refinishing and restoring furniture is one of my favorite things to do!! These are great tips!
Pepsi is better.
Thanks for your insight!
Mosey looks so cute helping his mother refinish furniture!