
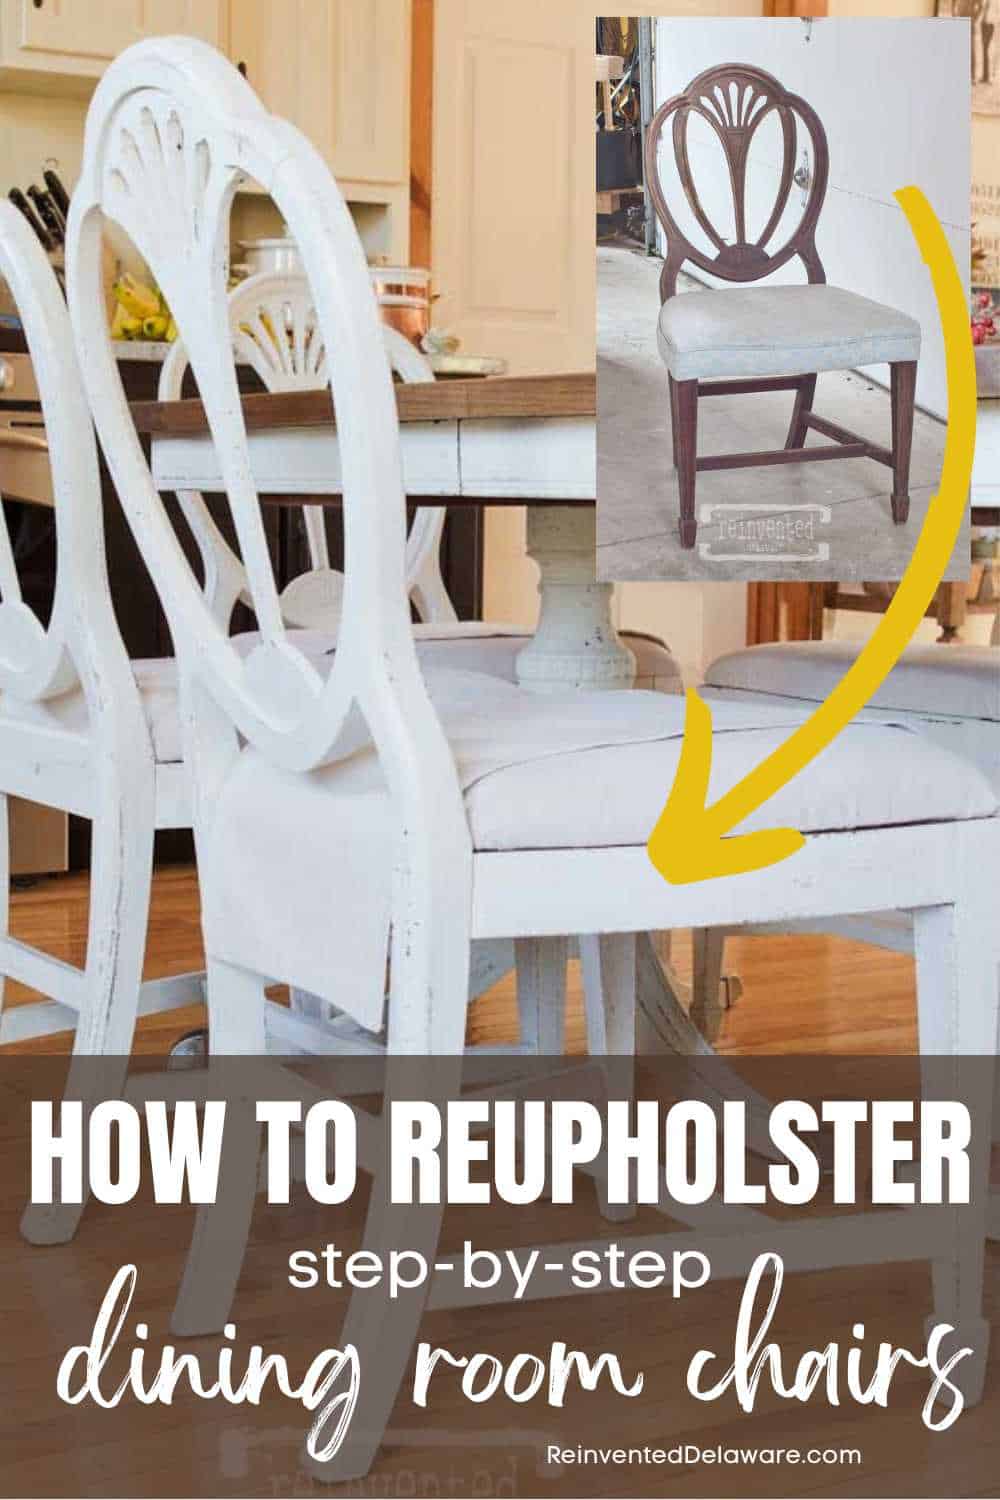
How to Reupholster Dining Chairs Step-by-Step Guide
Learn how to DIY reupholster a dining chair with our step-by-step guide. Transform your furniture with our easy reupholstering tips!
Welcome to our comprehensive guide on DIY reupholstering for dining room chairs. Whether you’re looking to revamp an old dining room table and chairs or personalize new chairs, our step-by-step instructions and expert tips will help you achieve professional results with ease.
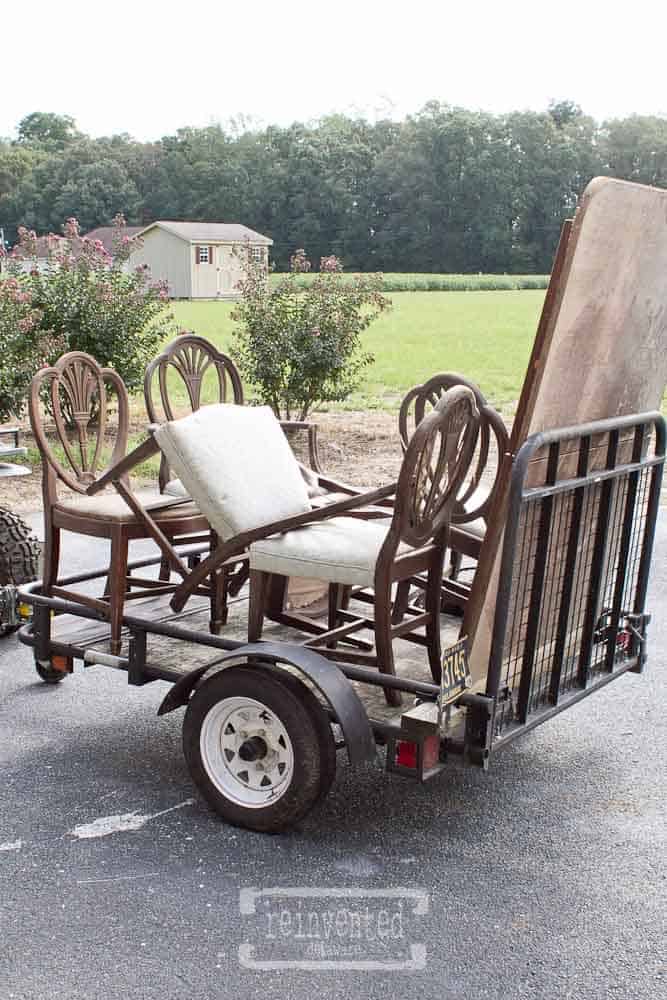
Dining Room Makeover
Reupholstering dining chairs can be a great way to give your dining room a fresh new look without breaking the bank. It’s a DIY project that can be completed in a weekend and can save you a lot of money compared to buying new chairs. In this article, I will guide you through the process of reupholstering your dining chairs step by step.
Before you start the project, you will need to gather some supplies. You will need fabric, foam, a staple gun (manual or pneumatic), staples, scissors, and a screwdriver. It’s important to choose a fabric that is durable and easy to clean, especially if you have kids or pets.
You can also choose a fabric that matches your decor or adds a pop of color to your dining room. Foam comes in different densities and thicknesses, so choose one that is comfortable to sit on but not too thick that it will make the seat too high.
The following post may contain affiliate links. That means if you click and then buy something, I will make a small commission at no additional cost to you! Thank you for supporting my blog. full disclosure here.
Assessing Your Dining Chair and Materials Needed
Evaluating Chair Condition
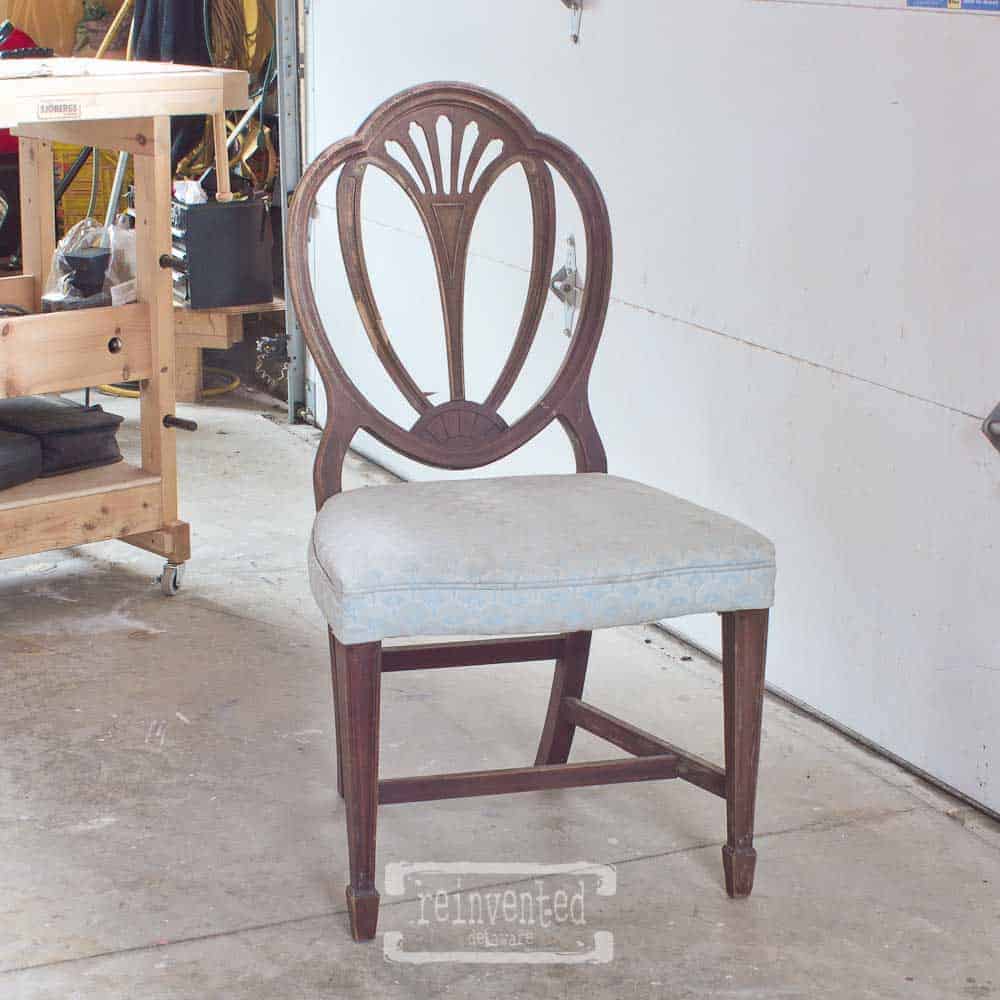
Before starting a DIY reupholstery project, it is important to evaluate the condition of your dining chair. Check the chair frame for any damage or cracks. If the frame is in good condition, you can proceed with the reupholstery process.
However, if the frame is damaged, it is recommended to repair or replace it before moving forward. The easiest way to find any damage is to take off the removable seat first. This will expose the chair frame so you can look for any damage.
Next, assess the condition of the old upholstery. If it is in good condition, you can reuse it as a base layer for the new upholstery. However, if it is worn out or stained, it is best to remove it completely. Look for tears in the fabric or thin areas in the fabric. More than likely, you will have to completely replace the fabric.
Choosing Upholstery Fabric
Choosing the right upholstery fabric is crucial for a successful reupholstery project. Consider the style of the dining chair and the overall theme of the room. Look for fabrics that are durable, easy to clean, and complement the existing décor.
As a rough estimate, you will need about 3-4 yards of fabric to recover four chairs. That’s not much fabric considering your chairs will look like new!
When selecting fabric, it is important to measure the dimensions of the chair seat (and backrest if your chairs have one) to ensure you have enough material. It is recommended to purchase extra fabric to account for any mistakes or miscalculations. It’s always best to have leftover fabric than to run out mid-project! Take my word for it!
Tools and Supplies List
To complete a DIY reupholstery project, you will need the following tools and supplies:
supplies
- staple puller and remover
- needle nose pliers
- pneumatic staple gun or manual staple gun
- air compressor (for pneumatic staple gun)
- staples to fit either staple gun
- upholstery fabric
- upholstery foam pad
- upholstery weight batting
- scissors
- marker and measuring tape
Visit a fabric store to purchase the right materials for your project. It is important to have all the necessary tools and supplies before starting the project to avoid any delays or interruptions. I have used a heavy 12 oz. dropcloth for this project that I purchased locally.
You can also keep your eye out for fabric when you are thrift store shopping. Often you will find upholstery weight fabric in the form of curtains that will work perfectly for a reupholstery project. I have even used matelasse bedspreads. Check out the linen section at your local thrift shop and look for heavy-weight fabric options.
By assessing the condition of your dining chair, choosing the right upholstery fabric, and gathering the necessary tools and supplies, you can complete a DIY reupholstery project.
Removing Old Upholstery
When reupholstering a dining chair, the first step is to remove the old upholstery. This can be a bit of a daunting task, but with the right tools and techniques, it can be done easily and efficiently. An audiobook helps!
Detaching the Seat
The first step in removing old upholstery is to detach the seat from the chair frame. Most dining chairs have seats that are attached to the frame with screws or bolts from the bottom of the chair.
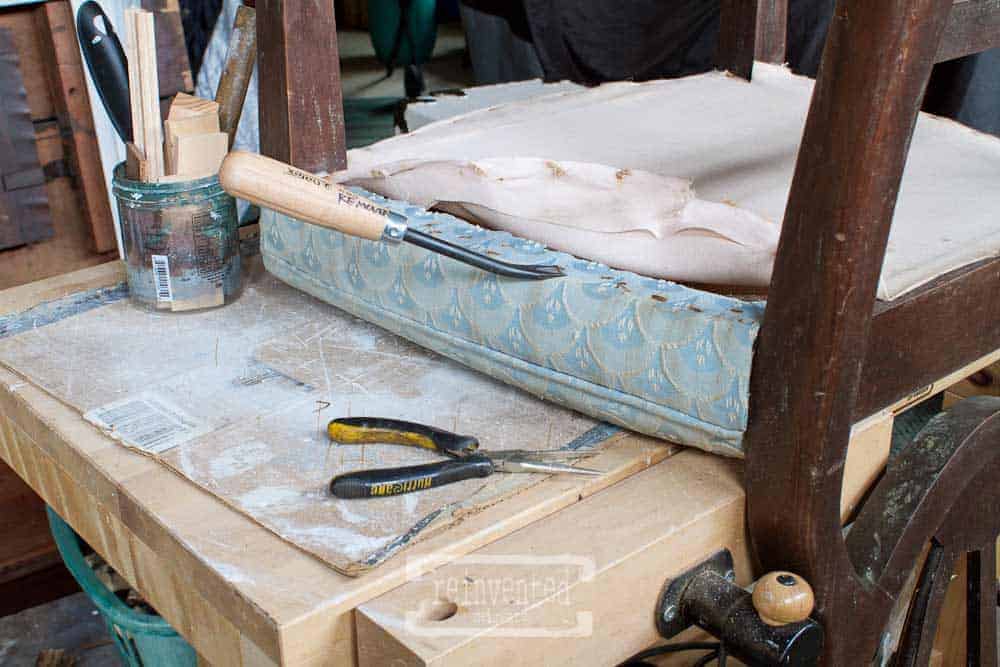
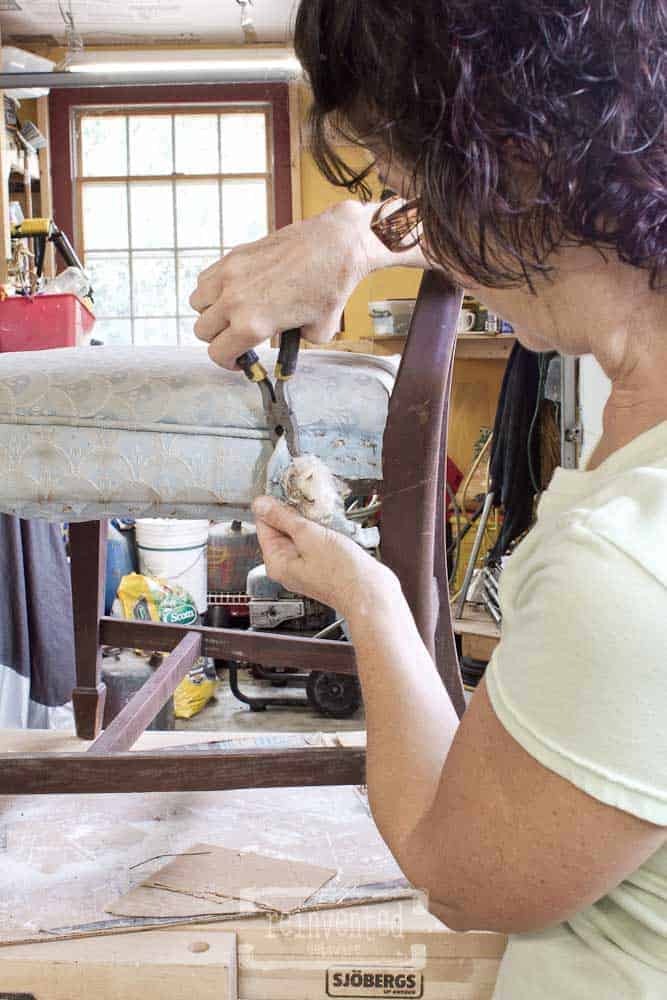
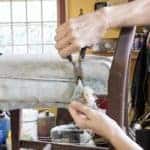
These Duncan Phyfe style dining chairs had an additional upholstery section around the chair seat that had to be removed before I could remove the actual chair seat section. I used my needle nose pliers to grip the fabric and pull it away from the frame. You can see that exposed another layer of staples!
Once the additional upholstered section was removed, I used a flathead screwdriver and I carefully unscrewed the screws that held the seat in place from the underside of the chair. Once the screws were removed, I set the seat aside.
By the way, it is a good idea to label the wooden part of the chair seat so that you know which seat goes with the chair. Often the screw holes can be off a bit from chair to chair. It’s easier to attach the chair seat back to the frame that it came off of. Use painter’s tape and a label like “A, B”on each. This will save you a big headache when it comes time to reattach the chair seats!
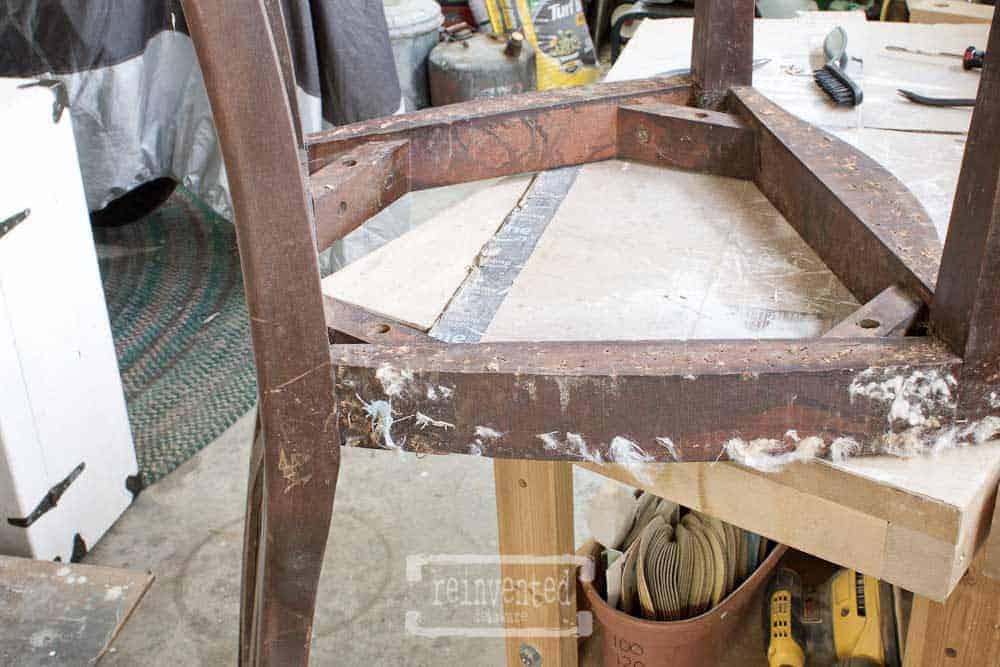
Cleaning the Chair Frame
With the seat removed, I took the opportunity to clean the chair frame. Using a damp cloth, I wiped down the frame to remove any dust and debris. This step is important so that you don’t get your pretty new fabric dirty!
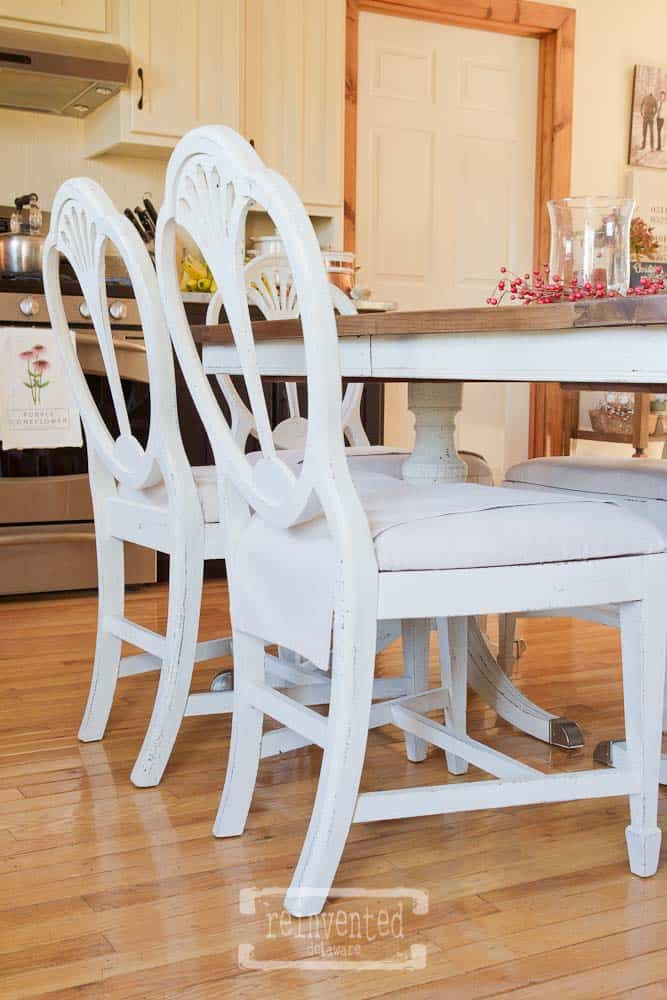
If you choose to paint the frame, this is the time to do it! I painted this Duncan Phyfe dining set in a light milk paint color, and then I sealed the paint with a clear coat.
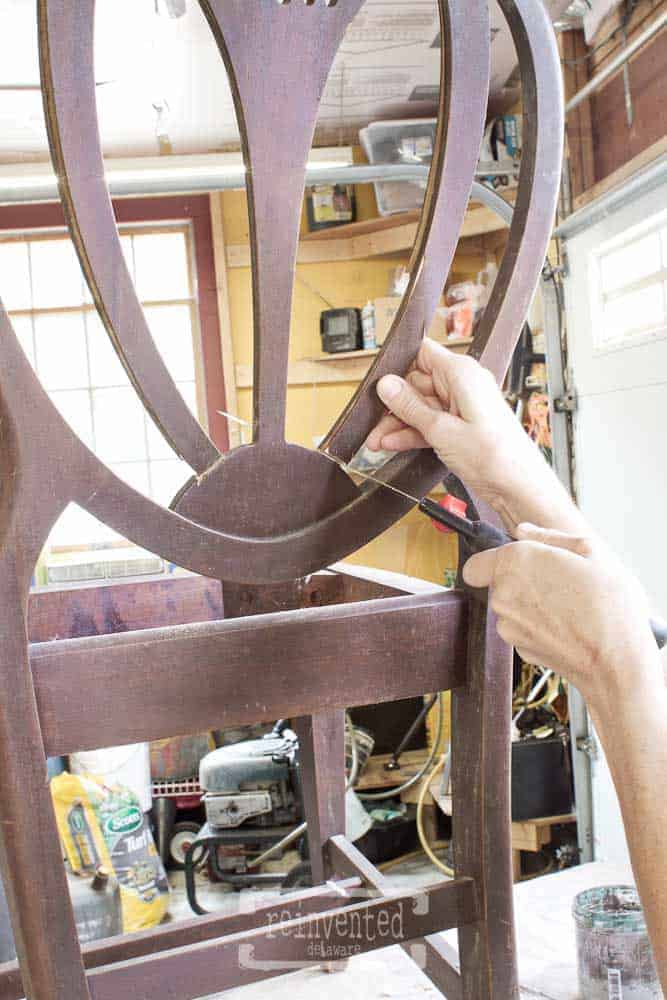
This was also the perfect time to make any needed repairs. Some of the decorative sections of the chair were broken. Instead of trying to repair them, I used a small pull saw and cut them off. If you have some broken sections you could use glue and clamps to make the repairs. For this project, cutting off the broken sections seemed to be the best solution.
Removing Staples and Fabric
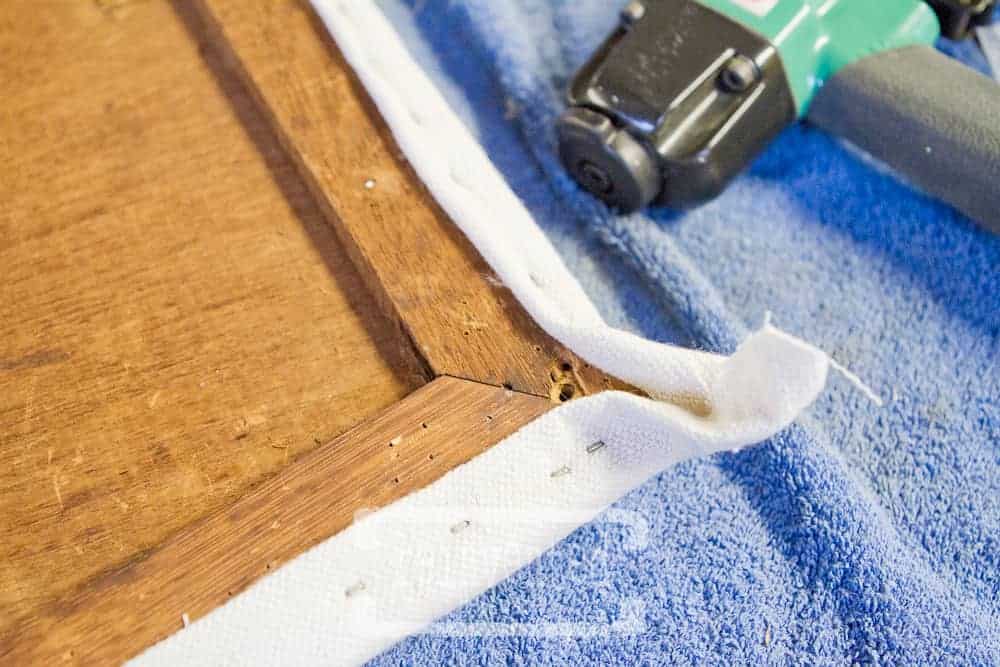
Now it was time to remove the rest of the old fabric and staples. I used a staple remover to carefully lift each staple. If the staple was too hard to pull out, then I used my needle nose pliers to do the work for me.
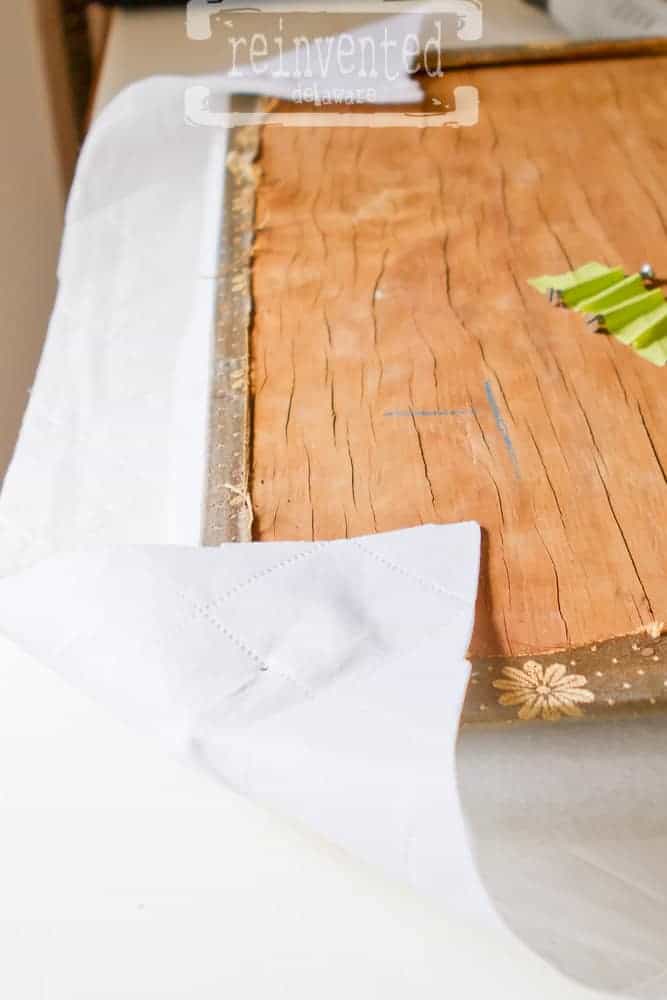
I carefully pulled the fabric away from the seat base. I continued to work my way around the seat, removing staples and excess fabric as I went. As a side note, keep an eye on the staples you are removing. Wear good shoes so you don’t accidentally step on any. Use a shop vac to clean up the area when all of the staples have been removed.
Once all the staples and fabric were removed, I was left with a clean seat base ready for new upholstery. Overall, this process was relatively easy and straightforward. With the right tools and a bit of patience, anyone can remove old upholstery from a dining chair with ease.
Cutting and Attaching New Fabric
Measuring and Cutting Fabric
The next step in reupholstering a dining chair is to measure and cut the new fabric, batting and foam. To do this, I lay the wood seat on top of the new fabric and cut around it, leaving about 2-3 inches of extra fabric on all sides. I do the same with batting.
The foam needs to be cut with more exact measurements so you can trace around the wooden chair seat directly onto the foam and cut it out.
For my chair upholstery project, I had heavy-duty upholstery weight batting on hand. This batting is as thick as foam so I was able to skip on using foam and only used the heavy batting.
You will probably have to use foam because this batting is hard to come by. You could also create a cardboard template by tracing the shape wooden base onto it. Then you could use the cardboard template to cut the foam for each chair.
Next, cut along the traced lines using a pair of sharp scissors. You will see this step in the short videos below.
thanks for being here!
I hope you are enjoying this project! Let me know if you have any questions. Or leave me a comment to tell me about your project and ideas!
thanks, Cindy 😀

Securing Fabric to the Seat
Now it’s time to layer the fabric right side down, batting, foam, and wooden base, all in that order. I also used an underlayer of fabric but it isn’t necessary.
Once the new fabric is cut to size, it’s time to secure it to the seat. I start by placing the fabric on the seat cushion with the right side facing down. Then, I center the cushion on the fabric and pull the fabric taut over the cushion. All of the layers are stapled an secured together.
There are a couple of options to attach the fabric to the wooden base. I used an old-fashioned method which includes small upholstery tacks, needle nose pliers, and a tack hammer. I wanted you to see that you do not need a powered staple gun to do this easy project. You could also use a manual staple gun but you have to have some upper body strength to make sure those staples go into the wood all of the way. This is not my preference!
You can also use a pneumatic staple gun. Keep in mind you have to have an air compressor, a specialty staple gun and staples, and an air compressor hose. You can see how I have used this tool in my chair upholstery series on YouTube.
To attach the fabric to the wooden frame of the chair, I used small tacks, pliers, and a tack hammer. Starting at the middle of each side, I staple the fabric to the underside of the seat, making sure to pull it tight as I go. Then, I work my way towards the corners, folding the fabric neatly and securing it with staples. Work the opposite sides of the chair seat by adding a couple of staples to the center, move to the opposite side, and do the same.
Then on the parallel sides of the seat, do the same. Work from the center of each side adding a few staples as you go and keep in mind to go back and forth from the opposite sides. This will help to keep the fabric even as you move towards the corners. Be sure to check the front side to ensure you do not have wrinkled fabric.
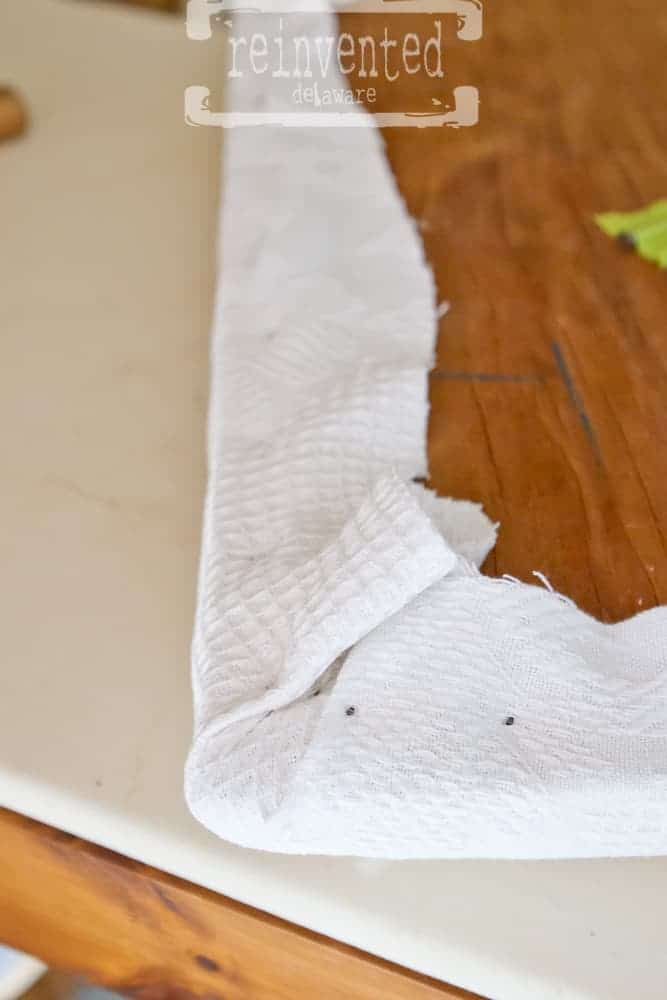
Don’t staple all the way to the corners. Allow room to fold the fabric for neat corners.
At each corner, pull the fabric at an angle to the back. Add a staple to hold it in place. Then fold each side of the excess fabric towards that staple and secure it with more staples. It might take a couple of times to fold the fabric to make sure it lays flat so double-check the look before securing it with staples. Repeat at all of the corners!
This simple way of cutting and attaching new fabric is a great DIY project for anyone looking to give their dining chairs a fresh new look. Just be sure to choose the right fabric for the job and take your time to ensure a professional-looking finish.
If there is any excess fabric, I trim it off with scissors. Finally, I flip the cushion over and make sure that the fabric is smooth and wrinkle-free on the top side of the cushion. I also like to use an iron with steam to help the fabric to lie flat on the underside. This will help to reduce bulk and make it a bit easier to reattach the seats to the frame.
I’ve created a couple of short YouTube videos for you to demonstrate these steps for you. Each video is very short! I made the videos long before I had a serious YouTube channel 🙂 I also have several other blog post tutorials demonstrating reupholstery techniques that will be helpful for you! I will link those tutorials later in this post.
Finishing Touches
Reattaching the Seat
Once you have finished reupholstering your dining chair, it’s time to reattach the seat. Place the seat back onto the chair base and secure it in place using the screws or bolts that were removed during the disassembly process. Make sure the seat is level and secure before using the chair. At this point, you will be glad you labeled all the parts!
Using these simple steps will help you to update your dining room chairs anytime!
Care Tips for Upholstered Chairs
Fabric chair seats can add a beautiful look to your home. Now that you know how to reupholster dining room chairs, you can do it anytime you want a change.
In the meantime, you will want to take care of the chair’s upholstery. Here are some tips to help you maintain the beautiful chairs:
- Spray Scotchgard Fabric Protector on the seats to protect against spills befreo reattaching the seats to the chair frame.
- Lay a waterproof fabric on the seat especially when children use the chair at the dining table.
- Stitch removable ‘sit-upon’ chair covers using a piece of fabric leftover from the upholstery. Toss it in the laundry when it becomes dirty. See image below!
- Use a steam cleaner to periodically clean the chairs.
- Use a patterned fabric to help hide stains.
- Upholster with washable home decor fabric for easy cleaning.
- Avoid velvet fabric since they are hard to keep clean.
- Replace with fresh fabric anytime now that you know how easy it is to do!
chair upholstery video playlist
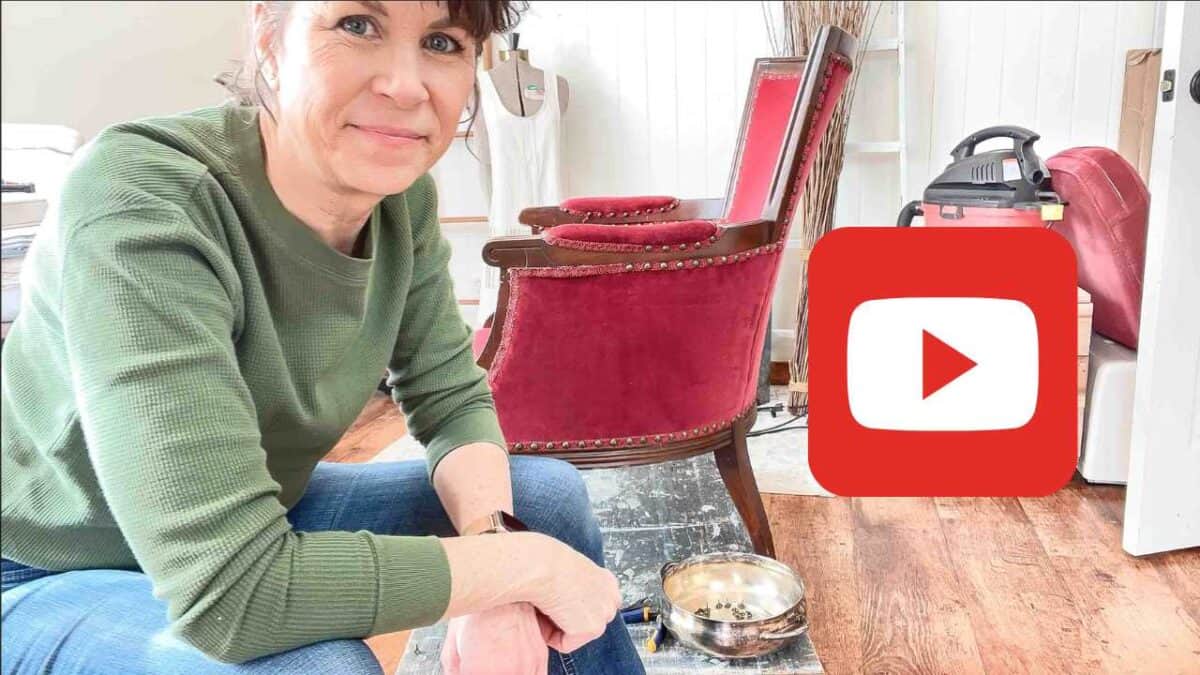
If you are interested in more upholstery techniques, check out this full step-by-step video playlist where I demonstrate how to reupholster an antique armchair. Tap the image below to watch the series.

Thanks for joining our journey!
Thanks so much for joining us for this post! Join our journey so you don’t miss any of the fun projects, tutorials, and inspiration that we share with you each week! You can follow us on Instagram, Facebook, and YouTube. We share even more inspiration on Pinterest!
Visit my Amazon Storefront!
Click the button below and head over to our online shop on Amazon!


Cindy Rust
Cindy has been decorating her home with thrift store finds for 40 years. She is an avid thrift store shopper who loves to makeover the items she finds into vintage-inspired home decor and furniture. When she isn’t thrift shopping or painting a piece of furniture, you can find her making homemade butter, working in her garden, or painting with watercolors.
How to Reupholster Dining Room Chairs
Equipment
- staple remover
- needle nose pliers
- pneumatic staple gun
- marker
- measuring tape
Materials
- upholstery weight fabric of your choice
- upholstery foam pad
- heavy batting
Instructions
- Detach the seat from the chair frame by removing the screws from the underside of the chair seat.
- Pull all of the staples and tacks used to secure the original fabric using the staple remover. Dispose of the staples and tacks keeping safety in mind.
- Make any needed repairs to the chair frame. Paint or restain the wood chair frame if needed.
- Measure and cut the fabric and batting to fit the chair seat allowing excess of 2-3 " on all sides.
- Cut the foam to fit the chair seat by tracing the wood shape onto the foam with a marker, then cutting on the line.
- Layer in this order: decorative fabric, batting, foam, wood seat.
- Secure all of the layers to the wood seat. Staple each side starting at the center and working out from there 2-3" on each side of the center.
- Move to the opposite side of the chair seat and secure the layers in the same manner pulling the layer snug but not too tight.
- Staple up to each corner but not completely to the corner. Fold and pull the fabric from the point of the corner into the wood seat and staple. Fold and secure the excess fabric neatly and staple to secure.
- Finish the newly upholstered seat by steam ironing the fabric.
So inspiring to see! I LOVE how you cut the back of the chair…so clever! I couldn’t get the videos to play??
Beautiful transformation!
Thanks Jaimee!! Hummm…. I’m not sure the videos didn’t play. Thanks for letting me know- I will look into it!! Thanks for commenting!!
I’ve been dying to find someone who added a new table top to an antique base and I love how this table turned out! Great work!! I was scrolling through your projects and maybe didn’t catch all but was curious if you all have done other tables like that? I have an antique duncan phyfe table that I would love to give a new look, but in doing so I’d love to do a farmhouse style top and make it bigger than the current size, I’m just not sure if its possible! Thoughts? Thanks in advance!!
It is absolutely possible to build a top like this for your table! We have made many tops like this one but I haven’t blogged all of them. Hubby builds these farmhouse tabletops in his workshop in the wee hours after work so I don’t have any photos or tutorials. I can say that he joins the board lengths with a couple of different joints, one being with dowels and of course glue and heavy-duty clamps. I suggest you do some research on joining boards for a tabletop. I wish I had a tutorial for you here, but I don’t. But thanks for the idea to create one! Have a great day!😊
Great tutorial, Cindy; I need to try this on my dining room chairs.
You can do it Wendy – This is such an easy project and makes a huge difference in a dining room 😊