
Dresser Makeover in MMS Milk Paint | Mora
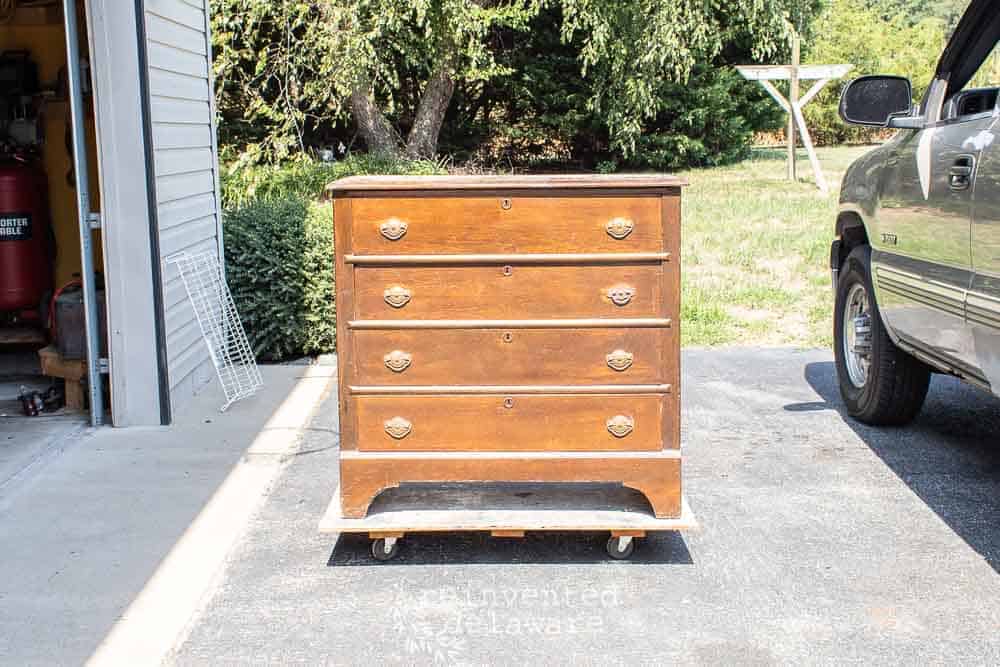
Ready for another dresser makeover? With just a bit of Miss Mustard Seed Milk Paint, we transformed this dusty dresser into a lovely piece for any home!
 Some links in this article are affiliate links and if you click on them, we will received a small commission at no additional cost to you! Clicking and purchasing helps to support this blog and all of the home decor tutorials we bring to you! Click to read my full disclosure.
exciting opportunity!
Furniture has been moving in and out alot around here lately and there is a good reason!
One of my Instagram furniture buddies, Jenn from Eight Hundred Furniture has invited me to join her at the Witches Fly North Antique & Artisan Show in Lebanon, PA.
The market will be held in the Lebanon Valley Expo Center on Friday, October 4th from 12p-5p and Saturday, October 5th from 8a-3p. I am super excited! This will be my first ever vintage market and I can’t wait to learn and experience all the things!
Anyway, that explains all of the furniture makeovers we have been doing lately. 😉 Let’s jump into this dresser makeover!
fancy drawers
First, let’s take a look at the gorgeous drawers! I mean, don’t we all start by looking at the drawers??
These drawers have lovely joinery. This kind of detail is one of the reasons I love old furniture instead of newer pieces. This Knapp joinery dates this piece back to the late 1800’s.
You can see that just a bit of sanding can really clean up the sides of the drawers so that the joinery can be seen clearly.

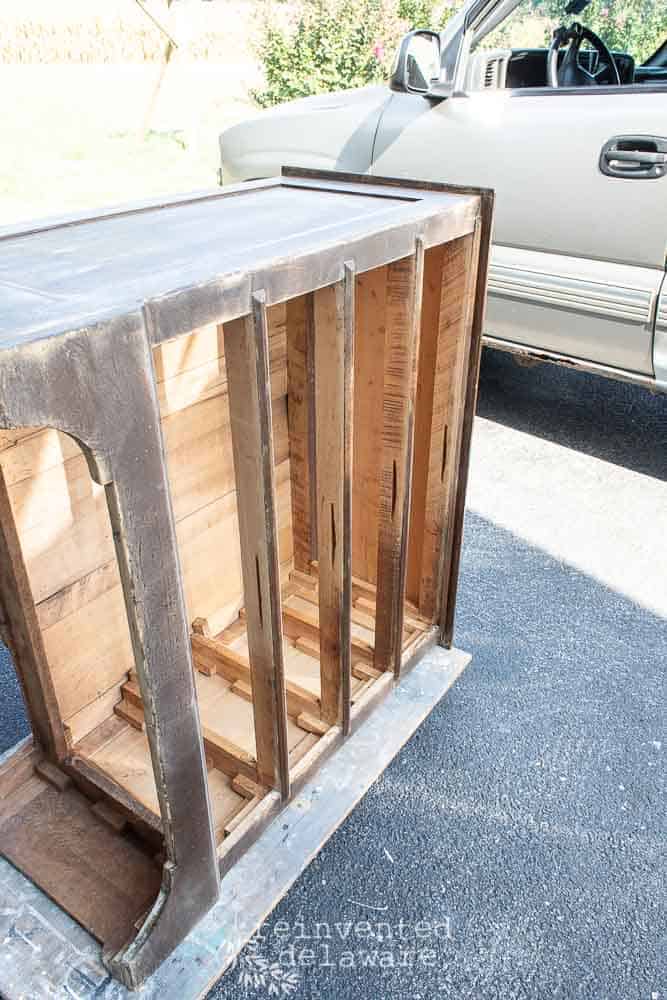
first step in dresser makeover
I always start furniture makeovers like this dresser makeover with a good sanding. It helps me to give the piece a good once over for needed repairs and it is one of the steps to prep for paint.
As I sanded the piece, I saw that a couple of the drawers needed a minor repair. See the split wood here on the side of the drawer? It’s an easy fix!
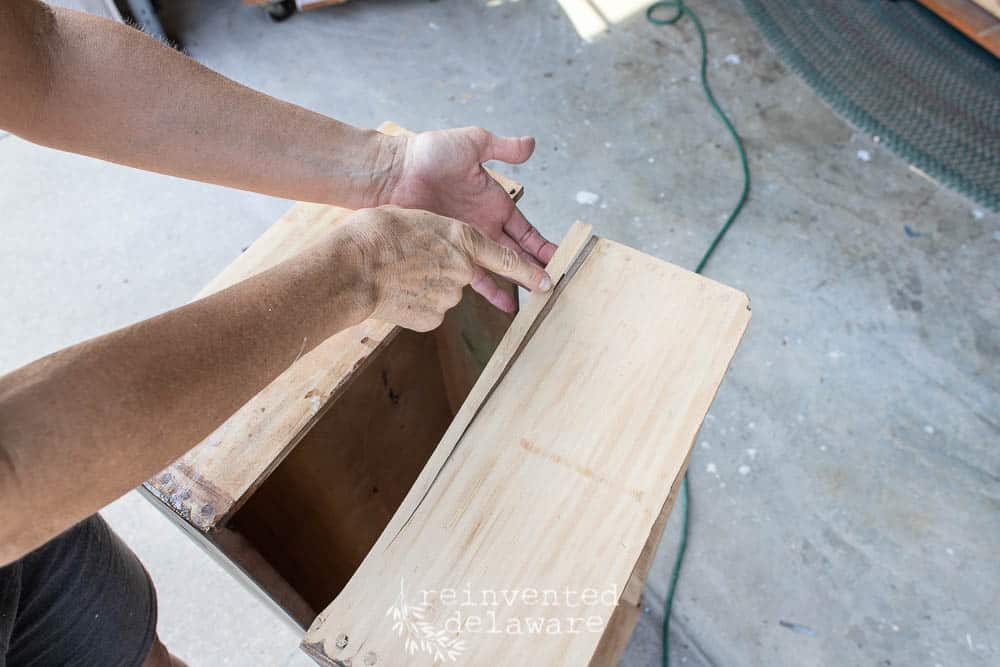
easy repair
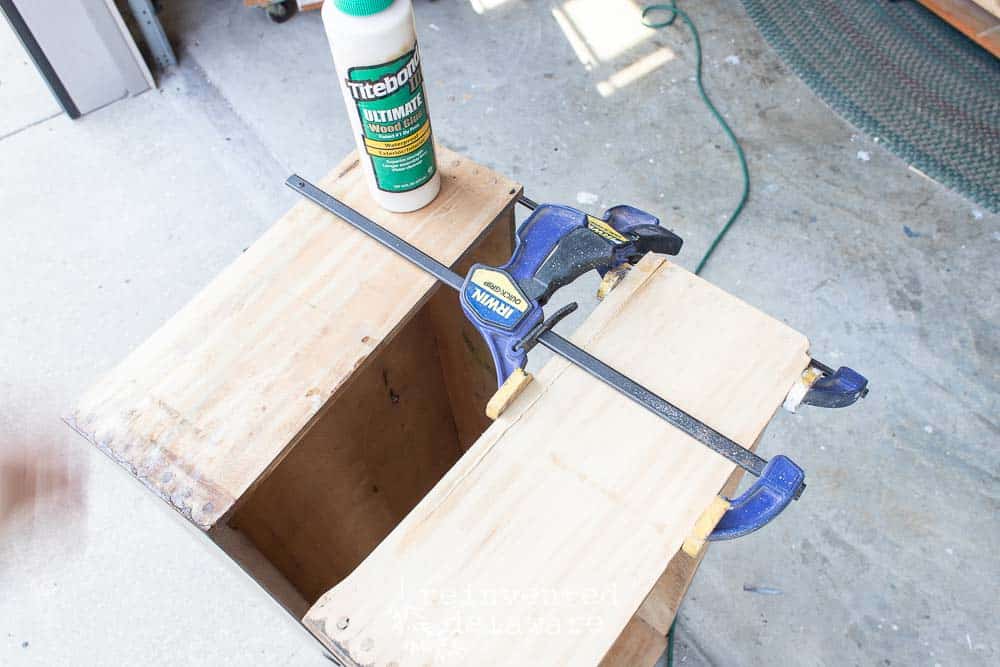
After that drawer was sanded, I cleaned off the dust with the shop vac and grabbed Titebond Wood Glue and a couple of Irwin Quick-Grip Clamps. Depending on the size of the split, you will need one or two clamps.
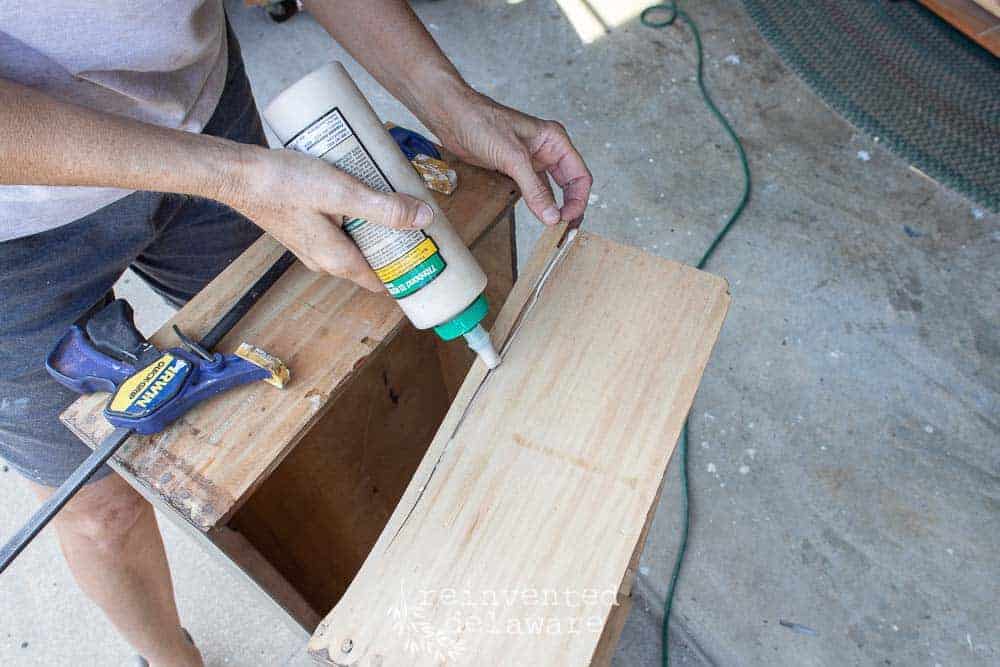
Fill the gap with the Titebond Wood Glue and then fit the split section back into its place. Put the clamps in place to hold the split tightly to the drawer. Squeeze the clamps until just a bit of glue squeezes out. Wipe away the excess glue and let it dry at least 4-6 hours. I usually let it set up overnight.
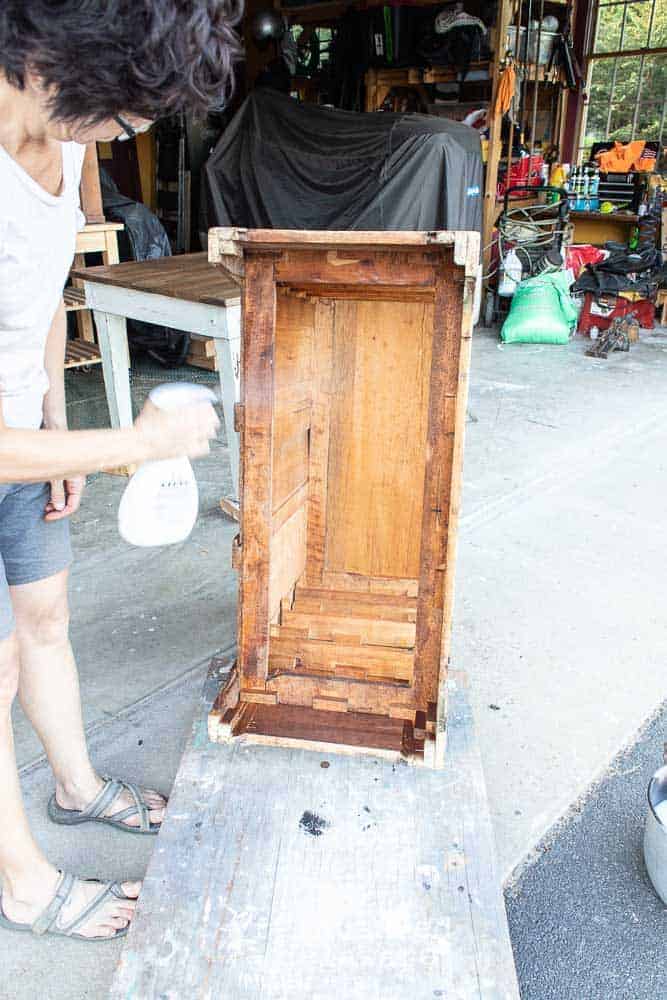
exfoliating
While the glue was drying, I carried on with the rest of the sanding. I like to turn the piece on it’s side or even upside down so that I can give a good sanding on every square inch of the piece.
I sand the openings for each drawer – tops, bottoms and both sides. I also sand under the legs of the piece. Often the feet are in bad shape so I do a bit of exfoliating 😉
We all need a little TLC from time to time, don’t we?
eliminate the odors
Another perk of sanding the piece entirely, is that it helps to eliminate odors. Remember, this kind of furniture is very old. That means years and years of dust accumulating on even the tiniest of surfaces. And btw, I won’t even think about what dust really is! Agh!!
Anyway, the sander removes all of that dust and in turn removes the musty smell that comes with the dust!
This dresser had an extra bit of old smell to it so I got the idea of using the heavy duty Febreze.
With the cabinet on its side, I gave the interior a good spraying. Then out into the sunshine so that the sun could do it’s own work!
After vacuuming the piece, I also washed it using a solution of hot water and Simple Green. I have used this cleaner for years under the strong recommendation of my mom. The old fashioned cleaners are amazing. Simple Green is easy on the environment and on my hands. And it has a clean, fresh smell to it as well!

cleaning recap
Let’s recap my cleaning process:
- thorough sanding to remove deep layers of dust
- thorough vacuuming with a brush attachment
- spray down with Febreze and a good sunshine soaking
- thorough cleaning with Simple Green and hot water
- back into the sunshine!
drawer pull makeover
Up next is the hardware. All of the gorgeous drawer pulls matched except one. So I took a poll on Instagram, and y’all voted to keep the pulls that came with the dresser instead of replacing them with new pulls.
I loved that response! The idea that somehow the drawer pull was lost and then substituted with whatever the owner had on hand is my kinda story!
They did need a good cleaning. A small wire brush will clean out all the yucky stuff and any rust that they may have.
Here is a tip that I find helpful when restoring vintage hardware this way: use a box with some holes punched in it to hold the drawer pulls as you use the wire brush around each piece. If you hold the drawer pull in your hands you are likely to knick your finger with the wire brush and that hurts! Trust me!
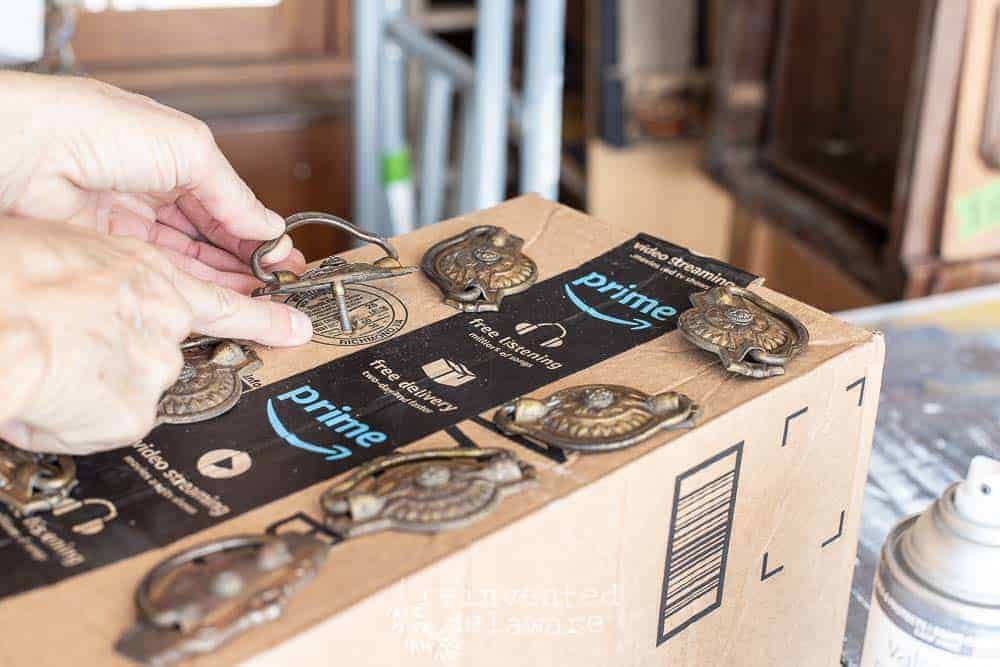
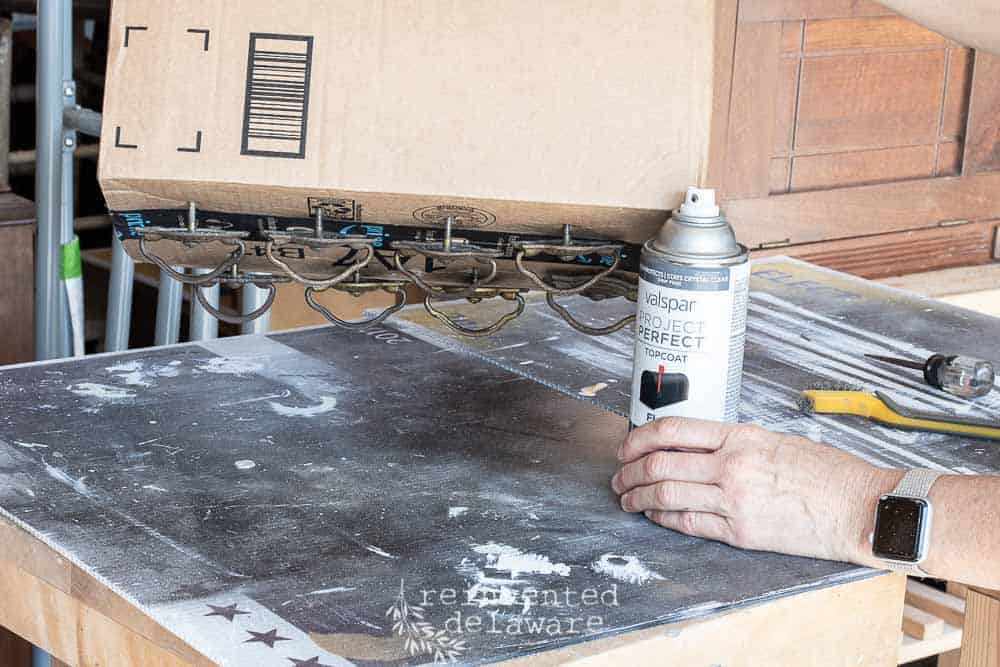
I used Valspar Project Perfect Clear Flat Spray Sealer to prep the pieces for the next step. I’ll explain that in a minute, but take a look at another advantage of using a box to hold the drawer pulls…..
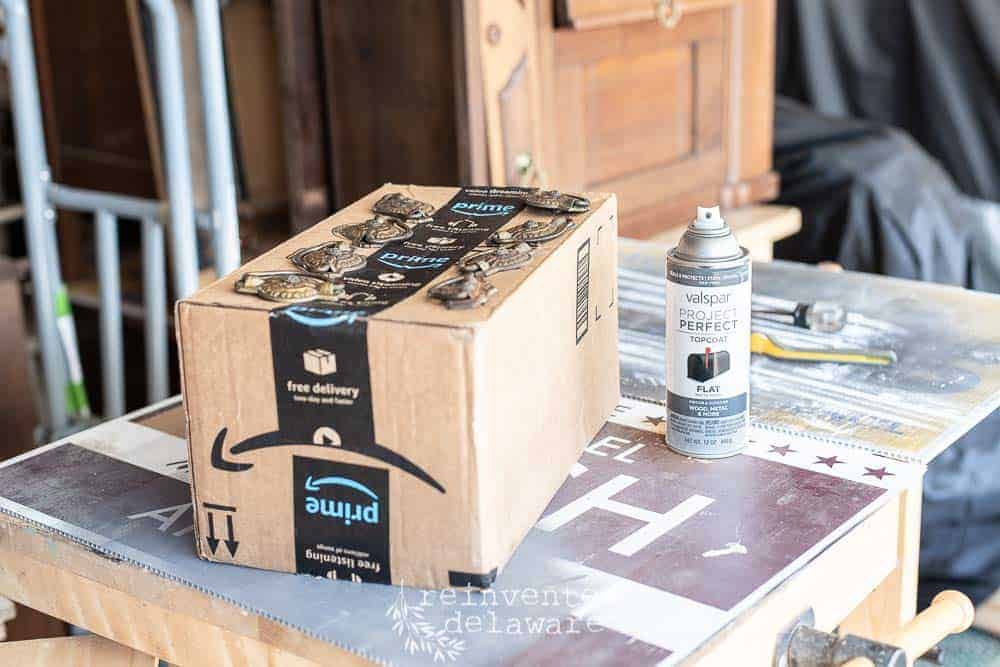
….turn the box upside down so the hardware dangles and you can spray without the clear coat gathering in puddles! The spray sealer dries super quick so by the time I put the can and the box down, it was dry!
a little bit of rub-n-buff
Okay, back to why I use the spray sealer. There have been a couple of times that I have used Rub-n-Buff on hardware and it hasn’t adhered well. Somehow I got the idea to spray this first to give the surface some tooth so that the Rub-n-Buff would stick to it. And it worked!
The Rub-n-Buff is easy to use. I apply it with a small artists brush that you can get from the dollar store. The paint brush gets the metallic based paste into all the nooks and crannies. Be sure to smooth it out over the surface evenly. Use a dry paper towel for a bit of buffing action.
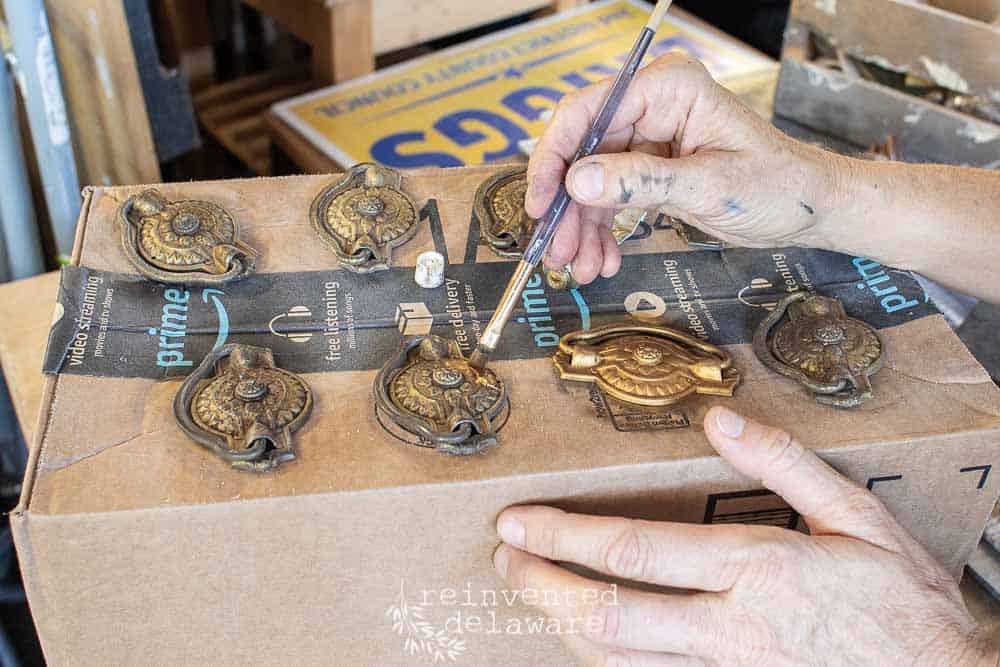
I used Grecian Gold for this set of drawer pulls. I also used a bit of the Rub-n-Buff in Ebony just on the high point of the pulls. It added some natural looking aging to them. You’ll see the final result in the reveal post!

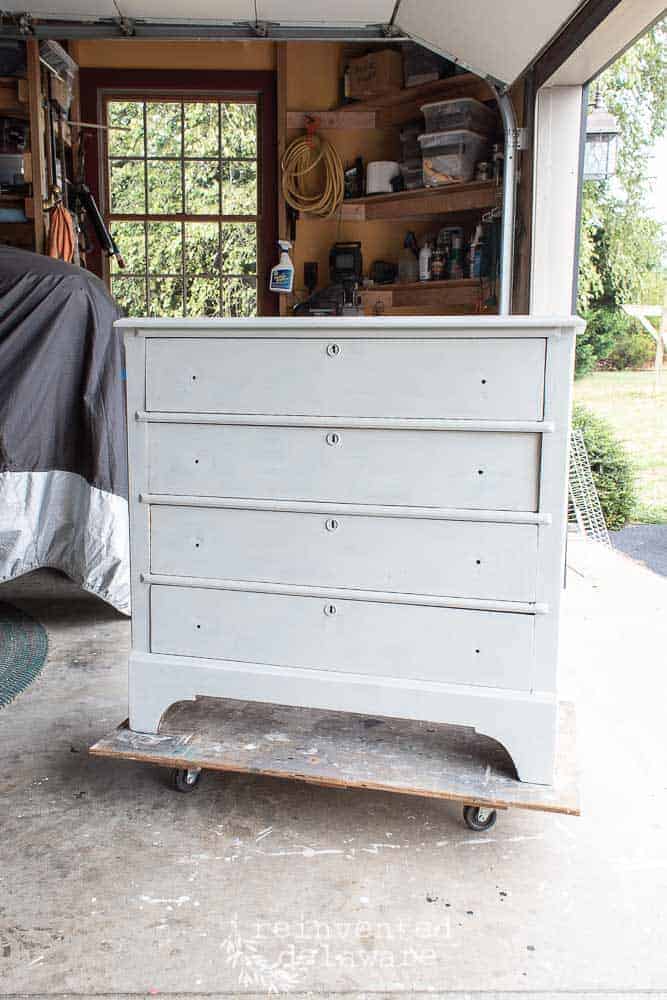
Miss Mustard Seed Milk Paint
I chose to use Miss Mustard Seed in Mora for this piece mostly because it is the color of the month! And I am so glad it is! This is just the first coat!
Thanks for stopping by!
That’s it for today! Stay tuned for part two of this gorgeous dresser makeover! I can’t wait to share it with you!
Join us over on Instagram and Facebook for more projects and reinventions. We love sharing what we are doing in the workshop! You can sign up for our projects updates and we will send them right to your inbox. Sign up in the side bar! No worries about us spamming you or selling your email, we’re not that kind of people 🙂
Thanks for stopping by! Join us on Pinterest for more inspiration! Be sure to pin this for future reference!
