
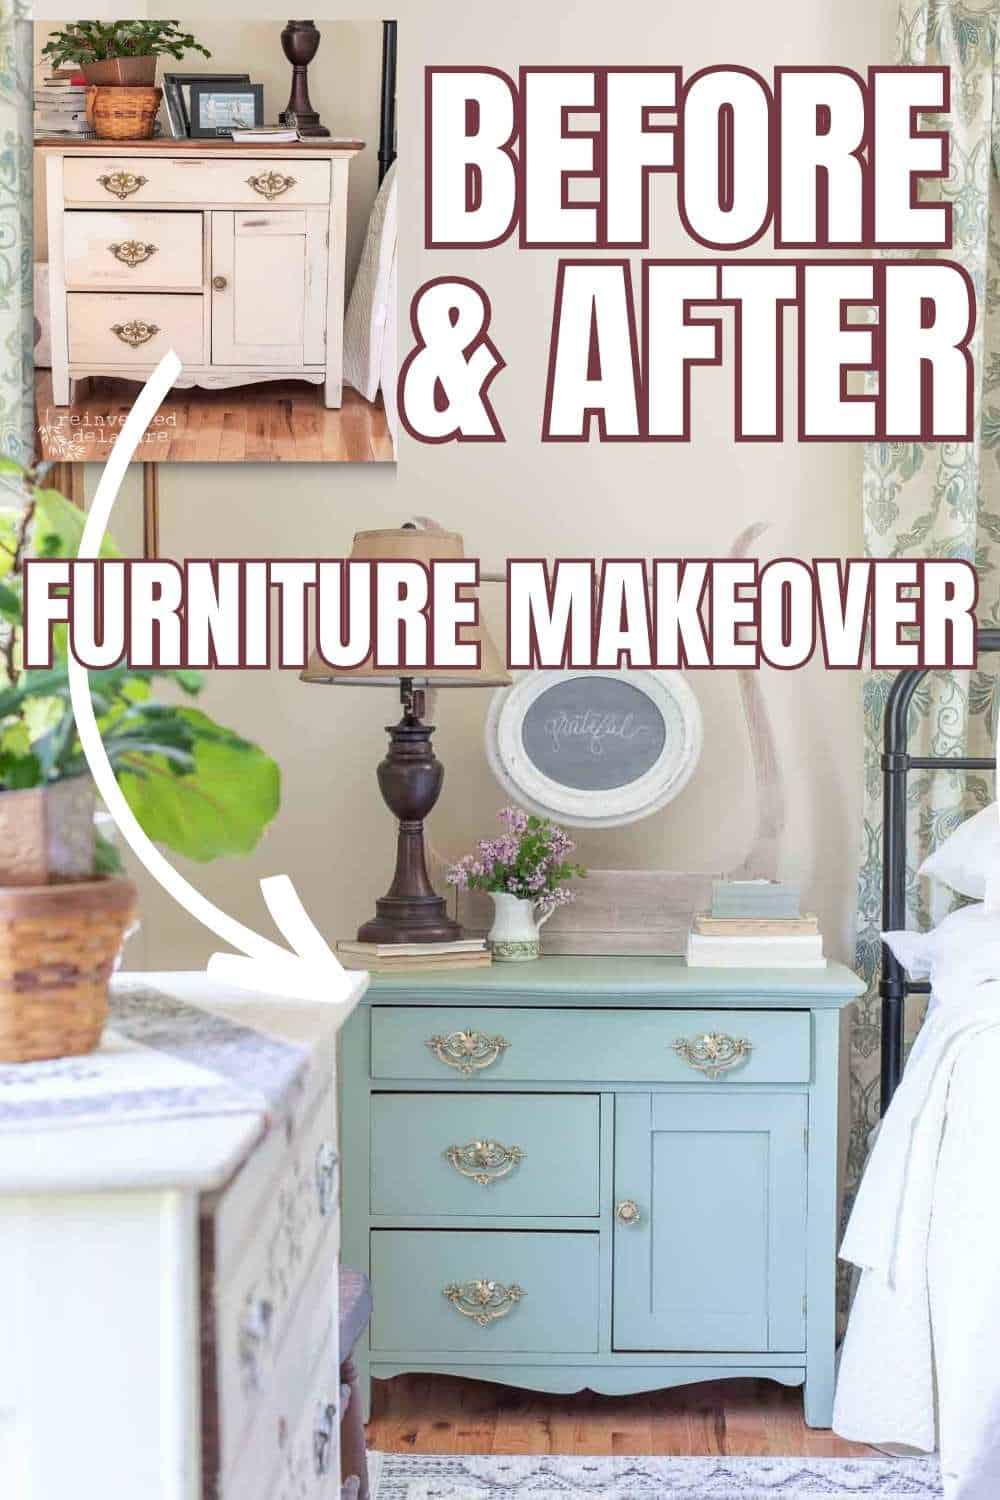
Antique Washstand Furniture Makeover with Chalk Paint
Learn to makeover a furniture piece like an antique washstand with chalk paint. Chalk mineral paint is easy to use and foolproof! You will love using this chalky paint!

Virtual Book Club
Welcome to this edition of the Virtual Book Club. Three of my blogging friends and I will share our interpretation of a different book on the fourth week of each month! You will see their ideas and inspiration at the bottom of this post.
Below are some of the books we will be using as inspiration. Click the arrows to scroll through our book choices. Tap to get your own copy.
On the last Thursday of each month, we will share something home decor-related, and a culinary treat on the following Saturday inspired by our book of the month.

We hope you join us in this reading adventure and grab a copy of the books so you can be inspired along with us!
Maybe you would rather listen to the audio version of these books! Join Audible and you can enjoy books on the go from your phone! This is a great way to read lots of books!Or maybe you are a movie watcher, like me! Join Amazon Prime and get access to thousands of movies!
This post is sponsored by Dixie Belle. All opinions are my own. The following post may contain affiliate links. That means if you click and then buy something, I will make a small commission at no additional cost to you! Thank you for supporting my blog. full disclosure here.

book inspiration – Anne of Green Gables
This month our virtual book club read Anne of Green Gables. This is such a classic story. When my kids were little, we watched movies over and over. The whole series was especially fun to watch on rainy Saturdays when they couldn’t go outside to play. We ate loads of popcorn on those days!
When I watched the movie on Amazon Prime, one of the first things I noticed was the furniture. Of course! The old furniture is my love language! Haha! Anyway, I spotted an adorable washstand in Anne’s room when she moved in with Matthew and Marilla. It was situated by the door and had a water pitcher and bowl along with a small linen towel hanging on the bar of the washstand harp.
washstand furniture makeovers
If you don’t know, washstands speak to me. We’ve given so many washstands new life by restoring them, painting them, white waxing them, and even decoupaging them!
So of course I was inspired to makeover one of our washstands. Actually, I gave two of our washstands a makeover!
BTW, don’t mind the white paint on the left of the washstand. I got a little crazy one day thinking I might paint it white. I’m so glad I didn’t do it!
This vintage washstand has been with us for the last ten years. We kept the original wood for some time and then decided it needed an update.
paint over orange-toned wood
The wood tones of this antique wash stand were a bit too orange for my liking. The beautiful oak wood had turned orange after years of having the original finish still on it. It’s been my experience that an old furniture piece like this oak vintage washstand can turn too orange, especially with shellac. Shellac by nature is orange in color.
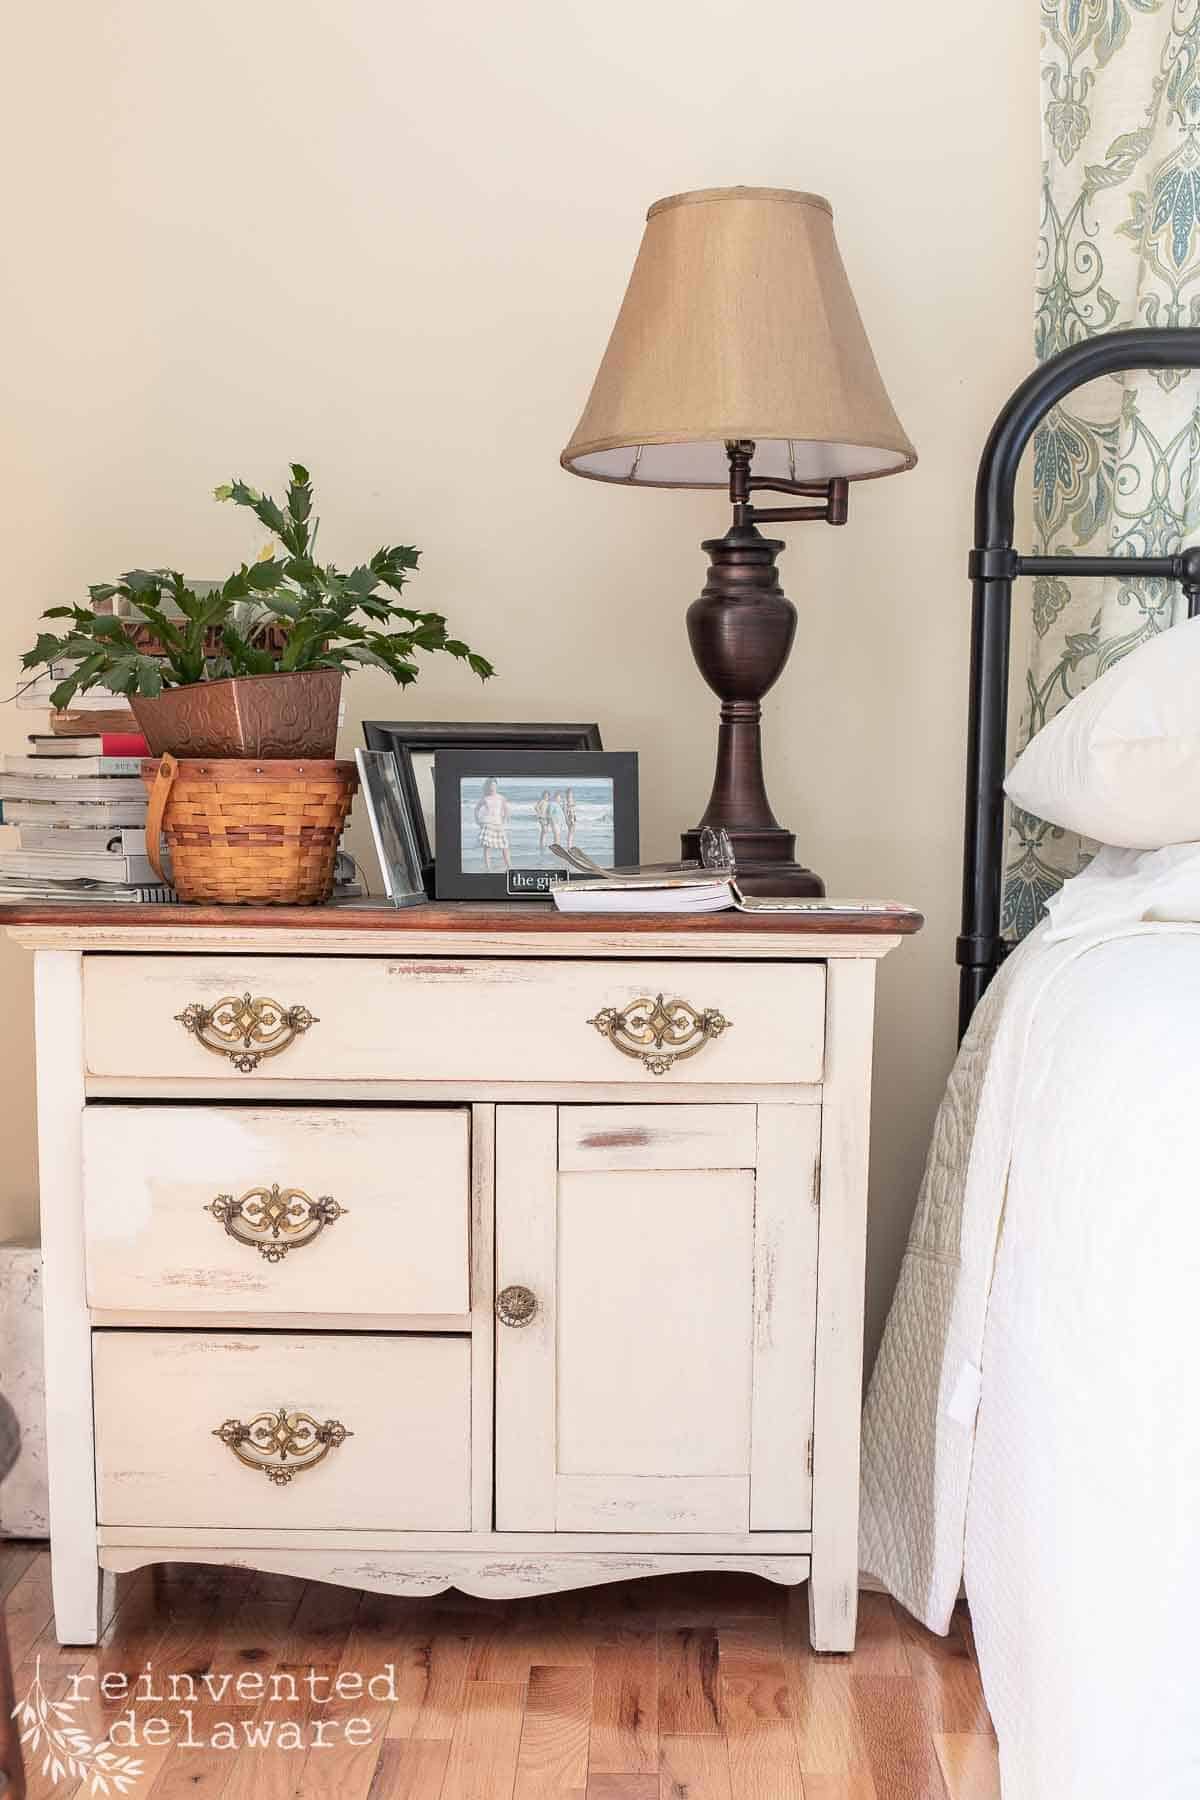
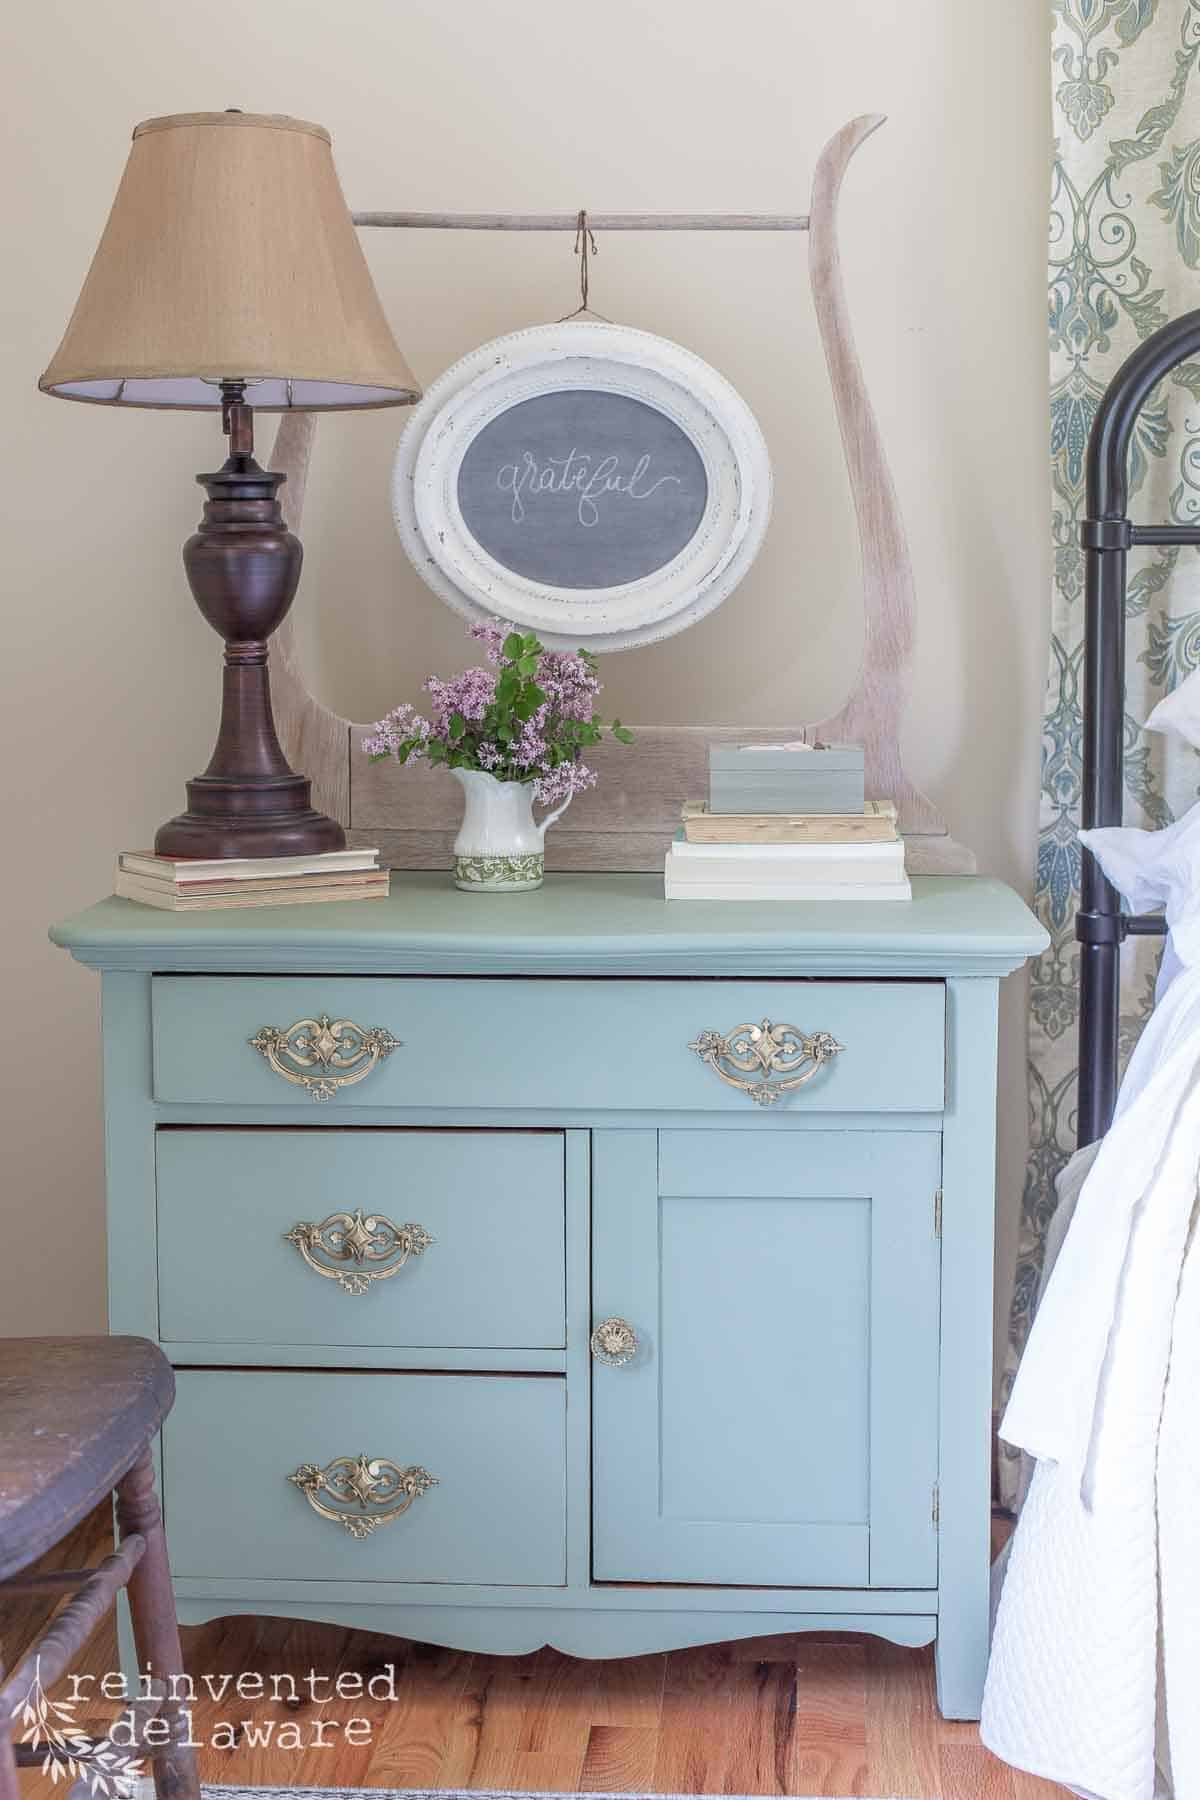
We have two antique washstands in our master bedroom that act as nightstands. This is a great use for a piece of antique furniture and they are the perfect side table.
We don’t use a washstand for the same purpose they were built. Not many of us have a wash basin pitcher that we need access to in our bedrooms! Most of us have indoor plumbing and a sink!
Both of the washstands had their first furniture makeover about five years ago. I removed the antique washstand harp on one and the other didn’t come with one when we bought it. Then I painted each washstand using General Finishes Milk paint. The top of each old piece of furniture only needed to be sanded with an orbital sander and then restained with General Finishes Van Dyke Brown Glaze.
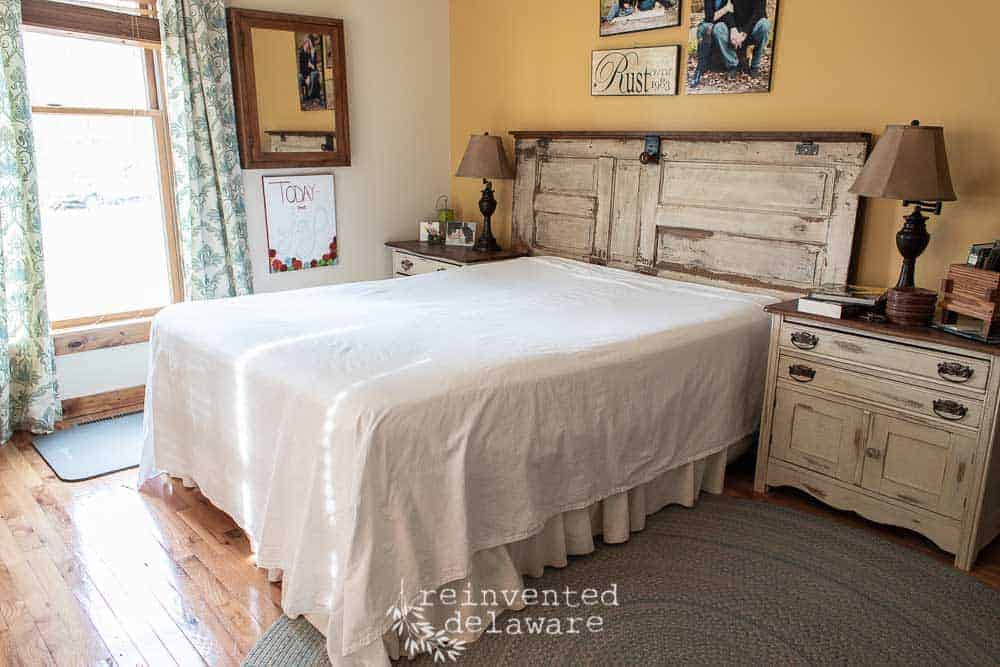
bedroom refresh
By the way, if you find an antique washstand, it might come with marble tops. That’s pretty common. The marble can be cleaned with a baking soda mixture and a microfiber cloth. Then you can protect the surface with clear wax.
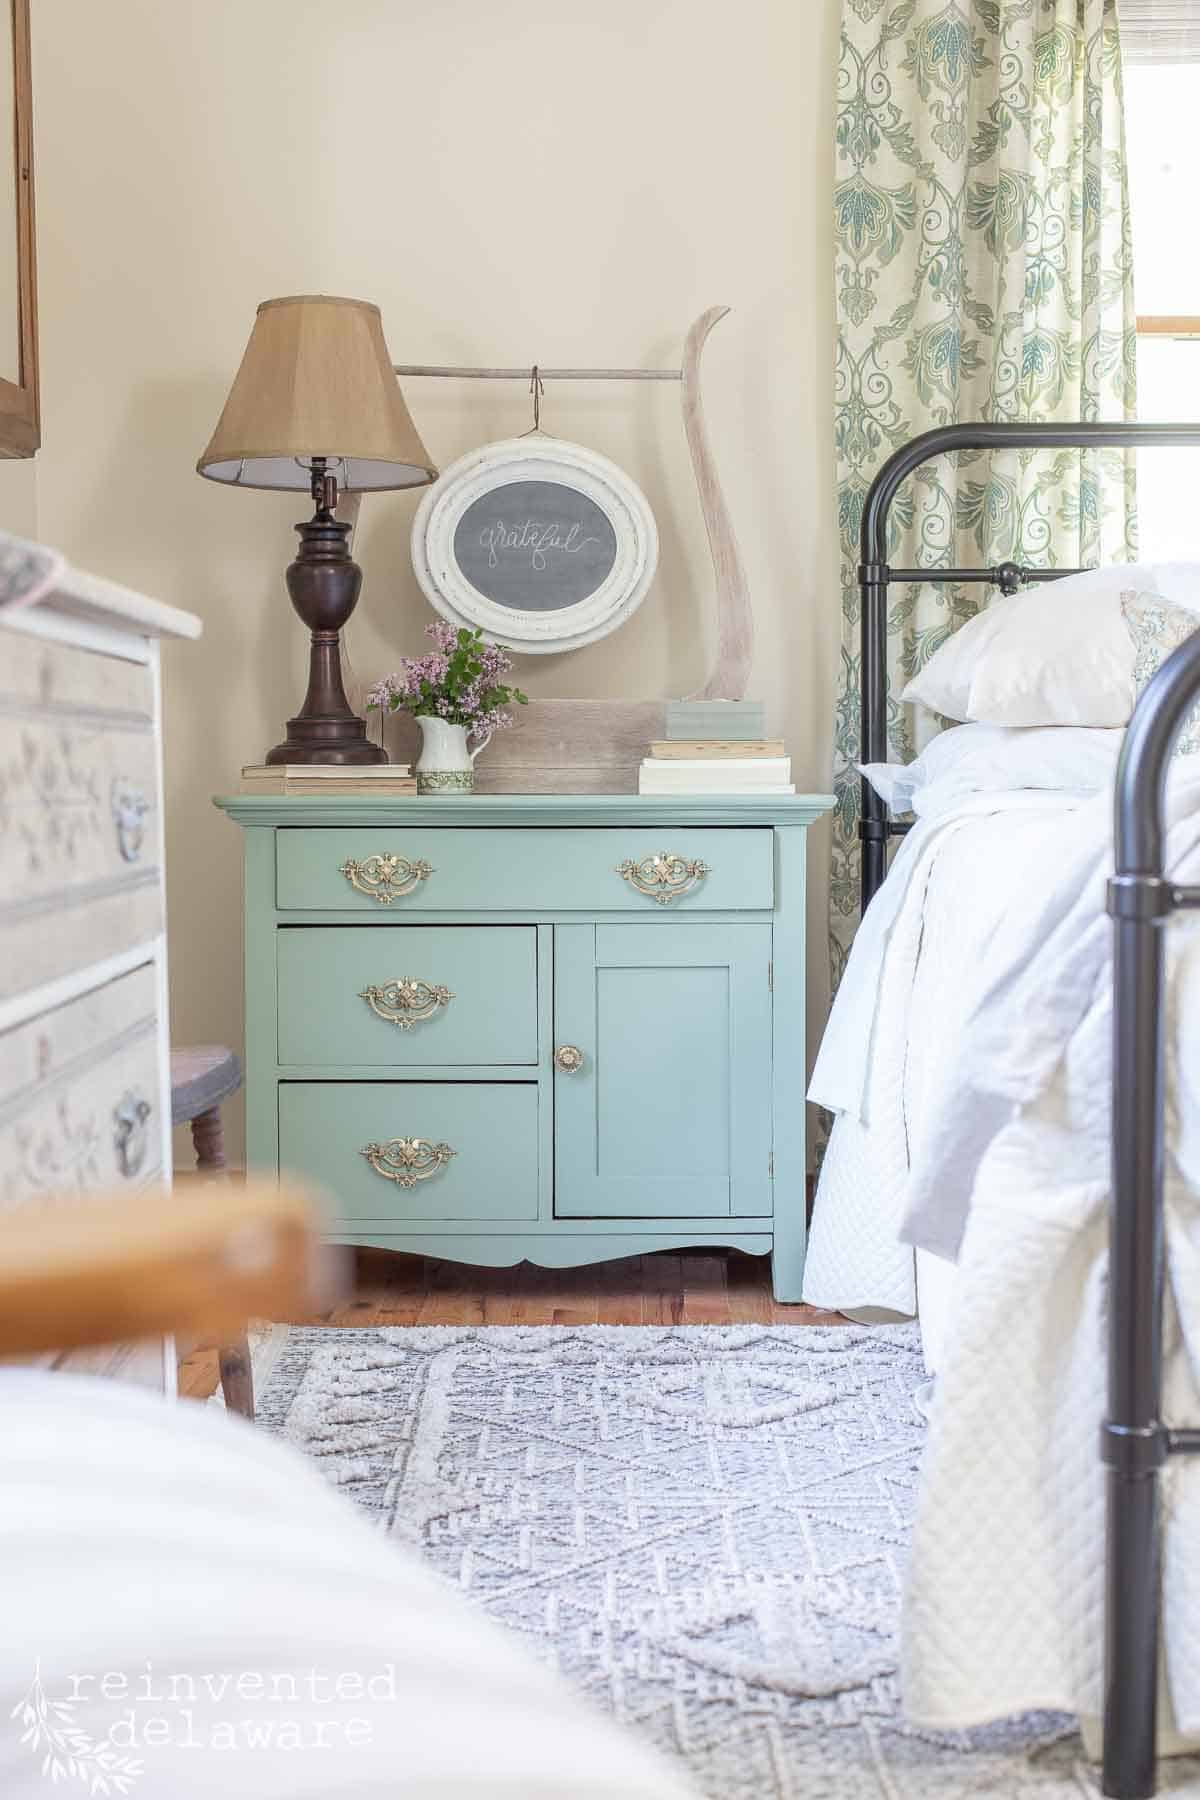
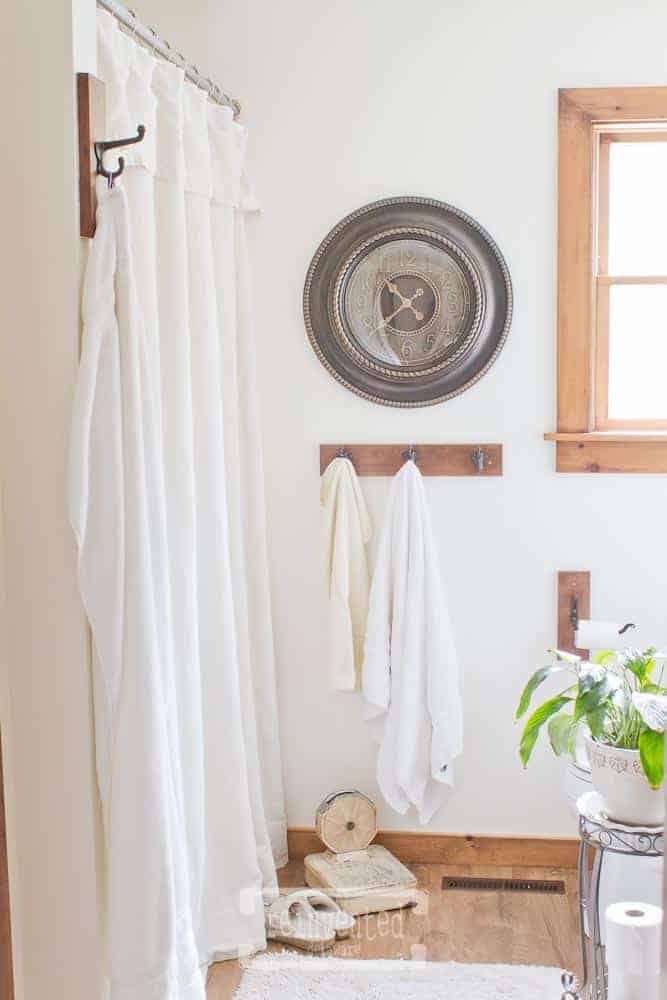
Let’s move on to the current furniture project! Our primary bedroom has needed to be refreshed for a very long time (ten years at least!) We’ve slowly been completing a couple of projects for the room including a faux fireplace and an old rocking chair reupholstery project.
I wanted to branch out with different colors that would be soothing and calming like the neutrals we used in the bedroom when I shared about the new sheets we bought. The elderly lady I cared for years ago always said a bedroom should be blue. I agree but I also really love green.
custom chalk paint color
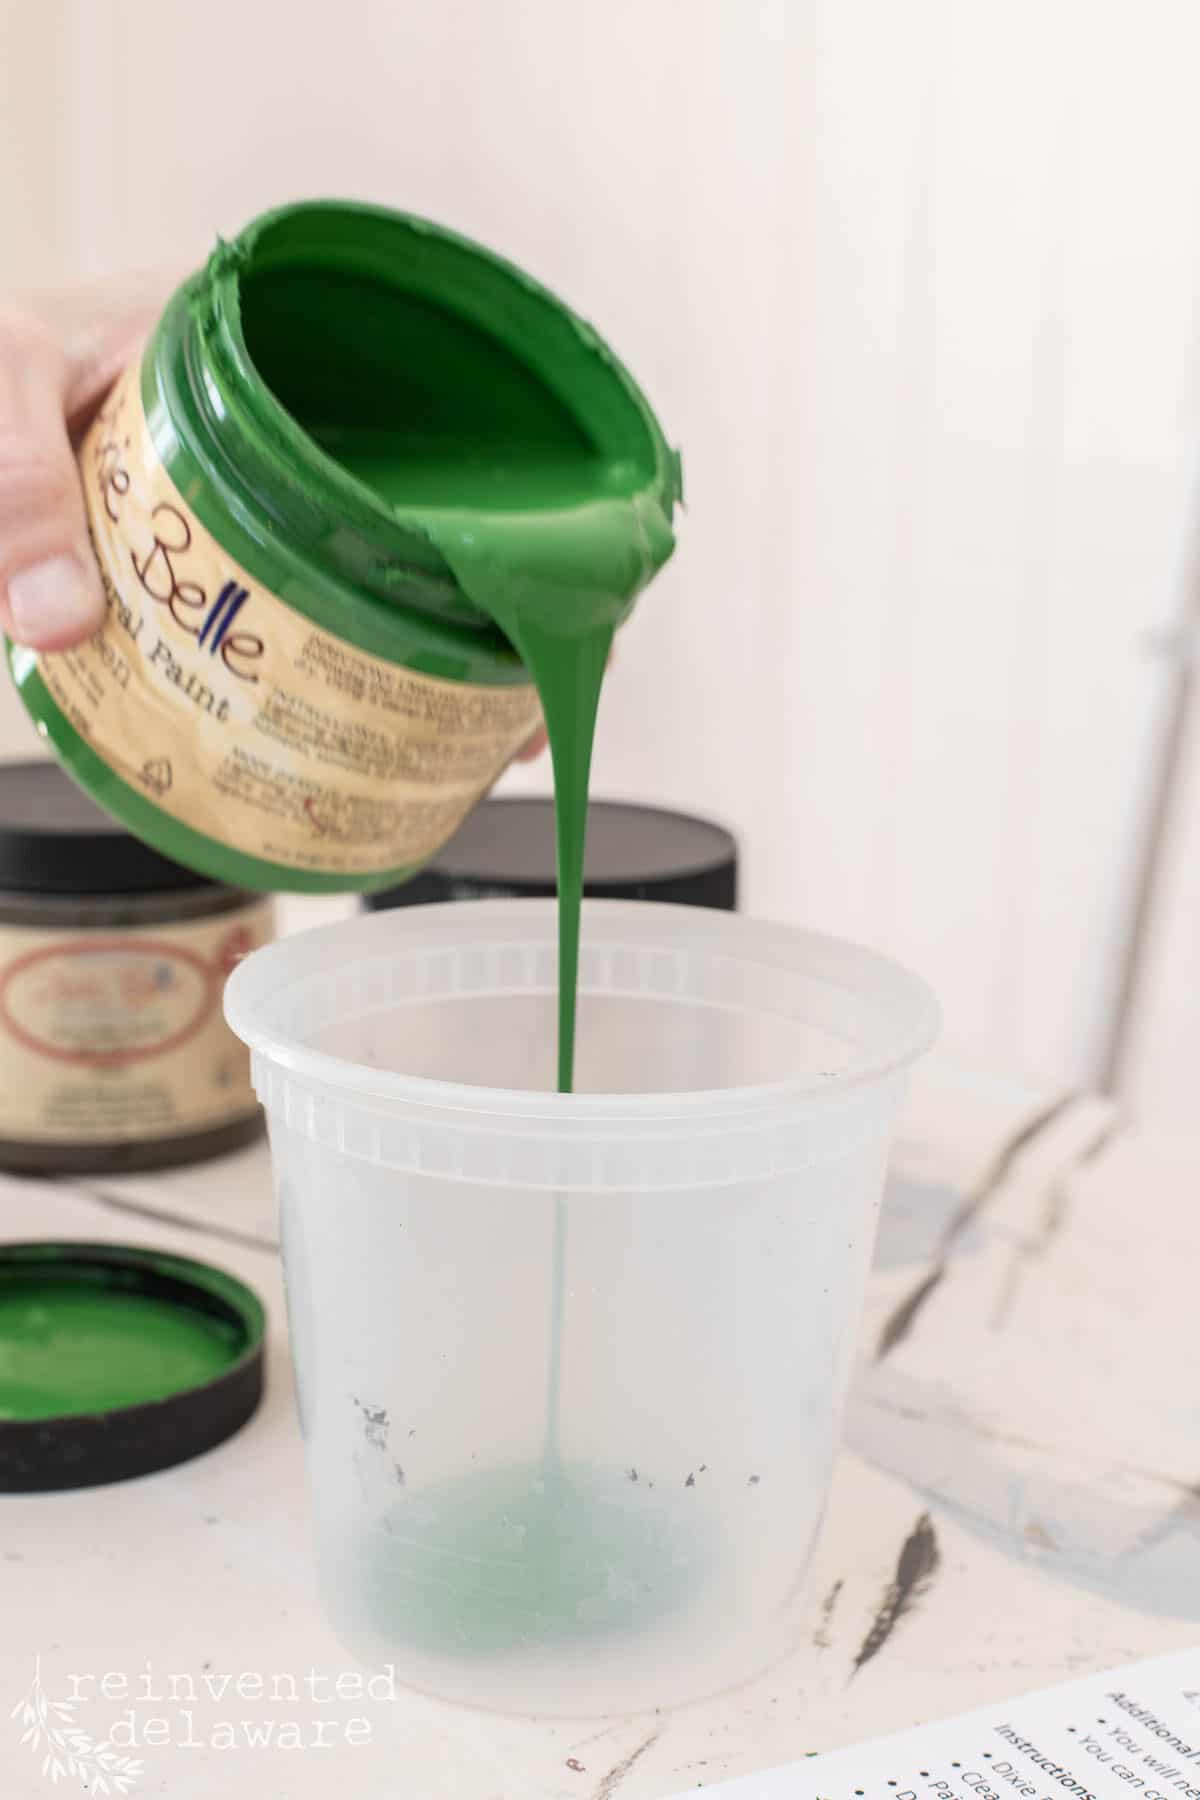
I opted to go with green. But I didn’t want to buy more mineral paint. Then I remembered that Dixie Belle paint has a way to mix colors of chalk paint that you already have on hand to create a new custom color! This would be the perfect solution to give these washstands new life! Plus, I am using the chalky paint I already have on my shelf!
Mixing the colors was foolproof with the amazing online tool that Dixie Belle offers. Head over to the Dixie Belle website and look for the Color Lab tab in the top menu. Enter the colors you have on hand, then make adjustments using the + and – buttons for each color.
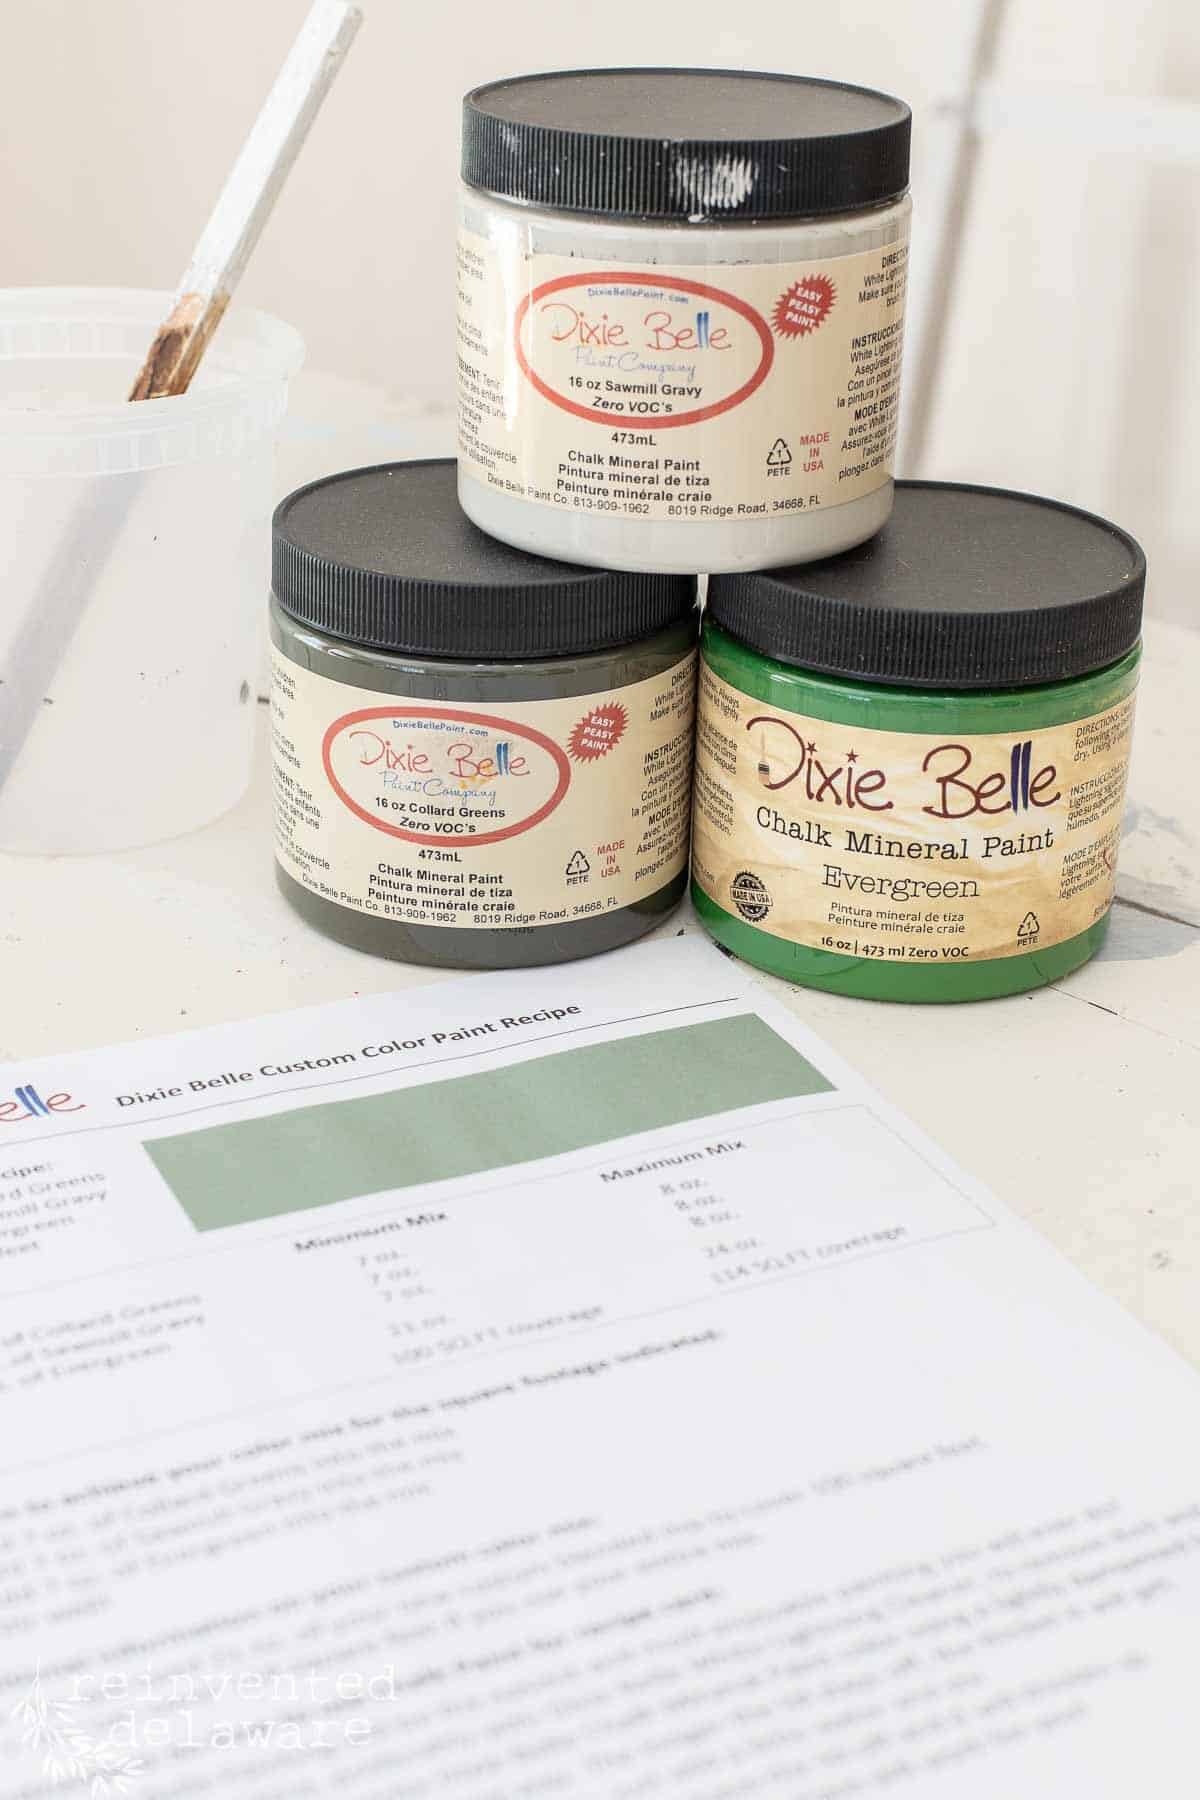
I started off with two colors I already had, Collard Greens and Evergreen in equal parts using the online tool. The color was a bit dark so I lightened it by adding Sawmill Gravy to the Color Lab. It was just the color I wanted!
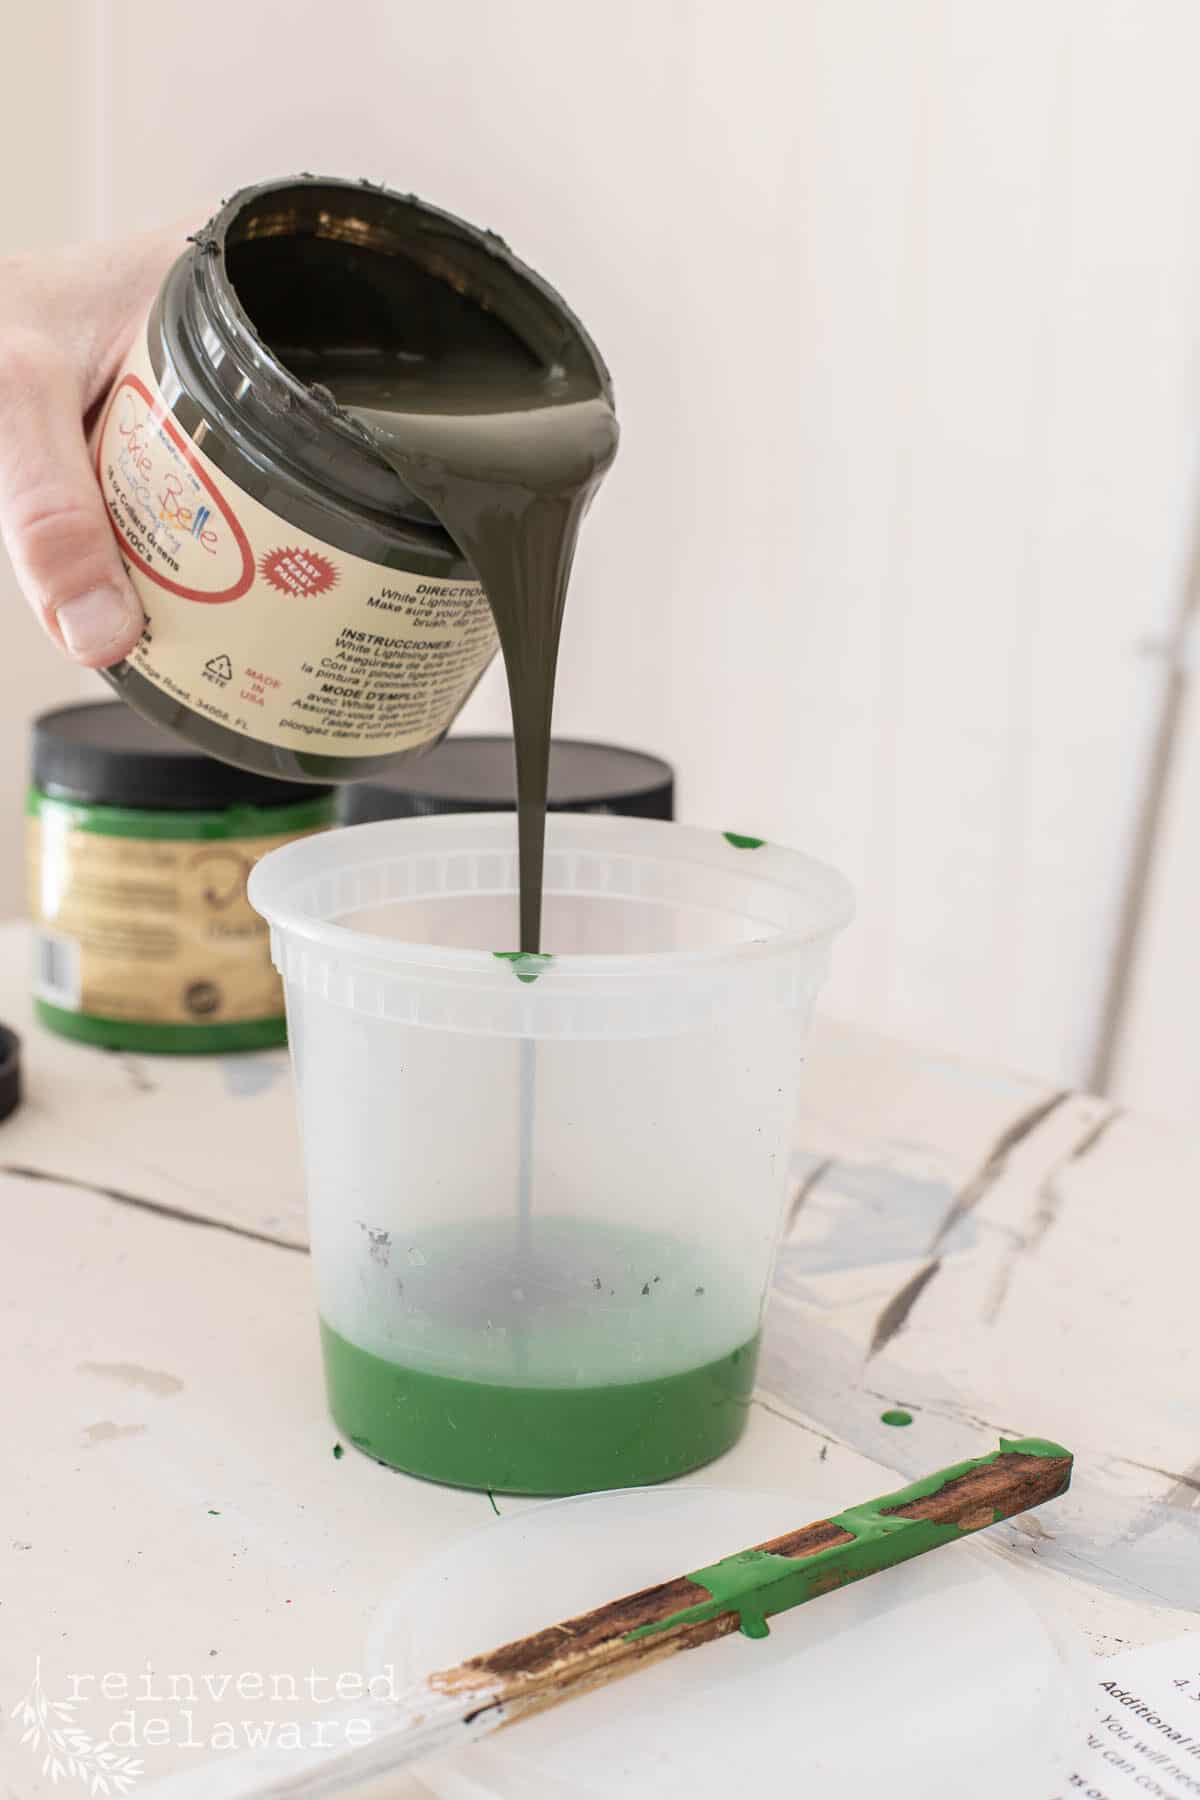
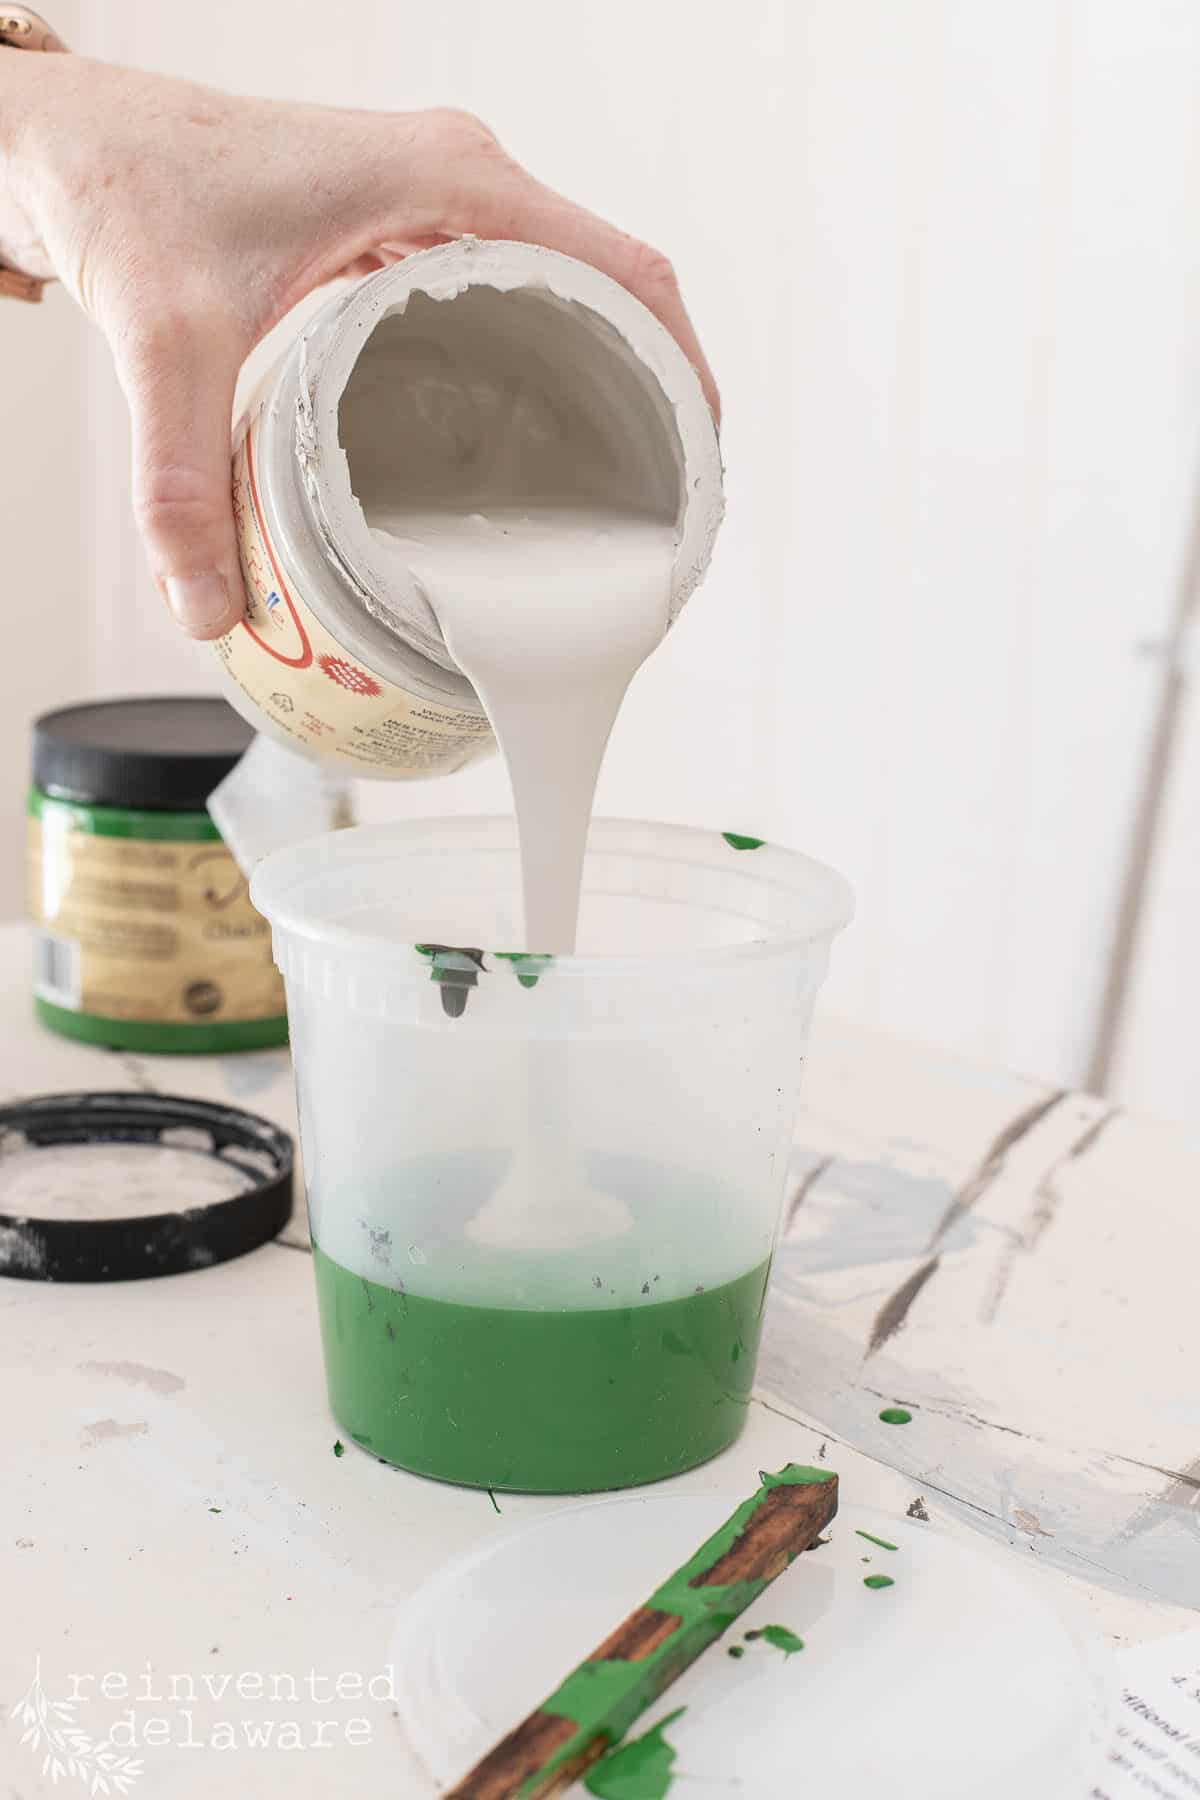
The mix I used was all equal parts but you can change the increments and color choices to your heart’s content! The best thing about this tool is it’s so much fun!! I might have spent an hour playing with color and I didn’t waste any paint testing out the final paint color. 🙂
The next step after playing with the Color Lab tool was to clean the furniture piece. All of the things I had been storing inside the washstand had to come out. Then I used the shop vac and vacuumed the inside of the drawer. One of our washstands has one drawer and two cabinet doors. The other one (it’s the washstand I use) has one wide drawer, two smaller drawers, and one cabinet door.
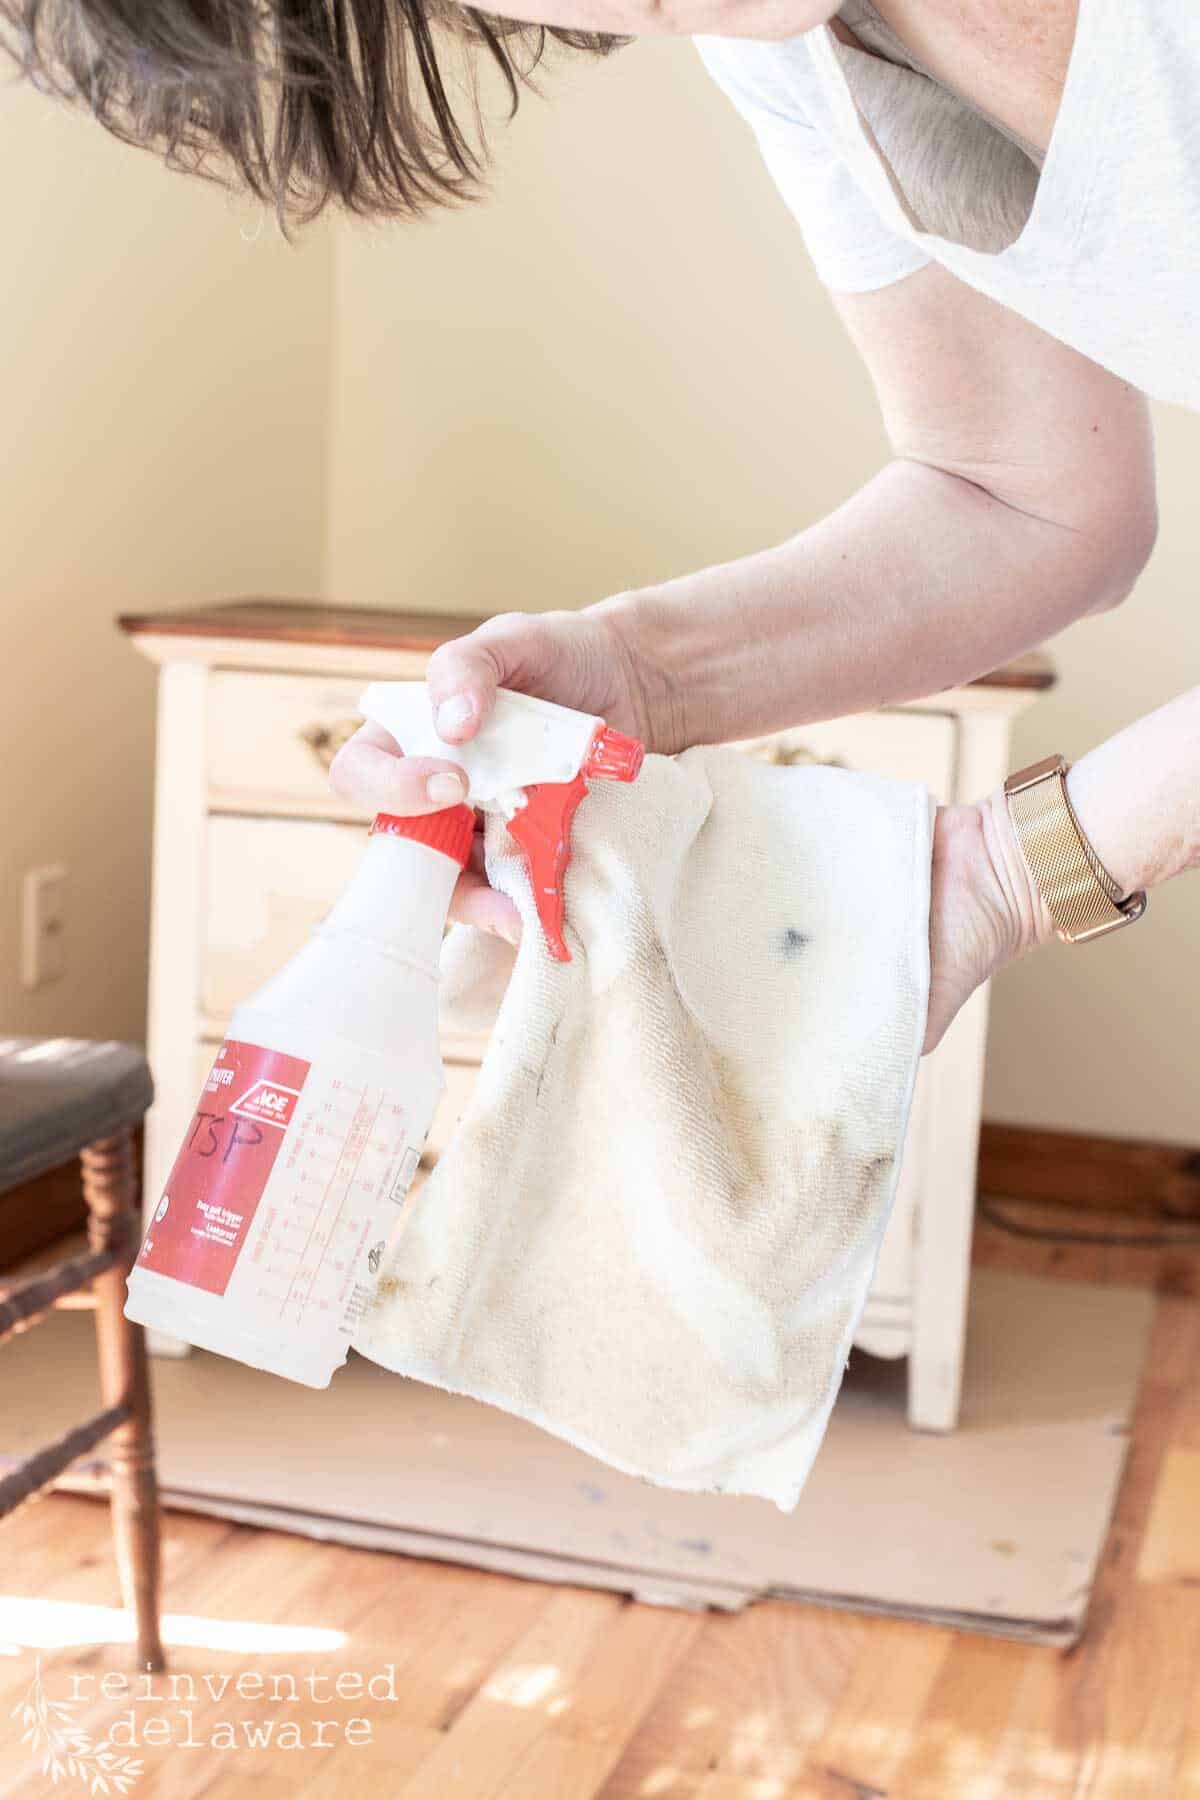
clean the furniture with TSP
Next, I cleaned the entire piece of furniture using a spray bottle filled with TSP alternative cleaner and a microfiber cloth. This cleaner is easy to use – spray it on, and then wipe it off. It’s also a good idea to go back over the cleaned surfaces with a clean damp microfiber cloth to remove any residue left by the TSP alternative cleaner.
If this is your first time painting a piece of furniture, any good furniture flipper will tell you in order to get the best results, clean the piece thoroughly before chalk painting furniture.
scuff sand the surfaces
The next step is to scuff sand the piece of furniture with fine grit sand paper. I use a worn-out sanding sponge for this task. You might be thinking that I have added a step by sanding after I have already cleaned the piece. One of the best tips for any furniture painting project is to clean the piece first! The last thing you want to do is push dirt or oils into the wood. This could cause the paint to not stick to the furniture surface.
how to repair drawer stops on old furniture
After painting the first coat of paint, I made a couple of quick repairs. This vintage washstand was in good shape except that the drawer slides were broken or missing altogether.
To fix this, I glued a couple of small pieces of wood together and created new drawer slides. The pieces of wood are actually wood shims. Having the drawer stops in place means that the drawer fronts won’t go too deep into the wash stand base. It will make the finished project much prettier!
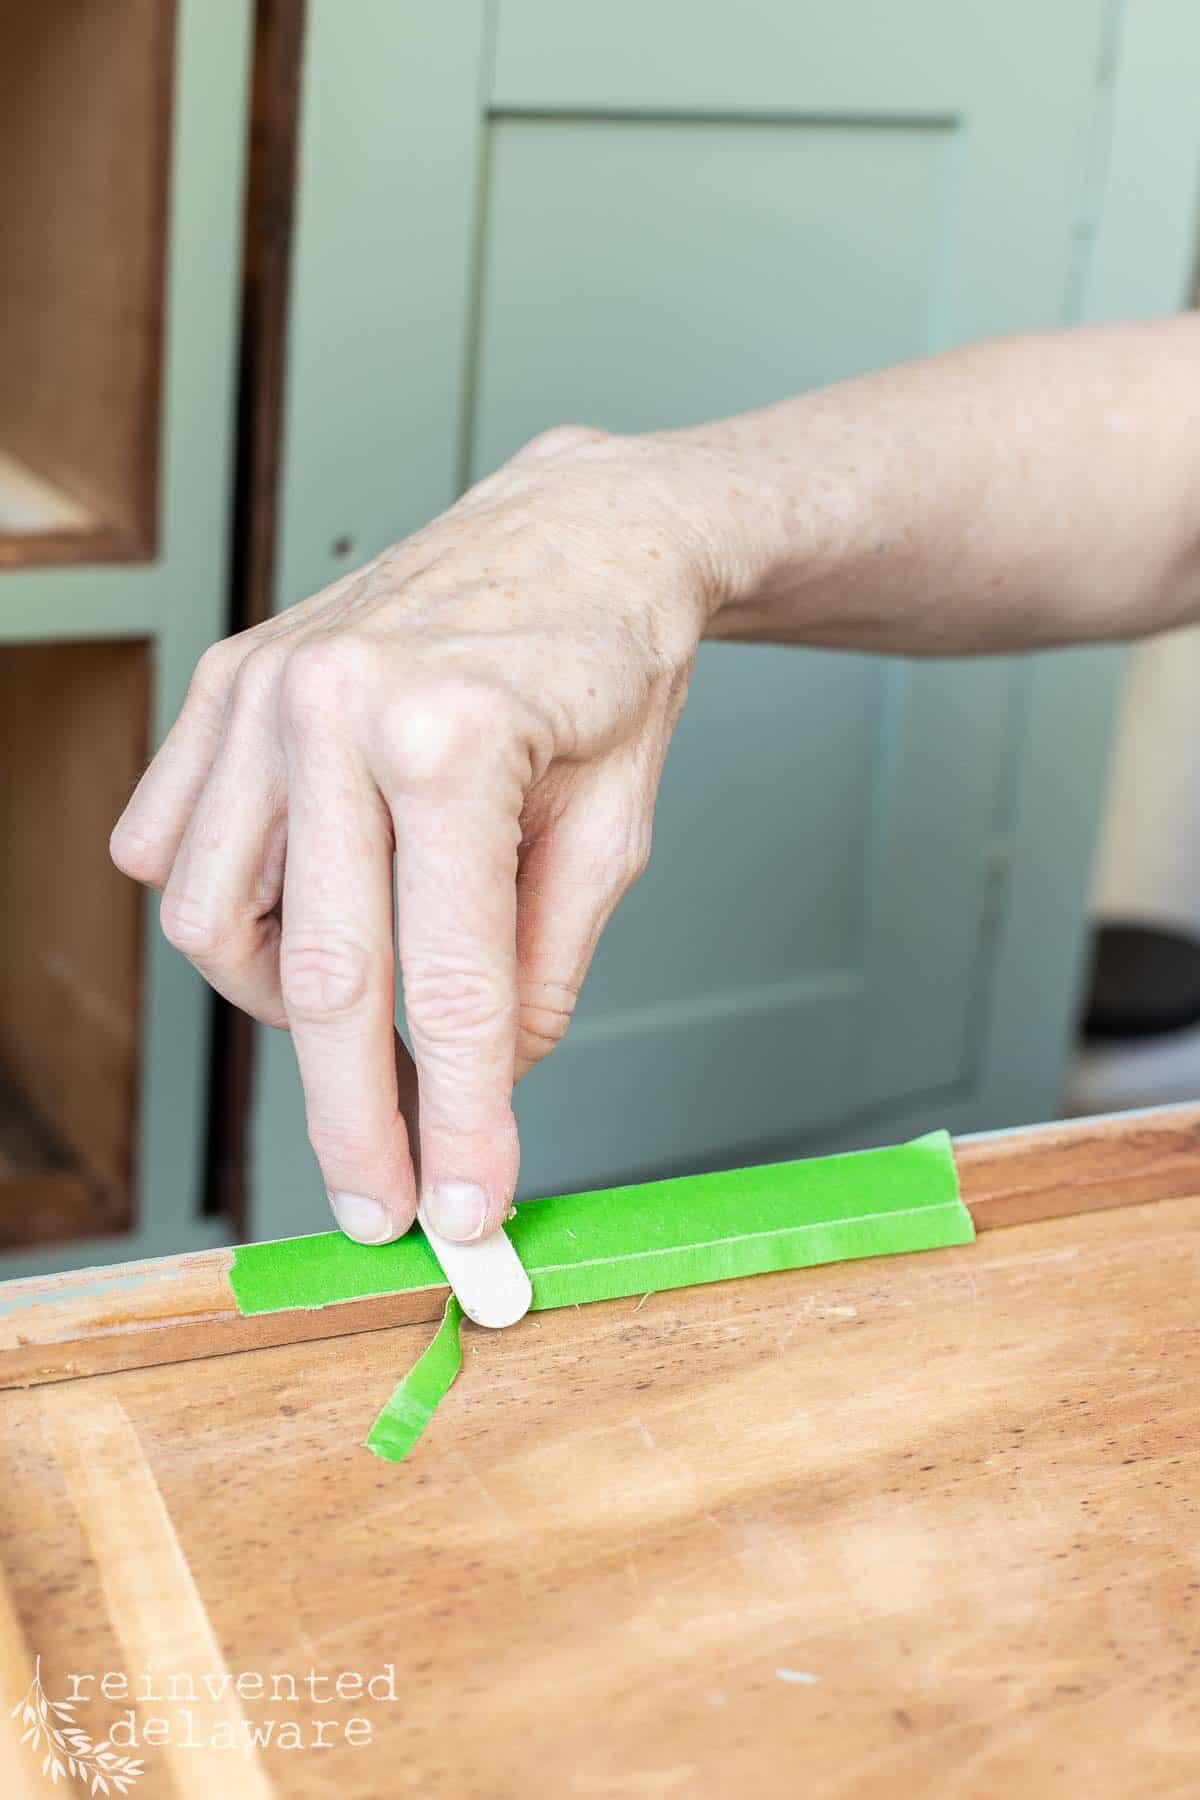
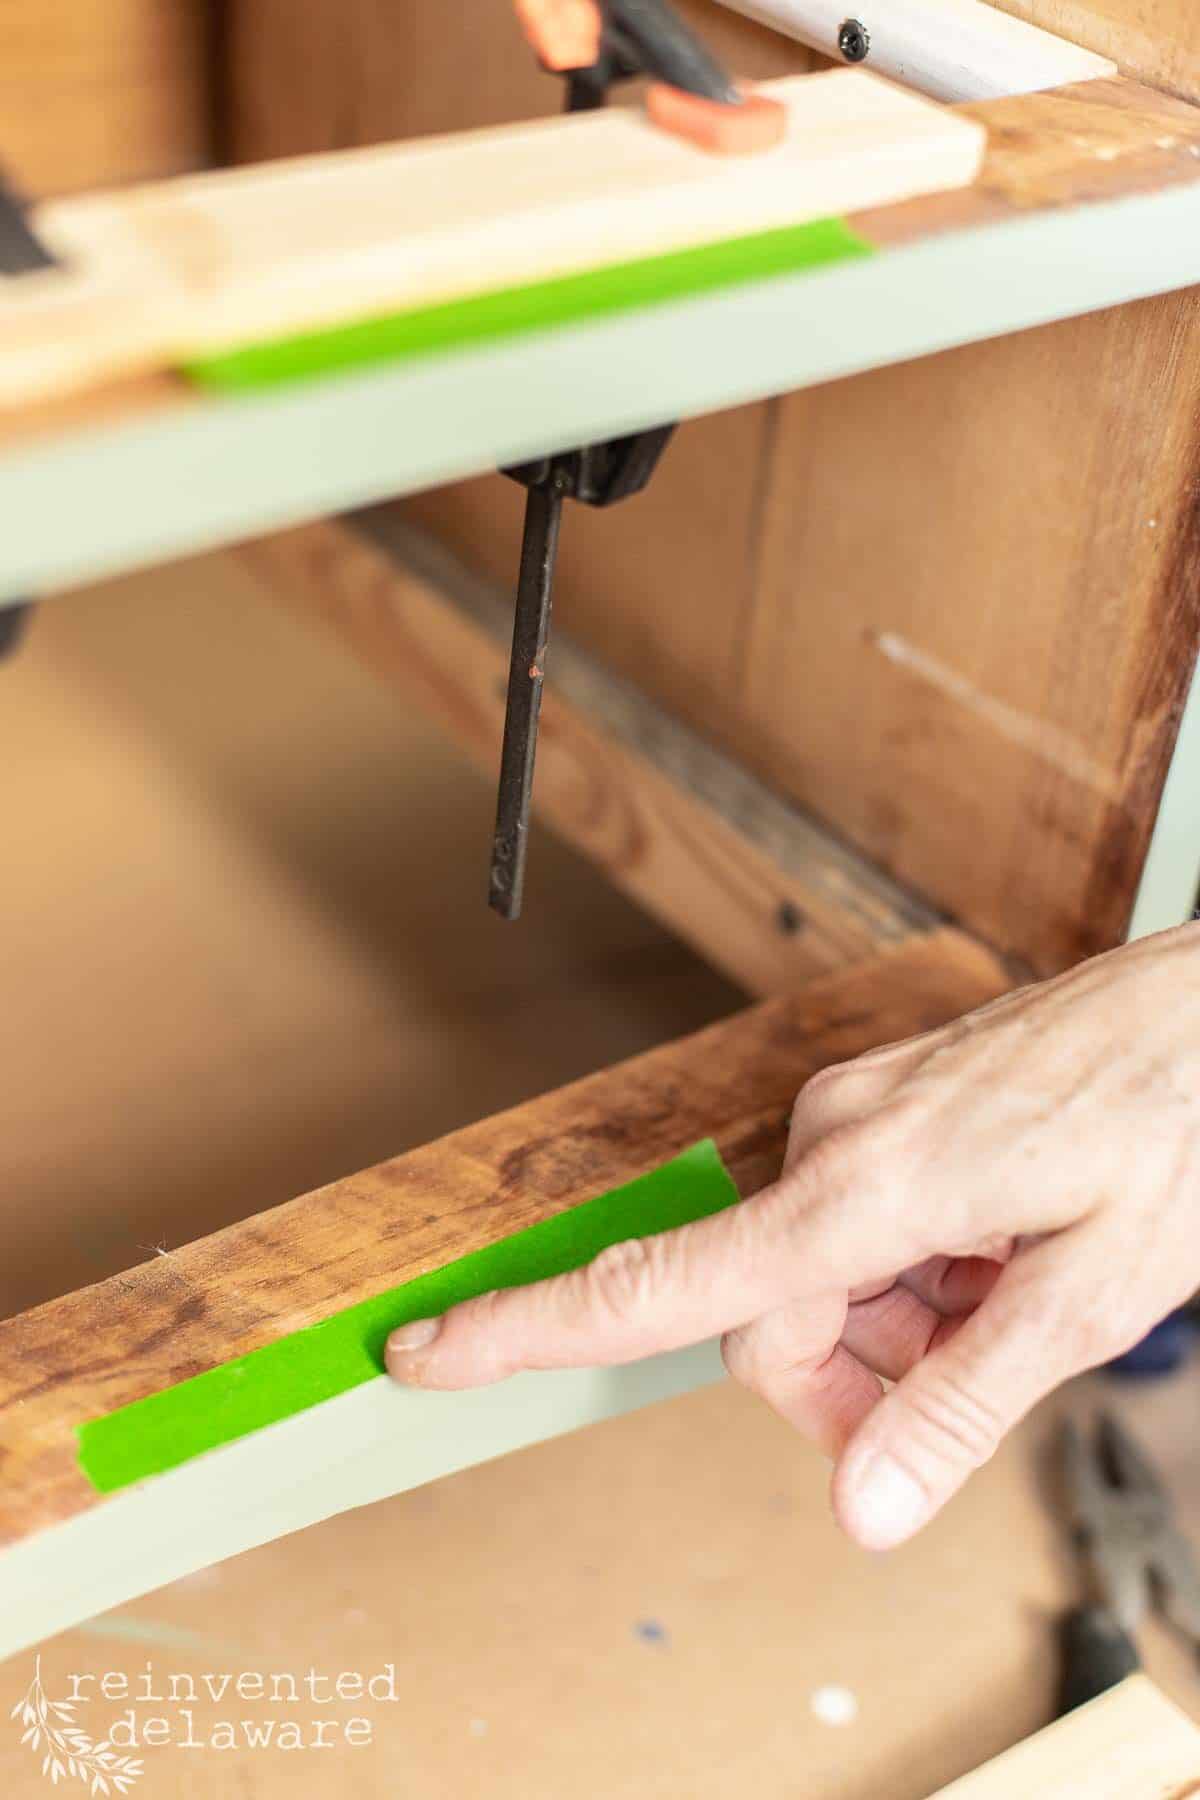
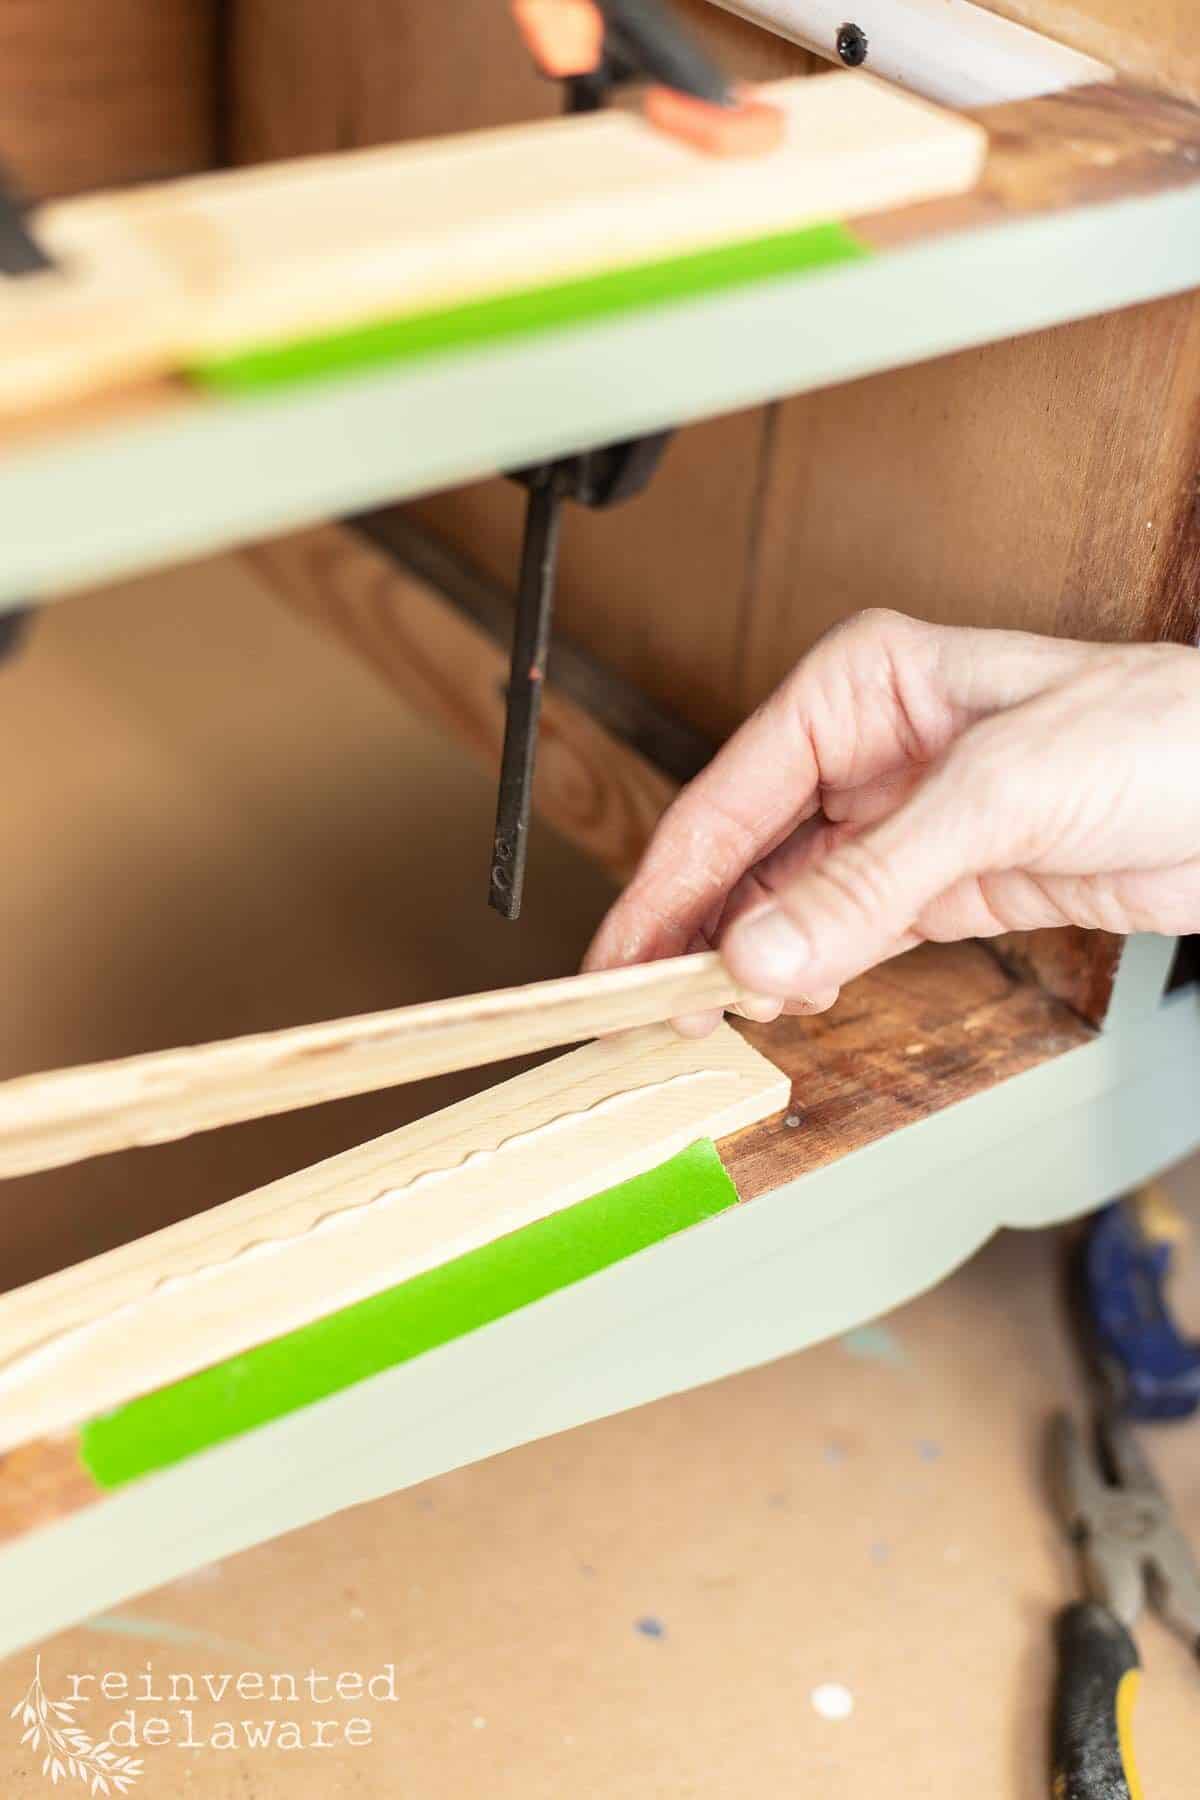
handy tip!
When making replacement drawer stops, use a piece of masking tape to measure the width. Place 4-5″ of tape on the drawer front then use an emery board to rub away the excess width of the tape so that it is the same depth as the drawer front. Lay that piece of tape on the bottom of the drawer cavity. Then you know where to place the pieces of wood to replace the missing drawer stops!
BONUS TIP: If you don’t have a scrap piece of wood just use a wood paint stir stick!
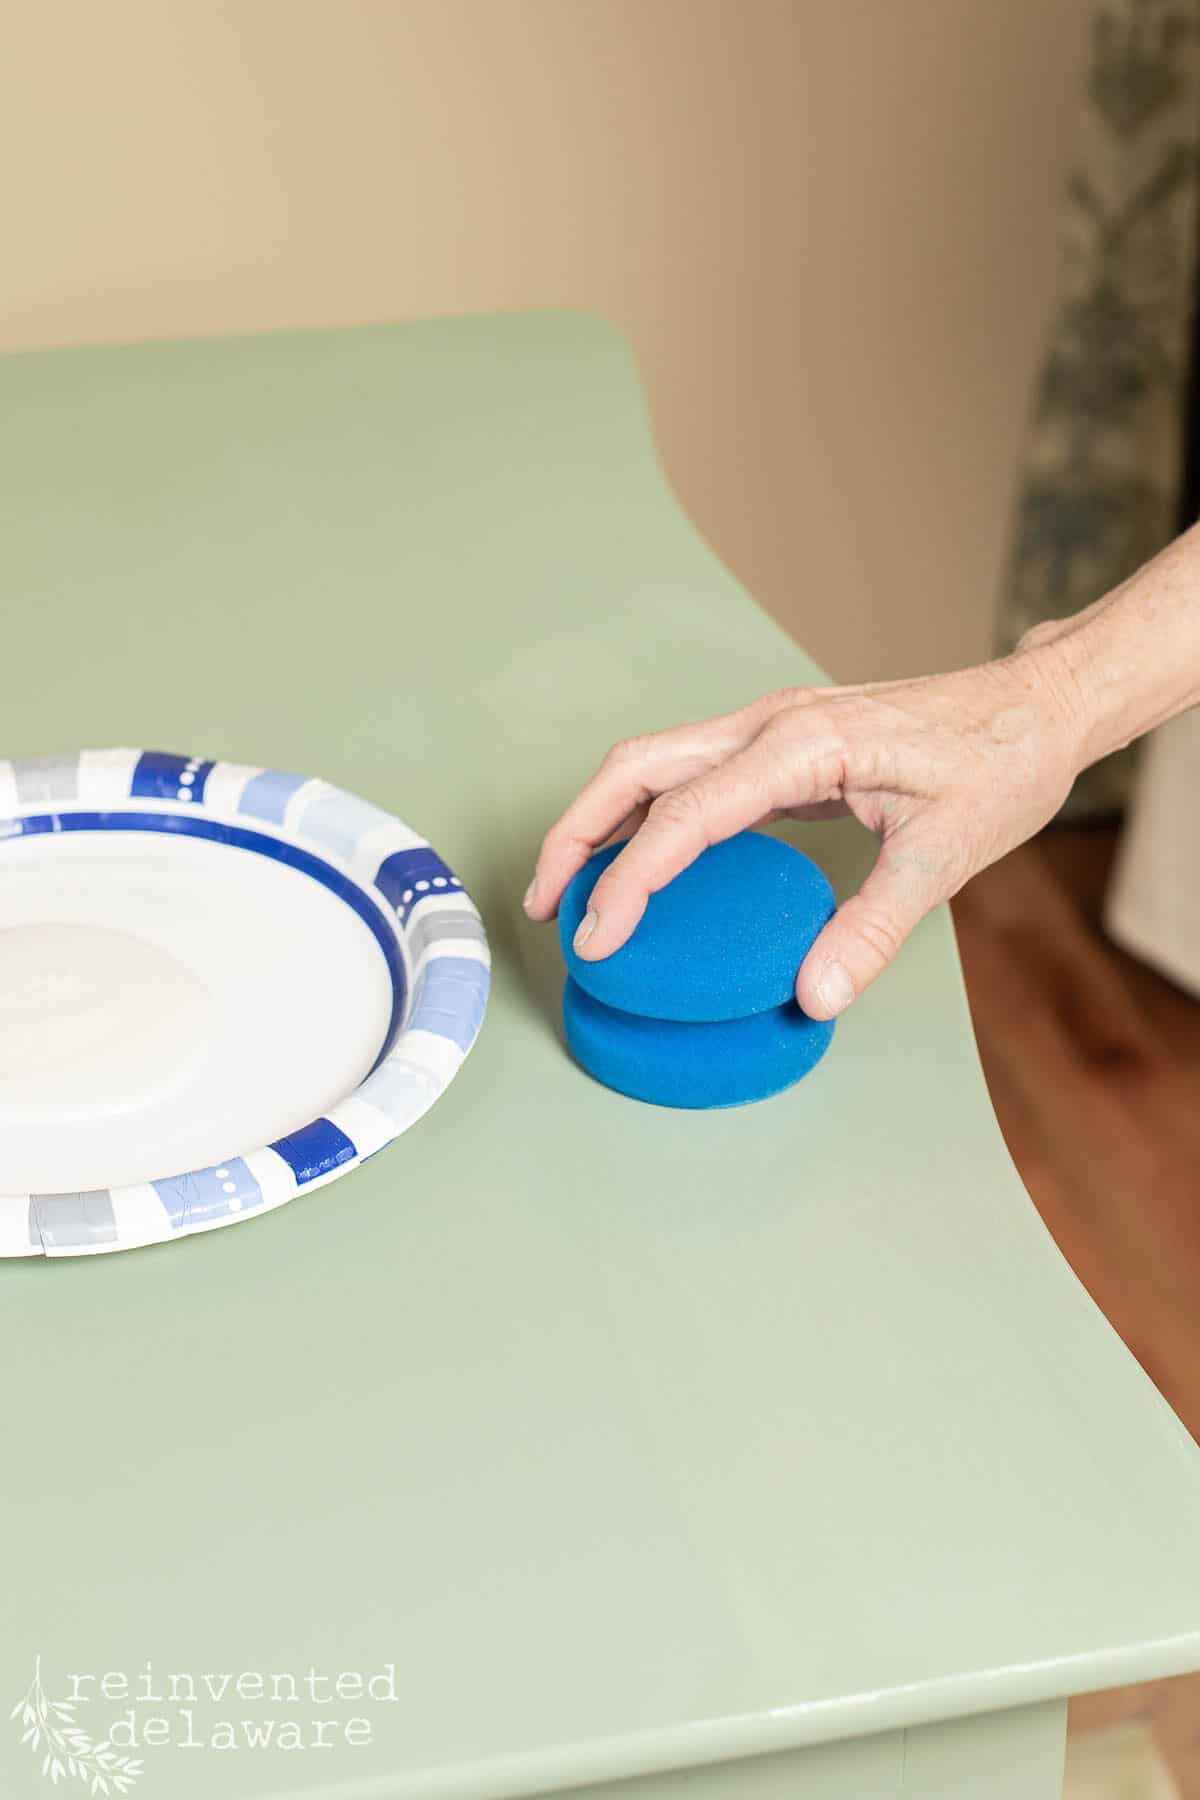
seal the chalk paint with clear coat
After painting the second coat of paint on the piece of furniture, I applied two coats of Dixie Belle Clear Coat in Flat. The sponge applicator makes this soooo easy! If your plan is to avoid brush strokes, this is the ticket. I’ve even seen people use the sponge to apply paint!
As for me, I don’t mind brush strokes. I like pieces to have a handmade appearance. In fact, I often deliberately add brush strokes going in all directions. I love this look. If you don’t, then be mindful of the direction you are painting your layers of paint. You can also use a misting bottle of water to give you a smooth finish.
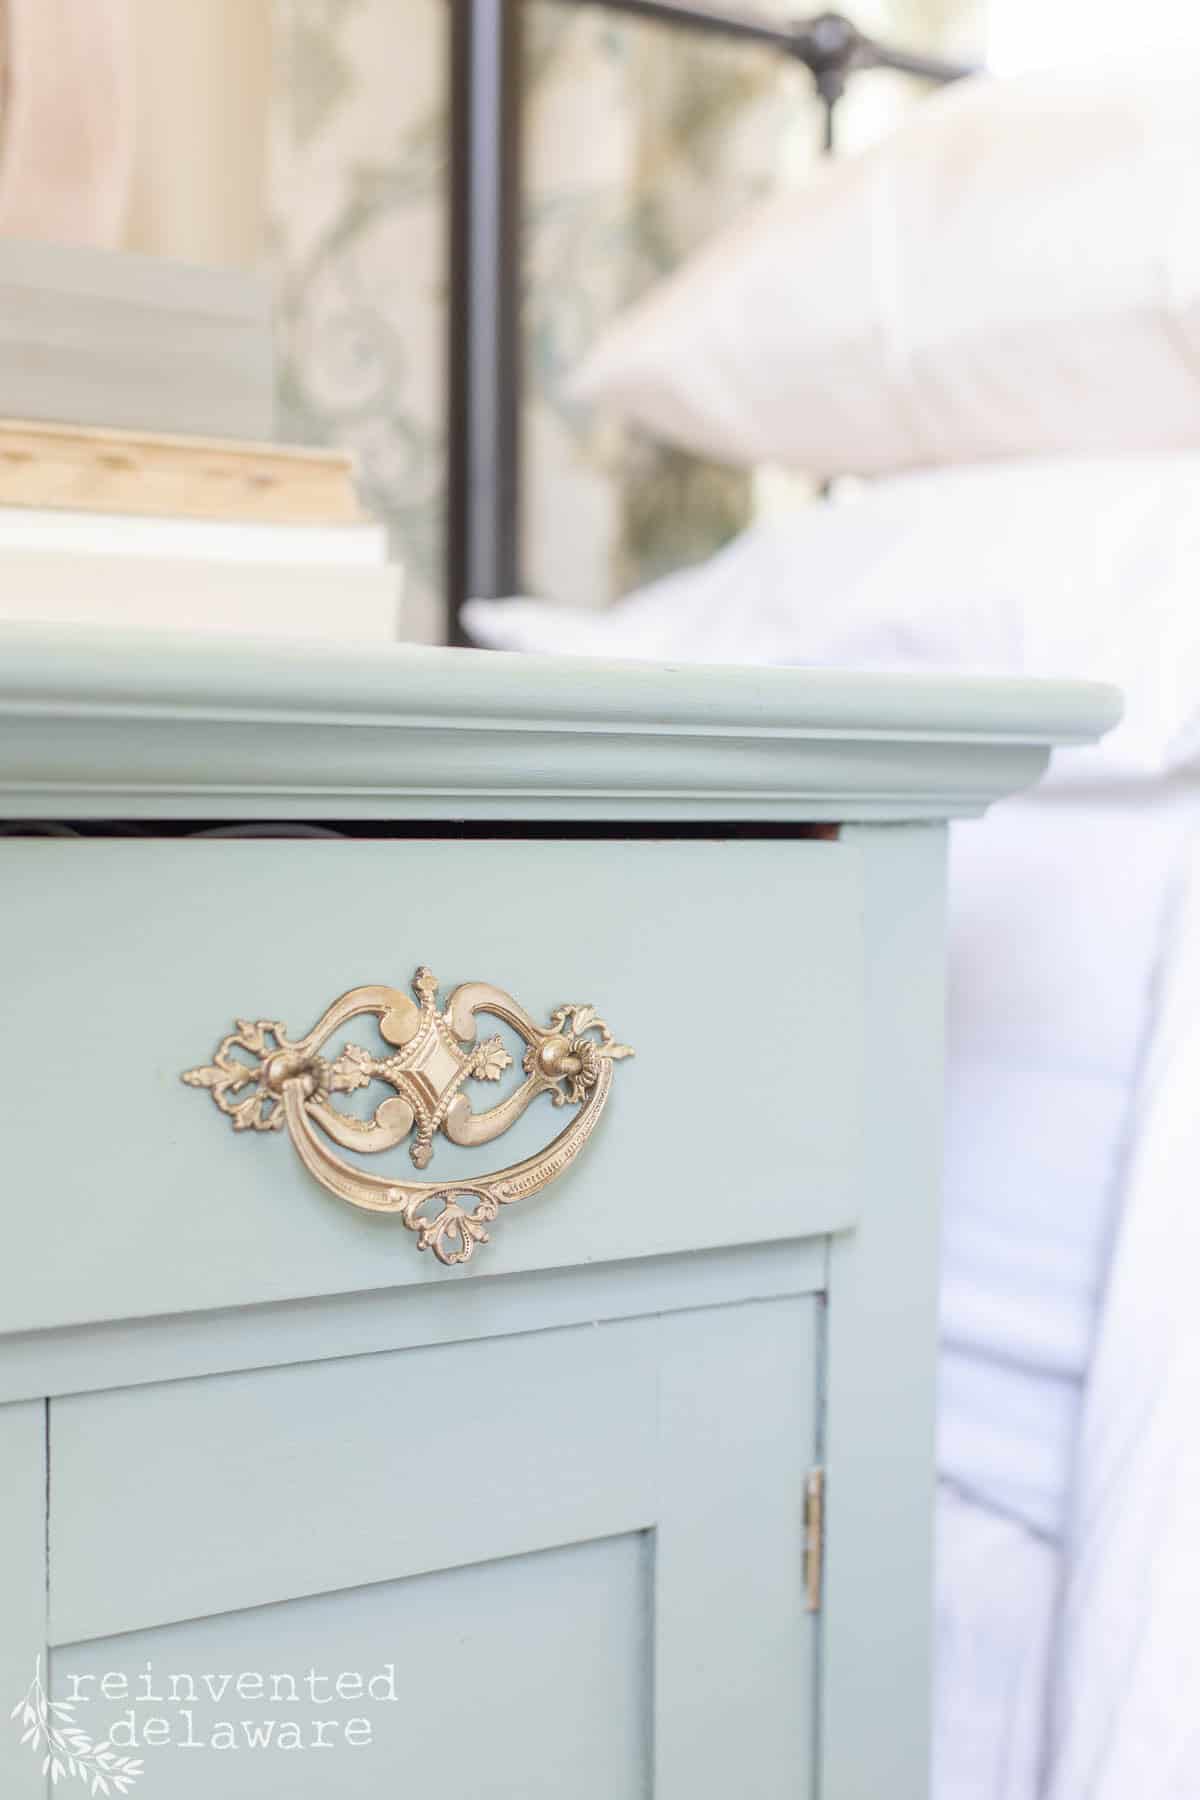
use gilding wax on furniture hardware
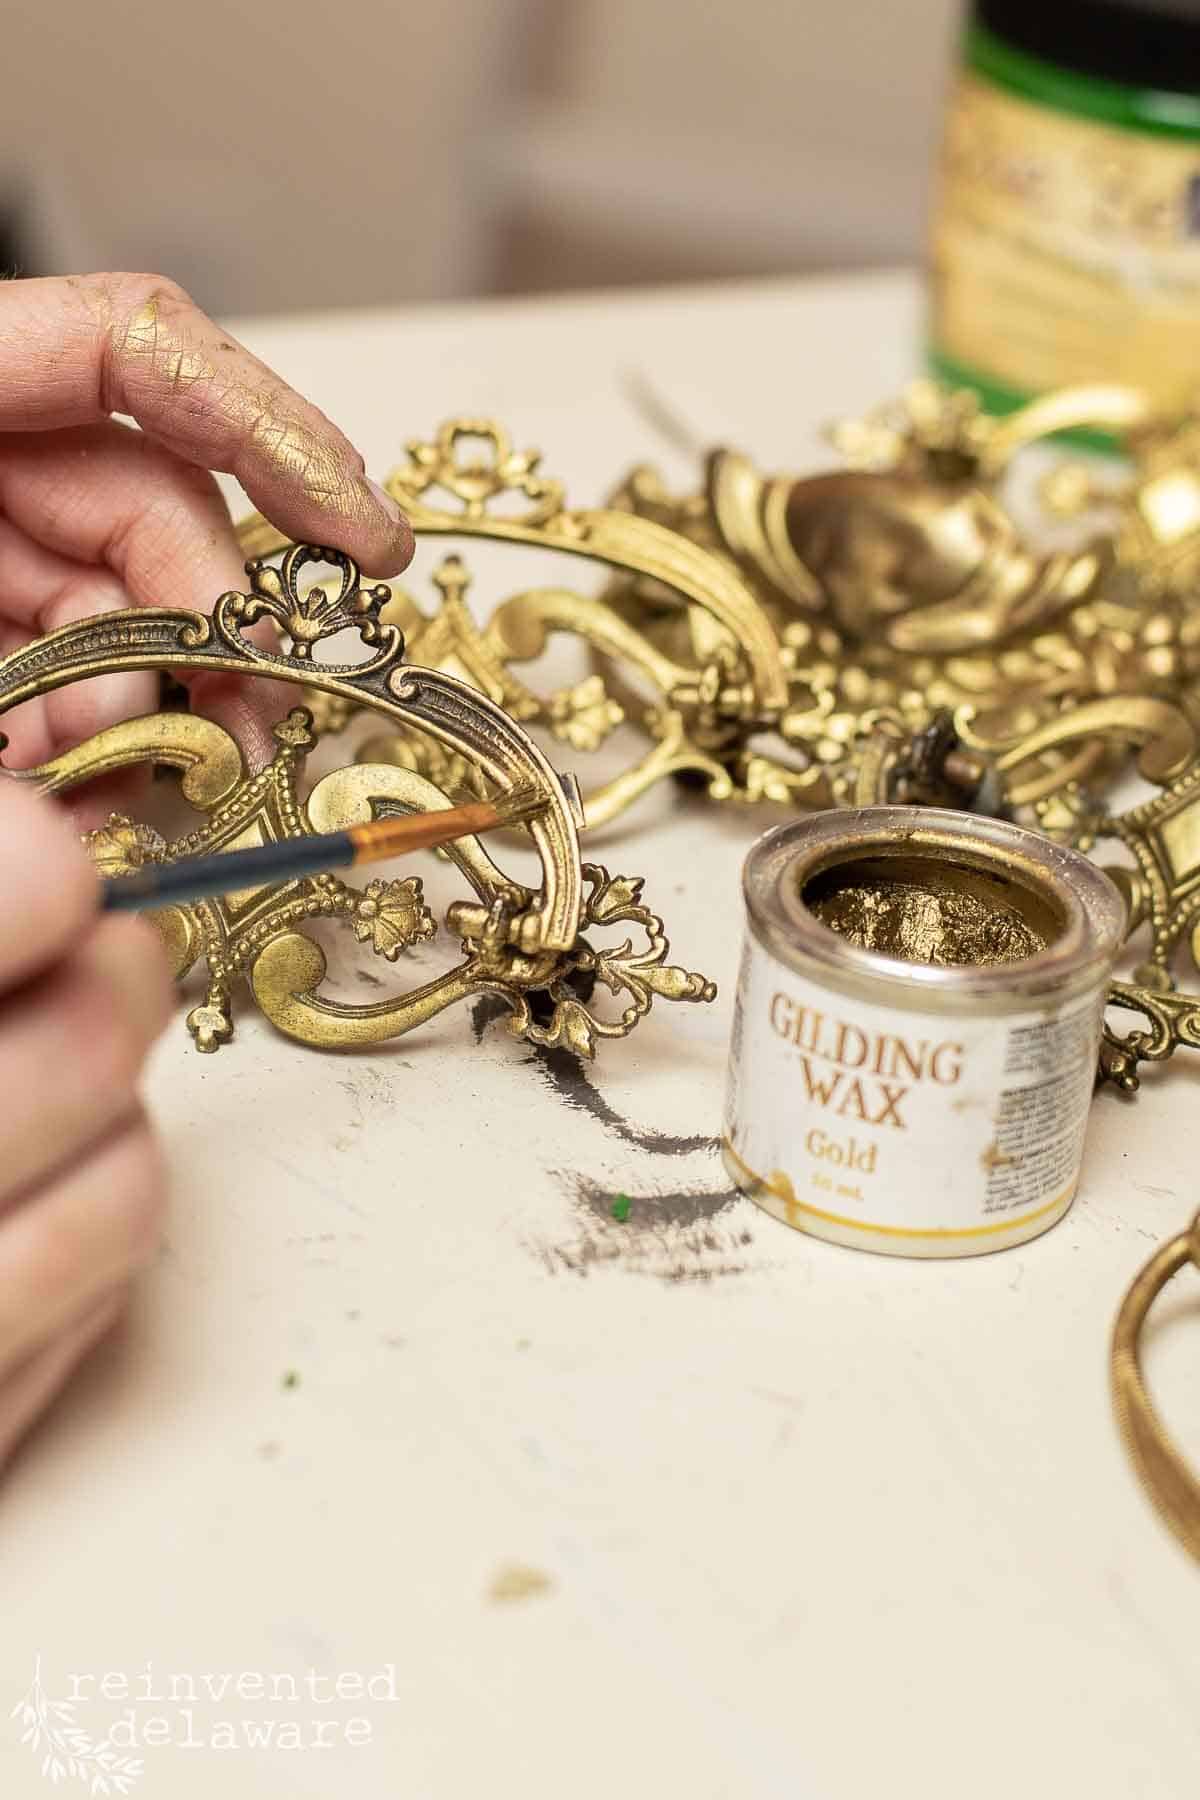
The last step was to take care of that gorgeous hardware. The good thing about doing an antique washstand makeover is to see all of the beautiful hardware. The drawer pulls on this washstand was in great shape but they needed a little bit of cleaning. I scrubbed them in warm water with a little dish soap. Then I applied Dixie Belle Gilding Wax in Gold. Gilding wax comes in several colors but I knew gold would give me the new look I wanted while keeping in step with the vintage feel of this antique wash stand.
Gilding wax is easy to apply. Using a small artist’s brush, I dabbed the gilding wax onto the hardware, getting into all of the nooks and crannies. The little brush is
perfect for this and much easier to control than a large wax brush.
The wax needs to cure for 30 days to a hardened finish. I attached the hardware to the drawer fronts and the cabinet doors knowing that they are still curing.
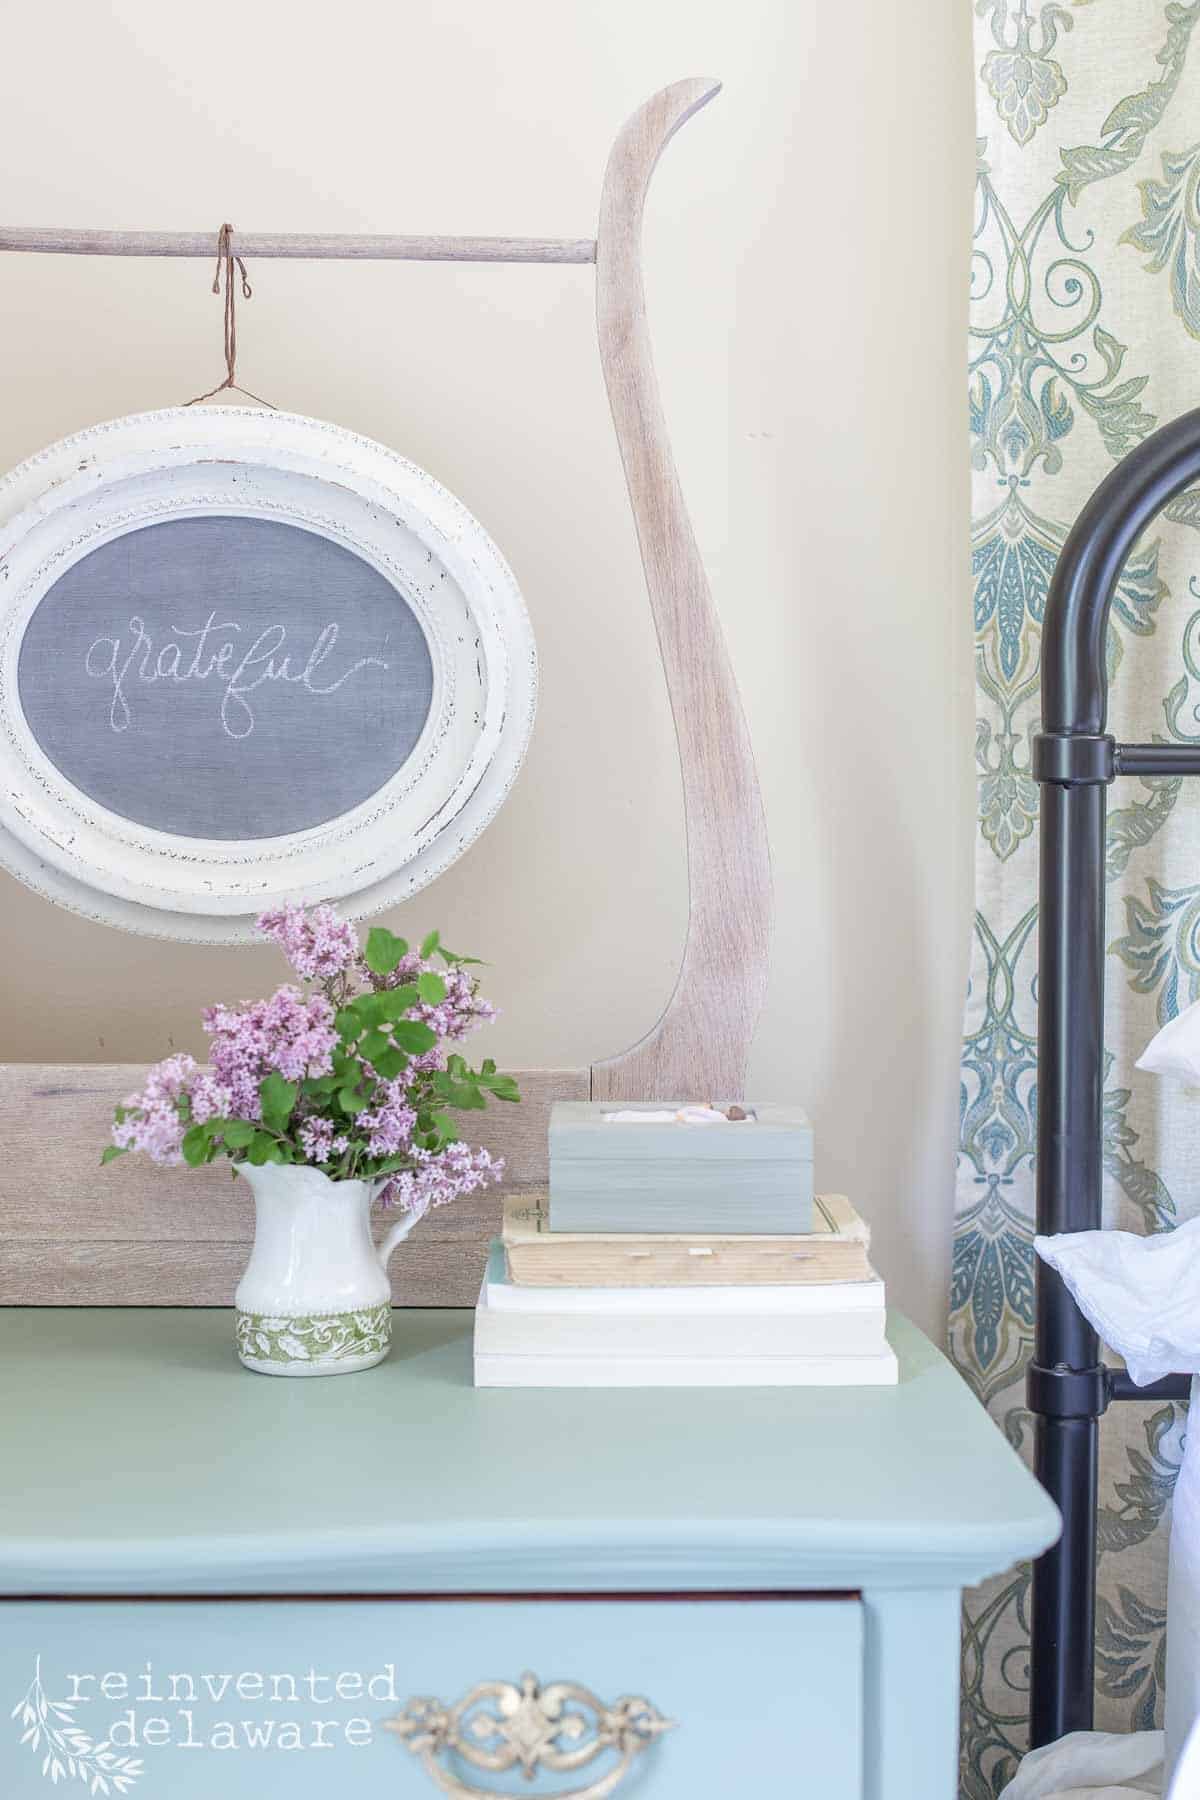
You will also see that the washstand harp is more of a natural look. This was so easy to achieve. After cleaning, sanding, and wiping the harp down, I applied a coat of white wax to the solid wood harp. This thin coat of wax softens the color of the original wood and takes away the orange look as well. This technique worked great on a custom piece we made over years ago. Hop over and see how to white wax dark furniture for a step-by-step tutorial.
If you like dark wood tones, use dark wax instead. It will create a deep, rich brown that will look so vintage!
easy cord access for all your devices
One thing I forgot to mention about the top drawer on both of these adorable antique wash stands: we drilled large holes in the back of the washstands and in the back of the top drawers.
This will allow us to add a power strip inside the drawer so that we can plug in all of our devices, phones, watches laptops. They certainly didn’t have those around when washstands like this were made!
Don’t you love this idea??

what kind of paint to use on furniture
Let’s chat a bit about what kind of paint to use when you are giving a piece of furniture a makeover. I realize there is debate out there about what kind of paint to use. Your opinion might differ, and I can appreciate that. But I would be careless of me to not pass on what I have learned in the last 7-8 years of furniture painting. Here are my thoughts about avoiding regular paint on furniture pieces.
can you use latex paint on furniture?
Latex paint: basically this paint is plastic-y. Technically it has vinyl and rubber in it. And most importantly it is made for drywall. If you have had the experience of peeling latex paint, you can see it feels like a rubber glove. It remains flexible to some degree and is made to be put on walls. Latex paint is not a good choice for furniture like a kitchen table that will get a lot of use. I would also say to avoid kitchen cabinet painting using latex paint. If you purchase paint for these purposes, ask specifically for paint specifically made for trim and cabinets.
water-based paint vs oil-based paint
Acrylic paint: is water-based and can be used on furniture. it hardens to a nice finish and does not need to be sealed.
Oil Base paint: hardens to a nice finish but at the cost of high VOCs. Oil-based paint is smelly and hard to clean up! It can also take hours to dry and sometimes days.
chalk mineral paint for furniture
Of the choices I’ve listed my favorite way to give a piece of furniture a makeover is to use chalk mineral paint. I don’t have to worry about adhesion or bad odors. Chalk paint dries quickly and cleaning up is so easy with soap and water. I actually clean up with Scrubby soap. The brushes and sponge applicator come so clean with it.
**As a side note, see the arm of an old rocking chair? It’s been in our family for over 40 years and I’ve reupholstered it four times!

In the past, I have used all four paints on projects. Chalk paint is by far the most dependable and easy to use and in my opinion, gives better results than the other options. If the color I want to use is not available, Dixie Belle has made it so easy to mix my own color using their established paint line. I’ve even used the Silk Line of chalk mineral paints on our kitchen cabinets! You can see how I completed this huge undertaking in Cabinet Painting in Four Easy Steps.
decorating idea for a washstand harp
Did you notice the artwork I have hanging on the washstand harp? It’s a vintage oval frame with a chalkboard insert my hubby made. I thought it would be a nice way to use the washstand harp area that would normally hold a handtowel.
I have the plan to find some vintage artwork while out thrifting and hang it on the washstand harp. The harp will help to frame the artwork! Don’t you love this idea?
keep scrolling down to see more home decorating inspiration!
Thanks for stopping by for this chalk painting furniture makeover project! I hope you found it helpful and inspiring. Let me know if you have any questions. I would love to help you with your painting project!

the virtual book club
I hope you enjoyed this post and the inspiration from the book Anne of Green Gables. Be sure to read the posts my blogging friends were inspired to write.
Join us next month when we will be reading Big Little Lies!
Lynn from Living Large in a Small House
Erin from Erin Evolving
Crystal from Sweet Valley Acres
Thanks for joining our journey!
Thanks so much for joining us for this post! Join our journey so you don’t miss any of the fun projects, tutorials, and inspiration that we share with you each week! You can follow us on Instagram, Facebook, and YouTube. We share even more inspiration on Pinterest!
click below to purchase supplies!
Dixie Belle has a clearance section! Click HERE to see the deals!
Visit my Amazon Storefront!
Click the button below and head over to our online shop on Amazon!

Cindy –
Amazing as always. The wash stand makes a wonderful bedside table. I didn’t know about mixing Dixie Belle Paints. Thank you for the tip. Also love the rug!!!
Isn’t the rug amazing?? BTW, mixing the paint is so easy online!
Cindy your washstand is stunning. The tone of blue you achieved makes my heart soar. Absolute perfection. I also love your room makeover and the curtains behind are so pretty. Too funny about the white paint – I relate to this so much because I do things like that! My husband is always shaking his head lol. Pinned!
We are kindred decorating spirits Crystal! Thanks for stopping by!
What a great transformation Cindy and a brilliant idea to cut that hole in the drawer. THe color you created is just perfect with your curtains.
Thanks Wendy! The hole in the drawer works perfectly!
Absolutely gorgeous, my friend. I love the color. So pretty. Hugs to you.
Thanks Renae. You can’t go wrong with Dixie Belle color lab!
Hi Cindy – I love the color you custom created for this piece! It looks stunning. Also, I enjoyed reading your discussion about the different types of paints. It can be very confusing knowing what the differences between paints are when you are standing in the aisle as the hardware store. Finally, I am always on the lookout for washstands with marble tops. Those are my favorite finds! Have a fabulous weekend.
Washstands with marble tops are so pretty! We have come across a few over the years and I love them too!
I love how your washstand turned out, Cindy! The color is beautiful. It would fit in perfectly in Anne’s room. The online tool for mixing paints is so handy. What a great idea. I did not know that you should clean a piece of furniture before sanding. Thanks for that helpful tip!
So glad the tip about cleaning first was helpful. It’s always best to start with a clean piece of furniture 🙂
I love the new look! The robin’s egg blue (is that the color?) is so pretty and the hardware is the perfect bit of sparkle.
Thanks Marie! It is a custom color by Dixie Belle and I am loving it!